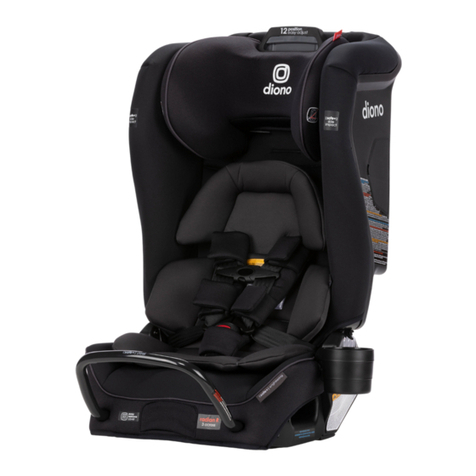
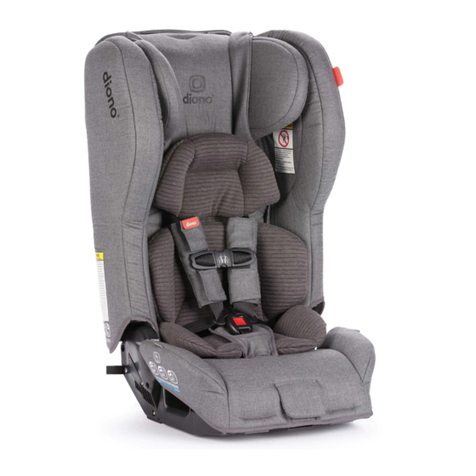
Diono Orcas NXT fix User manual

1
orcas NXT x
ENGLISHxxx
orcas NXT x
Designed for safe, comfortable
journeys day in day out.
IMPORTANT READ INSTRUCTION MANUAL
before using this child restraint


3
Important
Before using your child seat, ensure to review
and familiarise yourself with the features and
functions of the child seat by reference to this
user manual.
Follow the instructions to the letter and keep
them for future reference. The instruction manual
can be stowed in a handy location on the rear
of the backrest of the seat.
This child seat has been designed, tested and
approved for use in groups 1, 2 and 3, according
to the European Standard ECE R 44/04.
GROUP CHILD’S WEIGHT APPROX CHILD’S AGE
1 9 to 18 kg 9 month to 4 years
2 15 to 25 kg 3 to 7 years
3 22 to 36 kg 5 to 12 years
orcas NXT x
ENGLISH

4
orcas NXT x
ENGLISH
This child seat offers a variety of installation
options. The following table indicates the types
of installation for the respective groups:
GROUP INSTALLATION METHOD CHILD INSTALLATION HOMOLOGATION
1isox + top tether 5 point harness isox universal
1 vehicle belt 5 point harness universal
2 + 3 vehicle belt + isox
(NO top tether) vehicle belt semi universal
2 + 3 vehicle belt vehicle belt universal

5
orcas NXT x
ENGLISH
NOTICE
Groups 1-2-3 (from 9 to 36 kg) – securing with a
vehicle belt and top tether
1. This is a “Universal” child restraint. It is
approved to Regulation No. 44, 04 series
of amendments, for general use in vehicles
and it will t most, but not all, car seats.
2. A correct t is likely if the vehicle
manufacturer has declared in the vehicle
handbook that the vehicle is capable of
accepting a “Universal” child restraint for
this age group.
3. This child restraint has been classied as
“Universal” under more stringent conditions
than those which applied to earlier designs
which do not carry this notice.
4. Only suitabile if the approved vehicles are
tted with 3 point safety belts with retractors
approved to UN/ECE Regulation no. 16 or
other equivalent standards.
5. If in doubt, consult either the child restraint
manufacturer or the retailer.

6
orcas NXT x
ENGLISH
Group 1 (from 9 to 18 kg) – securing with the
IsoFix system
1. This is an ISOFIX CHILD RESTRAINT SYSTEM. It
is approved to Regulation No. 44, 04 series
of amendments for general use in vehicles
tted with ISOFIX anchorage systems.
2. It will t vehicles with positions approved as
ISOFIX positions (as detailed in the vehicle
handbook), depending on the category of
the child seat and of the xture.
3. The mass group and the ISOFIX size class for
which this device is intended is: B1
4. If in doubt, consult either the child restraint
manufacturer or the retailer.

7
orcas NXT x
ENGLISH
Groups 2 and 3 (from 15 to 36 kg) – securing
with vehicle belt and isox connectors (Semi
Universal – See tting list)
1. This child restraint is classied for Semi-
universal use and is suitable for xing into the
seat positions of the cars listed in the tting
list annexed to this manual. Seat positions in
other cars may also be suitable to accept
this child restraint.
2. Only suitabile if the approved vehicles are
tted with 3 point safety belts with retractors
approved to UN/ECE Regulation no. 16 or
other equivalent standards.
3. If in doubt, consult either the child restraint
manufacturer or the retailer.
• Warning: for groups 2 and 3 xed with the
isox system: always use the points together
with the vehicle’s safety belt. Do not x the
child seat by means of the isox attachment
points only.

8
orcas NXT x
ENGLISH
IMPORTANT INFORMATION
Safety
• Warning: for groups 2 and 3 xed with the
isox system: always use the isox system
together with the vehicle’s safety belt. Do
not x the child seat by means of the isox
attachment points only.
• Warning: incorrect tting or use of the child
seat may seriously affect the safety of the
child.
• Warning: check the road trafc regulations
in the country where you are travelling. The
use of your child seat may be restricted.
• Follow pr
ecisely the user instructions.
• Do not make any changes to the child seat, as
this could result to an unsafe situation.
• Do not t any accessories, spare parts or
components not supplied or approved by the
manufacturer.

9
orcas NXT x
ENGLISH
• Install the child seat so that its rigid items and
plastic parts are not liable, during everyday
use of the vehicle, to become trapped by a
movable seat or in a door of the vehicle.
• Do not leave the child unattended in the child
seat.
• Do not leave the child seat in the vehicle when
the vehicle is parked in the sun: steel and plastic
parts of the child seat may become very hot.
• Make sure that any luggage or other objects
liable to cause injuries in the event of a collision
are properly secured. All passengers must wear
safety belts.
• Secure the child seat to the vehicle seat even
when the seat is not in use.
• Periodically check the condition of the child
seat. Replace the child seat if it shows signs of
breakage or wear and tear.
• Do not use the child seat if any parts are broken
or missing.
• Use exclusively manufacturers spare parts.
• The covers are an integral part of the child
seat: the seat must not be used without the
covers. The covers must only be replaced with
manufacturers replacement covers.

10
orcas NXT x
ENGLISH
In the event of an accident
• All passengers must know how to take the
child out of the seat.
• Replace the child seat after an accident:
it may have suffered damage that is not
visible on the outside.
Comfort
• When the child seat is used on the rear seat
of the vehicle, make sure there is enough
room for the child’s feet. Move the front seat
forward slightly if necessary. Take frequent
breaks on long journeys so the child has a
chance to move about.

11
orcas NXT x
ENGLISH

12
orcas NXT x
ENGLISH
01
02
06
03
04
07
09
05
08
10
11
12
13
14
16
17
20
18
19
18
15
12
13
14
16
17
20
18
19
18
15
01
02
06
03
04
07
09
05
08
10
11
PREPARATORY WORK
Components of the car seat
Identify the components
of the child seat before using it.
01 Headrest
02 Belt guide (groups 2 and 3)
03 Harness shoulder pads
04 Internal cushion
05 5-point harness buckle
06 Belt guide (groups 2 and 3)
07 Belt guide (group 1)
08 Central adjuster
09 Crotch pad
10 Harness adjuster strap
11 Recline handle

13
orcas NXT x
ENGLISH
01
02
06
03
04
07
09
05
08
10
11
12
13
14
16
17
20
18
19
18
15
12
13
14
16
17
20
18
19
18
15
01
02
06
03
04
07
09
05
08
10
11
12 Headrest height adjuster handle
13 Top Tether
14 Diagonal seat belt
Lock off device (group 1)
15 Harness shoulder strap
height adjuster
16 Connecting piece
17 Instruction manual
storage compartment
18 Isox connectors
19 Fabric loop
20 Isox unlocking button
with indicators

14
orcas NXT x
ENGLISH
Preparing isox
Pull the fabric loop found at the rear of the base
to pull out both isox connectors completely.
Setting harness and headrest height
Check and if necessary adjust the height of the
shoulder straps and headrest before tting the
child seat in a car.
Place the child seat on the oor and sit the child
snugly into the seat.
Check that the straps are adjusted to the closest
position to the child’s shoulders and preferably
position just above the child’s shoulders.

15
orcas NXT x
ENGLISH
Adjust the height of the headrest so that the
child’s head is well enclosed. The headrest must
be adjusted so that there is a space no more
two ngers wide between the headrest and your
child’s shoulders.
Adjusting the headrest and the harness in 5-point
harness installation (group 1)
Press the central adjuster and, at the same time,
pull both harness shoulder straps to loosen them
as much as possible. Do not pull on the shoulder
pads.

16
orcas NXT x
ENGLISH
Press the button on the harness shoulder strap
height adjuster at the rear of the seat shell and
tilt the harness shoulder strap adjuster towards
you.
Slide the harness shoulder strap height adjuster
to select the correct height of the shoulder belts.
Release the harness shoulder strap height
adjuster to engage it in the desired position.
Adjusting the headrest in vehicle belt installation
(groups 2 and 3).
Remove the 5 point harness as described in the
paragraph “removal of the 5-point harness”
below.
Press the button on the harness shoulder strap
height adjuster at the rear of the seat shell and
tilt the harness shoulder strap adjuster towards
you.

17
orcas NXT x
ENGLISH
Slide the harness shoulder strap height adjuster
to select the highest possible position.
Release the harness shoulder strap height
adjuster to engage it in the desired position.
Squeeze the headrest height adjustment handle
on the back of the headrest.
Move the headrest to the desired height.
Release the headrest height adjustment handle
to lock the headrest at the desired height.
Reclining the seat
Find the recline handle under the front of the
child seat shell.
Pull the recline handle and simultaneously move
the seat forwards or backwards until achieving
the required reclined position.

18
orcas NXT x
ENGLISH
USING THE CHILD SEAT
Position the child seat on the vehicle seat giving
priority to a rear seat position. Use the front seat
position may differ in certain countries. Refer to
the highway code of the country where you are
travelling.
• Warning: do not place the child seat on a
seat that it only tted with a 2 point lap belt.
• Warning: do not put anything between the
child seat and the car seat.
Group 1 with isox and top tether
If you vehicle is not equipped with isox insert
guides, clip the two insert guides which are
included with the seat.
TIP: the isox attachment points are located
between the surface and the backrest of the
vehicle seat.

19
orcas NXT x
ENGLISH
Move the vehicle seat’s headrest to its highest
position.
Take the top tether from the storage bag and lay
it over the child seat.
Before installing the child car seat identify the
location of the top tether anchorage position,
usually located on the rear parcel shelf, rear of
seat back or oor of the boot.
Place the child seat facing in the direction
of travel on the vehicle seat backrest. Pass
between the vehicle headrest supports.
Grasp the child seat with both hands and slide
the two locking arms into the insert guides until
both ISOFIX connectors engage with a “click”
sound on both sides.
CLICK

20
orcas NXT x
ENGLISH
Check that the green safety buttons are visible
on both sides.
Push the child seat towards the backrest to
applying rm, even press on both sides.
Shake the child safety seat to make sure it is
safely attached and re-check the green safety
buttons to make sure that both of them are
completely green.
Take the Top Tether and press the metal tongue
to loosen and lengthen the strap.
Table of contents
Other Diono Car Seat manuals

Diono
Diono monterey XT LATCH User manual

Diono
Diono SantaFe User manual

Diono
Diono monterey XT LATCH User manual

Diono
Diono Radian 3 R User manual

Diono
Diono Everett NXT User manual

Diono
Diono Solana User manual

Diono
Diono monterey 5 iST FixSafe User manual

Diono
Diono Rainier User manual

Diono
Diono RadianR100 User manual

Diono
Diono Radian 3QX User manual

Diono
Diono Cambria User manual

Diono
Diono Cambria 2 User manual

Diono
Diono Everett NXT User manual

Diono
Diono Radian 3 RX User manual

Diono
Diono Radian 3 RXT User manual

Diono
Diono Monterey 2 User manual

Diono
Diono Radian 5 User manual

Diono
Diono Everett NXT User manual

Diono
Diono Radian 3 RXT User manual
Diono
Diono mXT User manual