diversey MoonBeam 3 User manual

© 2020 Diversey, Inc. All Rights Reserved. 87309-CRD en (20/334)
MoonBeam™3
Handling
If you have any questions, comments or need to reorder
this set of cards, please call 1-800-558-2332
MoonBeam™3 Handling
© 2018 Diversey, Inc. All Rights Reserved. 87309-CRD en (20/334)
Always wear personal protective equipment.
Introduction
Overview
Introduction Video for
MoonBeam3 - Click Here.
Video for MoonBeam3
User Instructions
- Click Here.
To view the complete Users
Manual for MoonBeam3
- Click Here.
To view our complete video library for
MoonBeam3 in our Digital Tool Resource
- Click Here.
MoonBeam™3 Handling
© 2018 Diversey, Inc. All Rights Reserved. 87309-CRD en (20/334)
Always wear personal protective equipment.
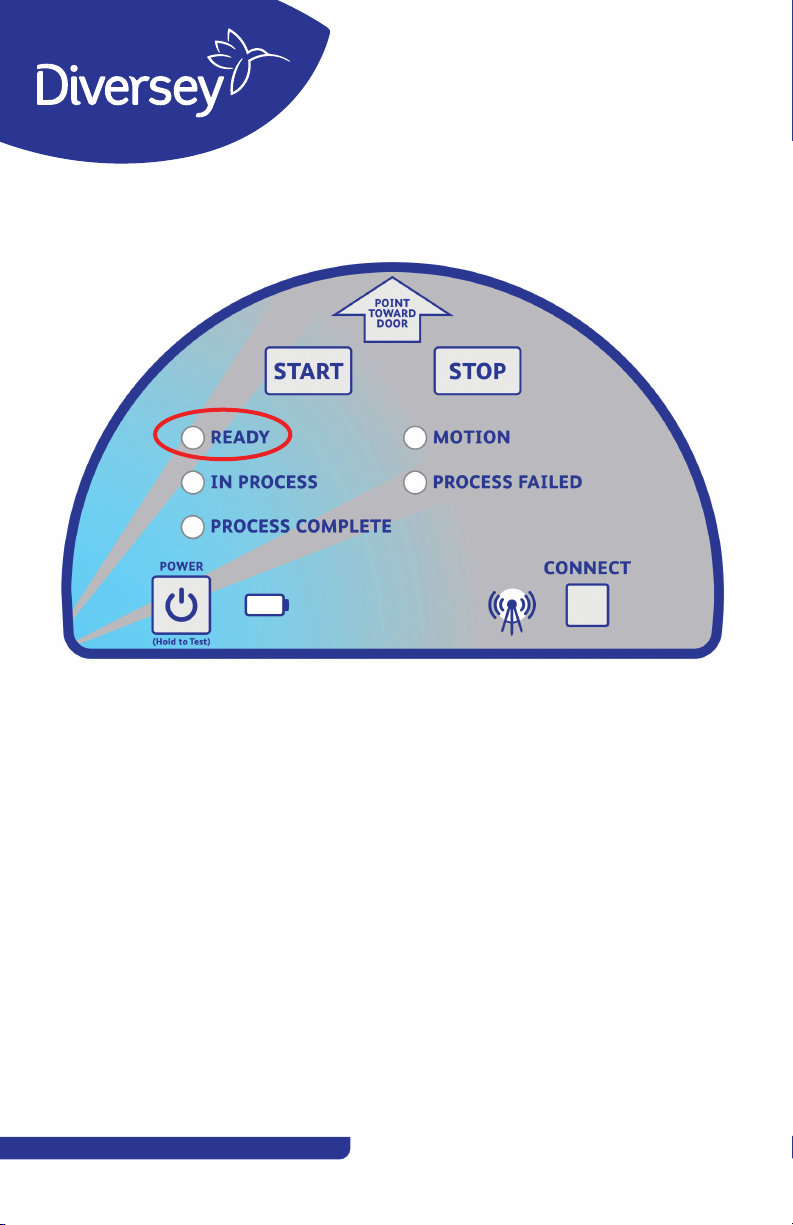
Cover Not Being
“READY”
The usual issue with a MoonBeam3 not coming "Ready"
could be that the yellow cover has not been properly
located against the door to the space being disinfected.
Make sure the arrow is pointing to the door and is less than
6” away.

MoonBeam™3 Handling
© 2018 Diversey, Inc. All Rights Reserved. 87309-CRD en (20/334)
Always wear personal protective equipment.
Cover Will Not
Power On
The usual issue with a MoonBeam3 power not coming
on or illuminated where the button is, is that the batteries
may be depleted.
Try replacing the 4 AA batteries.

MoonBeam™3 Handling
© 2018 Diversey, Inc. All Rights Reserved. 87309-CRD en (20/334)
Always wear personal protective equipment.
Make sure the yellow protective cover is up against a
solid door or surface with the arrow on the top facing
that surface.
Lights turn on for a short moment and then go out -
It is possible there is a bulb that is not secure, or came
loose during handling. Rotate or flip the bulb 180 degrees
and re-secure, and it should work.
Unit Will Not Turn On When
Ready Light is on and
Start Button is Pressed
MoonBeam™3 Handling
© 2018 Diversey, Inc. All Rights Reserved. 87309-CRD en (20/334)
Always wear personal protective equipment.
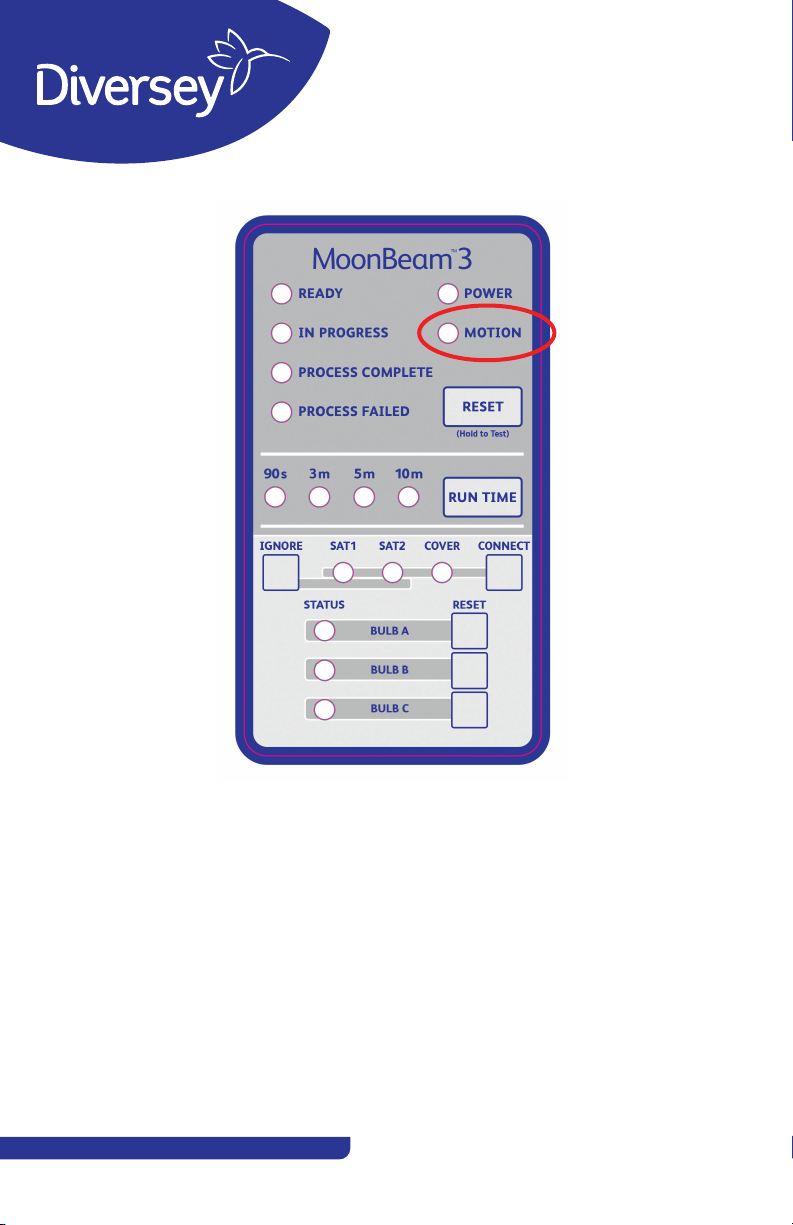
Cover Not Being Ready Due to
Motion Being Sensed
The motion sensors of the base may detect motion through
glass, and if required, bypass the motion sensors on the
base by pressing the RESET button three times. This will
cancel when the unit power is terminated or unplugged.
CAUTION: This action removes this safety feature and must
be used with care. This feature shall not be used in areas
with multiple entrances to the space as it may present a risk
of exposure!
MoonBeam™3 Handling
© 2018 Diversey, Inc. All Rights Reserved. 87309-CRD en (20/334)
Always wear personal protective equipment.
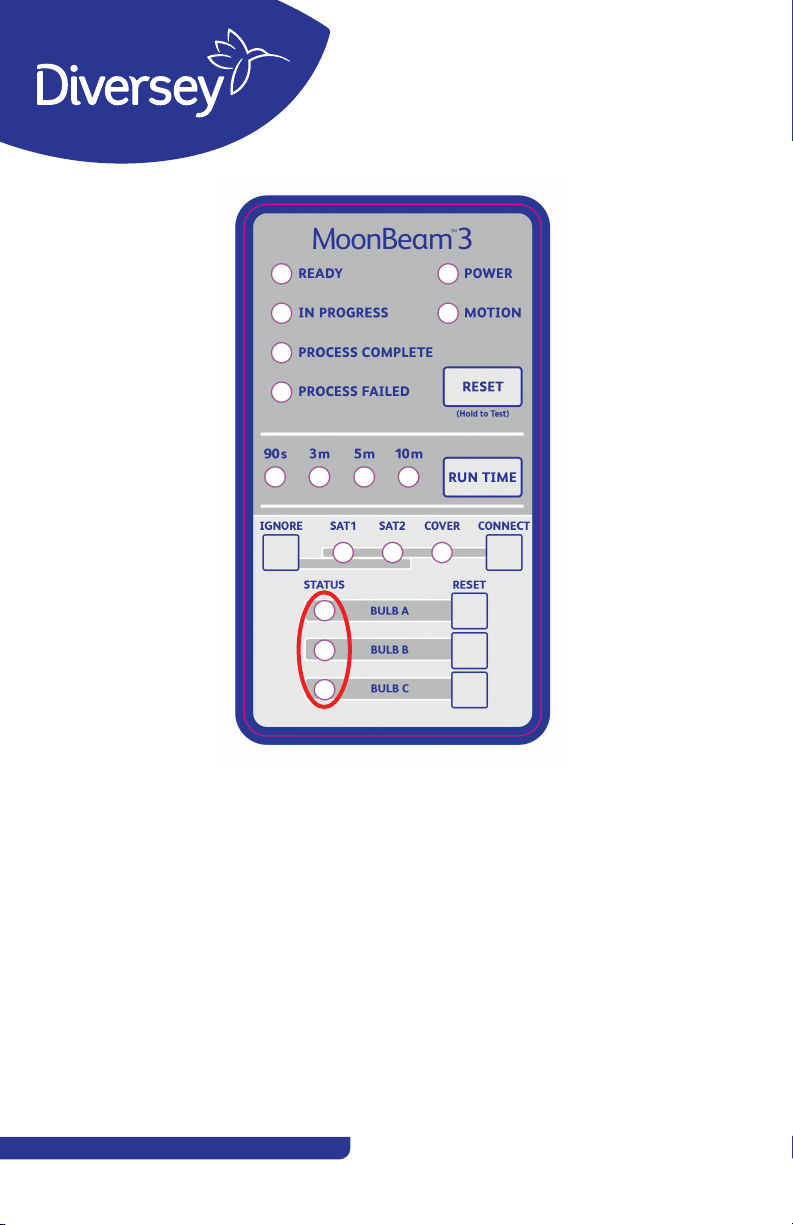
Bulb Status
Indicator is Red
The bulb may have come loose during transport.
1. Remove the bulb with the indicator
2. Flip the bulb at the base and re-insert
3. Make sure it clicks when inset so it is secure
If that does not solve then swap one of the bulbs between
the problem bulb and re-secure both, the issue should be
resolved.

MoonBeam™3 Handling
© 2018 Diversey, Inc. All Rights Reserved. 87309-CRD en (20/334)
Always wear personal protective equipment.
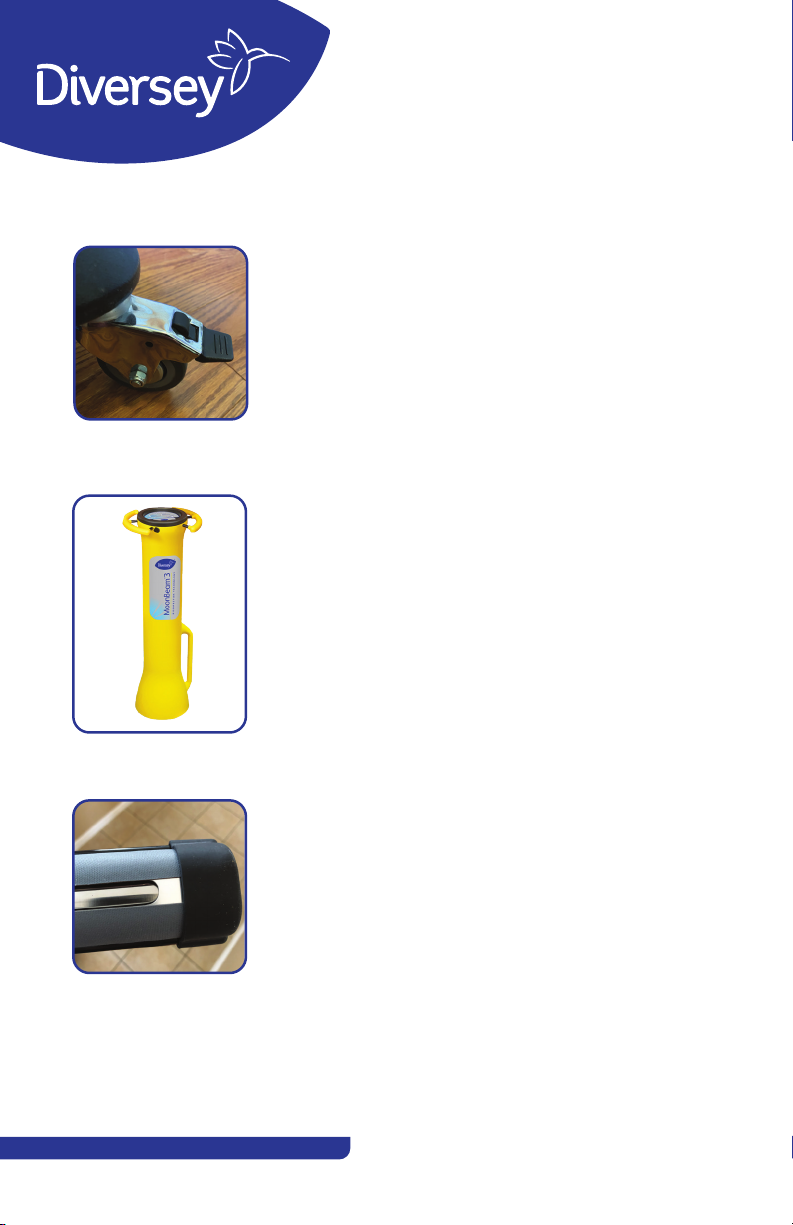
Telescoping Tubes
Slip Down
In the event that a telescoping tube (any one of the three
tubes that goes into the base) slides downward, there is
an allan slot for tightening the spring load. These always
accessible slots are in the handle of the MB3 and are shown
in the photos. If needed, tighten these lightly.
Lightly tighten the
fastener for the specific
telescoping tube.
Small adjustments are
necessary.

MoonBeam™3 Handling
© 2018 Diversey, Inc. All Rights Reserved. 87309-CRD en (20/334)
Always wear personal protective equipment.
Cover Becomes Disconnected
from the Base
If system components (Remote Covers and Base Units) are
swapped after usage or are exchanged under warranty, a
re-connecting of the system components (Remote Covers
and Base Units) will be required to allow communication for
continued utilization.
If required, press and hold both Connect buttons on the
Base Unit and the Remote Cover for 3 to 5 seconds
(blinking green) and both will illuminate solid green when
connected. Upon completion of powering the Remote Cover
and connecting to the Base Unit, the MoonBeam3 is now
ready for the targeted disinfection process to begin. To
start the disinfection process, press the Start button on the
Remote Cover user interface.
MoonBeam™3 Handling
© 2018 Diversey, Inc. All Rights Reserved. 87309-CRD en (20/334)
Always wear personal protective equipment.
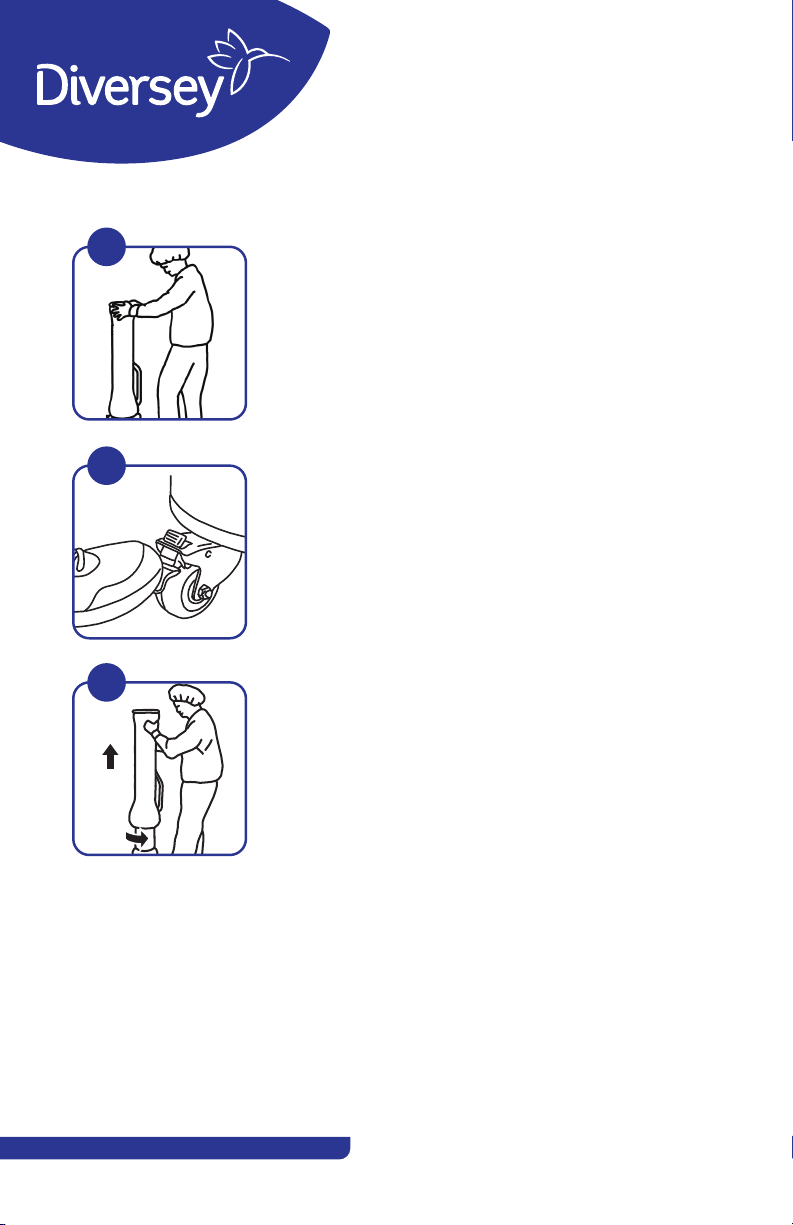
Securing the Cone
Removal from Base
Lock the wheel caster
using the foot lever.
2
Twist the cone counter-
clockwise and remove by
gently lifting up and clear
of the base – set it aside in
a safe spot.
1
2
3
Set the MoonBeam3
unit in the desired
location to get the
most coverage.
1
MoonBeam™3 Handling
© 2018 Diversey, Inc. All Rights Reserved. 87309-CRD en (20/334)
Always wear personal protective equipment.
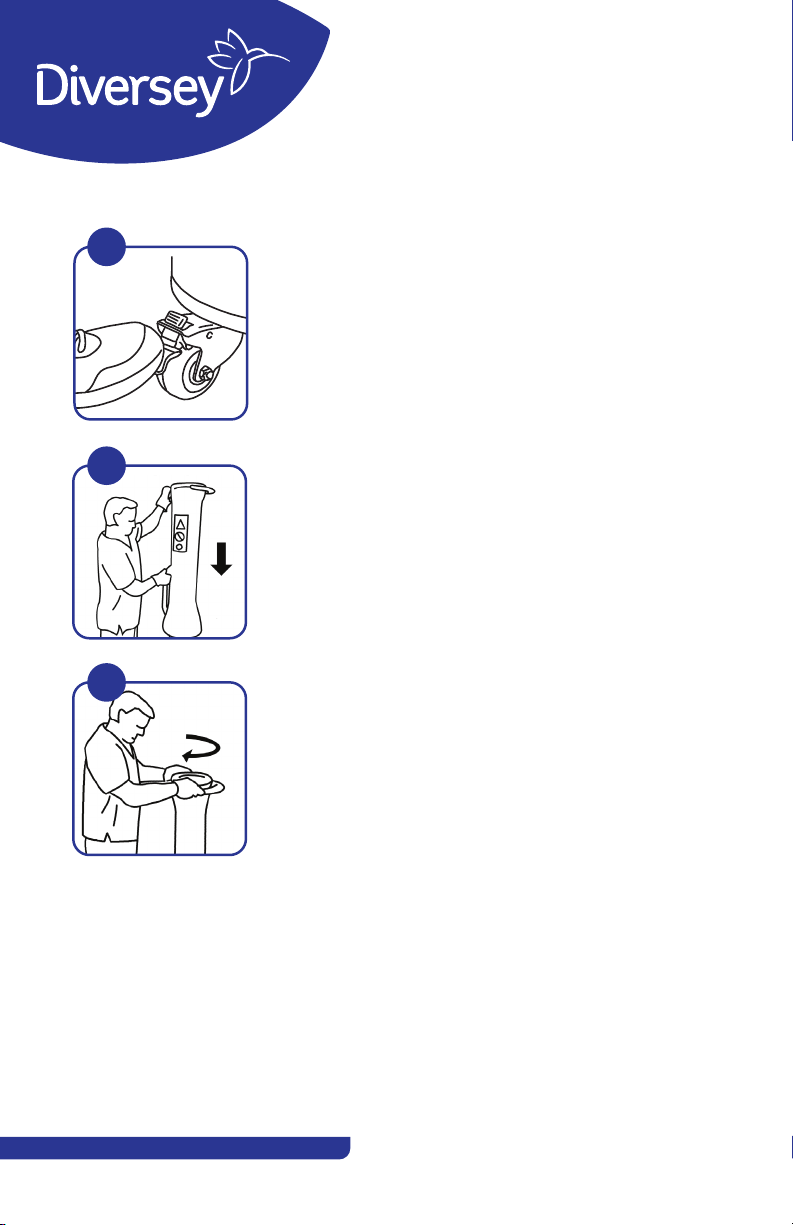
Securing the Cone
Replacing on Base
Gently lower the cone
on the MoonBeam
base. Make sure the
cone sits squarely on
the base.
2
Gently turn the cone clockwise on
the base. The cone should screw on
smoothly, with little resistance. If you
feel resistance, unscrew the cone,
adjust its position slightly and try
again until it screws on smoothly.
Tighten until just snug. Don’t
overtighten. Unlock wheel caster
to move unit.
3
Confirm that the
wheel caster is locked
using the foot lever.
1

MoonBeam™3 Handling
© 2018 Diversey, Inc. All Rights Reserved. 87309-CRD en (20/334)
Always wear personal protective equipment.
When Do You
Replace a Bulb?
“How do you know when to change the bulbs?
The MoonBeam3 system uses “stoplight” technology to
easily see bulb status. Each bulb has a status indicator that
will be green, yellow, or red. The status indicator will be
GREEN when the bulb is operating properly and has more
than 15 hours of life remaining; YELLOW when the bulb has
fifteen hours or less of useful life remaining; and finally, RED
when the bulb life has expired.“
Bulbs are rated for 600 hours of use. Cycle length
determines the life of the bulb, but in general practice,
600 hours X 60 minutes per hour = 36,000 minutes of
operation before replacement. That is 12,000 three-minute
disinfection cycles.
Bulb Replacement as shown in this video: Click Here
Wear Gloves!

MoonBeam™3 Handling
© 2018 Diversey, Inc. All Rights Reserved. 87309-CRD en (20/334)
Always wear personal protective equipment.
Replacing / Seating
a Bulb
Unplug the
MoonBeam unit.
Let the bulbs cool,
if recently run.
2
When handling light arm
and replacing/removing
bulbs, take care not to
damage the clear plastic
bulb covering.
3
Confirm that the
wheel caster is locked
using the foot lever.
1
MoonBeam™3 Handling
© 2018 Diversey, Inc. All Rights Reserved. 87309-CRD en (20/334)
Always wear personal protective equipment.
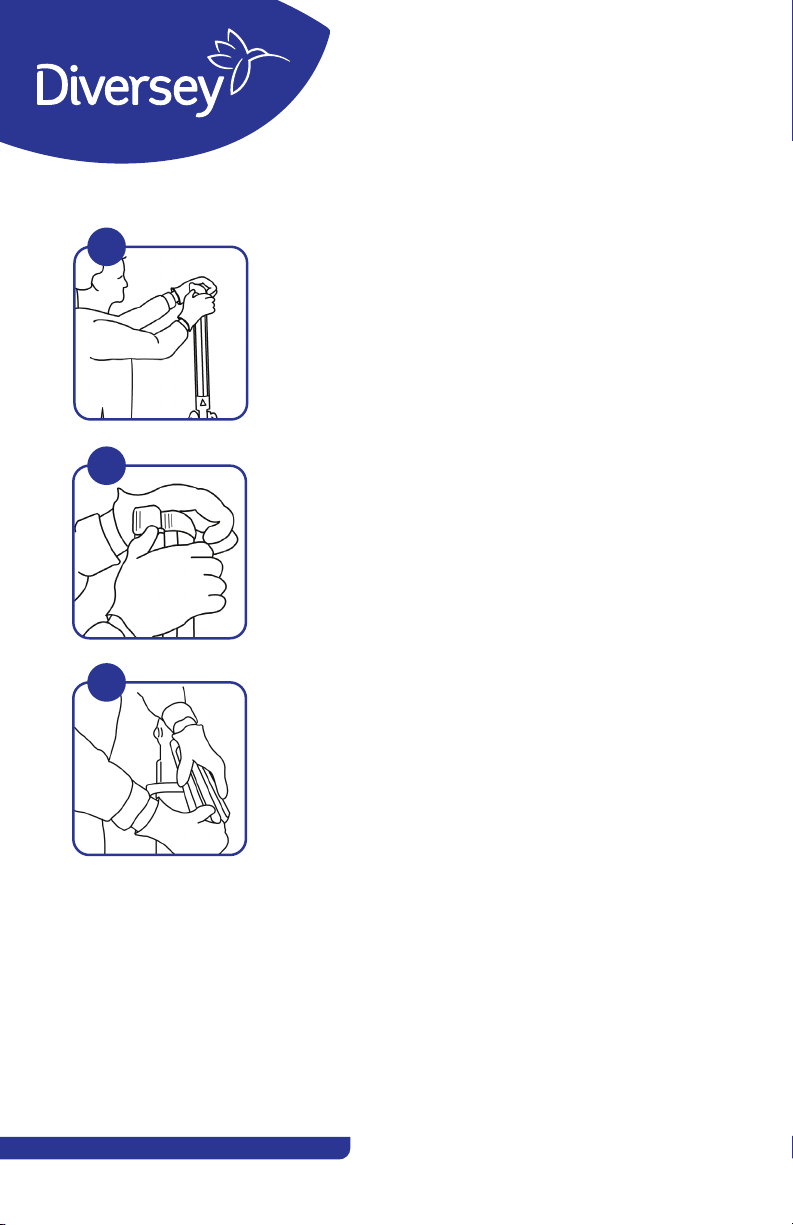
Replacing / Seating
a Bulb cont.
Use your thumb to
gently loosen the
black end cap on
the arm and remove
using your fingertips.
5
Tilt the light arm so the end is
about waist high, grasp the bulb
at the end, and gently but firmly
pull the bulb from the light arm. It
will release with a “snap.” Gently
jiggle the bulb to clear the light
arm opening. Dispose of used bulb
according to facility protocol.
6
Don gloves.
Place light where bulb
is to be replace into
an upright position
that is comfortable
to reach.
4

MoonBeam™3 Handling
© 2018 Diversey, Inc. All Rights Reserved. 87309-CRD en (20/334)
Always wear personal protective equipment.
Replacing / Seating
a Bulb cont.
When replacing black cap, note
thatthe bulbs should nest between two
translucent placement tubes (these
look like bits of soda straws). Be sure
these tubes are in place and bulbs fit
in between when replacing cap. Check
that cap is fully seated on light arm.
8
To verify successful bulb installation,
power on the MoonBeam unit.
9
Return light arm to upright position
and feed new bulb into light arm.
Gently push into socket. bulb will
click into place. Prepare to gently
replace black cap. See step 8 below.
7

MoonBeam™3 Handling
© 2018 Diversey, Inc. All Rights Reserved. 87309-CRD en (20/334)
Always wear personal protective equipment.
Rubber End Cap
Removal, Replacement, Positioners
Rubber End Caps with Positioners must be intact to have
positive transport and secure end caps.
If the little plastic positioners (white plastic positioner) fall
out the bulbs will be loose and mobile. This seems to be the
biggest issue. The caps will also fall o if the positioners fall
o. If they are all intact, the bulbs will not move and they
will transport better.
If they fall out, the bulbs will no longer be stable and the
caps will fall o.Based upon the fact thisis so isolated with
few customers, I don’t want to presume, and just want to
confirm. The straws do fall out and most be repositioned
back in or we will have 100% failure.
If they are in then there is little need to pull the caps o. In
the second image below, you can see how they positionthe
bulbs to keep secure as well as a diagram to the right.

MoonBeam™3 Handling
© 2018 Diversey, Inc. All Rights Reserved. 87309-CRD en (20/334)
Always wear personal protective equipment.
Rubber End Cap
Working with the FEP Covers
The Rubber End Caps Protect the FEP Covers and Should
be Carefully Applied to Not Crush the Ends
The Rubber End Caps protect the arms, the bulbs and the
FEP covers. It is best to apply them with leading the flat side
first, to ensure the cover slides between the opaque bulb
positioner in the middle diagram below and the flat side of
the end cap. This will keep the FEP from getting damaged
and protect it in the end cap.
The diagram on the right shows the film between the
positioner and the flat side of the end cap to ensure a
secure application.

MoonBeam™3 Handling
© 2018 Diversey, Inc. All Rights Reserved. 87309-CRD en (20/334)
Always wear personal protective equipment.
Troubleshooting
General
Troubleshooting Common Problems
The following table lists common problems, their possible
causes and how to solve them.
Problem Possible Cause(s) Solution(s)
Base unit in fault
state.
Failed boot sequence or
hardware fault
First Press the Reset Button to attempt
clearing fault
Disconnect and reconnect Power cord
to cycle power
Contact Technical Support
The Remote Cover
won’t turn on
when the Power
button is pressed.
The batteries no longer
provide an electrical charge.
Replace the batteries. See Battery
Replacement section in Chapter 4 of
the manul.
The Ready light
will not illuminate
on the Remote
Cover.
The Base Unit is not powered
One of the UV-C bulbs is not
fully seated in its socket.
Burned out bulbs on Base
Unit (Bulb Status displayed
as red).
The Remote Cover is not
placed against the closed
door.
The Sentry unit(s) which is
connected with the Base Unit
is not powered or configured
to be ignored.
Plug the line cord of the Base Unit into
an electrical outlet.
Ensure all three UV-C bulbs are fully
seated in their sockets.
Replace bulb and reset Bulb Status
on Base Unit. See Bulb Replacement
section in Chapter 4 of the manual.
Place the Remote Cover against the
closed door ensuring that the Point
Toward Door arrow is directed to the
door.
Turn on the Sentry unit(s), which is
connected with the Base Unit. If the
Sentry is configured to be ignored,
press the Base Unit’s Ignore button
four times for it to be acknowledged
for use.

MoonBeam™3 Handling
© 2018 Diversey, Inc. All Rights Reserved. 87309-CRD en (20/334)
Always wear personal protective equipment.
Troubleshooting
General (cont.)
Problem Possible Cause(s) Solution(s)
The Remote Cover
won’t turn on
when the Power
button is pressed.
The batteries no longer
provide an electrical charge.
Replace the batteries. See Battery
Replacement section in Chapter 4 of
the manual.
The Sentry Assist
Technology won’t
turn on when the
Power button is
pressed.
The batteries no longer
provide an electrical charge.
Replace the batteries. See Battery
Replacement section in Chapter 4 of
the manual.
The Remote Cover
doesn’t show as
connected to the
Base Unit.
Remote Covers may have
been swapped between
Base Units.
With power turned on for the Base
Unit and Remote Cover, press and hold
both Connect buttons on the Base
Unit and the Remote Cover for 3 to 5
seconds (blinking green) and both will
illuminate solid green when connected.
The Sentry doesn’t
show as connected
to the Base Unit.
Sentry units may have been
swapped between Base Units
or a new Sentry unit is to be
deployed for use.
With power turned on for the Base
Unit and the Sentry unit, press and
hold both Connect buttons on the Base
Unit and the Remote Cover for 3 to 5
seconds (blinking green) and both will
illuminate solid green when connected.
The Base Unit will
not power on.
The line cord may not be fully
seated in the Base Unit or the
electrical wall outlet.
The fuse may be blown.
Check each end of the line cord and
fully seat each connector.
Replace the fuse. See Fuse
Replacement section in Chapter 4 of
the manual.
The Sensor Self
Test fails on the
Base Unit, Remote
Cover or Sentry.
A malfunctioning sensor. Contact Technical Support.
The Base Unit will
not enter ready
state
Stuck button on control panel Contact Technical Support.
MoonBeam™3 Handling
© 2018 Diversey, Inc. All Rights Reserved. 87309-CRD en (20/334)
Always wear personal protective equipment.
Handling Tips
for Users
Remote Cover: The remote cover on unstable
ground is a cause for failed process as the cover
moves. Also, pushing the start button at an angle
(Right/Left) can cause the cover to move slightly and
cause failure. Pushing down from above works much
better and won’t activate the accelerometer.
The cover times out after about 10 minutes. Make
sure the sta is aware that the have had end-users
say the cover is a problem for initiating an exposure.
Gray Thermal Tape: The thermal tape gets
damaged when the rubber end cap is pulled o
or replaced, or when the yellow cover is replaced.
It may need to be replaced if it is removed.
Contact your representative if needed.
Caster: Kicking or forceful “locking” is may
break or disable function. Only the black
lock button on the castor needs to be lightly
depressed. Only one or two need to be locked
during use.
Other manuals for MoonBeam 3
1
Table of contents
Other diversey Cleaning Equipment manuals


