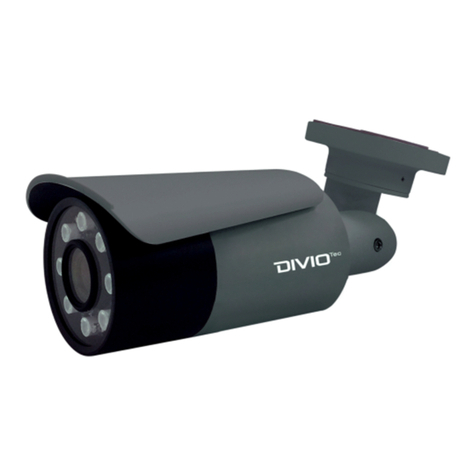
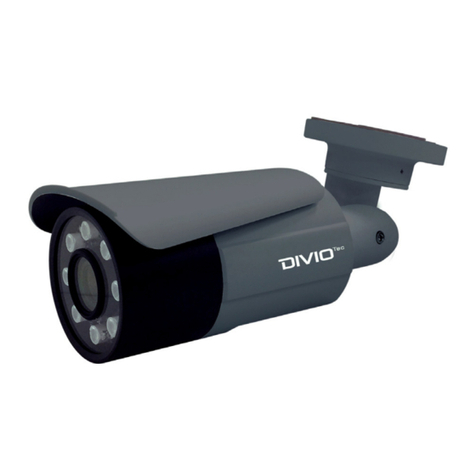
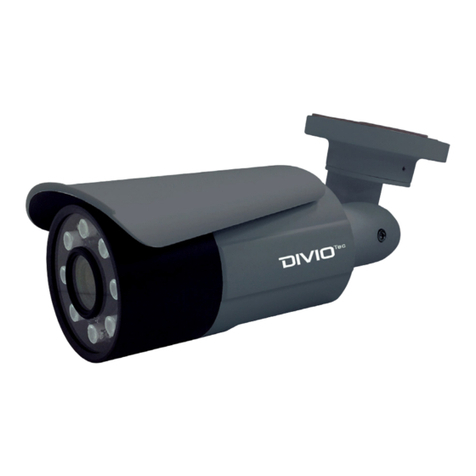
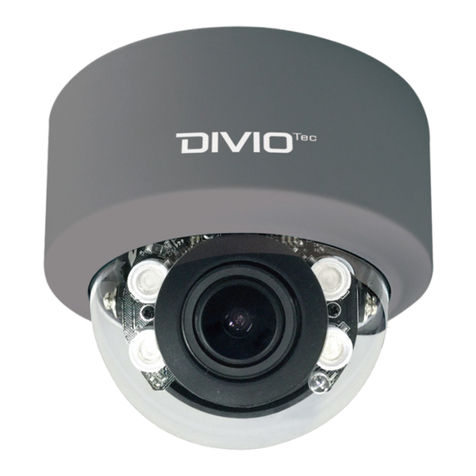
DivioTec TBR722 User manual

Network Camera
User Manual
The manual is applied to the following model:
Model No. Resolution Lens
TBR722
TBR721
TDR751
3MP@30fps
3MP@30fps
3MP@30fps
9-22mm Motorizaed Lens, F1.5
3-10mm Motorizaed Lens, F1.4
Note: The manual is subject to change without notice.

ii
Contents
Preface
Package Contents................................................................................................................. v
Chapter 1: Product Introduction
Overview ................................................................................................................................. 1
Key Features ........................................................................................................................... 1
Hardware Specications .................................................................................................... 2
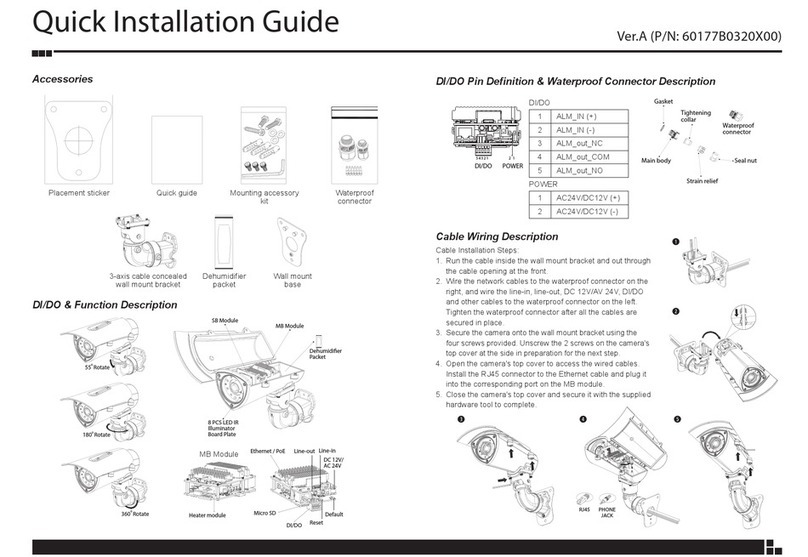
DI/DO & Function Description......................................................................................... 4
DI/O Pin Denition & Waterproof Connector Description..................................... 4
Cable Wiring Description................................................................................................... 5
Cable Outlet Description................................................................................................... 6
Web Browser (Internet Explorer)..................................................................................... 6
Chapter 2: Camera Conguration
Accessing the Camera’s Conguration Menu (Graphical User Interface)......... 8
Installing IP-FINDER.................................................................................................... 8
IP-FINDER .....................................................................................................................11
Web Browser (Internet Explorer) .........................................................................12
Conguring the Camera’s Setting ................................................................................14
Browsing Through the Conguration Menu........................................................15
SmartCatchTW .......................................................................................................................16
LPR Mode..........................................................................................................................16
Overview Mode..............................................................................................................17
Quick Viewer ...............................................................................................................17
Autoexposure Conguration ................................................................................17
Gamma Control..........................................................................................................17
Overview Mode Cont. ..................................................................................................20
Wide Dymamic Range (WDR) ...............................................................................18
IR LED Control.............................................................................................................18
P-Iris Control................................................................................................................18
Overview Mode Cont. ..................................................................................................20
Noise lter....................................................................................................................19
Exposure.......................................................................................................................19
Day & Night Threshold ............................................................................................19
Basic Settings.......................................................................................................................20
Video. ......................................................................................................................................21
Video Stream. .................................................................................................................21
Stream 1.......................................................................................................................21
Stream 2.......................................................................................................................22
Stream 3.......................................................................................................................22
Overlay Settings ............................................................................................................23
Contents ......................................................................................................................23
Network .................................................................................................................................24
TCP/IP ................................................................................................................................24
IP Address Conguration.......................................................................................24
Current Network Settings......................................................................................24
FTP......................................................................................................................................25
FTP Server....................................................................................................................25
Login Information ....................................................................................................25
Test Remote FTP Server..........................................................................................25
SMTP..................................................................................................................................26
SMTP Server................................................................................................................26
Login Information ....................................................................................................26
To Mail Address .........................................................................................................26
Ports...................................................................................................................................27

iii
HTTP..............................................................................................................................27
RTSP...............................................................................................................................27
HTTPS..............................................................................................................................28
Create and Install......................................................................................................28
Created Request........................................................................................................28
Install Certicate.......................................................................................................28
IP Address ltering .....................................................................................................29
General.........................................................................................................................29
Filtered IP Address....................................................................................................29
Filtered IP Address Setup.......................................................................................29
Network Storage.........................................................................................................30
Recipient Setup.........................................................................................................30
Login Certicate........................................................................................................30
Test and Remove Network Storage....................................................................30
Events .....................................................................................................................................31
Motion Detection..........................................................................................................31
Settings ........................................................................................................................31
Detection Zones .......................................................................................................32
Alarm In/Out Trigger....................................................................................................33
Alarm In Control........................................................................................................33
Alarm Out Control ........................................................................................................ 33
Event Actions..................................................................................................................34
When Motion Detection Triggered....................................................................34
When Alarm In Triggered.......................................................................................34
System....................................................................................................................................36
Audio .................................................................................................................................36
Audio Settings...........................................................................................................36
Recording Settings .......................................................................................................37
AVI File Setting...........................................................................................................37
User Management........................................................................................................38
Add/Modify User Accounts...................................................................................38
User List........................................................................................................................38
SD Card Management.................................................................................................39
SD Card Information................................................................................................39
File List..........................................................................................................................39
Date & Time.....................................................................................................................40
Current Camera Time ..............................................................................................40
Time Settings .............................................................................................................40
Date & Time Format.................................................................................................40
NTP Server...................................................................................................................40
Firmware Upgrade........................................................................................................42
Firmware Version ......................................................................................................42
Update..........................................................................................................................42
Maintenance...................................................................................................................43
Maintain.......................................................................................................................43
Camera Name Settings...........................................................................................43
Camera Conguration ............................................................................................43
Advanced Settings.............................................................................................................44
Video.......................................................................................................................................45
ROI.......................................................................................................................................45
Auto Exposure Weights ...............................................................................................46
Network .................................................................................................................................47
DDNS..................................................................................................................................47
DDNS Settings............................................................................................................47
SNMP..................................................................................................................................48
SNMP v1/v2 .................................................................................................................48
Traps for SNMP v1/v2...............................................................................................48
SNMP v3........................................................................................................................48
Multicast............................................................................................................................49
Settings.........................................................................................................................49
Events .....................................................................................................................................50
Ethernet Lost Detection ..............................................................................................50
Settings.........................................................................................................................50
Event Actions (Advanced)...........................................................................................51
iv
When Motion Detection Triggered.....................................................................51
When Tampering Detection Triggered..............................................................51
System....................................................................................................................................52
Schedule Recording......................................................................................................52
Schedule Recording Setting..................................................................................52
Chapter 3:
Viewing Live Video via VLC Media Player.............53

v
Package Contents
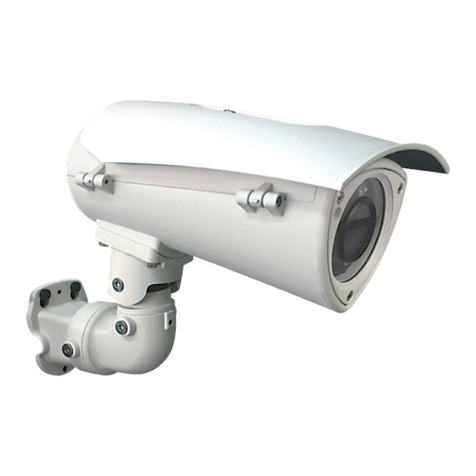
The 3MP Outdoor IR Bullet Camera package contains the following accessories:
Placement sticker Dehumidier packet
Quick guide
2-axis cable concealed wall
mount bracket
Sunshield Waterproof connector Wall mount base CD (User Manual)
Mounting accessory kit

1
Chapter 1: produCt IntroduCtIon
Overview Key Features
▪Progressive scan CMOS sensor at 3megapixel/1080p full HD resolution
▪Multiple H.264 and MJPEG streams
▪Easy installation with remote focus and zoom control
▪Support Auto-Focus to avoid focus error through human eyes
▪Adjustable P-iris to achieve best image quality
▪Perfect IR exposure calculation
▪WDR [Wide Dynamic Range] to overcome high contrast lighting environment
▪Outdoor-ready, IP67
▪Active tampering alarm
▪Impact-resistant for IK10
▪Excellent low light noise reduction
▪ONVIF support
▪Extreme weather support (-40°C to 60°C)

2
Hardware Specications
Camera
▪Image sensor: 1/3” 3megapixel true WDR progressive scan CMOS sensor
▪Lens: Motorized (9-22mm, F1.5) board type
▪Iris type: p-iris
▪Day and night: Yes
▪IR distance: Eective up to 50 meters
▪IR wavelength: 850nm ( 4pcs high power LED )
▪IR control: Smart IR+
▪ICR: Yes
▪WDR: Yes
▪Image Enhancement
– Brightness, Contrast, Saturation, Sharpness, Backlight compensation,
Mirror, Flip, Day/Night, Anti-icker
Video
▪Video compression: H.264/MJPEG
▪Video streaming: triple streaming
– H.264 Stream 1/ H.264 Stream 2/ MJPEG Stream 3
▪Video resolution: 2048 x 1536 to 320 x 240
▪Video quality
– VBR
– CBR
▪Frame rate
– 2048 x 1536 @ 30 fps
– 1920 x 1080 @ 60 fps
– 1280 x 720 @ 60 fps
– 720 x 576 @ 60 fps
– 720 x 480 @ 60 fps
– 640 x 480 @ 60 fps
– 320 x 240 @ 60 fps
Audio
▪Audio streaming: Two-way
▪Audio compression: G.711 8KHz/ 16bit
▪Audio input: Line-in
▪Audio output: Line-out
Network
▪Interface: 10/100/1000 Mbps Ethernet, RJ-45
▪Supported protocols: HTTP, TCP/ IP, UDP, RTP, RTSP, FTP, SMTP, DHCP, DNS,
DDNS, NTP, uPnP, ONVIF, IPv4/ v6
▪Security: Multi-level passwords/ HTTP encryption
I/O Connector
▪Audio in/ out port: Terminal block 1 in/ 1out
▪D I/O: DIX1,DOX1
▪RS485: N/A
▪Micro SD slot: Yes
▪RJ45: Yes
Event Management
▪Event trigger: Motion detection, DI
▪Notications: Trigger alarm output, email/ FTP and record video to server
or SD card
▪Post-recording: Yes
▪Pre-recording: Yes
Power
▪DC: DC 12V/ AC 24V
▪POE: Yes/ IEEE 802.3af

3
General
▪Power consumption: 16.6W max.
▪Weight: 2kg
▪Dimension: 406.22mm(D)X161(W)X263.3(H)
▪Operating Temp.: -40°C~60°C
▪Humidity: 90% RH (no condensation)
▪Certication: CE/ FCC
▪Vandal resistant: IK10
▪Outdoor capable: IP67, built-in heater
▪Application: SDK available for application development

4
DI/DO & Function Description DI/O Pin Denition & Waterproof
Connector Description
Pin Description
1 ALM_IN (+)
2 ALM_IN (-)
3 ALM_out_NC
4 ALM_out_COM
5 ALM_out_NO
Note:
Default : If the default button has been pressed 1~4 secs, the camera will
be re-started and all the settings will be back to default except IP address. If
over 5 secs, the camera will be re-started and all the settings will be back to
default including IP address.
Reset : Press to reset the camera.
55ORotate
360ORotate
SB Module MB Module
8 PCS LED IR
Illuminator
Board Plate
Dehumidifier
Packet
Bracket
Latch
Line out Line in
Etherent / PoE
Micro SD
DI/O Reset
Default
DC12V/
AC24V
Heater module
DI/O
54321
Gasket
Tightening
collar Waterproof
connector
Seal nut
Strain relief
Main body
DI/O
54321
Gasket
Tightening
collar Waterproof
connector
Seal nut
Strain relief
Main body

5
Cable Wiring Description
1. Cable Installation Steps:
2. Run the cable inside the wall mount bracket and out through the cable
opening at the front.
3. Press down the push-lock mechanism and secure the camera onto the
push-lock. Wire the network cables to the waterproof connector on
the right, and wire the line-in, line-out, DC 12V/AV 24V, DI/O and other
cables to the waterproof connector on the left. Tighten the waterproof
connector after all the cables are secured in place.
4. Secure the camera onto the wall mount bracket using the two screws
provided.
5. Open the camera’s top cover to access the wired cables. Install the RJ45
connector to the Ethernet cable and plug it into the corresponding port
on the MB module.
6. Close the camera’s top cover and secure it with the supplied hardware
tool to complete.
RJ45 PHONE
JACK
Push Lock
q
w
er
t

6
Cable Outlet Description
1. The camera features two waterproof connectors, the left one in the
diagram is for PoE connection, while right one is for line in, line out, DC
12V/AC 24V and DI/O connections.
2. The right one features four wire holes. Please cover unused holes with
sealing plugs to prevent water from entering.
3. Applicable cable diameter:
4. * Ø 2.5~1.8mm (Right)
5. * Ø 6.9~4.7mm (Left)
Line out
Line in
DC12V/AC24V
DI/DO
Ethernet
Hardware Installation
Web Browser (Internet Explorer)
1. Locate and open the Internet Explorer (IE) shortcut on the desktop.
2. In the address bar, type 192.168.0.250 (default IP address of the camera)
and then press the Enter button.
3. You will be prompted with a pop-up window asking for logininformation,
type in “Admin” (default login name) and“1234” (default password)
4. Open the camera’s cover and glue the dehumidier packet onto the metal
bracket using the adhesive sticker on its back, as depicted in the diagram
below. Close the camera’s cover and ensure the clip is locked in position.
Install the sunshield and tighten a torx screw on the side of cover.

7
5. Secure the connecting bracket to the camera’s rear.
Press
Press
6. Press and hold down the latch on the wall mount bracket and put it into
the connecting bracket. Once in place, secure the other side using the
supplied hex wrench.
7. Align the mounting holes on the wall mount bracket to the mounting
holes on the wall mount plate, then secure it tightly with screws to nish
the installation.

8
Chapter 2: Camera ConfIguratIon
Accessing the Camera’s Conguration
Menu (Graphical User Interface)
The camera’s default IP address is 192.168.0.250, make sure the IP address of
the computer accessing the camera is on the same network subnet before
proceeding.
You can access the camera via a web browser or IP-FINDER software included
with the camera. The following information outlines the instructions for
each method.
Installing IP-FINDER
1. Locate the installation le IP-FINDER-Setup.msi on the CD.
2. Once located, double click on the le to start the installation program.
3. Click the Next button on the welcome screen to continue.
Next button
Note: If IP-FINDER is already installed, you can skip this section and continue
to the next section IP-FINDER on page 8.

9
4. Conrm the directory that the program will be installed on. To specify
a dierent folder, please click on the Browse button and locate the
desired installation folder.
Next button
Browse button
Disk Cost
button
User accounts
7. Click on the Next button to continue.
5. To check the available drives you can install the software to and their
available and required disk space, please click on the Disk Cost button.
6. Specify which user accounts on the computer can access the program,
the options are Everyone and Just me.

10
Next button
8. Click on the Next button to begin installation.
Close button
9. Once the installation process is complete, click on the Close button to
nish. A shortcut will be created on the desktop.

11
IP-FINDER
1. Locate and open the IP-FINDER software shortcut on the desktop.
Home Page
IP Address
Camera List
Search
4. Click on the Home Page button and it will launch the camera’s
conguration menu via Internet Explorer. You can also access the menu
by double clicking the camera’s IP address under Camera List.
2. When the program is launched, it will begin searching the network for
the IP camera automatically (the search will last for up to 90 seconds).
You can also manually search cameras by clicking on the Search button.
3. Once the camera is discovered, it will show the following information:
▪Model name
▪IP address
▪MAC address
▪UUID
▪Serial number
▪Version
Note: Manual search will last for up to 90 seconds.

12
Multiple Cameras
If more than one IP camera are detected, the Camera List will show all the
available cameras on the network. To access all the cameras’conguration
menu simultaneously, click on the Select All button to select all the
cameras in the list, then click the Home Page button. Similarly, you can
access specic ones by ticking the camera’s checkbox.
To deselect, press the Clear All button to remove all the selection, or
specic ones by unchecking the checkbox.
Home Page Camera List
Select All
Checkbox
Clear All

13
Setup
PTZ/Zoom
Control
Focus
Control
Focus
Zone
Viewer
Snapshot Start/StopLive view
1. Locate and open the Internet Explorer (IE) shortcut on the desktop.
2. In the address bar, type 192.168.0.250 (default IP address of the camera)
and then press the Enter button.
3. You will be prompted with a pop-up window asking for login information,
type in “Admin”(default login name) and
“1234” (default password)
4. Once logged in, you will see the main screen with video stream [stream 3]
Web Browser (Internet Explorer) Snapshot
Takes a image snapshot from the camera, you will be prompted to store the
image le onto the computer’s hard drive.
Start/Stop
Press to stop the live video, press again to restart.
Viewer
Views the live video of the camera.
Setup
Options for conguring the IP camera.
PTZ/Zoom Control
Buttons used to control zooming and PTZ function.
Button Description
Moves the camera up, down, left and right.
Returns the camera back to default position.
Adjusts the camera to zoom in or out.
Focus Control
Adjusts the camera’s focus. To adjust the focus automatically, press the Auto
Focus button. To set the focus manually, press the to focus far objects,
and to focus near objects.
Focus Zone
Enables or disables display of focus zone in the center of the live view (cross-hair).

14
Conguring the Camera’s Setting
1. To congure the camera’s setting, click on the Setup button on the
main screen to enter the conguration menu.
Setup

15
Browsing Through the Conguration Menu
The layout of the conguration menu is split into two sections. All the camera
settings are located on the left hand side of the interface, clicking it will open
their corresponding sub-menu on the right.
The following are the camera settings available on the left hand side:
▪SmartCatch™
– LPR Mode
– Overview Mode
▪Basic Settings
▪Advanced Settings
This manual suits for next models
2
Table of contents
Other DivioTec Security Camera manuals

DivioTec
DivioTec NBR525P User manual

DivioTec
DivioTec NBR125C User manual

DivioTec
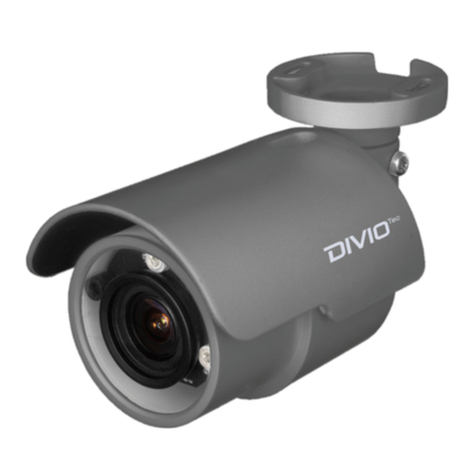
DivioTec TBR721 User manual

DivioTec
DivioTec NFF271 User manual

DivioTec
DivioTec TBR927 User manual

DivioTec
DivioTec NDR153P User manual

DivioTec
DivioTec NDR154P User manual

DivioTec
DivioTec NBR123 User manual

DivioTec
DivioTec NBR126PA User manual

DivioTec
DivioTec NBR225P User manual