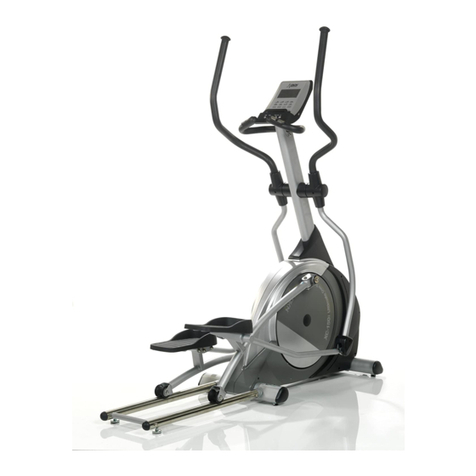
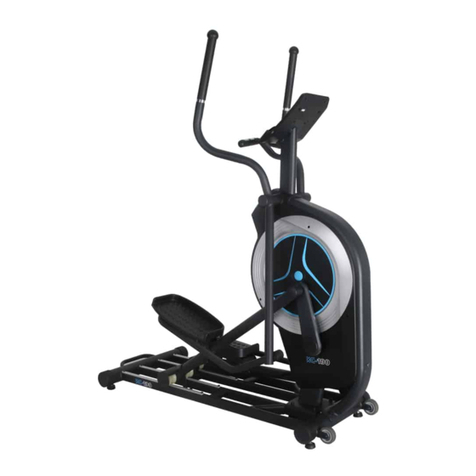
DKN technology EMX-800 User manual

www.dkn-uk.com
EMX-800
Owner’s Manual

Thank you for purchasing
The DKN EMX-800 Elliptical Cross Trainer.
You have chosen a high-quality, safe and innovative piece
of exercise equipment as your training partner and we are
certain it will keep you motivated on the way to achieving your
personal fitness goals. Please take the time to read this owner’s manual as it will
help you to get the most out of your new piece of equipment.
For more information, or if you require any assistance
Important Safety Information
Recycling Information
Safety Standards
3/5 Workout Programs 30/34
5
Selecting Workout
Manual Mode
Pre-Set Programs
Heart Rate Control (HRC) Programs
WATT Mode
Recovery Mode
Body Fat Mode
30
530
31
32
Warning Decal Placement
Unpacking Your EMX-800
6 33
34
7 34
Overview of Your EMX-800 8
Beginner’s Guide To Exercise 35/36
Warning
Why Exercise?
Before You Start
Target Heart Rate
Workout Tips
How To Begin
How Hard Should You Work?
35
35
EMX-800 Assembly 9/10 35
36
Contents Checklist
Hardware Pack
936
10 36
36
Assembly Instructions 11/20 Stretching Guide 37/38
Tips For Stretching
Warm-Up And Cool-Down
Warm-up
Stretching
Cool-down
37
Before You Use Your EMX-800 21 37
37
Mounting and Dismounting
Body Positioning
21 38
22 38
Moving Your EMX-800 23 Troubleshooting 39/40
24/27 Cu
s
t
o
mer Support 41
Console Images
Console Instructions
Handlebar Controls
Console Feedback Display Functions
Feedback Data Display Ranges
Heart Rate Function
Bluetooth App Function
Bluetooth Speakers
MP3 Input
USB Charging Port
24 Important 41
25
26
26 Ma
n
u
facturer’s Warranty 42
26
27 Terms
Normal Wear and Tear
Technical Parameters
42
27 42
27 42
27
27
Appendix 1: Exploded Diagram
Appendix 2: Parts List
Appendix 3: Space Requirements
43
Configuring Your EMX-800 28/29 44/45
Personalising The Units
Setting Up User Profiles
28 46
29
Manual Contents
Operating Instructions

Important Safety Information
1. Assemble the machine exactly as per
the instructions in this manual, using
only the supplied tools to assemble it.
2. Check all the screws, nuts and other
connections before using the machine
for the first time and ensure that it has
been built correctly and is safe to be
used.
3. This machine is for indoor, home use
only. Position the machine on a clear,
dry and level surface. DO NOT position it
near water or outdoors, or in a room or
building that is not properly insulated.
4. Place a suitable base (e.g. rubber mat,
wooden board etc.) beneath the
machine in the assembly area to protect
it from dirt.
5. Make sure there is sufficient free space
around the cross trainer when you set it
up.
6. Before beginning training, ensure there
is at least 1m of clearance in the front
and rear of the elliptical and 0.6m on
each side, free from any objects or
potential hazards. The minimum ceiling
height required is 2.3m.
7. Use the machine only for its intended
purpose as described in the manual.
This machine is not suitable for
therapeutic or medical purposes.
8. This machine may only be used by one
person at a time.
9. Always wear appropriate workout
clothing when exercising. Aerobic shoes
are required when using this machine.
10. Before exercising on this machine,
always warm up and do the stretching
exercises listed in this manual first.
11. When altering any adjustable parts,
make sure they are adjusted properly
and note the marked maximum position
for each part.
12. DO NOT use aggressive cleaning
products, such as detergents, to clean
the machine. Remove drops of sweat
from the machine immediately after
finishing training.
Please read these instructions carefully before using this
product and retain this manual for future reference.
The specifications of this product may vary slightly from the
illustrations and are subject to change without notice.
NOTE THE FOLLOWING PRECAUTIONS BEFORE ASSEMBLING
OR OPERATING THIS ELLIPTICAL CROSS TRAINER:
www.dkn-uk.com 3
13. Your health can be affected by incorrect or
excessive training. Consult a doctor before
beginning a training program.
14. WARNING! Heart rate monitoring systems
may be inaccurate. Over exercising may
result in serious injury or death. If you feel
faint or experience dizziness, nausea,
chest pain, or any other abnormal
symptoms STOP EXERCISING
IMMEDIATELY AND CONSULT A
PHYSICIAN WITHOUT DELAY.
15. Disabled persons should not use this
machine without a qualified person or
physician in attendance.
16. Children should be kept away from the
machine at all times.
17. WARNING! Individual human power which
is required to carry out an exercise can be
different than the mechanical power
displayed.
18. The machine is equipped with a computer
console which can adjust the resistance.
Change the resistance level by using
Quick-Resistance keys on the console and
handlebars.
19. WARNING! The machine does not
freewheel. The pedals will continue to spin
until the flywheel stops. Reduce your
pedaling speed in a controlled manner to
avoid injury.
20. The maximum user weight is 150kg
(331lbs). The product weighs 100kg
(220lbs). Safety standards:
EN/ISO 20957 – Class HA (Home use,
high accuracy).
21. Examine the machine carefully
before you use it, especially the
components most susceptible to
wear, e.g. handlebar, cranks, pedals
and the connection points.
22. WARNING: If any of the adjustment
devices are left projecting, they
could interfere with the user’s
movement.
23. Stop using the machine immediately
if there are any defective
components
and keep it out of use until you
replace the components or it is
repaired by a qualified engineer.
24. Use only original spare parts for any
necessary repairs. Using
3rd party parts will invalidate
any warranty.
25. WARNING! Inappropriate use of this
machine such as while under the
influence of drugs or alcohol, not in
line with instructions or excessive
usage, may result in serious injury or
death.
4www.dkn-uk.com

RECYCLING INFORMATION
Used electrical and electronic equipment (WEEE) should not be mixed with
general household waste. For proper treatment, recovery and recycling,
please take this product to designated collection points where it will be
accepted free of charge. Alternatively, in some countries you may be able to
return your products to your local retailer upon purchase of an equivalent new
product. Disposing of this product correctly will help save valuable resources
and prevent any potential negative effects on human health and the
environment, which could otherwise arise from inappropriate waste handling.
Please contact your local authority for further details of your nearest
designated collection point. Penalties may be applicable for incorrect disposal
of this waste, in accordance with your national legislation.
SAFETY STANDARDS
This equipment meets the requirements of European safety directives such as:
the Electromagnetic Compatibility (EMC) Directive and the Low Voltage
Directive (LVD).
DKN assumes no responsibility for
personal injury and/or property
damage sustained by or through the
use of this product.
WARNING: Before beginning using this
machine or doing any exercise program,
consult your doctor. This is especially
important for people over the age of 35
or those with pre-existing health
problems. Read all instructions before
using this elliptical cross trainer.
www.dkn-uk.com 5

Quick incline & quick
resistance decal
Safety warning
Handlebar sticker
Moving handlebar
sticker
Pedal L & R sticker
Safety warning
Warning Decal Placement
6www.dkn-uk.com

•Assembly requires two persons.
•The cross trainer is supplied on a wooden
pallet for added safety and protection.
•Place all parts in a cleared area and
remove the packing materials. With the
help of a second person, carefully place
the frame on the floor and use a
screwdriver (B19) to disassemble the
pallet as per image below.
Assembly requires the following tools
(included):
- Screwdriver
- Allen key
- Multi-hex spanner tool
Before beginning assembly, carefully
read the following information and
instructions:
•Do not dispose of the packing
materials until assembly is completed.
•As you assemble the elliptical, make
sure all parts are oriented as shown in
the drawings.
•To identify small parts, see page 9
Unpacking Your EMX-800
www.dkn-uk.com 7

Resistance Controls
Moving Handlebar
Console
Incline Controls Hand Pulse Sensors
Fixed Handlebar
Water Bottle Holder
Pedal
Wheel
Ramp
Length: 189cm (74”)
Width: 91cm (36”)
Height: 166cm (65”)
Weight: 100kg (220lbs) Handle
Overview of Your EMX-800
Thank you for selecting the DKN EMX-800 elliptical cross trainer. This manual will guide
you through the assembly process. Please familiarise yourself with the parts labeled in the
drawing below and check that they are all present and correct before you begin to
assemble your machine.
8www.dkn-uk.com

EMX-800 Assembly
Contents Checklist
www.dkn-uk.com 9

9
Hardware Pack
NOTE: To begin assembling, prepare all the parts depicted above, checking to make
sure all are present.
10 www.dkn-uk.com

Assembly Instructions
1. Use a screwdriver (B19) and two screws (D02) to attach the roller cover (C10) to the
bottom of the left roller arm (A10). Repeat for the right roller arm (A10) using the
second roller cover (C10).
2. Using the screwdriver (B19) and four bolts (D28), attach the left pedal (C22) to the left
pedal arm (A08). Then, attach the right pedal (C23) to the right pedal arm (A09) in the
same way.
Your DKN EMX-800 is partially pre-assembled to help ensure it runs smoothly and to reduce
the amount of assembly required. There are 10 straight-forward steps that need to be
followed before you can use the machine:
STEP 1:
www.dkn-uk.com 11

STEP 2:
1. While a second person holds the main upright (A01) near the frame (A06), connect the upper
wire (E08) to the bottom wire (E10), and the upper wire (E09) to the bottom wire (E11).
Please make sure the wires are properly connected before moving on to the next step.
2. Use the Allen key (B20) to fix the upright (A01) onto the frame (A06) with four bolts (D07),
four spring washers (D09) and two flat washers (D18). Take care not to pinch the wires!
12 www.dkn-uk.com

STEP 3:
1. Slide the lower end of the left vertical handrail (A12) into the left handrail cover (C29) and
the lower end of the right vertical handrail (A12) into the right handrail cover (C30). Then,
use the Allen key (B20) and two bolts (D07) to attach fixing plate (A16) to the lower end of
the left vertical handrail (A12) and fixing plate (A17) to the lower end of the right vertical
handrail
(A12).
2. Attach the horizontal handrail (A11) to the main upright (A01) with bolt (D07), spring
washer (D09) and flat washer (D18).
3. Using the Allen key (B20) and two bolts (D07) attach the top of the left vertical handrail
(A12) to the left hand side of the horizontal handrail (A11). Then, attach the top of the
right vertical handrail (A12) to the right hand side of the horizontal handrail (A11).
4. Using two bolts (D07), attach the bottom of the left vertical handrail (A12) to the frame
(A06) as shown. Then, attach the bottom of the right vertical handrail (A12) to the frame
(A06) in the same way. Use a screwdriver (B19) and a screw (D02) to attach the left
handrail cover (C29) to the frame (A06). Repeat for the right handrail cover (C30).
www.dkn-uk.com 13

STEP 4:
1. Use the screwdriver (B19) and four screws (D02) to attach handrail covers (C38)
to the left & right vertical handrails (A12).
2. Use the screwdriver (B19) and three screws (D01) to attach handrail covers (C27
& C28) to the vertical handrails on the left and right (A12) as shown. Fill in the
screw holes on both sides using three bolt caps (C36).
14 www.dkn-uk.com

STEP 5:
1. Attach the lower water bottle holder cover (C09) to the centre of the handrail (A11) using the
screwdriver (B19) and two bolts (D16). Place the rubber rings (C26) into position
as shown and use the screwdriver (B19) and three screws (D17) to attach the
upper water bottle holder cover (C08).
www.dkn-uk.com 15

STEP 6:
1. Using the screwdriver (B19) attach left console cover (C06) and right console cover
(C07) to the main upright (A01) using six screws (D01) and two screws (D29) as shown.
16 www.dkn-uk.com

STEP 7:
1. Use the Allen key (B20) to attach the left lower handlebar (A04) to the left hand side of the
upright (A01) with a bolt (D07), spring washer (D09) and a flat washer (D08). Then, attach
the right lower handlebar (A05) to the right hand side of the upright (A01) in the same way.
2. Attach the left lower handlebar (A04) to the left pedal frame (A08) using the multi-hex
spanner tool (B21), bolt (D12), flat washer (D13) and nut (D14). Then, attach the right
lower handlebar (A05) to the right pedal frame (A09) in the same way.
3. Use the screwdriver (B19) and Allen key (B20) to attach the left upper handlebar (A02) to
the left lower handlebar (A04) with bolts (D03), curved washers (D04) and nuts (D05).
Attach the right upper handlebar (A03) to the right lower handlebar (A05) in the same way.
www.dkn-uk.com 17

STEP 8:
1. Using the screwdriver (B19) and two screws (D01), attach the moving handlebar covers
(C14 & C15) to the upper part of the left lower handlebar (A04) as shown. Then, using
two screws (D10) attach the moving handlebar covers (C18 & C19) to the lower part of
the left handlebar (A04) as shown.
2. Repeat for the right hand side. Using the screwdriver (B19) and two screws (D01),
attach the moving handlebar covers (C16 & C17) to the upper part of the right lower
handlebar
(A05) as shown. Then, using two screws (D10) attach the moving handlebar covers
(C20 & C21) to the lower part of the right handlebar (A05) as shown.
18 www.dkn-uk.com

STEP 9:
1. While a second person holds the console (E01) near the upright (A01), connect the wires
on the console to the corresponding, matching, wires coming out of the upright (A01).
Please make sure the wires are properly connected before moving on to the next step.
Using the screwdriver (B19) and four bolts (D16) attach the console (E01) onto the
upright (A01).
NOTE: Avoid pinching the wires!
www.dkn-uk.com 19

STEP 10:
1. Plug the power supply cable (E04) into the DC input socket located next to the on/off button
(E05) in the frame (A06).
NOTE: Make sure that all parts are properly tightened before you use the elliptical.
20 www.dkn-uk.com
Table of contents
Other DKN technology Elliptical Trainer manuals