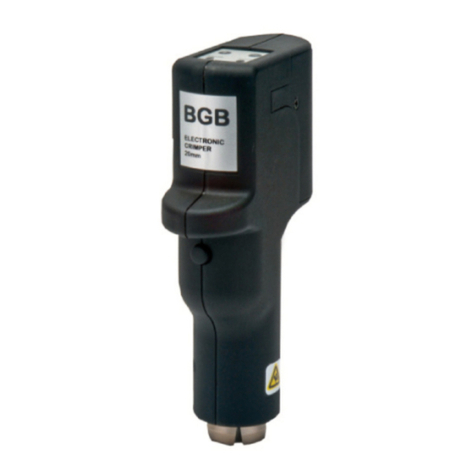
DMC HDE23C Owner's manual

HDE23C
BATTERY ELECTRIC HYDRAULIC CRIMP TOOL DATASHEET
________________________________________________________________________________________________
HDE23C-DS ©2021 Daniels Manufacturing Corporation Page 1 of 11 REV. A 10/12/2021
GENERAL INFORMATION
1. The DMC HDE23C is a heavy duty battery electric operated hydraulic crimp tool, designed to produce
four indent crimps on M39029 and similar contacts, sizes 8 thru 4/0 AWG. Various sizes and types of
contacts are accommodated by changing indenter die assemblies and locators.
2. This tool is a battery electric operated hydraulic equivalent to DMC tool part number WA23
(M22520/23-01) Heavy Duty Pneumatic Crimp Tool. It accepts all die assemblies and locators
designed for part number WA23. However this tool is NOT Mil Qualified at the time of this writing.
3. The tool’s hydraulic pump is filled with biodegradable hydraulic fluid at the factory and does not need
to be bled or primed.
SAFETY
1. Safety is essential in the use and maintenance of DMC tools and equipment. This datasheet and
markings on the tool provide information for avoiding hazards and unsafe practices related to the use
of this tool. Observe all of the safety information provided.
SEE PAGE 11 FOR
IMPORTANT INFORMATION
REGARDING LIMITED
WARRANTY AND LIMITATION
OF LIABILITY

HDE23C
BATTERY ELECTRIC HYDRAULIC CRIMP TOOL DATASHEET
________________________________________________________________________________________________
HDE23C-DS ©2021 Daniels Manufacturing Corporation Page 2 of 11 REV. A 10/12/2021
SPECIFICATIONS
Crimping Tool
Length 17.9” (454.7mm)
Height 13.3” (337.8mm)
Width 4.0” (101.6mm)
Mass/Weight 13.9lb (6.3kg)
Hydraulic Oil .1pt (50ml) Biodegradable Hydraulic Fluid
Crimping Capacities
Crimping Range 8 to 4/0
Pump Force Output 4.5 tons (40.03kN)
1
2
3
4
5
6
7
8
1. LED Work Light (White)
2. Crimp Tool Head
3. Lanyard/Tool Balancer Attachment Point
4. Crimp Tool Housing
5. Die Retract Button
6. LED Indicator (Red)
7. Li-ion Battery
8. Tool Trigger

HDE23C
BATTERY ELECTRIC HYDRAULIC CRIMP TOOL DATASHEET
________________________________________________________________________________________________
HDE23C-DS ©2021 Daniels Manufacturing Corporation Page 3 of 11 REV. A 10/12/2021
Figure 1
Figure 2 Figure3

HDE23C
BATTERY ELECTRIC HYDRAULIC CRIMP TOOL DATASHEET
________________________________________________________________________________________________
HDE23C-DS ©2021 Daniels Manufacturing Corporation Page 4 of 11 REV. A 10/12/2021
TOOL SET UP
INSTALLATION OF LOCATOR
1. Unscrew the red cap and remove die assembly, if installed. Insert the locator in the center hole,
See Figure 1.
2. Verify that the flange on the locator is seated in the counter bore, and the notch on the flange, See
Figure 2, is aligned with the locator alignment pin, See Figure 3.
INSTALLATION OF THE DIE ASSEMBLY
1. Press the die retract button on the side of the crimp tool housing to make sure that the indenter
activation arms are fully open.
2. Place the indenter die assembly, as shown in Figure 1, onto the tool body. The die assembly
alignment pin, See Figure 3, must fit into the corresponding hole in the die assembly. Align the
indenter heads with the activation arms. THE DIE ASSEMBLY MUST SIT FULLY FLUSH
AGAINST THE TOOL BODY. Place the red cap over the die assembly, See Figure 1, and tighten
FULLY to hold the die assembly FLUSH with the tool body.
3. Press the tool trigger until the die assembly’s indenters come in fully, the tool reaches full pressure
and the pressure release trips.
4. When the tools internal pressure release trips the indenters will retract automatically. Confirm that
the indenters move freely.
USE OF THE SHOULDER STRAP
1. Attach both ends of the shoulder strap to the Lanyard / Tool Balancer Attachment Point.
2. Place the strap, with tool attached, over one shoulder of the user.
3. Move the shoulder pad of the strap into the proper position.
4. Adjust the length of the strap so that the tool is at a comfortable working height for the user.
5. The Lanyard / Tool Balancer Attachment Point can also be used to attach the tool to a properly
sized tool balancer.
CRIMPING A CONTACT
1. Verify that the proper locator and die assembly are installed for the contact to be crimped.
2. Assemble the contact and wire to be crimped per the manufacturers instructions, and insert them into
the tool.
3. Push the contact in until it bottoms out in the locator.
4. Press the tool trigger until the indenters come in fully, and automatically retract.
5. Remove the crimped contact assembly. Visually inspect the crimp to verify crimp quality and location.
WARNING: DURING THE CRIMP CYCLE, KEEP FINGERS AWAY FROM THE DIE OPENING AREA

HDE23C
BATTERY ELECTRIC HYDRAULIC CRIMP TOOL DATASHEET
________________________________________________________________________________________________
HDE23C-DS ©2021 Daniels Manufacturing Corporation Page 5 of 11 REV. A 10/12/2021
GAGING THE DIE ASSEMBLY
1. The GO and NO-GO dimensions are marked on the face of each die assembly. The appropriate
gage pins are available from DMC.
2. To check the die closure of the installed die assembly, press the tool trigger until the tool brings the
indenters to the full travel (Closed) position but not to full pressure.RELEASE the trigger, and
indenters will stay in place.
3. Insert the GO gage pin between the closed indenters. The gage must pass between the indenter
tips.
4. With the indenters still closed, insert the NO-GO gage pin between the closed indenters. The gage
can begin to enter, but must not pass through the indenter tips. Manually retract indenters by
pressing the retract button.
CAUTION: DO NOT CRIMP GAGE PIN. THIS WILL DAMAGE THE TOOL AND VOID WARRANTY
AS22520/23 TOOL, DIE, ASSEMBLY, AND LOCATOR LIST
Military P/N
Description
DMC P/N
Contact
Size*
“GO” Dim “NO-GO” Dim Gage P/N
M2250/23-01
Crimp Tool
WA23
M22520/23-02
Die Assembly 8
WA23-2
8
.130
.136
G693
M22520/23-03
Die Assembly 6
WA23-3
6
.171
.178
G694
M22520/23-04
Die Assembly 4
WA23-4
4
.195
.202
G695
M22520/23-08
Die Assembly 1
WA23-8
1
.255
.265
G1299
M22520/23-05
Die Assembly
1/0
WA23-5 1/0 .325 .332 G696
M22520/23-06
Die Assembly
2/0
WA23-6 2/0 .351 .358 G697
M22520/23-07
Die Assembly
4/0
WA23-7 4/0 .425 .432 G698
M22520/23-09
Locator 8
WA23-9
8
M22520/23-10
Locator
6, 6N, 6G
WA23-10 6, 6N, 6`G
M22520/23-11
Locator 4
WA23-11
4
M22520/23-12
Locator
4, 4N, 4G
WA23-12 4, 4N, 4G
M22520/23-13
Locator 1/0
WA23-13
1/0
M22520/23-14
Locator
1/0, 1/0N
WA23-14 1/0, 1/0N
M22520/23-15
Locator
2/0, 2/0N
WA23-15 2/0, 2/0N
M22520/23-16
Locator
4/0, 4/0N
WA23-16 4/0, 4/0N
*Smaller wire gage may require the use of M39029/112-XX contact bushings.

HDE23C
BATTERY ELECTRIC HYDRAULIC CRIMP TOOL DATASHEET
________________________________________________________________________________________________
HDE23C-DS ©2021 Daniels Manufacturing Corporation Page 6 of 11 REV. A 10/12/2021
Battery Charger Operating Instructions
Operating Environment
The charger is designed for use in dry areas. All ventilation slots must be kept free of debris. If possible,
keep away from heat sources and out of direct sunlight as ambient temperatures in excess of 95°F (35°C)
may increase charging times significantly.
AC Connection
Before connecting the charger, check that the AC supply voltage is the same as what is indicated on the
charger.
Specifications
Frequency=50Hz to 60Hz
Output Voltage=7.2 to 18VDC
Weight=2.2lb(1.0kg)
Safety Instructions
The charger is designed only for Li-ion and Ni-MH batteries with voltages ranging from 7.2VDC to 18VDC
and capacities from 1.7Ah to 3.0Ah.
1. Before you use the charger, check the power cord, extension cable and connectors for any signs of
damage or aging.
2. Do not open up batteries or the charger. Do not puncture or expose to heat as there is RISK OF
EXPLOSION.
3. Only store in dry areas. Protect from moisture and dampness.
4. Do not use if the charger is defective and never insert defective batteries.
5. Observe the symbols on the charger’s rating plate.
6. Do not throw old batteries into the fire or dispose of as domestic waste.
7. Keep metal objects that could cause shorts away from the charger.
8. Do not dismantle the charger or batteries.
9. PAT (Portable Appliance Testing) should be periodically performed for safety.
Operation
Green LED (Center)
If the charger is connected to the AC line the green LED will flash repeatedly until a battery is installed for
charging.
Charging a Battery
When a battery is inserted on to the charger the red LED (Left) will illuminate and stay on while charging
occurs.
The green LED (Center) will turn off while the battery is less than 80% charged.

HDE23C
BATTERY ELECTRIC HYDRAULIC CRIMP TOOL DATASHEET
________________________________________________________________________________________________
HDE23C-DS ©2021 Daniels Manufacturing Corporation Page 7 of 11 REV. A 10/12/2021
Both green (Center) and red (Left) LED’s will illuminate when the battery is greater than 80% charged, but
not yet fully charged.
When charging is complete, the red (Left) LED will turn off, and the green (Center) LED will stay on.
If you leave the battery on the charger after it is charged, the charger will switch to its trickle charge mode for
24 hours.
The following are the possible conditions shown by the yellow (Right) LED.
Flashing indicates trouble with the cooling fan system. Ensure that all cooling vents, and the battery
connections are free of dust or debris. If flashing continues, return the unit to DMC for repair.
Continuous illumination indicates that a conditioning charge is occurring. This happens when the battery
being charged is at either a very low or very high temperature. This can also occur if you attempt to charge
a fully charged battery. These conditions will increase charging times.
Other conditions indicated by charger LED’s
Flashing Red with Green off - Charger is overheated. Unplug the charger, and allow it to cool down.
Flashing Red, with Flashing Green - This indicates a defective battery. Replace Battery.
Spare Battery Parts
120 VAC Battery Charger HDE-LI-120C
230 VAC Battery Charger HDE-LI-230C
18V Replacement Battery HDE-LI-B
120 VAC Power Adapter HDE-120AC-A
230 VAC Power Adapter HDE-230AC-A
Tool LED Lights
The tool is equipped with two LED lights, one white and one red.
LED Work Light (White)
This LED automatically turns on when the trigger is pulled. It remains on for 10 seconds after the trigger is
released.
LED Service Light (Red)
As well as the Tool Information Display, this tool is equipped with a special circuit board incorporating
several important features to inform the user about the current status of the unit. The Red LED on the side
of the tool signals in the following cases:

HDE23C
BATTERY ELECTRIC HYDRAULIC CRIMP TOOL DATASHEET
________________________________________________________________________________________________
HDE23C-DS ©2021 Daniels Manufacturing Corporation Page 8 of 11 REV. A 10/12/2021
What Happens…
Signal
What it Means…
Red service LED illuminates constant
for 20 seconds after a tool cycle
Battery charge is low, Charge
Battery
Red service LED flashes for 20 seconds
at rate of 2Hz after a tool cycle
••••
Return tool to DMC for
Maintenance Service
Red service LED flashes for 20 seconds
at rate of 5Hz after a tool cycle ••••••• Unit is too hot, let cool for 15min
and try again
Red service light illuminates, White
work light illuminates and an audible
tone is heard
Full tool pressure was not
achieved, because the operator
interrupted the crimp cycle
Red service light flashes 3 times, White
work light flashes 3 times and an
audible tone is heard
•••
•••
Full tool pressure not achieved
due to internal error, Return tool
to DMC for Repair Service
Bluetooth Connectivity
This tool features Bluetooth connectivity for tool monitoring via Klauke i-press software or the Klauke i-press
app. Features include:
i-press® software
•Exports all tool data, so you can check the tool status.
•In addition, i-press provides you with proof of quality in the form of a project record.
•i-press® is a desktop application, which you can download for free.
i-press®app
•Made easy - Your Next Generation tool connects to the i-press® app via Bluetooth - you can now use
the comprehensive range of functions.
•Everything under control - You can, for example, display the last service date, the last five pressure
values, the device temperature or the number of crimps you can still make with the connected tool.
•Record, verify and archive - Once the project is complete, you will receive an overview containing all
information and pressure values as an attachment. Very clearly arranged and revamped as a PDF for
printing and submitting.
The software can be downloaded at https://www.klauke.com/de/en/ipress-connectivity-software

HDE23C
BATTERY ELECTRIC HYDRAULIC CRIMP TOOL DATASHEET
________________________________________________________________________________________________
HDE23C-DS ©2021 Daniels Manufacturing Corporation Page 9 of 11 REV. A 10/12/2021
The App can be downloaded at:
Tool Informational Display
When a battery is installed onto the tool, the following information can be accessed.

HDE23C
BATTERY ELECTRIC HYDRAULIC CRIMP TOOL DATASHEET
________________________________________________________________________________________________
HDE23C-DS ©2021 Daniels Manufacturing Corporation Page 10 of 11 REV. A 10/12/2021
1. Install a charged battery onto the tool.
2. Press the tool trigger to activate the display. Any applicable error codes will be display. The 17
possible error codes are listed below. If an error code is displayed, the tool’s red LED will also flash.
3. The first screen will display whether tool is connected via bluetoooth, the battery charge level, current
pressure & max pressure.
4. Pressing the left button once will display the firmware version, and tool serial number.
a. Pressing the left button again displays the current user.
b. Pressing and holding both button lets you select a current user.
c. Use the right button to select the desired user.
d. Press the tool trigger to confirm selection and return.
5. Pressing the left button once again will display the number of cycles and days until the next service
interval.
6. Pressing the left button once again will display the total operating hours, total Amp Hours (Ah) and
the total number cycles.
7. Press the right button will allow you to go back to the previous screen.
Error Codes
1. Overcurrent Fuse
2. Overcurrent Comparator
3. Overheat Board
4. Overheat Battery
5. Battery Empty, Operation Stop
6. Faulty Crimp with Motor in Operation
7. Faulty Crimp without Motor in Operation
8. Low Battery
9. Battery Empty
10.RTC Battery Low
11.Tool Deactivated
12.Service Necessary
13.RTC not Found
14.BT Unit not Found
15.
16.Pressure Sensor not Found
17.Burst Pressure Exceeded
18.Battery Temperature Too Low

HDE23C
BATTERY ELECTRIC HYDRAULIC CRIMP TOOL DATASHEET
________________________________________________________________________________________________
HDE23C-DS ©2021 Daniels Manufacturing Corporation Page 11 of 11 REV. A 10/12/2021
DMC offers complete refurbishing and recalibration services.
DMC specially engineers and manufactures complete tool kits to satisfy individual customer requirements,
such as total aircraft support general shop maintenance or production, on board ship and vehicle service,
etc.
Limitation of Liability
DANIELS MANUFACTURING CORPORATION IS NOT LIABLE FOR CONSEQUENTIAL OR SPECIAL
DAMAGES OF ANY NATURE OR KIND RESULTING FROM THE USE, OR MISUSE, OF ANY OF ITS
PRODUCTS. OWNERS AND USERS OF DMC PRODUCTS ASSUME FULL RESPONSIBILTY FOR
INSTRUCTING THEIR EMPLOYEES IN THE PROPER AND SAFE USE OF SUCH PRODUCTS.
Limited Warranty
DMC (Daniels Manufacturing Corporation) warrants each new product sold by it to be free from defects in
material and workmanship under normal use and service. DMC’s obligation under this warranty is limited to
the free correction or, at DMC’s option, the refund of the purchase price of any such product which proves
defective in normal service within ninety (90) days after delivery to the first user, provided that the product is
returned to DMC with all transportation charges prepaid and which shall appear to DMC’s satisfaction, after
DMC’s inspection, to have been defective in material and workmanship, it being understood that DMC
products are not consumer products. This warranty shall not cover any damage to any product which, in the
opinion of DMC, was caused by normal wear, misuse, improper operation, tampering, neglect or accident.
This warranty is in lieu of all other warranties express or implied. No warranty, express or implied, is made
or authorized to be made or assumed with respect to products of Daniels Manufacturing Corporation other
than those herein set forth.
Table of contents
Other DMC Crimping Tools manuals
Popular Crimping Tools manuals by other brands

TE Connectivity
TE Connectivity 2378724-1 instruction sheet

Textron
Textron Klauke K 15 instruction manual

TE Connectivity
TE Connectivity 607949-1 Original instructions

molex
molex 207128 Series manual

Gates
Gates Power Crimp 707 Safety and operating manual

Hilti
Hilti NCR 120 PC-A22 Original operating instructions

BARTON TOOLS
BARTON TOOLS EC300 instruction manual

Tyco Electronics
Tyco Electronics STRATO-THERM 1-46673-0 instruction sheet

Emerson
Emerson Klauke UAP100120CFM manual

Trick-tools
Trick-tools Roper Whitney 0585 Operation, parts & maintenance manual

Tyco Electronics
Tyco Electronics 58649-1 instruction sheet

HSS Hire
HSS Hire 68613 Operating & safety guide