©2022 DANIELS MANUFACTURING CORP., ALL RIGHTS RESERVED
Daniels Manufacturing Corporation
526 Thorpe Road, Orlando, FL 32824 USA
HDE51C
BATTERY POWERED CRIMP TOOL
Operation
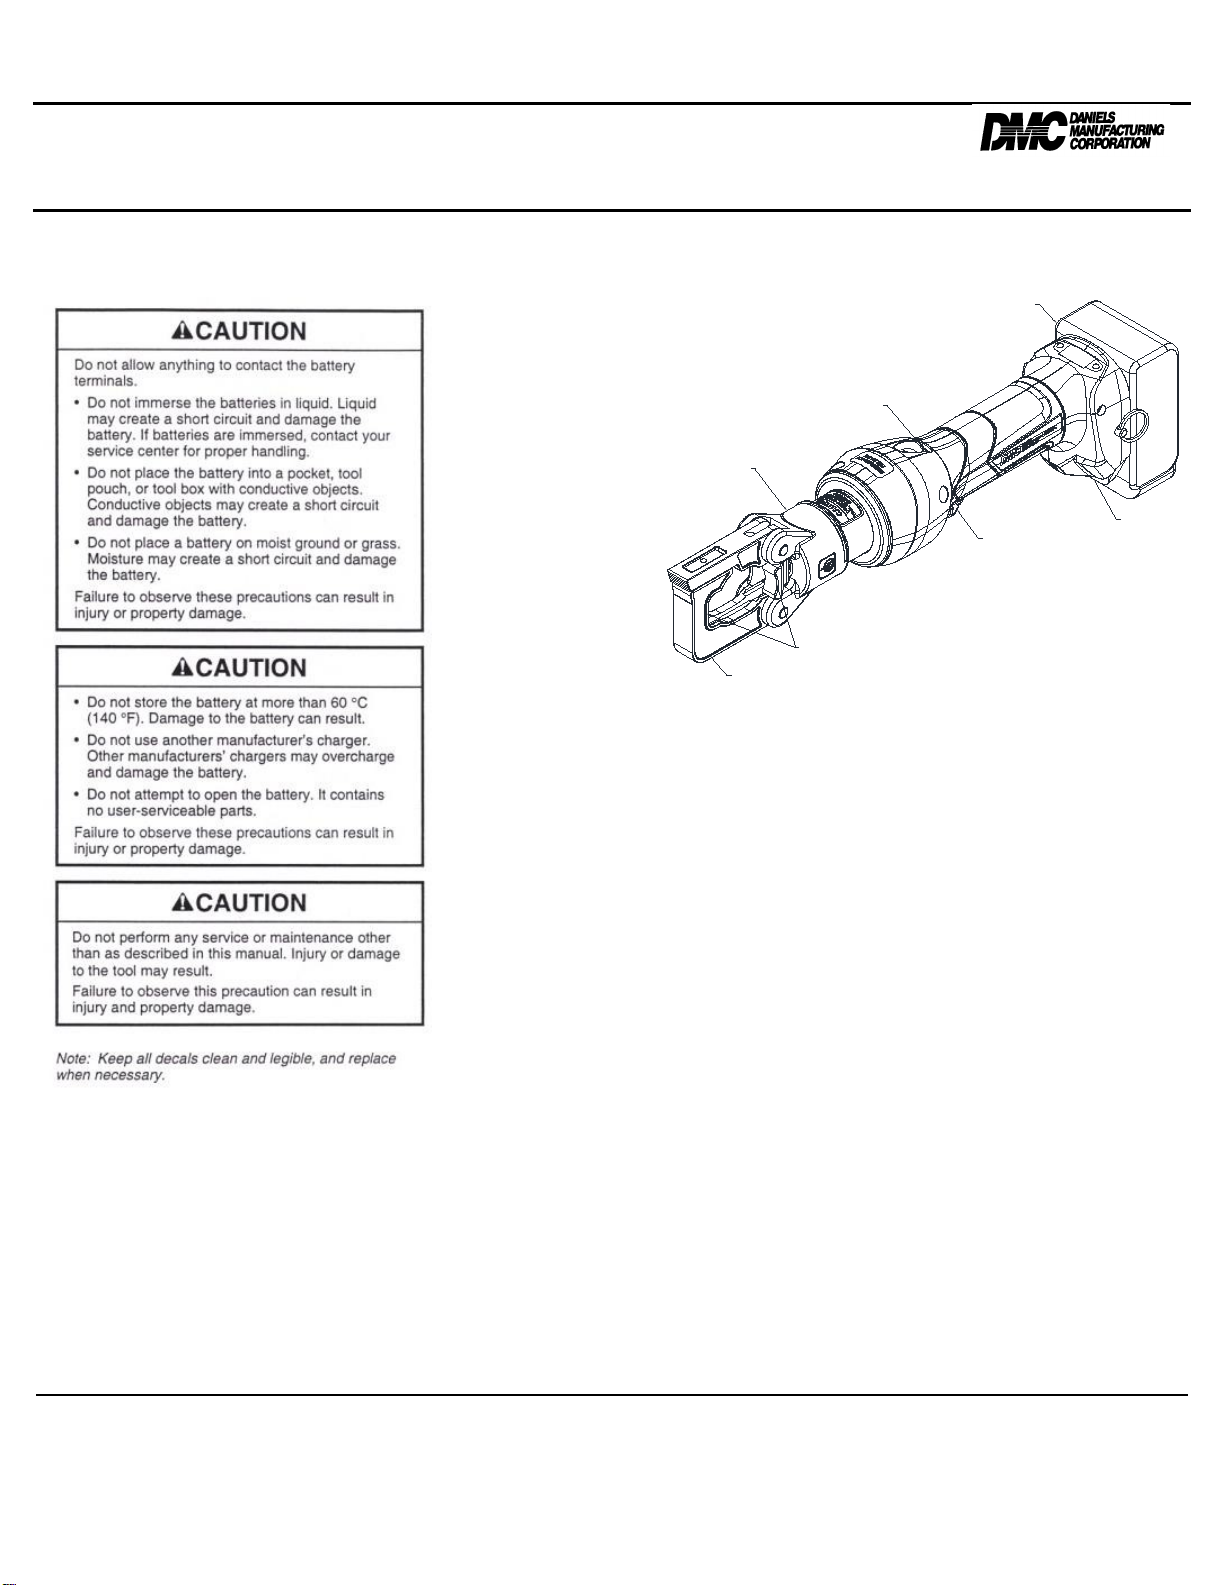
LED Work Light (White)
This LED automatically turns on when the trigger is
pulled. It remains on for 10 seconds after the trigger is
released.
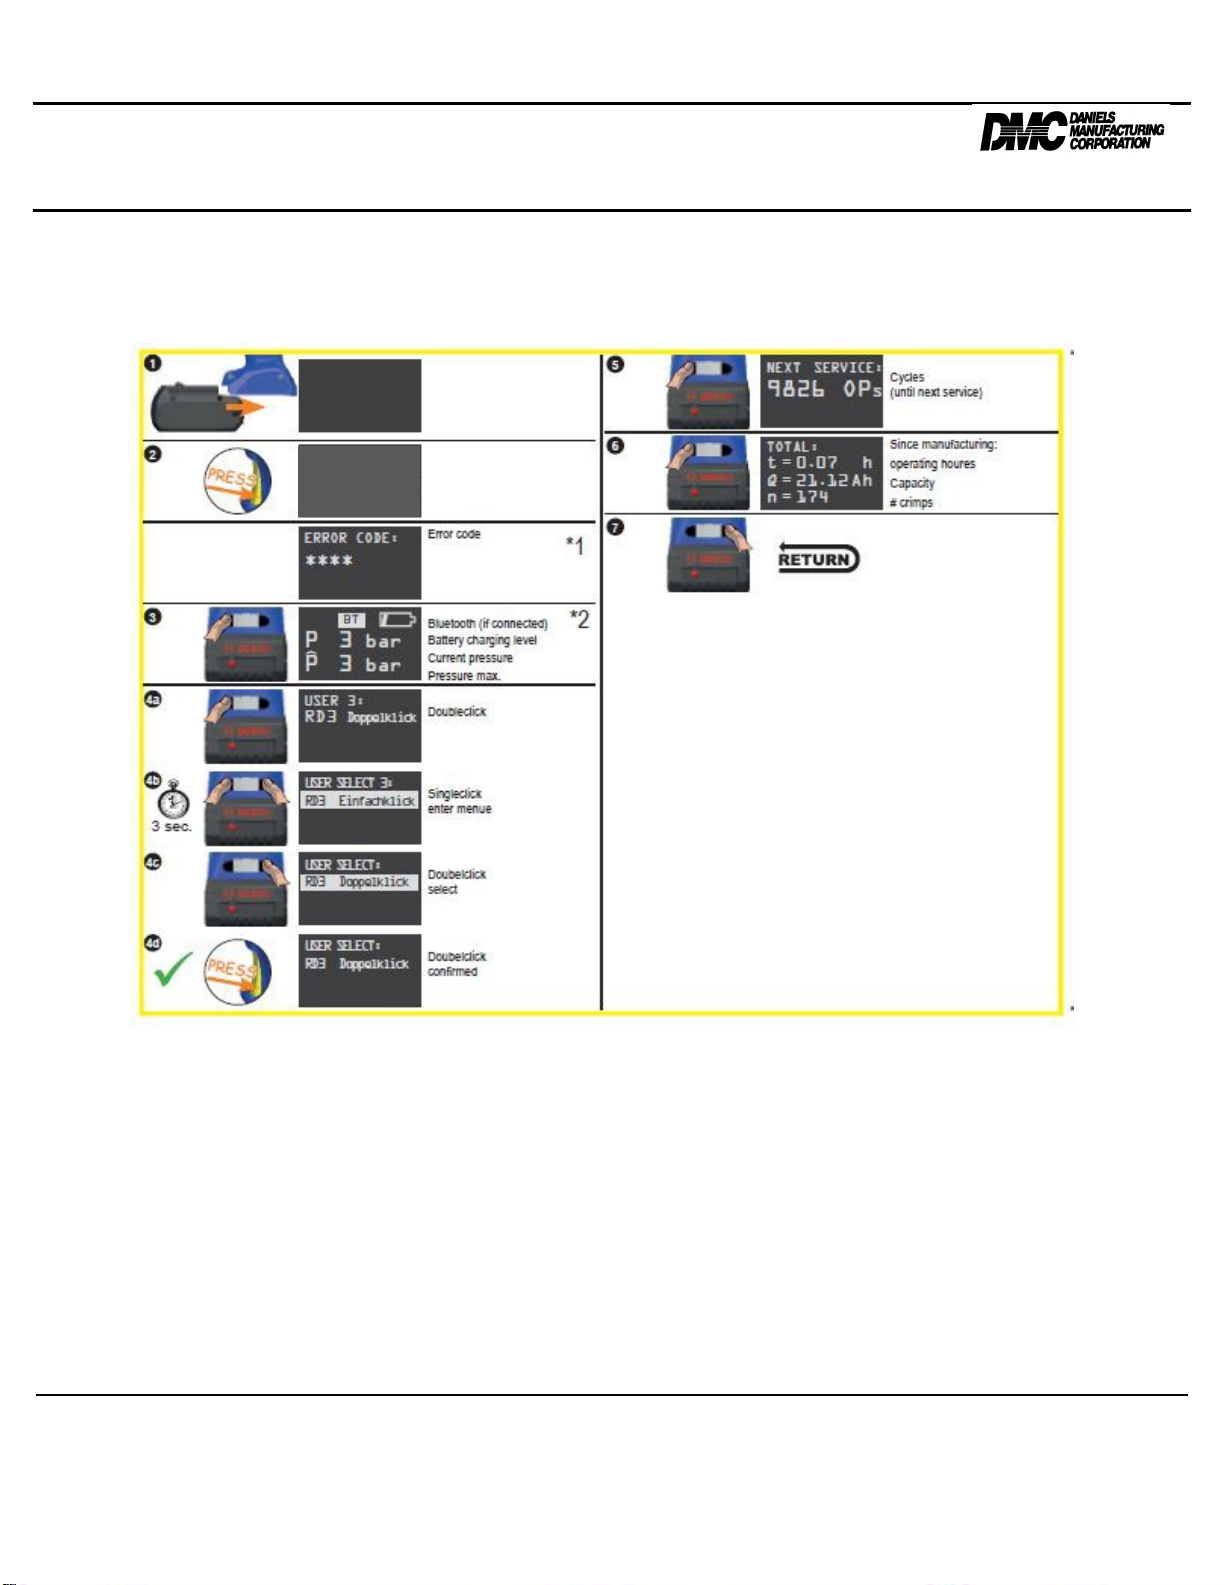
LED Indicator (Red)
This tool is equipped with a special circuit board
incorporating several important features to inform the user
about the current status of the unit. The Red LED on the
side of the tool signals in the following cases:
•• Battery is inserted in tool
seconds at end of
Battery charge is below 17V at
beginning of cycle
and constant light
for 20 seconds when
Battery charge is below 16V at
beginning of cycle
constant light for 20
seconds after trigger
Battery voltage drops below 13V
during cycle
flashing light for 20
seconds when
••••
Motor current exceeds 20A during
cycle
Circuit has become too hot
Pressure Sensor
This tool is equipped with a pressure sensor that alerts
the user of an incomplete crimp.
•
If the tool is manually retracted before completion
of a crimp, the red LED and audible beep will be
active for 2 seconds.
•
If the tool is unable to reach the required crimp
force, the red LED, work light, and an audible
beep will pulse until after the trigger isreleased.
Installing Dies
1.
Select the proper dies for the intendedcrimp.
2.
Slide the die into the crimping head until it
“snaps” into place.
3.
Properly position the second die, and repeat step 2.
Preparing Cable
Follow the lug/connector manufacturer’s instructions for
appropriate cable strip length, and contact/wire assembly.
Crimping Cable
1.
If necessary, lift the upper latching arm to open
the crimping head.
2.
Insert the properly assembled connector into
the crimping head.
3.
Close the crimping head, if it was opened.
4.
Pull the trigger to make thecrimp.
5.
Hold the trigger down until crimping tool achieves
pressure relief, which is accompanied by an
audible “pop”.
6.
The crimp tool push rod retractsautomatically.
7.
If necessary, open the crimping head and
remove the crimped connector.
Note:If itis necessaryto retractthe toolpushrod before
a crimpcycleiscompleted,pushand hold the
Emergency Release button. Pushing and holding the
Emergency Releasebuttonwillresultinthecomplete
retractionofthe pushrod.
Maintenance
Each Operating Day
Before Use:
1.
Inspect dies for wear or damage such as
cracks, gouges, or chips.
2.
Inspect the tool for damage or leaks. If damage
is detected, return the tool to the DMC repair
center for inspection.
After Use:
1.
Wipe all tool surfaces clean with a damp cloth
and mild detergent.
2.
Charge the battery.
3.
Fully retract the tool push rod.
4.
Place the tool in the carrying case.
5.
Store in a cool dry place.
Monthly
1.
Thoroughly clean all surfaces.
2.
Oil the push rod outer surface.
Annually or after 10,000 Crimps
1. Return the tool to the DMC repair center for
inspection & calibration.