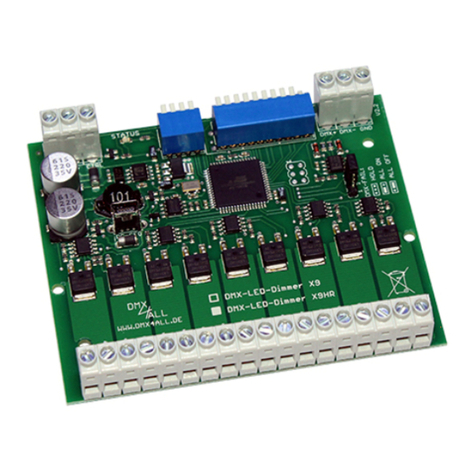
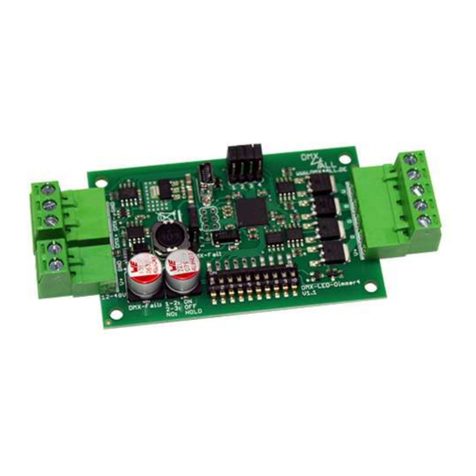
DMX4ALL DMX-LED-DIMMER X9 HR User manual

DMX-LED-DIMMER X9 HR
9x 16 BIT PWM per 10A
User Manual

DMX-LED-Dimmer X9 HR 2
Description
The DMX-LED-Dimmer X9 HR is especially designed for controlling RGB LED-
Stripes. It has 9 High-Resolution PWM-Outputs (3xRGB) independently controllable
via DMX.
A global master dimmer (all outputs) or a master dimmer per RGB-group can be
activated. The global master dimmer can be determined permanent as system-
master dimmer to DMX-address 1.
POWER
RISC
CONTROLLER
PWM
DMX
PWM
PWM
+
DMX
Energy Saving Design:
By modern switch mode technology less heat will be generated and thus the energy
consumption will be reduced.
Technical Data
Power supply: 7-24V DC / 100mA without load
LED voltage: 7-24V DC (no AC voltage !)
DMX: 9 channels with 8Bit-controlling and LookUp-table
18 channels with 16Bit-controlling
+ optional master-dimmer-channels
DMX-Fail: Hold / Off / On
Output: 9 PWM-signal with 16Bit-resolution
common supply voltage
Output current: max. 10A each output,
Together 90A with all GND connections
(direct from PSU)
Output power: 9x 120W (12V) / 9x 240W (24V)
PWM-frequency: 244 Hz / 2kHz / 4kHz

DMX-LED-Dimmer X9 HR 3
Dimensions: 99 x 82 mm

DMX-LED-Dimmer X9 HR 4
Connection with one power supply
DMX-LED-Dimmer X9HR
RGB-LED-Stripe (12V)
POWER 12V
GND
V+
GND
OUT1
GND
OUT2
GND
OUT3
GND
OUT4
GND
OUT5
GND
OUT6
RGB-LED-Stripe (12V)
V+
DMX+
DMX-
GND
ADDRESS
GND
GND
GND
OUT7
OUT8
OUT9
DMX IN
DMX OUT
CFG
Must be connected direct
from the power supply.
Depends on the current for
the LED-Stripes.

DMX-LED-Dimmer X9 HR 5
Connection with several power supplies
DMX-LED-Dimmer X9HR
RGB-LED-Stripe (12V)
POWER 12V
GND
V+
GND
OUT1
GND
OUT2
GND
OUT3
GND
OUT4
GND
OUT5
GND
OUT6
RGB-LED-Stripe (24V)
RGB-LED-Stripe (12V)
V+
DMX+
DMX-
GND
ADDRESS
GND
GND
GND
OUT7
OUT8
OUT9
DMX IN
DMX OUT
POWER 12V
POWER 24V
POWER 12V
CFG
Must be connected direct
from the power supply.
Depends on the current for
the LED-Stripes.

DMX-LED-Dimmer X9 HR 6
Connection with single color and multi color stripes
DMX-LED-Dimmer X9HR
RGB-LED-Stripe (12V)
POWER 12V
GND
V+
GND
OUT1
GND
OUT2
GND
OUT3
GND
OUT4
GND
OUT5
GND
OUT6
LED-Stripe WEIß (12V)
V+
DMX+
DMX-
GND
ADDRESS
GND
GND
GND
OUT7
OUT8
OUT9
DMX IN
DMX OUT
CFG
Must be connected direct
from the power supply.
Depends on the current for
the LED-Stripes.

DMX-LED-Dimmer X9 HR 7
DMX-Addressing
The starting address is adjustable with the switches 1 to up 9.
Switch 1 has the valecy 2
0
(=1), switch 2 the valency 2
1
(=2) etc. until switch 9 has
the valency 2
8
(=256). In total the switches showing ON correlate with the starting
address.
LED-Display-Codes
The integrated LED is a multifunctional-display.
During the normal DMX-operation the LED flashes permanent. In this case the device
is working.
Furthermore the LED shows the events. In this case the LED lights in short pitches
and than turns into the off mode for a longer period. The number of flashing impulses
corresponds with the event number:
Error
Status
Error Description
1 No DMX There is no DMX-Signal reaching the dimmer
2 Address error Check if a valid DMX starting address is adjusted at
the DIP-switch
3 DMX-signal error An invalid DMX input signal is detected, invert the
signal line by changing switch 2 and 3 or use a
twisted pair wire.
1
2
4
8
16
32
64
128
256
OFF

DMX-LED-Dimmer X9 HR 8
DMX-Fail option
from 06/2013 (Version 2)
The DMX-LED-Dimmer X9 can hold the last value, switch on or switch off the LED
outputs on DMX fail.
This DMX-Fail option is selectable with the
Jumper.
Setting the operation mode
The DMX-LED-Dimmer X9 HR has 2 operation modes adjustable via the
configuration switch 4:
Switch 4 OFF: Controlling the outputs via one DMX-channel
In this operation mode each output has a LookUp table.
This displays the outputs 16Bit-resolution for the available 256 values of
the DMX-channels. The LookUp tables are linear programmable ex ante
and freely programmable.
Switch 4 ON: Controlling the outputs via two DMX-channels
Each output has a 16Bit resolution. For a direct calling via DMX, 2 DMX-
channels are used per output. The 2. DMX-channel is for the subtle
settings.

DMX-LED-Dimmer X9 HR 9
Configurating the LookUp-Table
The DMX-LED-Dimmer X9 HR has one LookUp table per output. The received DMX-
channel has values from 0 up to 255. However the DMX-LED-Dimmer X9 HR output
driver provides 65536 steps (16 Bit) which will be assigned to the DMX-values.
So it‘s possible to effect with small steps little brightness changings in the lower
brightness range. However in the upper brightness range it’s possible to program
bigger steps.
To define the LooUp table please use the program DMX-LED-Dimmer PC-
Control from V2.1. For every output exists a table with the DMX-values from 0-
255 and the corresponding output valus. A graphically presentation of the table
represents the output charateristics:
For transferring the table into the DMX-LED-Dimmer X9
HR a PC-connection cable and a USB-connection from the
PC is necessary. Please connect the cable and the PC one
another and the CTRL-connection from the DMX-LED-
Dimmer X9 HR as shown in the right picture.
Now, start the software DMX-LED-Dimmer PC-Control.
Select Write to transfer the table from the displayed output.
Software-Reset
A RESET for the LookUp table of the DMX-LED-Dimmer X9 HR will be executed by
adjusting switch 1 until 10 on ON and than turning on the supply voltage. During the
reset the LED flashes with the event code 4. This will take some time so wait until the
event code 4 is not displayed.

DMX-LED-Dimmer X9 HR 10
DMX-Master-Dimmer
The DMX-LED-Dimmer X9 HR has several master dimmer. These will be activated
as follows:
Master dimmer for all channels
The DMX-channel which is adjusted as starting address will be used as master
dimmer for all 9 outputs. The DMX-addresses assignment is as follows:
Master
OUT 1 (R1)
OUT 2 (G1)
OUT 3 (B1)
OUT 4 (R2)
OUT 9 (B4)
Master
OUT 1 (R1)
OUT 1 (fine)
OUT 2 (G1)
OUT 2 (fine)
OUT 9 (B4)
OUT 9 (fine)
OUT 3 (B1)
OUT 3 (fine)
OUT 4 (R2)
OUT 4 (fine)
Master dimmer per RGB-group
Per RGB-group one master dimmer is used. The DMX-addresses assigment is as
follows:
Master 1
OUT 1 (R1)
OUT 2 (G1)
OUT 3 (B1)
OUT 4 (R2)
OUT 9 (B4)
Master 1
OUT 1 (R1)
OUT 1 (fine)
OUT 2 (G1)
OUT 2 (fine)
OUT 9 (B4)
OUT 9 (fine)
OUT 3 (B1)
OUT 3 (fine)
OUT 4 (R2)
OUT 4 (fine)
Master 2
Master 2
System-master dimmer for all channels
The value for the master dimmer corresponds with the DMX-channel 1 which is used
as master dimmer for all 9 outputs. The DMX-starting address represents the DMX-
channel on which begins the DMX-values for the outputs. The DMX-addresses
assignment is as follows:
Master
OUT 1 (R1)
OUT 2 (G1)
OUT 3 (B1)
OUT 4 (R2)
OUT 9 (B4)
Master
OUT 1 (R1)
OUT 1 (fine)
OUT 2 (G1)
OUT 2 (fine)
OUT 9 (B4)
OUT 9 (fine)
OUT 3 (B1)
OUT 3 (fine)
OUT 4 (R2)
OUT 4 (fine)
No master dimmer
Master dimmer for all channels
Master dimmer per RGB-group
System master dimmer for all
channels
Starting address Starting address
Starting address
Starting
address
Channel 1 Channel 1

DMX-LED-Dimmer X9 HR 11
High Frequency Mode
(from FW V1.1)
The DMX-LED-Dimmer X9 HR has a High Frequency Mode. This mode is optimized
for using in correlation with video recording e.g. in the TV-studio.
This will be activated as follows:
In this mode a DMX-channel (256 steps) will be used for the brightness settings. The
master dimmer options are combinable.
In this mode is a fixed LookUp table used which can’t be changed.
High Frequency Mode 2kHz
High Frequency Mode 4kHz

DMX-LED-Dimmer X9 HR 12
Equipment
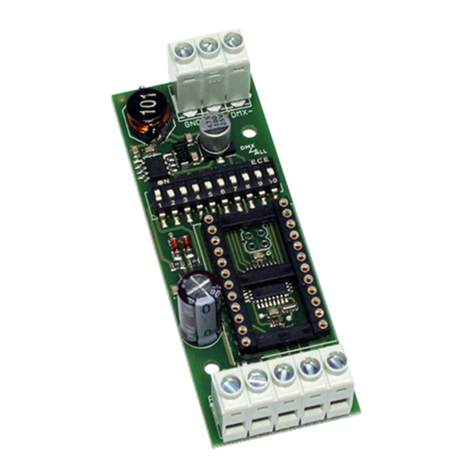
DIN-rail housing 1050
LED-Dimmer Configuration cable

DMX-LED-Dimmer X9 HR 13
CE-conformity
This assembly (board) is controlled by a microprocessor and
uses high frequency (8MHz). To get the characteristics of the
assembly in relation to the CE-conformity, an installation in a
compact metal casing is necessary.
Risk-Notes
You purchased a technical product. Conformable to the best available technology the
following risks should not excluded:
Failure risk: The device can drop out partially or completely at any time without
warning. To reduce the probability of a failure a redundant system structure is
necessary.
Initiation risk: For the installation of the board, the board must be connected and
adjusted to foreign components according to the device paperwork. This work can
only be done by qualified personnel, which read the full device paperwork and
understand it.
Operating risk: The Change or the operation under special conditions of the
installed systems/components could as well as hidden defects cause to breakdown
within the running time.
Misusage risk: Any nonstandard use could cause incalculable risks and is not
allowed.
Warning: It is not allowed to use the device in an operation, where the safety of
persons depend on this device.

DMX4ALL GmbH
Reiterweg 2A
D-44869 Bochum
Germany
© Copyright 2013 DMX4ALL GmbH
All rights reserve. No part of this manual may be reproduced in any form (photocopy, pressure, microfilm or in another
procedure) without written permission or processed, multiplied or spread using electronic systems.
All information contained in this manual was arranged with largest care and after best knowledge. Nevertheless errors are to be
excluded not completely. For this reason I see myself compelled to point out that I can take over neither a warranty nor the
legal responsibility or any adhesion for consequences, which decrease/go back to incorrect data. This document does not
contain assured characteristics. The guidance and the characteristics can be changed at any time and without previous
announcement.
Other manuals for DMX-LED-DIMMER X9 HR
1
Table of contents
Other DMX4ALL Controllers manuals

DMX4ALL
DMX4ALL ArtNet Multi PixxControl User manual

DMX4ALL
DMX4ALL DMX-LED-Dimmer 4 User manual

DMX4ALL
DMX4ALL DMX-LED-DIMMER X9 HR User manual

DMX4ALL
DMX4ALL ArtNet PixxControl PX2 User manual

DMX4ALL
DMX4ALL ArtNet Player 4 User manual

DMX4ALL
DMX4ALL DMX-LED-Dimmer BB4 User manual

DMX4ALL
DMX4ALL DMX MultiPixx Control User manual

DMX4ALL
DMX4ALL DMX-LED-Dimmer CC1 User manual

DMX4ALL
DMX4ALL ArtNet Player X4 Installation and operating instructions

DMX4ALL
DMX4ALL AuroraDMX Control User manual