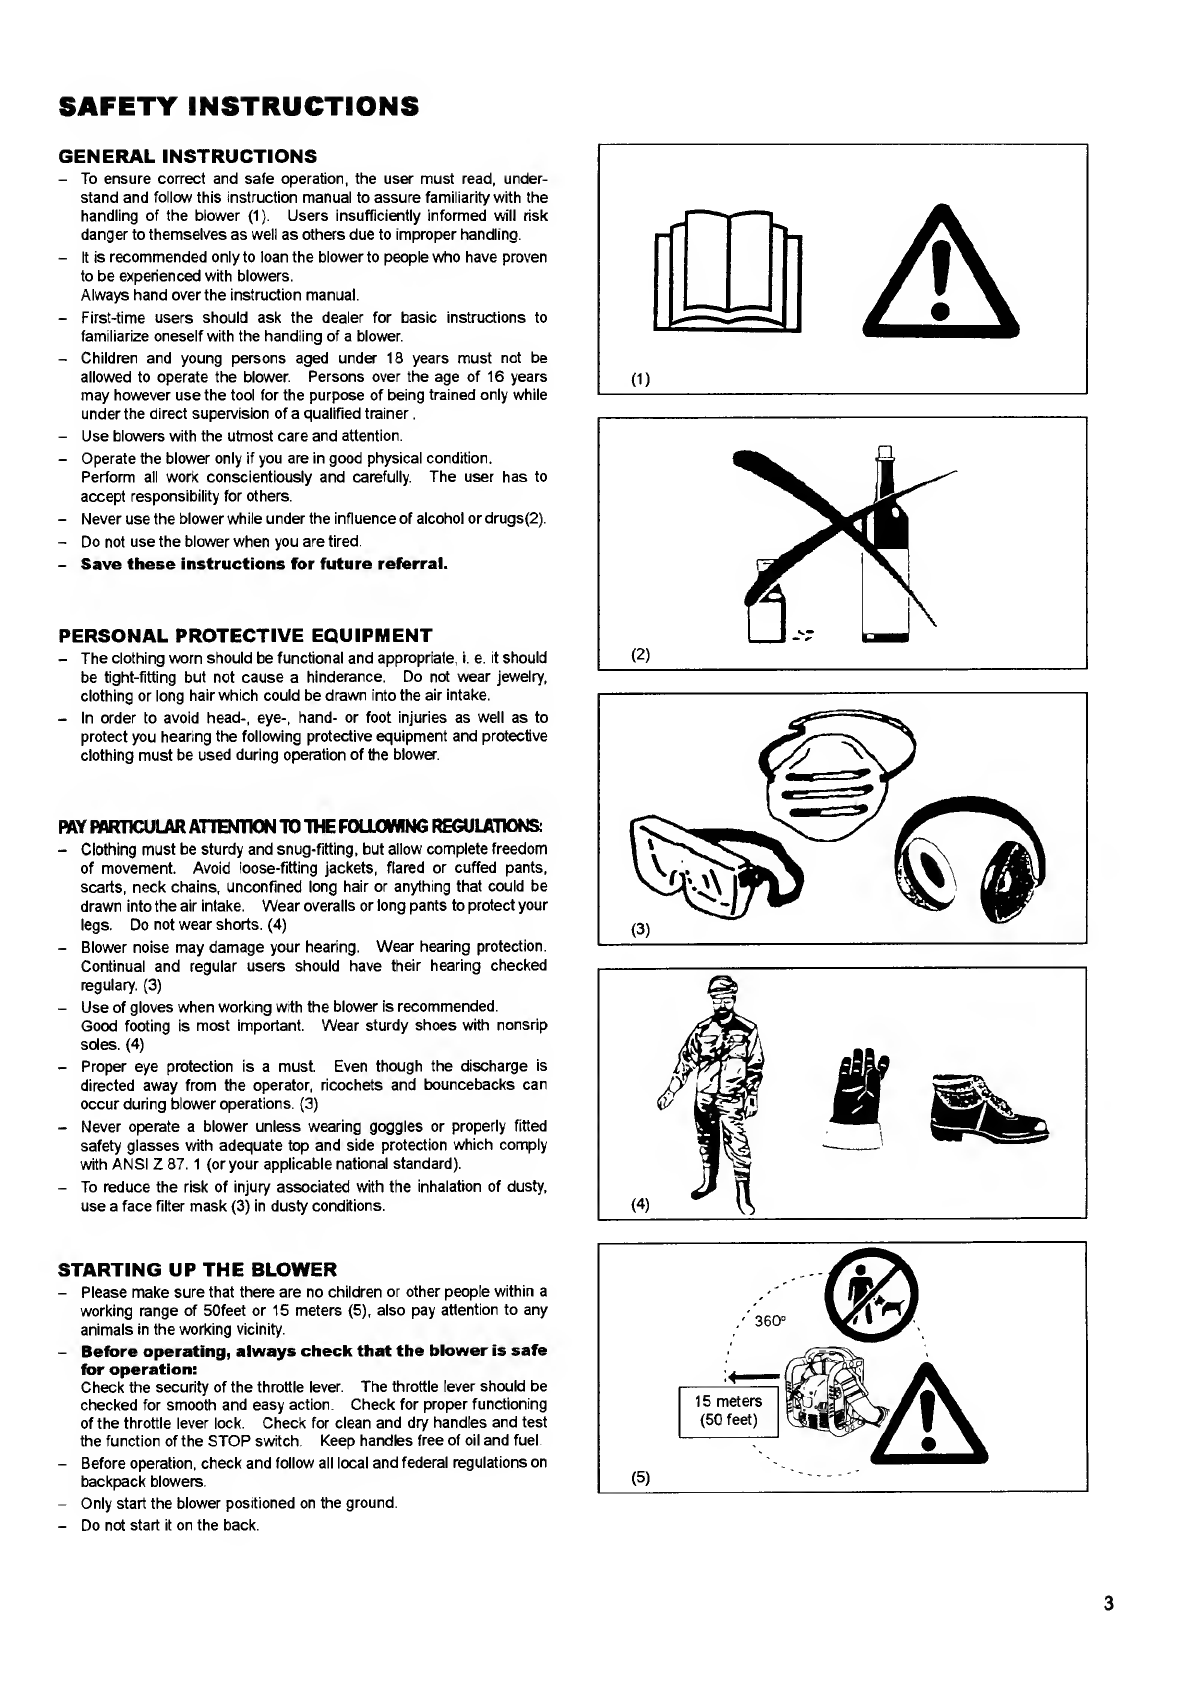
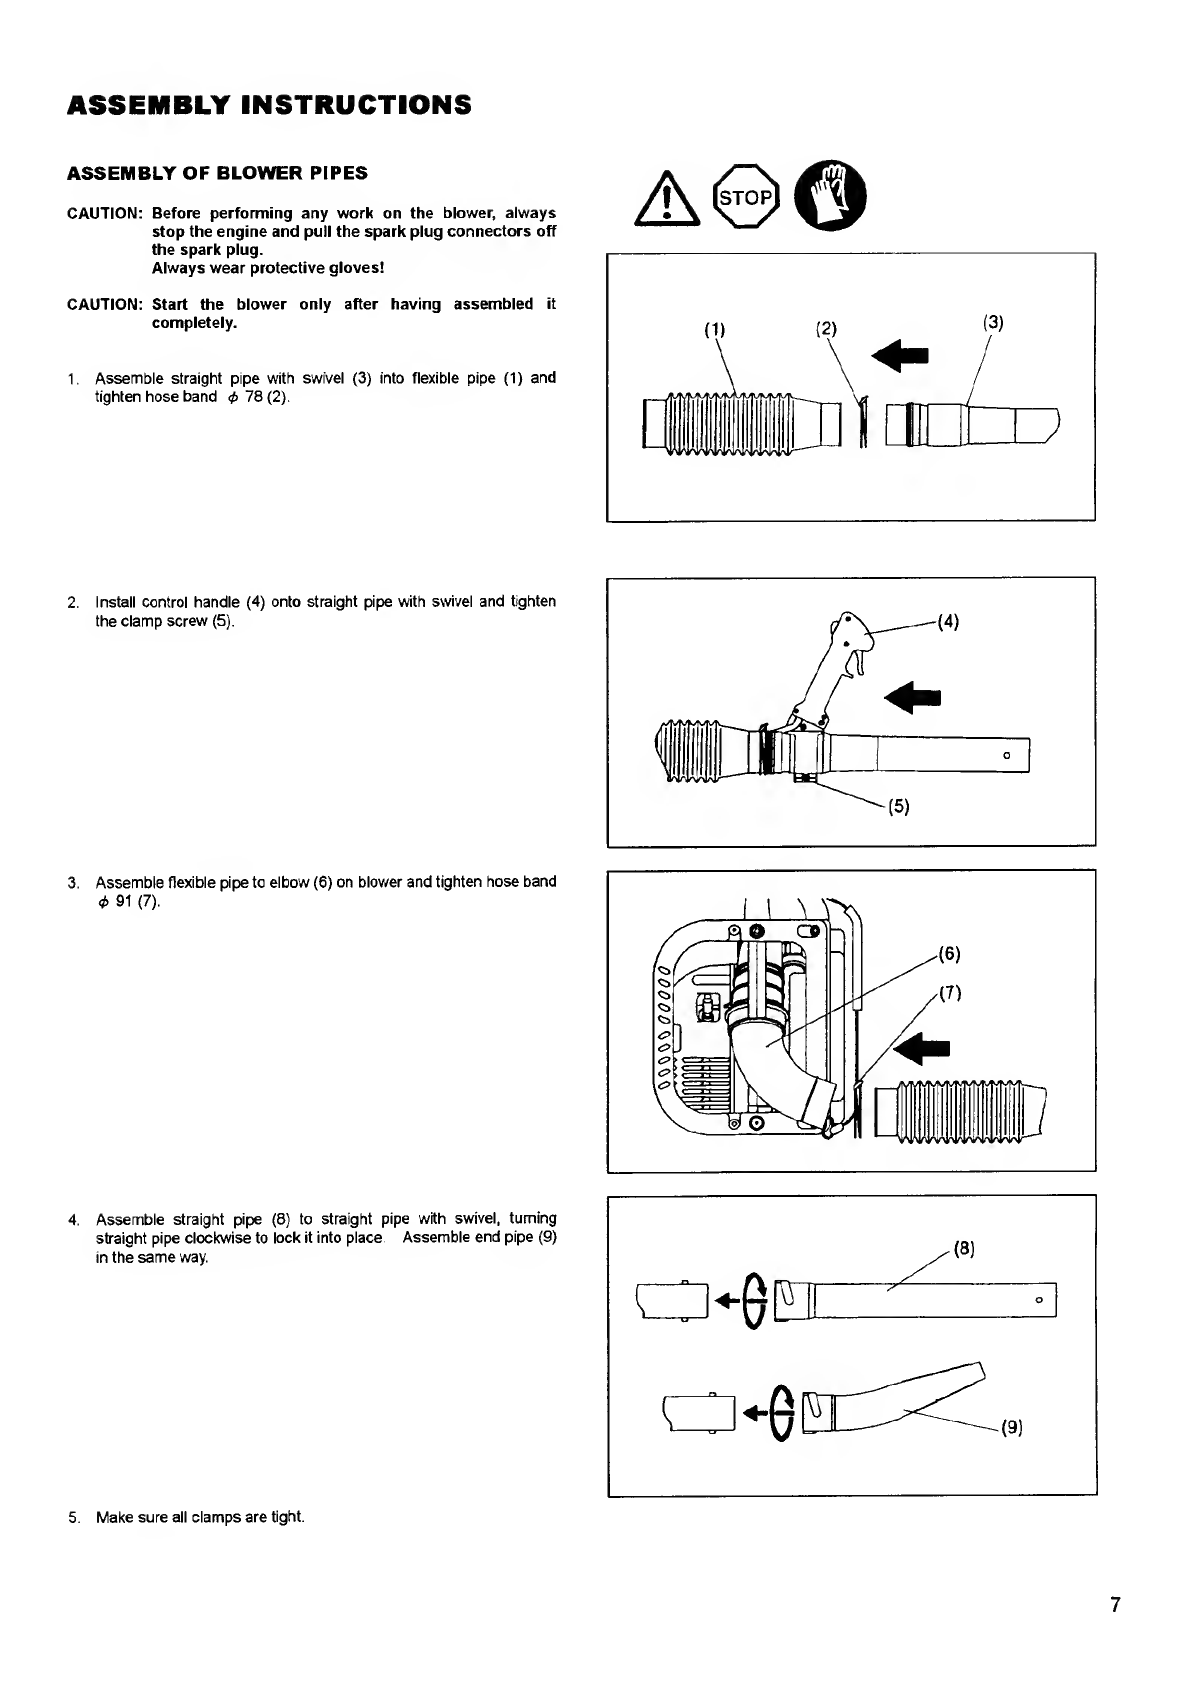
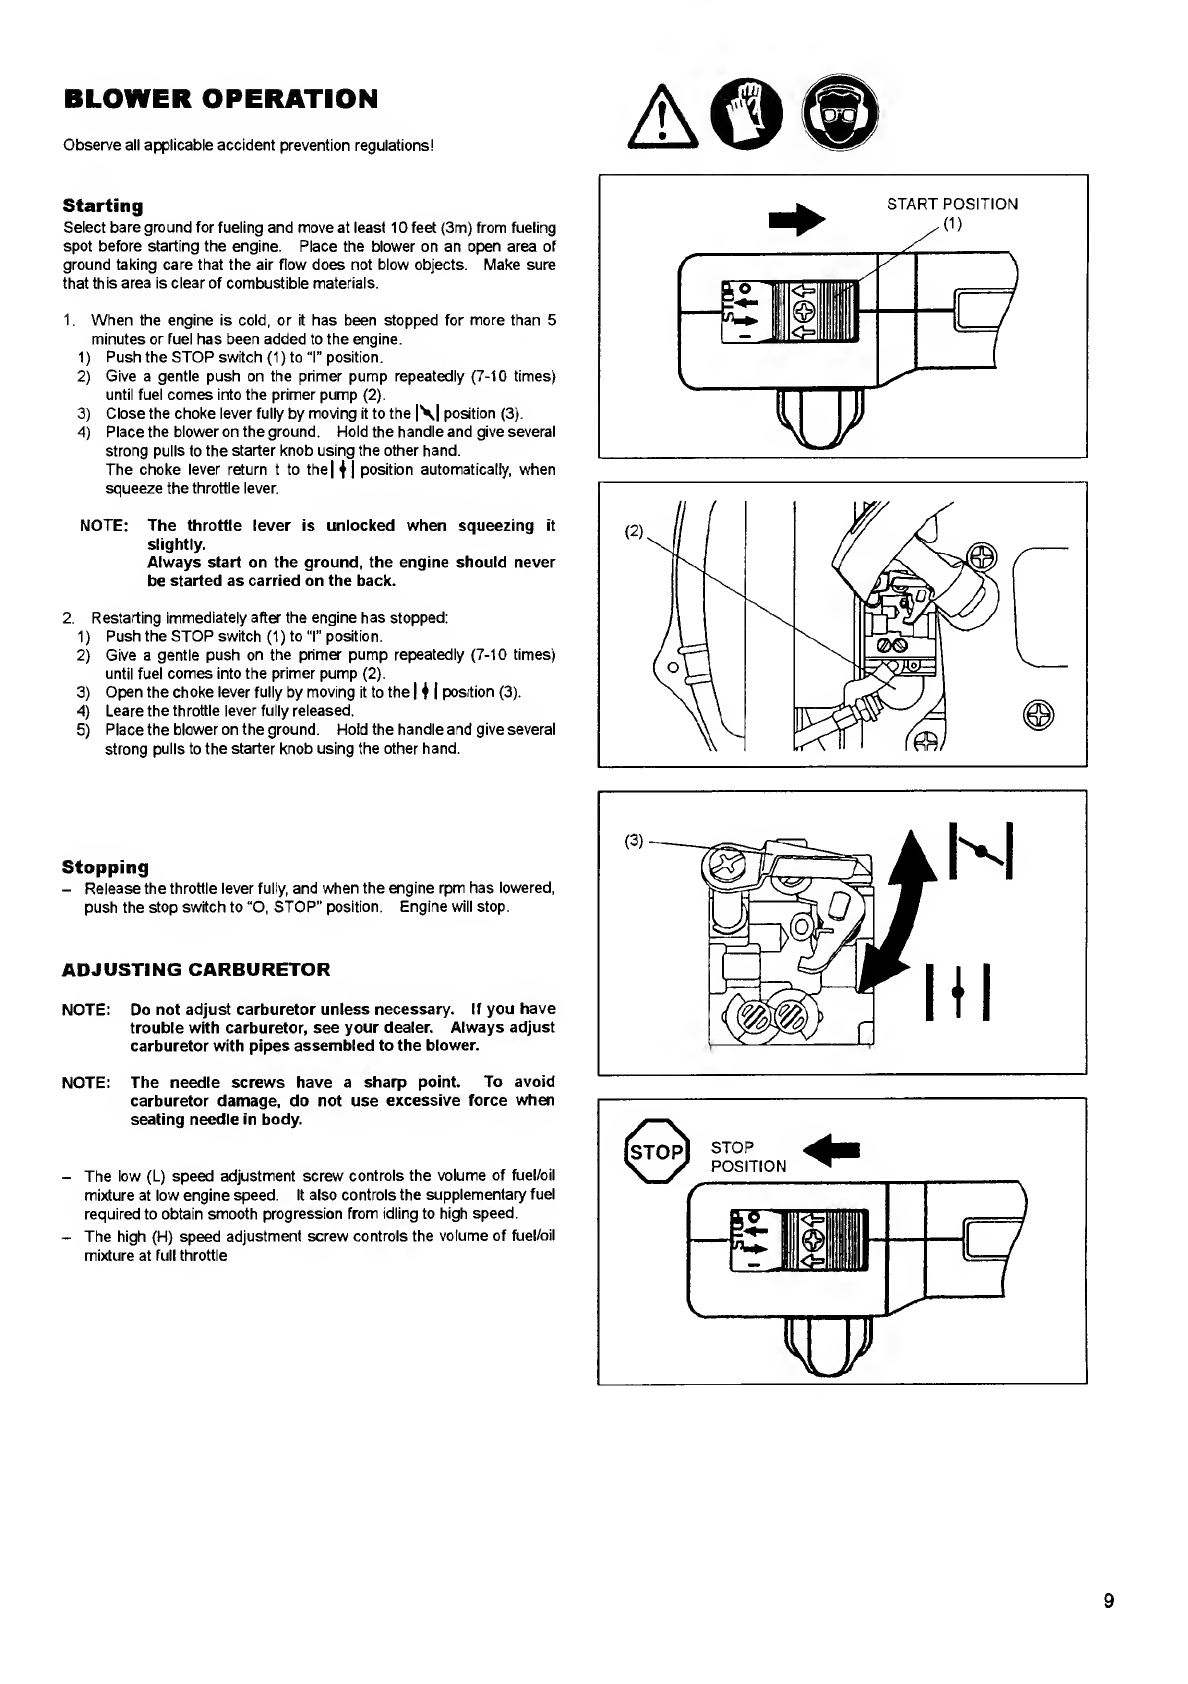
Dolmar PB-500 R User manual
Other Dolmar Blower manuals

Dolmar
Dolmar PB-500 R Guide

Dolmar
Dolmar EB166 User guide

Dolmar
Dolmar AG-3729 User manual

Dolmar
Dolmar AG-3729 User manual

Dolmar
Dolmar PB-251.4 Guide

Dolmar
Dolmar SP-7650.4 R User guide

Dolmar
Dolmar PB-250.4 User manual

Dolmar
Dolmar PB-7600.4 User manual

Dolmar
Dolmar PB-7601.4 User manual

Dolmar
Dolmar PB-7601.4 User manual

Dolmar
Dolmar SP-7650.4 R User guide

Dolmar
Dolmar EB-165 User guide

Dolmar
Dolmar AG-3750 User manual

Dolmar
Dolmar PB-252.4 User manual

Dolmar
Dolmar PB-250.4 User manual

Dolmar
Dolmar PB-250 User manual

Dolmar
Dolmar PBV250 User guide

Dolmar
Dolmar AG-3750 User manual

Dolmar
Dolmar PB-251.4 User manual

Dolmar
Dolmar PB-252.4 User manual