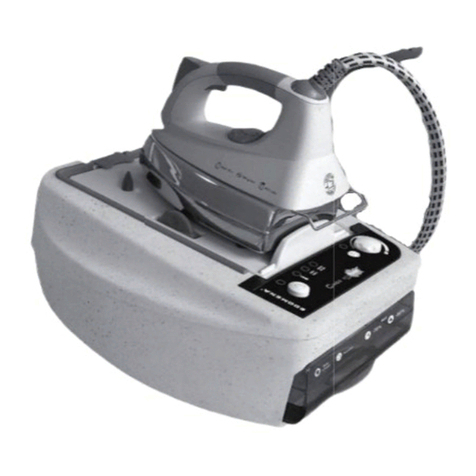
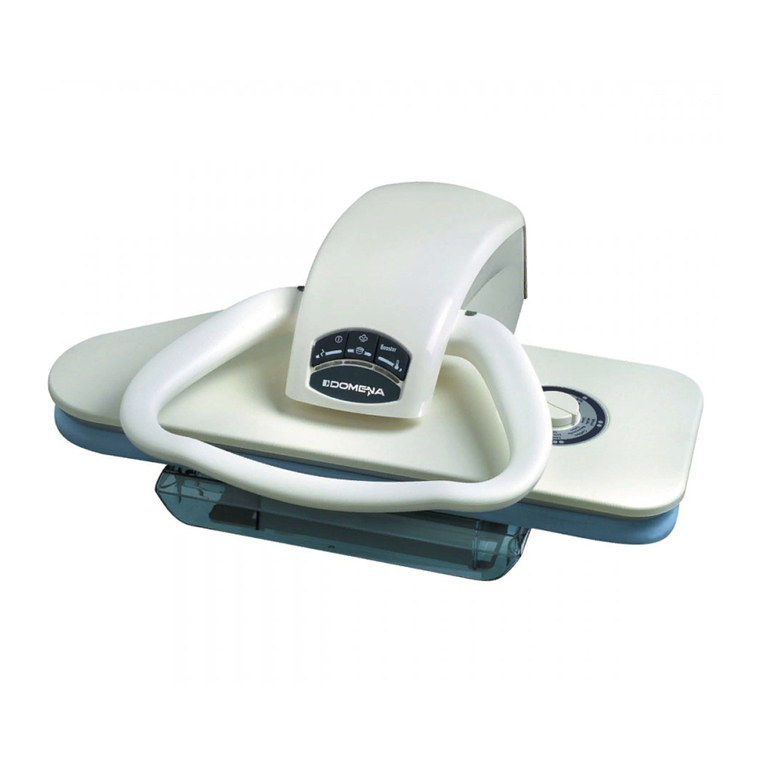
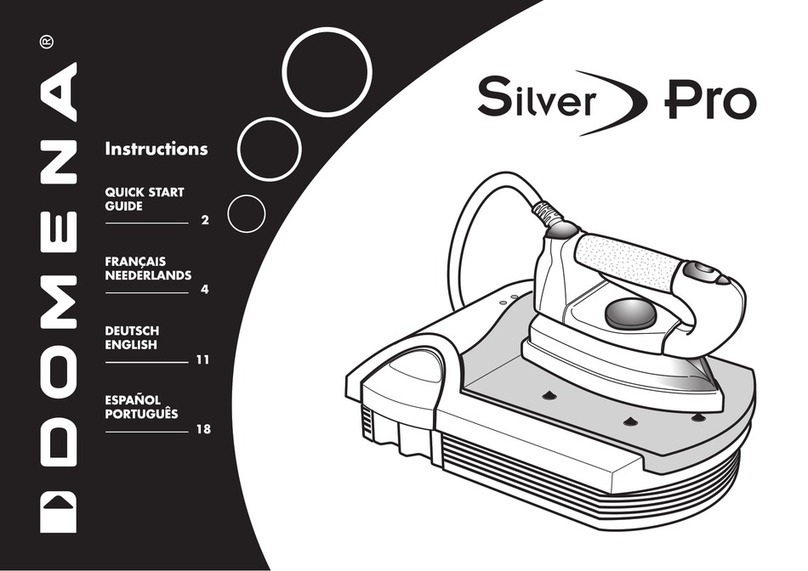
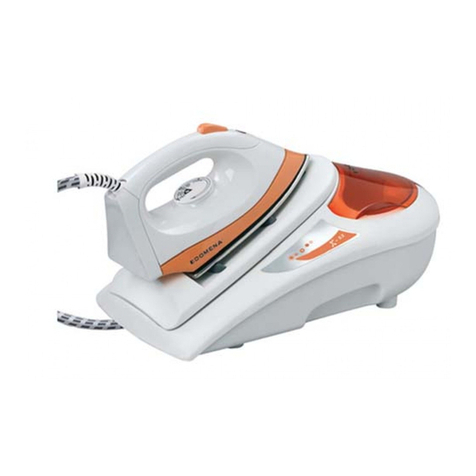
DOMENA SP4500 ecofibres User manual

STEAM IRONING PRESS
INSTRUCTION BOOK
Congratulations on purchasing this Domena Ironing press SP4500 ecofibres®
ecofibres® are mainly made from natural fibres such as fine shavings from trees like spruce. This allows a reduction in
unit weight, and ensures a total recycling of the material.
Natural fibres are a renewable source, which allows the material to keep its original technical properties whilst
remaining ecological. ecofibres® are totally recyclable, and reduce the use of petrochemicals in manufacturing.
SP4500 ecofibre® is the first ecological iron press which also allows the user to realise 50% savings in electricity
consumption and 50% savings in water thanks to the ECO settings.


4
IMPORTANT SAFEGUARDS
When using your ironing press, basic safety precautions should be followed, including the following :
– Read all instructions before using the ironing press.
– Use ironing press only for its intended use.
–Before plugging in your ironing press, be sure the electrical information on the label on the bottom of the base agrees
with your power supply.
– Always use a mains supply which has an earth connection, for your own safety.
– The ironing press should always be turned off before plugging or unplugging from socket.
– Never yank the lead to disconnect from socket ; instead, grasp the plug and pull to disconnect.
–Do not allow power lead to touch hot surfaces. Let the ironing press cool completely before putting it away.
– Do not operate ironing press with a damaged power lead or if the ironing press leaks or is damaged. To avoid the risk of
an electrical shock, do not attempt to open and repair the ironing press ; take it to your nearest service centre for
examination or eventual repair. Incorrect re-assembly can cause a risk of electric shock when the ironing press is used.
– Close supervision is necessary when using your press with children around.
– This appliance is not intended for use by persons (including children) with reduced physical, sensory or mental
capabilities, or lack of experience and knowledge, unless they have been given supervision or instruction concerning
use of the appliance by a person responsible for their safety.
– To avoid a circuit overload, do not operate another high wattage appliance on the same circuit.
– If an extension lead is absolutely necessary, a 10-ampere cord should be used.
Power leads rated for less amperage may overheat. Care should be taken to arrange the lead so that it cannot be
pulled or tripped over.
– Never immerse the machine in water or other liquids.
– Only use cold water.
– Do not place your hands between the ironing/steaming surface and the heating plate whilst pressing.
– For any repair, take your machine to a registered after-sales service centre, to ensure that the repair complies with the
standards indicated in this instruction book.
– Any repair done by an unauthorized person would cancel the warranty.
The appliance you have just bought conforms to the low voltage European directive 73/23/CEE relating to safety and the
CEM directive 89/336/CEE relating to electromagnetic compatibility, amended by 93/68/CEE.
The manufacturer reserves the right to make changes and alterations to the product without prior notice.
GUARANTEE CARD
Thank your for choosing this product from DOMENA. It is built to the highest standards and we hope it will give you many years of trouble-free service.
One-Year Product Guarantee
Your DOMENA appliance will be repaired free of charge for one year from the date of purchase if it fails to work properly because of the materials or
workmanship we have used, subject to the following conditions:
Delivery to and from our authorised service agents will be at your risk and cost. The guarantee does not cover damage caused by abormal or professional
useage or by not complying with the instructions for use provided with the product.
The guarantee does not cover appliances that have been altered or serviced by non-DOMENA-approved agents.
After-Sales Service
For the address of your nearest Authorised Service Agenty simply contact our Customer Services in England, Telephone 01825-768899
This warranty is given in addition to and does not affect your statutory rights.
For countries outside the United Kingdom, please contact the Consumer Relation Desk in your country.
DOMENA Ltd.
Unit 20, Ridgewood Industrial Estate
Uckfield
EAST SUSSEX TN22 5QE
Tel: +44 (0)1825 749498
Fax: +44 (0)1825 749499
5
PRINCIPAL
COMPONENTS
1. Locking buttons for carrying
and handling
2. Eco button
3. Thermostat pilot light
4. Temperature control dial
5. Heating plate
6. Cushioned ironing/steaming
board
7. Location of the anti-scale in
cartridge into the reservoir
8. Water reservoir
9. Handle to open/close the
press and progressive
pressure of the heating plate.
Automatic steam output
control
10. Anti-scale cartridge
11. Pressing cushion
12.
Mains lead
1
5 6 7 8 9 10 11
12
2 3 4
SETTING UP
1. Unpack the appliance. Lay the appliance on a stable, heat-resistant surface. A table
is the ideal.
USING YOUR PRESS
2. SECURITY LOCK
To prevent accidental opening, your ironing press is locked for safety.
Gently press the handle down and push the two locking buttons on the handle upwards.
Open the press by gently raising the handle.
3. OPENING AND CLOSING THE PRESS
The handle is used to open and close the heating plate. By lifting it with your hand, the
pressure is released and the machine opens. By bringing the handle down, the machine
closes and the pressing pressure increases until it automatically engages at maximum
pressure.
Caution : The press opens automatically. Always hold the handle while
opening.
The handle also operates the automatic steam output (see : Steam generation).
4. MAXIMUM OPENING
To obtain the maximum opening of the press : open the press and continue to gently bring
the handle upwards.
The ironing board access is wide and the board can even be used as a normal ironing
board if desired.
The maximum opening position allows large items to be pressed easily and can also used
for folding the laundry. The heating plate returns automatically to its original position when
lowering the handle.
1
2 3 4

6
TYPES OF WATER
You can use: Tap water, distilled water for
irons.
Do not use : Rain water, water from the
fridge, water from any evaporating appliance,
water produced by a condenser tumble drier.
Choosing your water
You can use either tap water or distilled water
for irons. Depending upon the calcium level
contained in your tap water as well as upon
your weekly ironing time (average time : 2/3
hours), it can be more economical to use
distilled water for irons (not for car batteries). In
this case, your cartridge should last up to 1 year
(depending on the volume of your ironing and
on the quantity of steam you ask for).
A. Dip the strip 1 second into tap water.
Air the strip for a few seconds and wait for
the result in approximately 1 minute.
Recommendation
B. 1 or 1 1/2 mauve square : you can use
tap water
C. 2 or more mauve squares : we advise you
to use distilled water for irons.
TIPS
Noise : To ensure constant steam output
performance, your unit is equipped with an
injection pump which is activated each time
you lower the handle to the semi-closed
steam position. It is louder when :
1) the water tank is empty
2) the unit is used for the first time
3) the anti-scale cartridge has just been
changed.
The pump can be heard humming during
normal use.
LOCATING THE ANTI-SCALE
CARTRIDGE
FILLING UP THE WATER
RESERVOIR
5. Hold the reservoir at both ends and pull it
towards you until you see the fill hole (fill
position)
6. Holding the reservoir in the middle, pull it
completely out (position for changing the
anti-scale cartridge and for emptying).
7. Remove the anti-scale cartridge from its
plastic bag.
8. Insert it into the reservoir. The tube lines
up with the mark on the reservoir.
9. Turn the cartridge towards the right until
it stops.
10.Replace the reservoir by sliding it in like
a drawer up to the fill position.
11.Fill the reservoir with tap or
demineralised water
5
6
8
7
9
10
11
A
B C

7
12.Push the reservoir right in to make sure of a firm connection with the appliance.
Caution :
Never call for steam when there is no water in the reservoir. You could damage the
pump.
Never fill the reservoir with hot water. Never add products containing alcohol or
essences (perfume, eau de Cologne, lavender essence…) to the water.
Warranty does not cover servicing of your appliance due to scaling up.
13. Plugging in the ironing press
- Connect the power lead to the plug at the rear of the press.
- Connect the power lead to the socket outlet and switch on. For your own safety,
check that you are using an earthed plug.
Electrical safety
If the machine is plugged in and closed for about 10 seconds, the electrical heating is
automatically cut off.
Opening the machine. The electrical heating switches on again automatically.
14. Temperature control
– Having switched on your press, the temperature pilot light will come on at the same
time.
– The temperature pilot light goes out when the temperature corresponding to the
selected position on the thermostat is reached.
It will go on and off regularly during the ironing.
Caution : the pilot light will not come on when the thermostat is at the position
but the steam generator is heating.
15. SELECTING THE PROPER TEMPERATURE
The quality of the ironing depends both on the quantity of the steam you use and
partly on using a suitable heat.
Labels on articles and garments indicate the correct ironing temperature using the
following International Pressing Symbols :
●Minimum heat
●● Medium heat
●●● Maximum heat
These symbols are marked on the thermostat control dial on the appliance.
- Turn the thermostat to the position corresponding to the fabric to be pressed and to
the symbol indicated on the fabric label.
When the thermostat is opposite the symbol , the hot plate does not heat up.
We recommend that you press the items requiring the coolest setting first, building up
to the maximum position last.
14
13
15
Type of fabric
Synthetic fibres
Acetates
Polyacrylics
Polyamides
Natural animal fibres
Silk
Wool
Natural vegetable fibres
Cotton - Linen
Thermostat
adjustment
NYLON
●
SILK - WOOL
●●
COTTON - LINEN
●●●
Steam quantity
Dry or very little steam
Moderate steaming time
Maximum steaming time
12

8
STEAM GENERATION
PRESSING
After plugging in your steam press, the steam
generator will be ready to steam after about
3 minutes.
The eco switch should be in steam position (ie
not engaged).
16. Position your garment on the ironing
board.
17. Lower the heating plate using the handle.
In the half closed position steam will
automatically be generated for as long
as required.
18. Close the press in order to obtain the
automatic pressure.
Leave the press closed a few seconds in
order to dry and press the garment.
19. Open the press by lifting the handle.
Do not press down on the handle more that
normal when closing the press : the pressure
is automatic.
First time steam generation
Your unit is brand new. The steam system will
have to be started up.
– Put the anti-scale cartridge in place.
– Fill the water tank up completely (see
above).
– Slide the water tank back into its housing,
pushing it all the way in.
–Switch on your unit.
–As soon as the appliance is ready to
produce steam, lower the handle to the
steam position.
ECO Function
By using the ECO settings, both the electricity
and water consumptions will be reduced.
We suggest that you use the ECO mode for
lightly creased or for the lighter or mixed
fabrics. In this way you will save up to 50%
on electricity and 50% on water
consumption.
20. To activate the ECO function for steam
push in the eco button.
21. Turn the thermostat dial to line up with
the green eco area marked on the dial.
22. EASY TO CARRY
It is easy to carry and store the machine.
Ensure you lock the machine before carrying
it by the handle by keeping the press closed
and pushing the two locking buttons down.
16
17
18
20
21
19
22
LIN
LAINE
COTON
SOIE
NYLON

25
26
24
23
23. STORING
When you have finished your ironing operation, switch off the appliance and unplug it
from mains socket.
Let the press cool down for, about 30 minutes, before closing it.
PLEASE NOTE : Before carrying and storing vertically your ironing press in an upright
position, it is essential that you empty the water reservoir to avoid any spillages.
CHANGING THE ANTI-SCALE
CARTRIDGE
With tap water :
Scaling up is no longer a problem thanks to the anti-scale cartridge. Please remember
that the resin will progressively change colour as it looses its efficiency. The cartridge
needs replacing when the change in colour goes all the way up to the top. Each time
you fill the water tank, check the anti-scale cartridge.
With demineralised water :
The cartridge must be regularly checked and replaced as described above. However,
by using demineralised water for domestic purposes, your cartridge should last for up
to 1 - 2 years.
CAUTION : Warranty does not cover servicing of your appliance
due to scaling up.
24. Anti-scale cartridge
The reference number to order anti-scale cartridges for this press is 413 044.
The anti-scale cartridges are available in a blister pack from your retailer or the Domena
Help Line.
MAINTENANCE
CLEANING
To keep your press perfectly clean, wash the outside parts with a slightly soapy water
and carefully wipe it off with a soft cloth.
25. THE FOAM
After extensive use, the foam under the ironing cover will become compressed,
affecting the quality of your ironing. It should then be replaced.
25. THE COVER
Make sure that the cover is always tight enough so that it does not wrinkle up. It may
be washed up to 40° C. Avoid mixing it with white items. If it shows signs of wear it
must be replaced.
26. HEATING PLATE
In any ironing process the starches in fabrics, residues of cleaning products, and
particles of yarn fibres can gradually create spots on the heating plate. To remove
these rub the heating plate while still warm with strong paper or a soft cloth which
does not leave fluff. If “hard to remove” spots appear on the plate (e.g. if synthetic
fabrics like nylon have been pressed at too high a temperature), clean them off with a
proprietary iron cleaning stick. Do not use scouring powders, alkalines (e.g. for
ovens), abrasives or steel wool.
STEAM GENERATOR
Your press will not scale up if you follow the above instructions carefully. Failure to follow
the recommendations will result in the steam generation system scaling up more rapidly,
and the steam output constantly decreasing.
Take your appliance to a registered after-sales service centre in order to have your
machine de-scaled.
9

10
HINTS FOR PRESSING
❏The secret to successful ironing lies in laying your garment carefully on the pressing board and smoothing it out. Take
care not to touch the heating plate with the backs of your hands.
❏Always begin with items of laundry which require low temperatures perhaps without steam. To press nylon the correct
heat will be reached in approx. 3 minutes.
❏Before pressing, carefully smooth the garment on the board. This will prevent unwanted creases.
❏As the pressing board is padded, you can press anything which has standard buttons without breaking them.
Nevertheless be careful with synthetic buttons and zip fasteners which can melt.
❏If the items have to be stiffened or starched, proceed in the normal way.
❏If you wish, you may use a damp cloth when pressing.
❏Condensation due to extended use or when beginning to use the press may cause water spots to appear on the
ironing cover. Use the hotplate to dry it out.
❏To press and bring out monograms or pieces of embroidery or when pressing buttons, place them downwards onto the
ironing board for best results.
❏Knitted garments can easily be ironed just by lowering the heating plate without closing the press. The steam will
revitalise the fibres.
❏To remove unwanted creases, slightly moisten them and press.
❏When finished ironing, let the press cool down. It is easy to carry and store and do not forget to close and lock it.
❏Your press can be stored vertically without any risk. It is essential that you empty the water reservoir to avoid any
spillage.

PRESSING
HANDKERCHIEFS, NAPKINS,
TOWELS, KITCHEN LINENS,
ETC.
1. Carefully place the handkerchief or the
napkin on the ironing board and press.
2. Fold once and press again.
Finish folding, press.
BED SHEETS, TABLE CLOTHS
3. Fold the bed sheet or the table cloth three
or four times in length or width.
Place the folded sections at the back of the
ironing board.
If necessary, use the maximum opening
position for easier access.
Press the first part, then progressively pull
the other folds towards you and press.
Meantime, the pressed sections will rest on
your lap.
4. Finally give the sheet etc. a last pressing
by just holding the hotplate down on the
sheet, but without the full pressure, as
shown in fig. 4.
DUVET COVERS AND PILLOW
CASES
5. First press the buttoned end, with buttons
downwards towards ironing board.
As usual, fold in two or three times and
press.
FITTED SHEETS/VALANCES
(WITH ELASTICATED
ENDS/CORNERS)
6. Start with one corner. To iron without
causing creases, stretch the sheet by
pulling on the elastic and press.
Continue pressing and moving the item
round from left to right until you reach the
next corner. Press this corner on left hand
of board.
7. Handy hint : Fold bed sheets twice in
width and press four layers (eight sides) at
a time.
MONOGRAMS AND RAISED
PIECES OF EMBROIDERY
8. Press them before the rest of the item.
Place them downwards onto the ironing
board.
1
2
4
3
5
6
7
11
8

12
SHIRTS
Sleeves :
9. Fold the sleeve lengthwise. The crease is
formed along the side seam. Place the top
of the sleeve along the ironing board.
Press and open.
Repeat the same for the second sleeve.
10. Place the second sleeve on top of the first
one.
Then bring the collar up to the cuffs.
11. Hold the two sleeves and the collar in the
right hand, the rest of the shirt in the left
hand, and place the whole shirt to the
back, moving the upper part of the shirt
towards the right.
12. Front, buttonside :
Put the shirt opening to the front,
arranging the garment so that the
shoulder and neckline are lined up with
the right edge of the board.
Hold the collar slightly pinched between
the fingers so that the curve of the neck
opening is flat on the board. Press.
13. Underarm section :
Move the shirt by slightly pulling it
towards the right side, then move it
towards you.
The side seam is against the front of the
board. Press.
For a fitted shirt or blouse, make a pleat
that will be ironed smooth when pressing
the lower part of the shirt.
14. Back :
Continue in the same way by bringing
the shirt gradually towards you, until you
reach the front opening.
The collar seam should be against the
edge of the board.
15. Front, buttonholeside :
For the front opening,
again hold the collar
pinched between the
fingers so that the curve of
the neck-opening is flat on
the board. Press.
16. Cuffs :
Press the cuffs (wristbands).
17. Collar :
Press the reverse side once and then the
right side once. Stretch the collar by
hand before pressing. (n.b. if you wish
you can press the collar and cuffs at
same time as the sleeves
9
11
10
12
14
13
15
16
17

13
18. Folding :
Fold the collar by hand and button up
the shirt while it is still warm.
19. Lower part of the shirt :
Steam to smooth out any creases made
and press the front. Slightly moisten if
necessary.
SOME OTHER WAYS FOR AN
EVEN BETTER LOOKING
FINISH
20. For shirts with a hard, starched or
large collars place the pressing cushion
along the shoulder seam. Slightly lower
the heating plate so that it just touches
the shirt.
21. Pleated sleeves on the cuff
To press the pleats on the cuff, use the
small cushion by sliding it into the
sleeve up to the beginning of the
pleats.
Arrange the pleats on the cushion.
Lower the heating plate without using
the full automatic pressure. Then, turn
the sleeve and press the other side.
22. Cuffs
Place the wrist opening on the side of
the board. Press, pulling the sleeve
smoothly towards you. Press the cuffs
as usual.
23. To finish the sleeve
Place it on board at an angle and
press.
24. WOMEN’S SHIRTS AND
BLOUSES
These garments are pressed generally
like shirts.
FITTED SHIRTS AND
BLOUSES
For fitted blouses, press in two stages. First
one fitted side, then the other.
25. Finish afterwards by pressing one area
after another using the end of the
board to help you.
N.B. If you don’t want creases on the
sleeves, utilise the small cushion to
press, or a rolled soft thick flannel.
Use the small cushion for the shoulders
or the neck opening of a shirt or a
blouse with a special neckline.
26. Sleeves without pleats
Use the small cushion or a rolled soft
thick flannel.
27. Pressing sleeves without
leaving creases
Place the sleeve on the board, folded
from the wrist to the middle of the
shoulder. Press. Two creases will be
marked initially.
Then steam or dampen and smooth out
the two creases with the sleeve folded
along the under-arm sleeve seam.
Let the sleeve pass the front of the
board.
18
19
21
23
20
22
25
27
26
24

14
TROUSERS FOR MEN OR
WOMEN
For woollen items, use a damp cloth if
necessary.
28. Press the waist and the belt holder on the
edge of the board.
You can use the pressing cushion
accordingly.
Press, then open, etc and rotate waist
around the edge of the board.
29. Place the crotch flat on the left-hand side
of the board, lining it up with the shape
of the board. Press and open.
Repeat the same for the second leg.
30. Lay the front crease flat on the board
starting with the upper part. The seams
must be on the edge of the board as any
pressure on them could result in marks or
shine.
Press and open.
Move the trousers to press the lower part
of the leg.
31. Move the leg to press the back crease of
the lower part of the leg. Press and open.
Again place the seam at the edge of the
ironing board.
32. Finish with the back crease on the upper
part of the trousers.
Press and open.
Press the second leg.
33. JEANS
The stitching on jeans has a tendency to
shrink more than the fabric. This causes
pulling. If necessary, pull the leg to
‘stretch’ the seams once the machine is
closed, and as the pressing proceeds.
Press the waist, turning it around the
board, as for any other pair of trousers.
Place the leg on the board, folding it
along one of the two seams. Leave the
other seam out of the board, as well as
the hem.
n.b. For material in velvet, press them
preferably on the wrong side in order to
avoid "shine" marks.
34. TROUSERS WITHOUT
CREASES
If the leg is wider than the board, leave
the edges outside of the board. Move the
garment to press the other unpressed
sections.
In the leg is narrower than the board, use
the cushion or introduce a rolled soft
thick flannel or cotton into the trouser leg.
Press in two or more stages if necessary.
28
29
31
30
32
33
34

15
SOME OTHER USES OF THE
PRESSING CUSHION
35. For certain shapes, ironing can be
completed using the pressing cushion,
supplied with the machine. It is slipped
into or under the garment, in the
especially difficult areas.
36. Shoulder
Rub the shoulder, with the cushion inside
it, against the heating plate.
37. To remove creases in the sleeves of a
jacket. To remove creases in the flaps of
a jacket (with or without a cushion).
38. APRONS
Press first the waistband and the pleats,
then the rest of the apron.
39. SWEATERS, KNITTED
GARMENTS
The ironing of hand or machine knitted
garments is
done by only using steam - no pressing
at all.
Lower the heating plate leaving a
minimum space of 5 cm between the
garment and the heating plate, without
closing the handle.
The steam will revitalise the fibres.
40. TEE-SHIRTS (cotton)
The sleeves :
Place them flat on the board, adapting
the shape of the shoulder to the shape of
the board. Press and open.
The body :
Place it flat. Press and open.
41. SKIRTS WITH PLEATS
Slip waist on end of board. Press.
Arrange pleats carefully.
42.To press the pleats part you can pin them
onto the padded pressing board. You
can dampen as well (according to the
type of garment).
FLOUNCES
43. Begin to press the centre of the flounces
rubbing them by hand against the edge
of the heating plate.
44. Finish by using the left end of the board.
Close the machine and pull the flounces
gently towards you.
39
43
44
40
38
41
42
36
37
35

500 413 674 - Printed in France
Environmental Protection
Your electrical appliance comprises numerous recyclable elements.
The normal disposal of these elements may trigger harmful effects on human health and the environment.
It is technically impossible to sort the waste once it is combined.
The recycling of appliances which have to be disposed of is the responsibility of the consumer.
The various packaging items can be recycled. Dispose of these in the containers provided for this purpose.
When the time comes, your appliance should not be disposed of with your usual household refuse.
Use a pair of pliers to cut the electric cable to prevent it from being re-used.
Dispose of the device at an approved collection centre in the container provided for this purpose so that it can be re-processed.
If you have a battery-operated device or an apparatus fitted with a remote control system, remove the batteries and dispose of these at the approved location.
Table of contents
Other DOMENA Iron manuals

DOMENA
DOMENA Xellence 30 User manual

DOMENA
DOMENA XELLENCE XL1 User manual

DOMENA
DOMENA Xelys 1 User manual

DOMENA
DOMENA Xprime 1 User manual

DOMENA
DOMENA XL Pro 90 Ecofibres User manual

DOMENA
DOMENA CLASS 150 User manual

DOMENA
DOMENA Duo Life User manual

DOMENA
DOMENA Xprime 1 User manual

DOMENA
DOMENA SP 2050 User manual

DOMENA
DOMENA Silver Pro User manual

DOMENA
DOMENA PS4500 User manual

DOMENA
DOMENA PRIMO 2 User manual

DOMENA
DOMENA SP4000 User manual

DOMENA
DOMENA Initial 120 User manual

DOMENA
DOMENA Dual force 45 User manual

DOMENA
DOMENA CX 30 ecofibres User manual

DOMENA
DOMENA Xstream 1 User manual

DOMENA
DOMENA Primalis 100 User manual

DOMENA
DOMENA Linea 1.0 User manual

DOMENA
DOMENA Dressy User manual