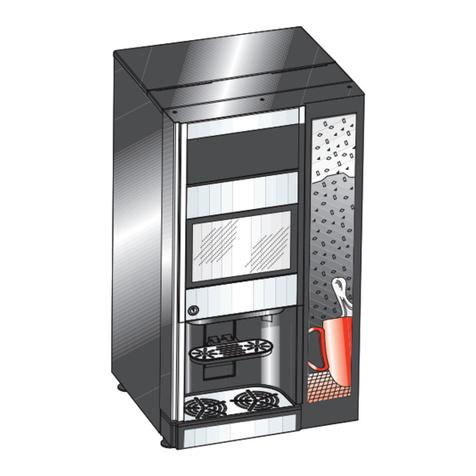
DONG GU ELECTRONICS DG-108F3M User manual

Model : DG-108F3M
DONG GU ELEC.CO.,LTD.
Office Coffee Service
Vending Machine
Before performing the connection, make sure that
the ratings correspond to the power supply voltage
DONG GU ELECTRONICS. CO.,LTD.
Main Office : 500-5, Sangdaewon-Dong,Jungwon-Ku,
Sungnam-City, Kyungki-Do, Korea
TEL. 82-31-731-3600
FAX. 82-31-733-1155
Email. [email protected]
http://www.venusta.net


Disassemble the material
barrels at first
●The maximum volume of the material containers is 1,600g
4
How to supply water
How to supply materials
How to supply water
(INSIDE WATER TANK USING ONLY)
1
Open the lid of the
water tank by twisting
the arrow direction as
indicated.
2
Put the water in to the
tank using a big kettle
●Supply the water to reach 3cm
distance from the top of the
water tank.
●If the water overflows or gets
into the assembly, it may cause
the defect of the machine.
Tea 1
Tea 2
Tea 3
Coffee
Available Unavailable
Premix coffee(Cafe Latte,
Cappuccino, CafeMoca,etc)
Freshbrew coffee(Linger)
Material
Tea
Material
Citron/Tea
Cocoa, Powder Milk
Ginseng tea, Choco
Liquid type cream
Containedgrain tea
soup, stew
(stickymaterial)
1
Lift the funnel and take out.
2
Take out the barrel by lifting the front side of it
slightly
Disassemble in the following from
left(Tea1) to right(Tea2)
3
Description of each section
The front side
Push button/
Indication panel
Cup outlet
Power
Switch
Water tank cover
Display
MODE
Menu Button Taste control button
Display of
vending price
Display of
vending price
Coin slot
Internal View
Inside the door
The rear side
Water tank
Controller
Cleaning button
Cup test button
Mixing bowl
Fixing device
Drink outlet
Water gutter
Canister(1,2,3)
The cup barrel
Coin sensor
Coin box
Cup holder
Electric current
fuse holder
Damp-air
Ventilator
Drainage hose
/coke
Electric power
code

5
How to cup test
Put into cup barrel/Cup test method
1
Put the paper cups
into cup bucket.
•Put 5~10 cups each time into
the barrel for cup sensor to
operate moderately
2
Press the cup test
button.
•You can see the paper cup
comes out through the outlet
with beep sound
●Do not use substandard ,distorted, deformed or wet cups.
●Do not press the cups to put more cups into the barrel.
●May cause the cup sensor be out of order.
●Use the only 6.5Oz cups,(195ml
standard type)
●If the cups are not placed straightly
into the barrel, beat or tap with hand 2
or 3 times upward lightly
How to assemble barrels, and supply materials
1
Close the lid after putting the raw materials into the container
•When putting raw materials, incline the barrel slightly backward for the materials not to get
out of the front hole of the barrel.
2
Fix the fixing hole of barrel into the rotating shaft correctly.
•Before assembling containers, make sure that the names of the material shown in a plate
adhered to barrel with those of indicating panel.
Assemble barrels in order
•Tea2 barrel Tea1 barrel(From the left to the right)
3
Put the projecting part located in the lower part of barrel into panel
groove correctly.
Put the raw material funnel into the panel hole correctly.
●Put the raw material into the barrel after removing any moisture from the barrel for the
material not to be hardened due to any moisture.
How to clean the connection tubes
Cleaning the connection tubes
Press the cleaning button inside of the door.
•The coffee or tea material mixing barrel and the
connection tubes are cleaned with hot water.
2
1
Put the water gutter
back , after after remove
draining water.
Cleanning
mixing bowl barrel
Water gutter
Drink outlet
●Tea material mixing barrel No.1 cleaning
→one time Press the cleaning button
●Tea material mixing barrel No.2 cleaning
→two times press the cleaning button for shortly time
●Tea material mixing barrel No.3 cleaning
→three times press the cleaning button for shortly time
●Tea material mixing barrel No.1,2, 3 in order
→one time Press the cleaning button for long time.
When using the machine for the first time or exception the connection tubes to be clogged due to the
hardened materials during operation, press the cleaning button, it will clean them automatically.
The cleaning function is only available during power is on.
6

8
How to install and operate
This product is adjusted for the best taste at factory when it comes out. Try to make the drink be tasteful.
How to set up and choose drink
1
First of all, supply water
into the tank and put raw
materials (See page 5),
cup(see page 6)
2
Connect the electric plug
to correct voltage outlet.
•Use the outlet absolutely having
been grounded.(All of power plugs
of the machine are grounded)
220V
3
Turn on the power switch
on the right side of the
machine.
•The heating lamp will be turned on
after buzzer sounds three times
and operating lamp will be turned
on after 13minutes pass.
4
Press the menu button
•When starting to operate the
machine for the first time, the
price has a factory set-up at "Free
of charge "Therefore, when
pressing the button, the drink will
be served immediately.
5
Take the cup out of the
cup service outlet.
앗! 이런 표시가 나타나요
●When "no cup" lamp is changed on supply
cups or insert your hand into the outlet and
tap 2 or 3 times upward.
•The lamp is turned on when cups remain by almost
consuming them.
•The lamp is turned on when the cups are not placed correctly.
●When "no water" lamp is changed on put the
water more.
•There may no water in tank, or little water remains.
7
How to use mountable water bottle
Please notice do not exchange with spring water bottle of kids or infirmity with age
Be careful not pouring or flowering inside of the machine .
It may cause electric shock or malfunction.
1
Open the water tank on the support of the cabinet with the bottom
up & put the water bottle on the tank on the support of the cabinet
with the bottom up.
2
This machine is (small size middle size & large size ) exclusive use
spring water bottle only.
3
Water bottle(Middle,Large size) mountable system.


20
How to disassemble fan cover of damp - Air ventilator
(bottom of the rear panel )
Please press a head of on pressing "A"
•While the damp air inside the product goes out through the damp
air ventilator the moisture and dust materials may be mixed and it
makes them contaminate.
•So disassemble and clean the fan cover and the ventilating fan.
“A" PART
Be sure to turn off machine remove the cover.
it might cause injury.
19
How to disassemble the mixing bowl
How to disassemble the water tank
1
Hold the canister with both fingers and remove
it by lowering and pulling it upward part "A"
2
After remove "A" part,
Turn off upward part "B".
3
Remove the mixing part in the
direction to an arrow
4
Remove Drink outlet hose &
Mixing bow
How to disassemble parts
1
Pull the draining hose of
the rear side and
remove the lid.
•The water in the tank is
drained completely.
•Turn the power off after
draining water.
•Be careful hot water.
Precaution While draining water, be careful of
hot water because hot water (above 90℃)
gets drained from the beginning.
2
Disconnect the rear side
cover with + type screw
driver.
3
Loosen screws on
the rear panel and
push the water
tank and then,
disconnector and
pull it out.

Table of contents
Popular Vending Machine manuals by other brands

AUTOMATROM
AUTOMATROM PICOBRIDGE RS232 manual

Seaga
Seaga INFINITY Series Service and parts manual

Westomatic
Westomatic snackpoint touch Installation & maintenance guide

Seaga
Seaga N2G5000 owner's manual

Westomatic
Westomatic SIGMA Service, parts and schematics

Atlantis
Atlantis Air Press Series User's manual & warranty card

Elektral
Elektral Tru-VEND Midi Buffet STD User & maintenance manual

Three Square Market
Three Square Market Kiosk Guide

Westomatic
Westomatic Primo Compact installation manual

N&W Global Vending
N&W Global Vending Krea Installation - use - maintenance

Pyramid
Pyramid APEX 5000 Series Installation & operation manual

Douwe Egberts
Douwe Egberts Cafitesse 4000 operating instructions