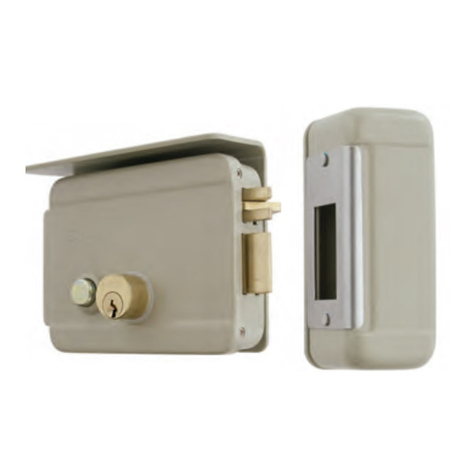
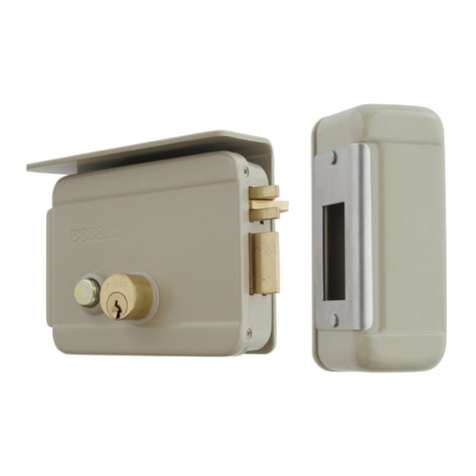
Dorcas DUO 25/85 User manual

INSTRUCCIONES DE INSTALACIÓN, AJUSTE Y MANTENIMIENTO
INSTALLATION GUIDELINE, ADJUST AND MAINTENANCE
DUO
LEER INSTRUCCIONES HASTA EL FINAL
READ MANUAL COMPLETELY
VERY IMPORTANT

P1
ELEMENTO MECÁNICO / MECHANICAL PART ELEMENTO ELÉCTRICO / ELECTRIC PART SUPLEMENTOS DE AJUSTE
BLACK PLASTIC SPACERS
E *
C *
DIMENSIONES / DIMENSIONS
La distancia entre ambos elementos debe estar entre 3 y 4 mm. Se
aconseja el uso de los suplementos de ajuste en el elemento
eléctrico, para conseguir su correcta instalación.
The distance between both parts must be 3-4 mm. We recommend
to use the black plastic spacers to install the electric part correctly.
85
E
*
3 - 4 mm
C
*
PRIM 220V
PULSADOR
PUSH BUTTON
TIPOS E* C *
DUO 40/85
DUO 35/85
DUO 30/85
DUO 25/85 25 39
30 44
35 49
40 54
DUO 50/85 50 64
DUO 60/85 60 74
E*: Distancia en mm entre el centro del
cilindro y el frente.
E*: Backset in mm.
Se recomienda el uso de esta cerradura en
combinación con un cierrapuertas.
It’s recommended to install with an automa-
tic door closer.

1 V
-10ºC / 50ºC
Vdc -- 750 mA
Vac -- 550 mA
12 Vac / Vdc 24 Vac / Vdc
1 V
-10ºC / 50ºC
Vdc -- 710 mA
Vac -- 600 mA
17 Ohmios 32 Ohmios
Ohmios / Ohms
CARACTERÍSTICAS ELÉCTRICAS / ELECTRICAL FEATURES
Tetones a limar según
dirección de apertura
INSTALACIÓN / INSTALLATION
CONSEJOS INSTALACIÓN / INSTALLATION ADVICES
Instalar la cerradura centrada y alineada (Pág.1 apartado dimensiones instalación). Si la puerta
tiende a abrirse, se necesitará limar los tetones antifricción de los alterales del alojamiento de
palanca (en el agujero de la parte eléctrica se ven dos tetones a cada lado. Limar los más
cercanos a la dirección de apetura y de dentro hacia fuera, nunca de arriba a bajo) y además
instalar un cierrapuertas que centre las dos partes automáticamente.
Install the lock centered and aligned (Pág.1 section installation dimensions). If the door tends to
open, it will be necessary to file the antifriction lugs on the sides of the lever housing (in the hole of
the electrical part you can see two lugs on each side, the ones closest to the direction of opening
and inside must be filed outwards, never from top to bottom)
Recomendable instalar la cerradura en combinación con un cierrapuertas.
It is recommended to install the lock in combination with a door closer.
Es preferible instalar el suplemento en forma de rampa en la entrada de la parte electrica para facilitar la entrada del picaporte,
de éste modo se reduce la fuerza que se ha de hacer al cerrar la puerta, la vibración y el ruido, además de que aumenta la vida
del producto sustancialmente pues el picaporte recibe un menor golpe al cerrar.
It is preferable to install the supplement with the ramp at the entrance of the electrical part to facilitate the entrance of the latch,
thus reducing the force that must be made when closing the door, vibration and noise, in addition to increasing the life of the
product substantially because the handle receives a minor blow when closing.
La distancia entre los dos frentes ha de ser la máxima posible (entre 3 y 4 mm) para que la presión ejercida por el picaporte sobre
la ventana d e latón esté controlada, además de que esto aumenta la vida del producto y permite que el cierre sea más suave.
The distance between the two fronts must be the maximum possible (between 3 and 4 mm) so that the pressure exerted by the
latch on the brass window is controlled, besides this increases the life of the product and allows the closure to be softer.
Tetons to file according to
opening address

Debido a que el funcionamiento está muy ajustado para abrir con solvencia, pero sin consumir en exceso se debe asegurar que
la cerradura recibe 12V estabilizados y el Amperaje especificado (0,75 A) por lo que es necesario el uso de fuentes de alimenta-
ción y transformadores que tengan potencia suficiente para la cerradura sin que sobrepasen los 12V.
Because the operation is very tight to open with solvency, but without consuming too much, it must be ensured that the lock
receives stabilized 12V and the specified amperage (0.75 A), so it is necessary to use power supplies and transformers. that have
sufficient power for the lock without exceeding 12V.
El funcionamiento se puede dar indistintamente en corriente alterna como en continua, pero se ha observado un funcionamiento
más óptimo en alterna pues la variación en la corriente produce que pese a que exista una pequeña caida de tensión termine
abriendo en un plazo corte de tiempo.
The operation can be indistinctly in alternating current as in DC, but it has been observed a more optimal operation in alternating
since the variation in the current produces that in spite of that there is a small fall of tension it finishes opening in a term cut of time.
Para funcionamientos de corriente continua instalamos un diodo para proteger la instalación de posibles sobretensiones, si no se
especifica en el pedido y pretende utilizar éste tipo de corriente, aconsejamos la instalación de un diodo.
For direct current operations we install a diode to protect the installation from possible surges, if it is not specified in the order and
intends to use this type of current, we recommend the installation of a diode.
Para asegurar que la tensión que recibe el aparato es de 12V, la DUO puede complementarse con un booster (elevador de
voltaje), el cual produce un aumento de la potencia entregada inicial garantizando el funcionamiento aun en edificios antiguos
donde se producen caídas de tensión significativas. Se ha de instalar en paralelo a la parte eléctrica y lo más cerca posible a ésta
para garantizar un funcionamiento óptimo del sistema.
To ensure that the voltage received by the device is 12V, the DUO can be complemented with a booster (booster), which produces
an increase in the initial power delivered ensuring operation even in old buildings where significant voltage drops occur . It must be
installed in parallel to the electrical part and as close as possible to it to guarantee an optimal functioning of the system.
PREGUNTAS FRECUENTES/ FREQUENT ASKED QUESTIONS
Al abrir eléctricamente se escucha el “clack” característico de la corriente contínua o el “zumbido y clack” si es en alterna, pero
no abre:
La puerta está haciendo fuerza hacia afuera y ésto produce que el bulón roce con su alojamiento y no pueda retraerse por si solo.
-La solución a éste problema es la de centrar la parte eléctrica respecto a la mecánica.
-En caso de no poder centrar las dos partes, se han de limar los tetones de la parte eléctrica dónde se aloja el bulón de la forma
que se especifica en los consejos de instalación, además de instalar un cierrapuertas que asegure que la puerta no hace fuerza
constantemente sobre la cerradura.
-Este problema podría ser originado debido a que la distancia entre ambos componentes sea inadecuada, por lo que ésta debe
ser revisada, sabiendo que dicha separación entre la parte eléctrica y la mecánica debe ser entre 3 y 4mm.
Debido a que el funcionamiento está muy ajustado para abrir con solvencia, pero sin consumir en exceso se debe asegurar que
la cerradura recibe 12V estabilizados y el Amperaje especificado (0,75 A), por lo que se aconseja el uso e fuentes de alimentación
y transformadores que tengan potencia suficiente para la cerradura sin que sobrepasen los 12V.
El funcionamiento se puede pedir indistintamente en corriente alterna como en continua, pero se ha observado un funcionamien-
to más óptimo en alterna, pues la variación en la corriente produce que pese a que exista una pequeña caída de tensión termine
abriendo en un plazo corto de tiempo.
When opening electrically, the characteristic "clack" of the direct current or the "buzz and clack" is heard if it is in alternating, but it
does not open:
The door is pulling outward and this causes the bolt to rub against its housing and can not retract on its own.
-The solution to this problem is to focus the electrical part on the mechanics.
-In the case of not being able to center the two parts, the lugs of the electrical part where the bolt is housed should be filed in the
way specified in the installation advice, in addition to installing a door closer that ensures that the door does not constantly force
on the lock.
-This problem could be caused because the distance between both components is inadequate, so it should be checked, knowing
that this separation between the electrical and mechanical part should be between 3 and 4mm.
Because the operation is very tight to open with solvency, but without excessive consumption, it must be ensured that the lock
receives 12V stabilized and the specified amperage (0.75 A), so it is advisable to use power supplies and transformers that have
sufficient power for the lock without exceeding 12V.
The operation can be ordered indistinctly in alternating current as in DC, but a more optimal operation has been observed in
alternating current, since the variation in the current produces that despite there being a small voltage drop it ends up opening in
a short period of time.
3

He conectado la cerradura y no produce ningún sonido ni abre eléctricamente.
La parte eléctrica está mal alojada, no recibe corriente o no recibe la corriente necesaria.
-Respetar la distancia entre la parte eléctrica y la mecánica de entre 3 y 4mm.
-Mirar que el picaporte de Nylon negro está centrado verticalmente con la ventana de latón. Una vez cerrada la puerta deben
estar totalmente en contacto.
-Asegurarse de que la cerradura recibe la potencia y el voltaje especificado. (Voltios x Amperios = W(Vatios))
-Revisar las conexiones por si hay cortocircuito.
I have connected the lock and it does not produce any sound or open electrically.
The electrical part is badly housed, does not receive power or does not receive the necessary current.
-Respect the distance between the electrical part and the mechanics between 3 and 4mm.
-Look that the black Nylon handle is centered vertically with the brass window. Once closed the door must be in full contact.
-Ensure that the lock receives the power and the specified voltage. (Volts x Amperes = W (Watts))
-Check the connections in case there is a short circuit.
La cerradura no abre inicialmente cuando no está haciendo fuerza en la puerta.
-El bulón tiende a clavarse e los tetones de su alojamiento de la parte eléctrica del modo que se indica en los consejos de
instalación para que le resulte más sencillo retraerse el bulón.
The lock does not open initially when you are not pushing on the door.
-The bolt tends to dig into the lugs of its housing of the electrical part in the manner indicated in the installation tips to make it easier
to retract the bolt.
El bulón de la parte mecánica actua de forma muy pesada al actuar con la maneta y/o con la llave.
La instalación en la puerta no es correcta.
-Revisar la cerradura en búsqueda de elementos extraños.
-Agrandar el agujero de la puerta donde se aloja la cerradura para eliminar la presión sobre las chapas.
-Revisar que la maneta de la puerta esté bien ajustada y su cuadradillo no esté ejerciendo fuerza en la nueca de la cerradura.
The bolt of the mechanical part acts very heavy when acting with the handle and / or with the key.
The installation in the door is not correct.
-Review the lock in search of strange elements.
-Adjust the hole in the door where the lock is lodged to eliminate the pressure on the plates.
-Check that the door handle is tight and its square is not exerting force on the keyhole.
La cerradura se queda abierta cuando se cierra la puerta pese a que he dejado de suministrarle electricidad.
Tenga en cuenta que la cerradura tiene la función automática, la cual produce que una vez cortada la corriente se queda a la
espera de que un último usuario abra la puerta y la vuelva a cerrar.
También posee un sistema de seguridad apra evitar que la cerradura quede inservible si por cualquier motivo se le suministra
electricidad demasiado tiempo.
-Si éste problema ocurre de forme aislada: Se le suministra electricidad durante demasiado tiempo, por lo que el sistema de
seguridad se activa. Ésto puede ser causado por una mala instalación eléctrica, un relé que no corta completamente la electrici-
dad, algún botón de un portero enganchado, vandalismo, etc.
-Asegúrese de dejar un minuto la parte eléctrica sin corriente para que el sistema de seguridad se rearme y vuelva a trabajar con
normalidad.
-Si éste problema ocurre más de una vez: La vibración de la puerta produce ue el mecanismo se abra. Se suele dar en puertas con
marco en voladizo ya que ofrece menos resistencia a la vibración cuando se cierra la puerta.
-Respetar la distancia entre la parte eléctrica y la parte mecánica de entre 3 y 4mm, e instalar el suplemento con forma de rampa
para un cierre de la puerta más suave.
La cerradura no permite que la puerta se cierre.
The lock remains open when the door is closed even though I have stopped supplying electricity.
Note that the lock has the automatic function, which produces that once cut the current is waiting for a last user to open the door
and close it again.
It also has a security system to prevent the lock from being unusable if for any reason electricity is supplied too long.
4

-If this problem occurs in isolation: It is supplied with electricity for too long, so the security system is activated. This can be caused
by a bad electrical installation, a relay that does not completely cut the electricity, a button of a hooked doorman, vandalism, etc.
-Make sure to leave the electrical part without power for a minute so that the safety system is reset and work normally again.
-If this problem occurs more than once: The vibration of the door causes the mechanism to open. It is usually given on doors with
cantilevered frame as it offers less resistance to vibration when the door is closed.
-Respect the distance between the electrical part and the mechanical part between 3 and 4mm, and install the ramp-shaped
insert for a softer door closure.
The lock does not allow the door to close.
La cerradura está instalada al revés, la puerta está muy ajustada y/o el marco de la puerta donde golpea el picaporte tiene el
acabado en esquina.
-Revise que la parte mecánica se ha instalado en la puerta y la parte eléctrica en el marco.
-Respetar la distancia entre la parte eléctrica y la mecánica de entre 3 y 4mm e instalar el suplemento con forma de rampa.
The lock is installed upside down, the door is very tight and / or the door frame where it hits the latch has the corner finish.
-Check that the mechanical part has been installed in the door and the electrical part in the frame.
-Respect the distance between the electrical part and the mechanical part between 3 and 4mm and install the ramp-shaped
insert.
La pieza negra de la parte eléctrica que envuelve la ventana de latón reforzado se ha roto.
El vandalísmo y una incorrecta instalación pueden ocasionar este problema.
-Desatornillar la armadura de la parte eléctrica y sacar la pieza de latón en forma de “T” la “U” de Nylon negro. Limpiar y girar 180º
la pieza con forma de “U” y colocar la parte sin usar en la posición que se había roto. Volver a colocar la pieza en su alojamiento
de la caja de forma que encajen los ejes de su base en los agujeros de la caja, posteriormente la “T” y finalmente volver a atornillar
la armadura.
The black part of the electrical part that surrounds the reinforced brass window has been broken.
Vandalism and improper installation can cause this problem.
-Unscrew the armature of the electrical part and take out the piece of brass in the shape of "T" the "U" of black Nylon. Clean and
rotate the piece with a "U" shape 180º and place the unused part in the position that had been broken. Replace the piece in its
housing of the box so that the axes of its base fit into the holes in the box, then the "T" and finally screw the reinforcement back.
El videoportero pierde la imagen cuando suministra electricidad a la cerradura.
Algunos videoporteros que funcionan con corriente contínua no están preparados para aparatos con bobinas inferiores a 30
Ohmios. La DUO emplea bobina de 17 Ohmios, por lo que su consumo es mayor.
-Emplear una fuente de alimentación o un transformador de más potencia suele solucionar el problema.
-Si no se soluciona, se debe cambiar la instalación añadiendo una nueva fuente de alimentación o transformador que actúe
exclusivamente para la cerradura. Para regular el paso de la electricidad de éste nuevo transformador, se debe hacer que el
videoportero actúe sobre un relé que consuma un máximo de 300mA (no incluido), el cual se debería instalar entre el transforma-
dor y la cerradura. De éste modo el consumo de la cerradura no influirá en el videportero.
The video door phone loses the image when it supplies electricity to the lock.
Some video door phones that work with direct current are not prepared for devices with coils under 30 Ohms. The DUO uses a 17
Ohm coil, so its consumption is higher.
-Employing a power supply or a more powerful transformer usually solves the problem.
-If it is not solved, the installation must be changed adding a new power supply or transformer that acts exclusively for the lock. To
regulate the passage of electricity from this new transformer, the video intercom must be operated on a relay that consumes a
maximum of 300mA (not included), which should be installed between the transformer and the lock. In this way the consumption of
the lock will not influence the video door entry.
RECUERDE: Manipular las piezas interiores de cualquiera de las dos partes de la cerradura, a excepción de las indicadas en este
manual, produce la total pérdida de la garantía.
REMEMBER: Manipulating the interior parts of any of the two parts of the lock, with the exception of those indicated in this manual,
results in the total loss of the warranty.
5
4


M.E. DORCAS, S.L.
C/ José Serrano, nº 6
Siete Aguas
Valencia (SPAIN)
España Export
Tel: +34 962340136 Tel: +34 96 234 18 03
Fax: +34 962340162 Fax: +34 96 234 18 06
www.dorcas.com
This manual suits for next models
5
Other Dorcas Lock manuals
Popular Lock manuals by other brands

Shepherd
Shepherd Shepherd Lock installation guide

National Cabinet Lock
National Cabinet Lock C8111 Dimensional drawing

DOM
DOM Tronic Pro instructions

Emtek
Emtek EMPowered EMP7990RKUS15 manual

IHT Cordynamic
IHT Cordynamic IDL707 installation instructions

Burg Wächter
Burg Wächter secuENTRY ENTRY 7710 RFID manual

Burg
Burg m.options sPinLock 200 operating manual

Kaba Mas
Kaba Mas CDX-10 Installation & operating instructions

RCI
RCI 4 Series installation guide

Axelent
Axelent Storeroom X-It Electric F Assembly manual

Yale
Yale nexTouch Installation and programming instructions

Zamel
Zamel SUNDI COMPACT DNS-002/N Mounting instruction