TAS12/IntraQ Direct Connect Advanced Conguration Guide 4.0
TAS12/IntraQ Direct Connect Advanced Conguration Guide 4.0
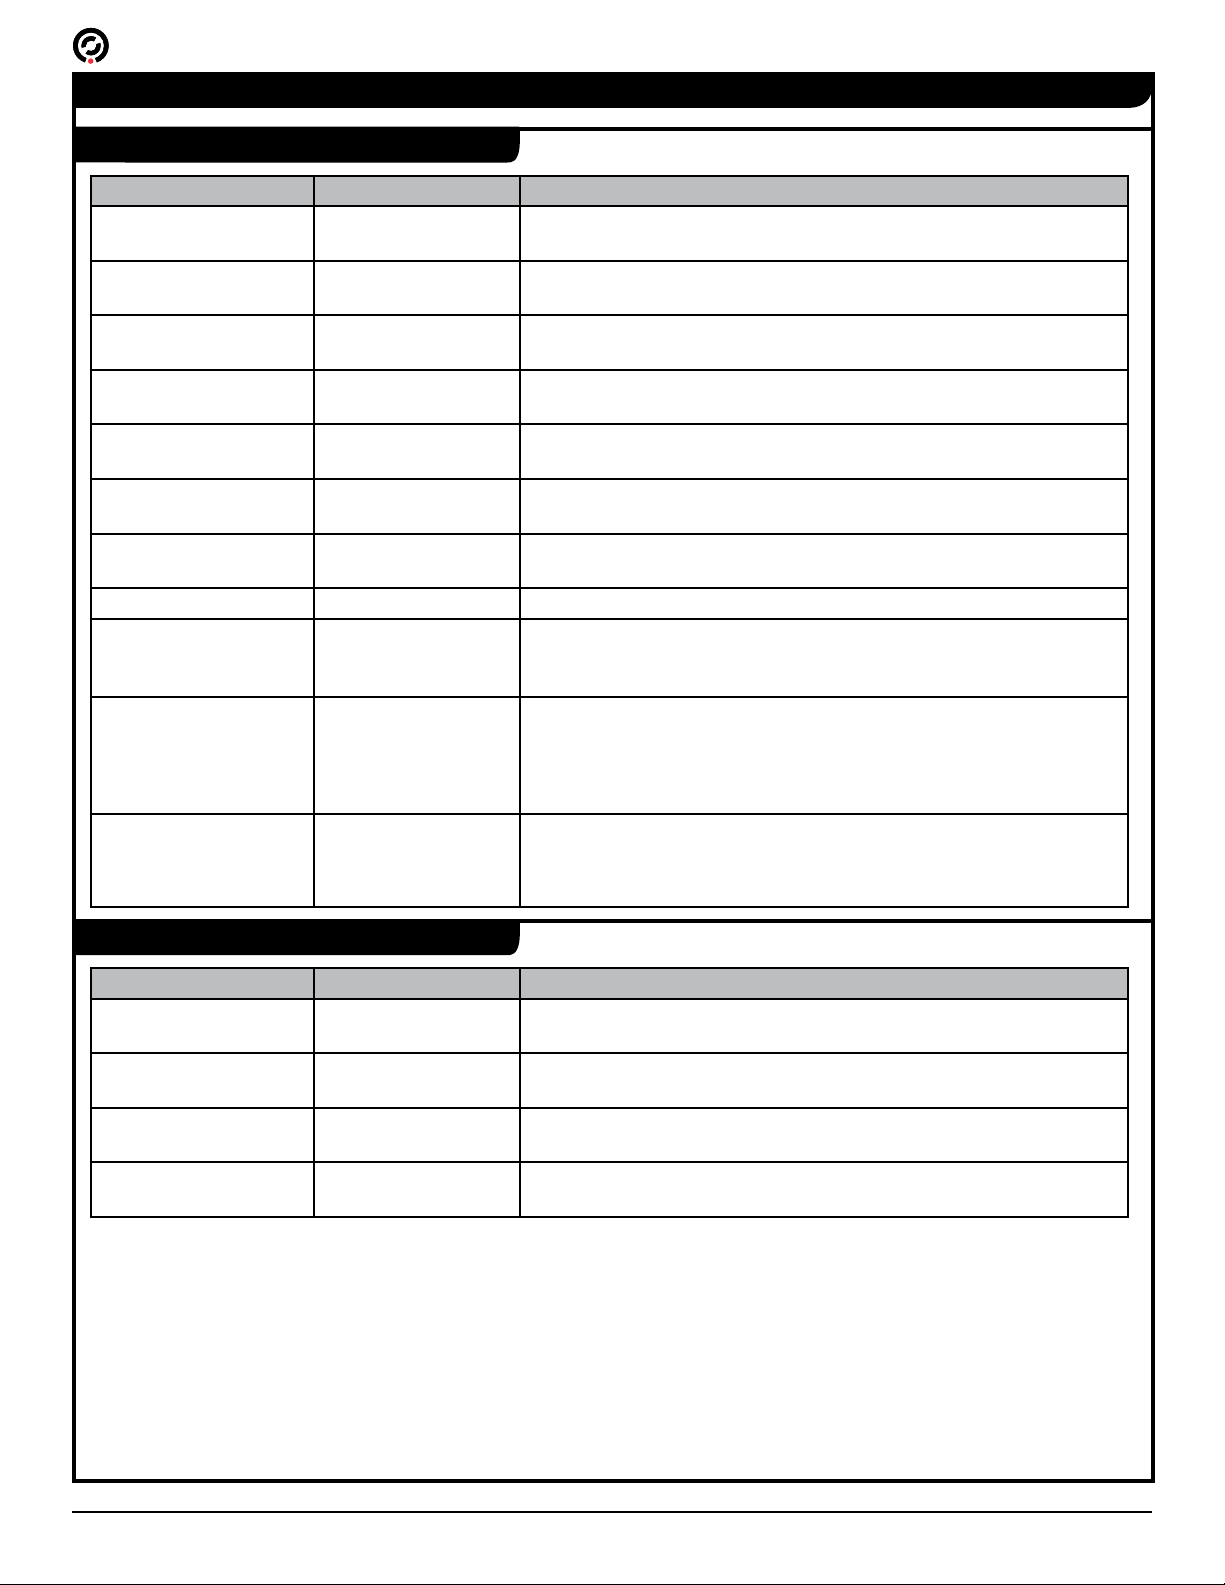
Setting Name Default Description
SCREEN TIMEOUT= 10 Time in seconds that the device will remain idle on
the Operator Menu or Operator Login screens before
it returns to the previous screen. The timeout applies
individually to each screen.
SCREEN REFRESH
DELAY=
5 Time in seconds that the device displays the result of the
most recent scan on the Ticket Validation or Delivery ID
Validation screens.
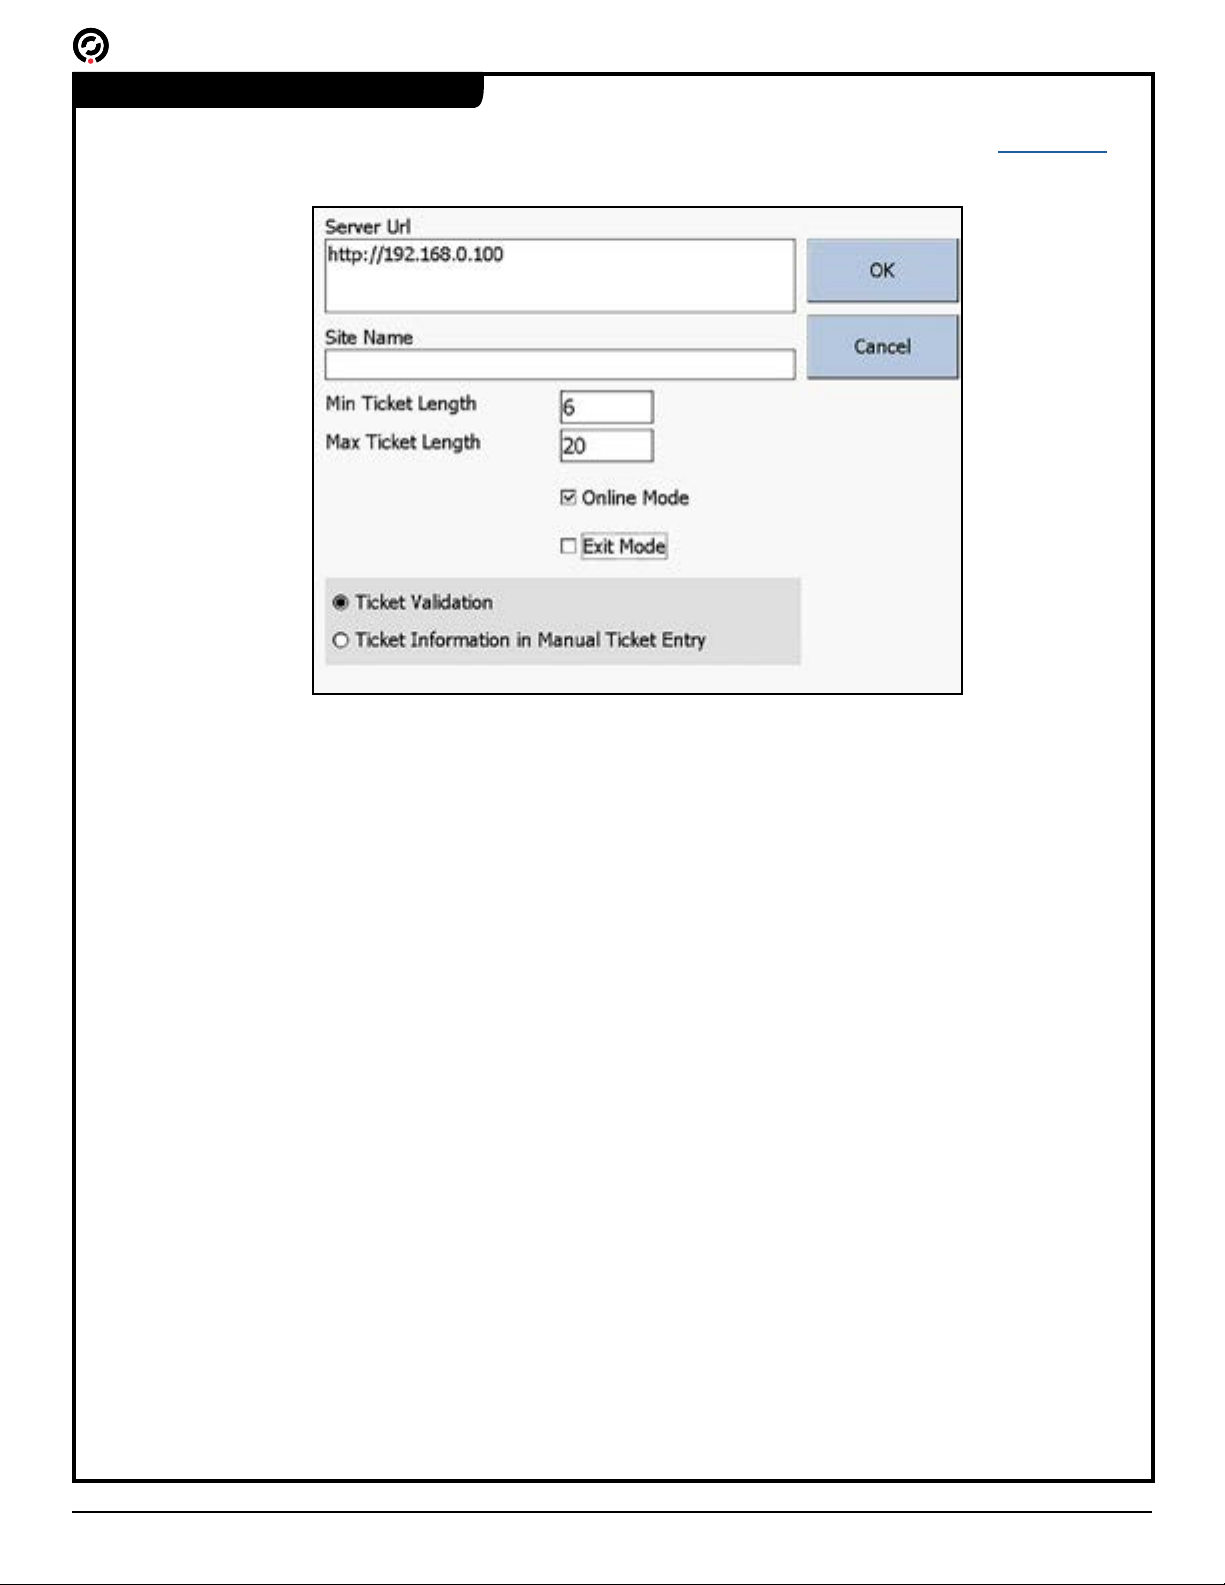
EXIT= False True: The device scans tickets out of the facility. If using
an Exit Mode device with a turnstile, the turnstile GPIO
settings must be set up for exit scanning as well.
False: The device scans tickets into the facility.
DEBUG MODE= False True: Adds a Close button to the Home screen which
closes the TAS12 application and returns to the desktop.
The device also records information about TCP service,
start, stop, and error states. This log le is located in the
Program Files\TAS\DeviceLog.txt le.
False: There is no Close button and the device does not
write to the DeviceLog.txt le.
SAME TICKET
DELAY=
2000 Time in milliseconds the device will wait before
processing a duplicate ticket. For example, a value of
2000 means that the device ignores a ticket’s barcode
for two seconds after it is scanned.
ACTIVATION TIME= 0 Sets the time in milliseconds that the activation signal
(output wires – ACC1) remain in a closed-contact
state. Set this value to 0 to use the value dened in the
GREEN= eld.
If there is a non-zero value in this eld, the contact
signal from the TAS12 unit will remain in the closed
state. If used with a turnstile, the turnstile does not re-
lock if a patron passes through the turnstile before the
conclusion of this time. This setting is meant for use with
non-Alvarado turnstiles and is typically set for 500 (0.5
seconds).
DISPLAY TYPE= 4 Vacuum Fluorescent Display (VFD) display port.
Possible port values:
• 0 – Noritake Itron VFD – Model CU20026SCPB-
T28A
• 2 – ASCII
• 4 – MatrixOrbital
PRINT RECEIPT= True True: When ENHANCED MODE is also set to true,
the device prints receipts when it scans a barcode
with one of the symbologies dened in the RECEIPT
SYMBOLOGY eld.
False: Scanned tickets validate, but do not print.
TRACK= 2 The device reads from this track number when a
magnetic scan media is presented.