""""""
BE VESPA-WISE Q..
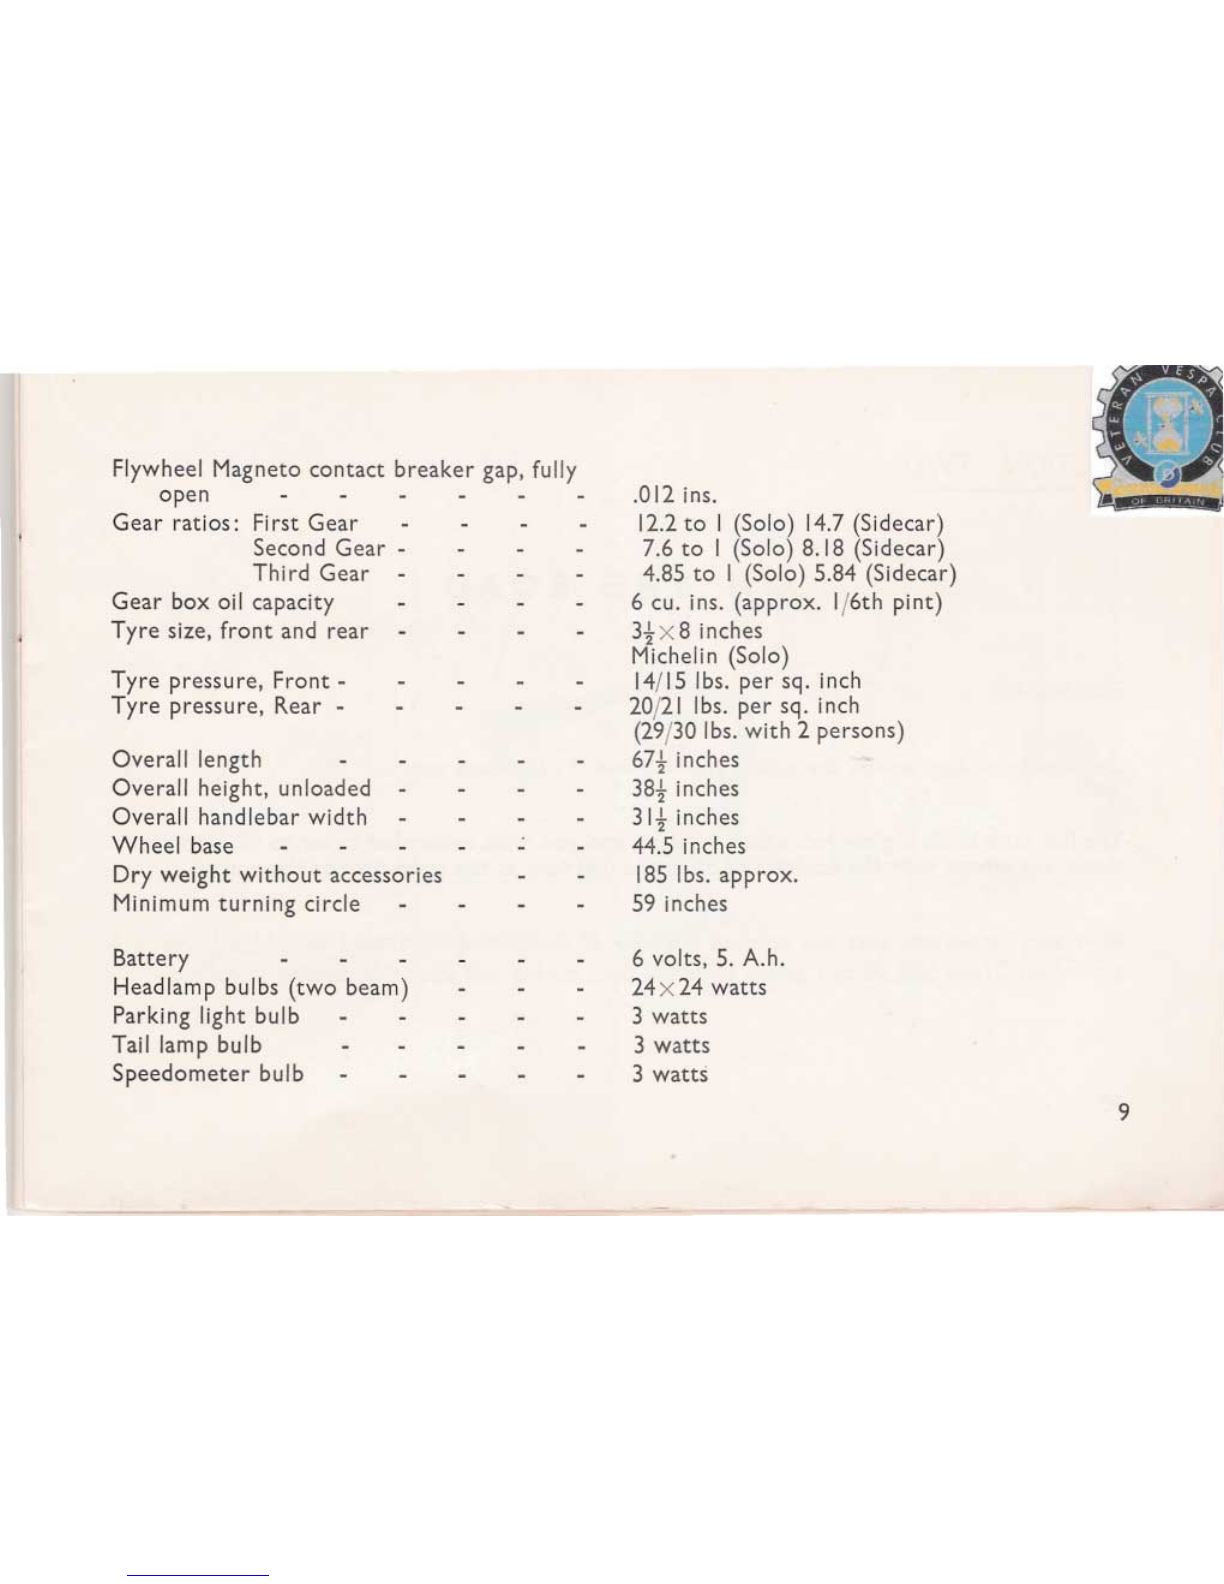
...
..
.
..
-
.
.
.
-
.
..
.. . . .
~
INTRODUCTORYNOTE
Now that you own a DOUGLAS-VESPA,which we trust will afford you great satisfaction, may
we ask you to treat it with pride, and thus, by following a few simple rules of maintenance, help
it to work for youefficiently? .
In this booklet we have tried to set out the principal maintenance operations and procedures
for carrying out minor overhauls. We feel however, that major servicing and particularly
overhauls to the Engine and Gearbox should, whenever possible, be entrusted to Service Agents
who have the necessary facilities to undertake this work.
Whilst the instructions herein are as clear and simple as possible, we realise that at times you
may find yourself in difficulties. We have, therefore, made arrangements with our Service
Agents to handle and answer any queries which may be causing you trouble. They only ask
that you let them have the fullest possible information and details regarding your problem,
with particular mention of the Engine and Frame numbers of your machine.
DOUGLAS (SALES & SERVICE) LTD., KINGSWQOD, BRISTOL.
Telephone 67-1881/9
DireCtors: J. W. G. Kershaw (Chairman). C. McCormack (Managing). J. Grlffith Hall. N. G. Cadman. H. J. Willis. H. R. Ba;ne..
E. F. Brockway. B. C. Owen.
2