Dover OPW 623V Series User manual

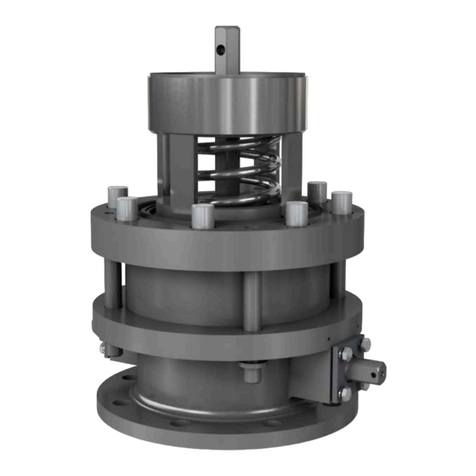
OPW 623V Pressure / Vacuum Vent Valve
Installation and Maintenance Instructions
Please read these warnings and assembly instructions com-
pletely and carefully before starting. Failure to do so may
cause product failure, or result in environmental contami-
nation due to liquid leakage into the soil, creating hazard-
ous spill conditions.
IMPORTANT: The OPW 623V Pressure/Vacuum
vent is preassembled for your convenience and ease of in-
stallation. Check to make sure the unit is intact and undam-
aged and all parts have been supplied. Never substitute
parts for those supplied. Doing so may cause product fail-
ure.
WARNING-DANGER: Using electrically operated equip-
ment near gasoline or gasoline vapors may result in a re or
explosion, causing personal injury and property damage. Be
sure that the working area is free from such hazards, and
always use proper precautions.
Notice: OPW products must be used in compliance with
applicable federal, state, and local laws and regulations.
Product selection should be based on physical specica-
tions and limitations and compatibility with the environ-
ment and material to be handled. All illustrations and spec-
ications in this literature are based on the latest produc-
tion information available at the time of publication. Prices,
materials, and specication are subject to change at any
time, and models may be discontinued at any time, in either
case, without notice or obligation.
OPW STANDARD PRODUCT WARRANTY TAG
Notice: FlexWorks by OPW, Inc., VAPORSAVER™ and all other
OPW products must be used in compliance with all applicable
federal, state, provincial and local laws, rules and regulations.
Product selection is the sole responsibility of the customer
and/or its agents and must be based on physical specica-
tions and limitations, compatibility with the environment and
material to be handled. All illustrations and specications in
this literature are based on the latest production information
available at the time of publication. Prices, materials and
specications are subject to change at any time, and models
may be discontinued at any time, in either case, without no-
tice or obligation.
OPW warrants solely to its customer (the initial purchaser and
any subsequent purchasers within the warranty period) that
the following products sold by OPW will be free from defects
in materials and workmanship under normal use and condi-
tions for the periods indicated:
OPW’s exclusive obligation under this limited warranty is, at
its option, to repair, replace or issue credit (in an amount not
to exceed the list price for the product) for future orders for
any product that may prove defective within the applicable
warranty period. (Parts repaired or replaced under warranty
are subject to prorated warranty coverage for remainder of
the original warranty period). Complete and proper warranty
claim documentation and proof of purchase required. All
warranty claims must be made in writing and delivered dur-
ing the applicable warranty period to OPW at OPW 9393
Princeton-Glendale Road Hamilton, Ohio, USA 45011, Atten-
tion: Customer Service Manager. No products may be re-
turned to OPW without its prior written authority.
This limited warranty shall not apply to any FlexWorks or VA-
PORSAVER™ product unless it is installed by an OPW attested
installer and all required site and warranty registration forms
are completed and received by OPW within 60 days of instal-
lation. This limited warranty also shall not apply to any Flex-
Works, VAPORSAVER™ or other OPW product: unless all pip-
ing connections are installed with a nationally-recognized or
state-approved leak detection device in each tank and dis-
penser sump (which are not for storage and from which all
discharge hydrocarbons must be removed, and the systems
completely cleaned, within 24 hours); unless testable sumps
utilize FlexWorks pipe and access ttings; unless a sump in-
spection log or an EPA recommended/required checklist is
maintained and the results are furnished to OPW upon re-
quest; and unless OPW is notied within 24 hours of any
known or suspected product failure and is provided with un-
PRODUCT WARRANTY PERIOD
FlexWorks Primary Pipe 10 years from date of manufacture
All Products and re-
placement parts in-
stalled in the State of
California
Certied to California
CP-201 and/or CP-206
Standards*
1 year from date of installation
(proof of purchase from certied
contractors/technicians required)
OPW warrants ongoing compliance
with the standards and specica-
tions for the duration of the warran-
ty period required by the State of
California; this limited warranty is
under the condition the equipment
was installed and maintained by
trained and certied contractors/
technicians unless noted in Installa-
tion Manual.
All other Products and
replacement parts
1 year from date of manufacture**
*Products certied to California CP-201 and/or CP-206 Stand-
ards have been factory tested and met all applicable perfor-
mance standards and specications and will have an OPW
registration card enclosed/attached to the product.
restricted access to the product and the site. This limited war-
ranty also shall not apply to any product which has been al-
tered in any way, which has been repaired by anyone other
than a service representative authorized by OPW, or when
failure or defect is due to: improper installation or mainte-
nance (including, without limitation, failure to follow Flex-
Works Quick Reference Manual Installation Guide and all
product warning labels); abuse or misuse; violation of health
or safety requirements; use of another manufacturer’s, or
otherwise unauthorized, substances or components; soil or
other surface or subsurface conditions; or re, ood, storm,
lightning, earthquake, accident or any other conditions,
events or circumstances beyond OPW’s control.
THIS LIMITED WARRANTY IS IN LIEU OF ALL OTHER WARRAN-
TIES, EXPRESS OR IMPLIED, AND ALL OTHER WARRANTIES
INCLUDING, WITHOUT LIMITATION, THE WARRANTIES OF
MERCHANTABILITY AND FITNESS FOR A PARTICULAR PUR-
POSE, ARE HEREBY EXCLUDED.
OPW shall have no other liability whatsoever, whether based
on breach of contract, negligence, gross negligence, strict
liability or any other claim, including, without limitation, for
special, incidental, consequential or exemplary damages or
for the cost of labor, freight, excavation, clean-up, downtime,
removal, reinstallation, loss of prot, or any other cost or
charges. No person or entity is authorized to assume on be-
half of OPW any liability beyond this limited warranty. This
limited warranty is not assignable.
** Date of manufacture on this product is located on the
top of the Valve.
OPW 623V Series Performance Specications:
This Pressure / Vacuum vent has been manufactured and
tested to the following specications: Pressure leak rate not
to exceed 0.05 CFH at 2” W.C. Vacuum leak rate not to ex-
ceed 0.21 CFH at -4” W.C. The cracking pressure to be 2.5” to
6” W.C. and cracking vacuum to be -6” to -10” W.C. Tested
using CARB Test Procedure TP-201.1E, TP-201.1E CERT, or
applicable Phase I Executive Order.
Install vent per requirements in NFPA 30. Vents should be
located so that vapors will not be trapped by eaves or other
obstructions.
Torque Specication:
Vent Assembly 2” NPT, 35 ft-lbs minimum to 55 ft-lbs maxi-
mum.
OPW 623V PRESSURE / VACUUM VENT
VALVE INSTALLATION INSTRUCTIONS:
Step 1:
Deburr and thoroughly clean vent pipe. NOTE: Vent must be
mounted vertically. Apply pipe dope to vent pipe threads.
Pipe dope to be a non-hardening, gasoline resistant pipe
thread seal compound.
Step 2: (See Figure 1)
Screw the vent assembly onto the vent pipe and torque to 35
ft.-lbs minimum to 55 ft-lbs maximum. Use the ats on the
pipe adaptor only, Do not wrench on the composite valve
assembly.
NOTE: NEVER PAINT OR COVER THE VENT
Operation and Maintenance:
Annual maintenance is required to keep the vent operating
satisfactorily. Remove and inspect lter screens – clean or
replace as necessary. Test as necessary.
Upper Screen Maintenance
1. Remove vent top by depressing tabs as indicated in Fig.
2, and lift top upward. Screen will slip up and out of
valve.
2. Clean or replace lter screen (P/N H14895M for 623V)
as necessary and reinstall Fig. 3.
3. Reinstall vent top by reinserting into the body. Be sure
the tabs are inside the valve body, and then rotate top
until the tabs snap into place.
Figure 1
Figure 2

Figure 3
Lower Screen Maintenance
Note: Do not remove the pipe adaptor from the vent pipe to
service the lower lter screen.
1. Remove valve assembly from the pipe adaptor. Grip as-
sembly at the ats just above the pipe adaptor and un-
screw. (Fig. 4)
2. Lift the lter screen out and clean or replace (P/N
C05086M) as necessary.
3. Reinstall lter screen in the pipe adaptor (see Fig. 4 for
orientation).
4. Reinstall valve assembly on pipe adaptor and tighten
until it stops. Do not wrench valve assembly except with
smooth jaw wrench.
Valve Testing
If any issues are seen when testing using CARB Test Proce-
dure TP-201.1E it is recommended to retest the valve using
CARB Test Procedure TP-201.1E CERT.
IMPORTANT: Leave these instructions with Station Oper-
ator.
Product Identication
Manufacture Date “MM / YY”
MM = Month, YY = Year
Figure 4

Part Number: H14898PA
Issue Date: 03-01-16REV E
Supercedes: 02-13-13 REV D
OPW Retail Fueling
3250 US 70 Business West
Smithfield, NC 27577
Customer Service:1-(800) 422-2525
Technical Service and Questions:
1-(877) OPW-TECH
www.opwglobal.com
Notice: OPW products must be used in compliance with applicable federal, state, provincial and local laws and regulations. Product selection should be based on physical specifications and limitations and compatibility with the environment and material to be handled. OPW makes no warranty of
fitness for a particular use. All illustrations and specifications in this literature are based on the latest production information available at the time of publication. Prices, materials and specifications are subject to change at any time, and models may be discontinued at any time, in either case,
without notice or obligation. For complete OPW warranty information, visit our web site at www.opwglobal.com.
Other Dover Control Unit manuals

Dover
Dover PSG Quattroflow Q-Control User manual

Dover
Dover Midland A-547PL Series Instruction manual

Dover
Dover Midland A-718D Series Instruction manual

Dover
Dover PSG BLACKMER AIR VALVE Manual

Dover
Dover MIDLAND A-1402C Series Instruction manual

Dover
Dover Midland A-720 Series Instruction manual

Dover
Dover OPW Midland A-522-C2-CS-SJ-SU-ST Installation instructions
Popular Control Unit manuals by other brands

Agilent Technologies
Agilent Technologies HP E1355A user manual

Kemper
Kemper KHS 686 04 Installation and operating manual

Heritage Bathrooms
Heritage Bathrooms SDC05 Installation instructions and user guide

Sony
Sony CCU-TX7 Service manual

Pentek
Pentek 71620 operating manual

Parker
Parker PHD Series user guide