manuals.online logo
Brands
  1. Home
  2. •
  3. Brands
  4. •
  5. Draper
  6. •
  7. Projection Screen
  8. •
  9. Draper M Series Manual

Draper M Series Manual

Installation/Operating Instructions
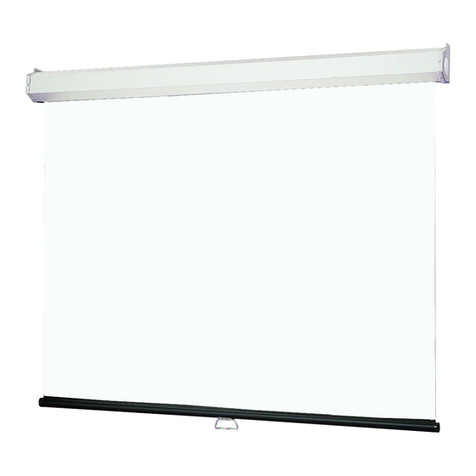
Access/Series M Projection Screen by Draper
Caution
➀Read instructions through completely before proceeding.
➁Follow instructions carefully. Installation contrary to instructions
invalidates warranty.
➂Entire bottom of screen case should be unobstructed to permit access
to bottom panel for servicing.
➃Screen should be installed level (using a carpenter’s level).
➄Nothing should be fastened to screen dowel or viewing surface.
NOTE: Screen has been thoroughly inspected and tested at factory and
found to be operating properly prior to shipment.
Hanging Screen
When locating viewing surface and checking clearance for screen’s operation,
remember surface is centered in the length of the case. Regardless of
mounting method used, the following points apply:
➀Mounting brackets are packed separately in carton. Engage each bracket
with top of housing as shown below and tighten set screws. A bracket
should be within 18" of each end of screen case. Brackets can be
removed and case mounted with lag screws through top of case (holes
drilled on site).
➁Screen should be positively and securely supported so that vibration or
even abusive pulling on viewing surface will not weaken installation.
➂Installer must insure that fasteners used are of adequate strength and
suitable for the mounting surface chosen. Supporting hardware (chains,
cables, rods, etc.) must be essentially vertical.
➃Entire bottom of case must be readily accessible after installation is
complete.
➄Front, back and top of case must be straight—not forced to warp or bow.
➅If case is painted on location, removal of roller/fabric assembly is recom-
mended prior to painting. If not removed, slot on bottom of case should be
shielded to protect viewing surface from paint splatters or overspray.
Copyright © 2002 Draper Inc. Form AccessM_Inst02 Printed in U.S.A.
Bottom Access Panel Installation/Removal
Bottom access panel hooks over the lower inside edge of the screen housing
and then is pivoted downward until the engagement brackets on each end of
the bottom panel click into place with the ball detents on each endcap. Make
sure bottom access panel clicks in place at each end of its length.
With bottom access panel
angled up approx. 20 degrees,
engage hook on the panel
with lip of the housing
Using the hook and lip as a pivot,
pull the panel downward until the
engagement brackets click into
place with the ball detent
on each endcap
Engagement bracket
(one on each end of the
bottom access panel)
Remove bottom access panel by pushing up at each corner of panel adjacent
to slot in bottom of the housing.
With bottom access panel angled up approximately at 20° it can be lifted off of
the lip of the housing and then lowered out of the housing completely.
Bottom flange of Access housing
Bottom access panel pushup
points for panel removal
Access case as seen from below
Spring Roller/Fabric Installation
The bottom access panel must be removed first.
The spear end mounting bracket has rectangular openings for accepting roller
spear. Back out the four set screws in bracket until they are flush with top side
of bracket.
To engage the spear end bracket flange above the two channels in the top of
the screen housing, rotate the bracket approximately 45° counterclockwise to
allow the top surface of the motor bracket to rest flat against the top inside of
the housing. Rotating the bracket clockwise until it is engaged with the
channels, slide it along the length of the housing toward the left end of
housing, leaving approximately
3
/
4
" clearance between bracket and endcap.
Tighten the four set screws on the bracket flange using
1
/
8
" hex key.
Engage the idler end bracket (nylon bushing) in the same manner as the
spear end bracket and slide it toward the opposite end of the screen housing.
Do not tighten the set screws on this bracket until the roller/fabric assembly is
installed.
65/8"
77/16"
8" 1"
¾"
3
7
/
16
"
1
3
/
16
"
Threaded rod
by others
Access/Series M by Draper Page 2 of 2
Locate the roller/fabric assembly and remove the retaining clip and flat washer
from the idler end pin, and remove retaining clip from the spear. Remove
brackets from roller.
NOTE: This may require two people to perform safely.
Raise the roller/
fabric assembly up into the screen housing and engage the spear of the roller
completely into the spear mounting bracket. If roller is 1
3
/
4
" diameter, use slot
closest to the edge of the bracket. If roller is 2
1
/
4
" or 3" diameter, use the
center slot.
Install the retaining clip on the spear, locking spear and bracket together.
While supporting the idler end of the roller, slide the idler end mounting
bracket toward the roller. Insert the roller pin into the nylon bushing on the
idler end mounting bracket.
The roller idler pin needs to go through the idler bracket far enough to allow
the washer and retaining clip to be reinstalled on the pin. Failure to replace
the washer and retaining clip as shown could result in the separation of the
roller from the brackets.
Securely tighten the four set screws on the idler end mounting bracket.
Reinstall the bottom access panel as previously described.
Spring Roller/Fabric Removal
Reverse the instructions above “Spring Roller/Fabric Installation” for removal
of the unit.
If you encounter any difficulties installing or servicing your Access/Series M
screen, call your dealer or Draper, Inc., in Spiceland, Indiana, (765) 987-7999;
fax (765) 987-7142; or e-mail
[email protected].
Case Dimensions
Mounting hardware supplied by others
Engagement bracket (one on each end
of the bottom access panel) clicks into
place with the ball detent on each endcap.
1
5/32"
4
23
/
32
"
2
1
/
8
"
3" Viewing
Surface
7 7/16"
8"
Overall
flange width
Access
panel
65/8"
Overall case length
33/4"
3
7
/
16
"
13/16"
Mounting brackets slide
left and right as needed.
Use this slot on 2¼" and 3" dia. rollers
Use this slot on 1¾" dia. roller
Retaining
clip
Roller pin
Retaining clip
Washer
Nylon bushing
Roller mtg. brkt.
Roller

This manual suits for next models

1

Other Draper Projection Screen manuals

Draper M Series User manual

Draper

Draper M Series User manual

Draper Artisan Series Manual

Draper

Draper Artisan Series Manual

Draper Targa Manual

Draper

Draper Targa Manual

Draper Silhouette C Series Manual

Draper

Draper Silhouette C Series Manual

Draper Paragon V Series Manual

Draper

Draper Paragon V Series Manual

Draper Salara User manual

Draper

Draper Salara User manual

Draper Paragon User manual

Draper

Draper Paragon User manual

Draper Signature/Series V Manual

Draper

Draper Signature/Series V Manual

Draper Targa Manual

Draper

Draper Targa Manual

Draper Targa 220V Manual

Draper

Draper Targa 220V Manual

Draper 220V Access Electric Projection Screen User manual

Draper

Draper 220V Access Electric Projection Screen User manual

Draper Envoy Manual

Draper

Draper Envoy Manual

Draper Signature V Series Manual

Draper

Draper Signature V Series Manual

Draper Ultimate Access V Installation instructions

Draper

Draper Ultimate Access V Installation instructions

Draper 220V Signature/Series E Manual

Draper

Draper 220V Signature/Series E Manual

Draper Onyx User manual

Draper

Draper Onyx User manual

Draper MC1 User manual

Draper

Draper MC1 User manual

Draper Access XL Manual

Draper

Draper Access XL Manual

Draper Silhouette/Series V Manual

Draper

Draper Silhouette/Series V Manual

Draper Envoy Manual

Draper

Draper Envoy Manual

Draper Envoy Manual

Draper

Draper Envoy Manual

Draper Targa Manual

Draper

Draper Targa Manual

Draper 220V Envoy Manual

Draper

Draper 220V Envoy Manual

Draper Nocturne+E Programming manual

Draper

Draper Nocturne+E Programming manual

Popular Projection Screen manuals by other brands

Celexon Chroma Key user manual

Celexon

Celexon Chroma Key user manual

Euroscreen Diplomat Electric manual

Euroscreen

Euroscreen Diplomat Electric manual

DMT Fast-Setup Screen Pro manual

DMT

DMT Fast-Setup Screen Pro manual

Elite Screens M85XWS1-SRM manual

Elite Screens

Elite Screens M85XWS1-SRM manual

Elite Screens AR120WH2 user guide

Elite Screens

Elite Screens AR120WH2 user guide

Grandview LF-PU Series installation guide

Grandview

Grandview LF-PU Series installation guide

Da-Lite Polacoat Flex Plex Instruction book

Da-Lite

Da-Lite Polacoat Flex Plex Instruction book

Andersen LuminAire installation guide

Andersen

Andersen LuminAire installation guide

Kohler Aerie K-12345M Installation and care guide

Kohler

Kohler Aerie K-12345M Installation and care guide

Da-Lite DESIGNER DA-TAB ELECTROL Instruction book

Da-Lite

Da-Lite DESIGNER DA-TAB ELECTROL Instruction book

Da-Lite MULTI-MASK IMAGER Instruction book

Da-Lite

Da-Lite MULTI-MASK IMAGER Instruction book

Da-Lite PROFESSIONAL ELECTROL Instruction book

Da-Lite

Da-Lite PROFESSIONAL ELECTROL Instruction book

Da-Lite ADVANTAGE DELUXE ELECTROL specification

Da-Lite

Da-Lite ADVANTAGE DELUXE ELECTROL specification

REMACO TECHNOLOGIES PRO-L3030 manual

REMACO TECHNOLOGIES

REMACO TECHNOLOGIES PRO-L3030 manual

FART PRODUKT Standard SCREEN Installation instruction

FART PRODUKT

FART PRODUKT Standard SCREEN Installation instruction

Da-Lite DESIGNER ELECTROL Instruction book

Da-Lite

Da-Lite DESIGNER ELECTROL Instruction book

Elite Screens M170XWS1 user guide

Elite Screens

Elite Screens M170XWS1 user guide

SCREENLINE LODO instructions

SCREENLINE

SCREENLINE LODO instructions

manuals.online logo
manuals.online logoBrands
  • About & Mission
  • Contact us
  • Privacy Policy
  • Terms and Conditions

Copyright 2025 Manuals.Online. All Rights Reserved.