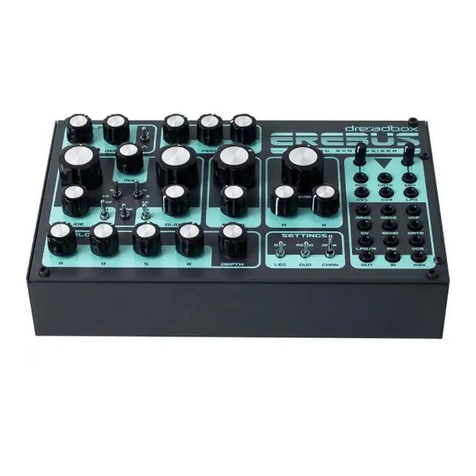
Dreadbox Erebus V3 User manual

Dreadbox Erebus V3 Ctrlr panel documentation and instructions
V2.0–2021-11-01

Dreadbox Erebus V3 Ctrlr panel documentation and instructions v2.0
sunny.synths@gmail.com Page 2 of 49
Introduction
Hi! Thanks for having purchased this Ctrlr Dreadbox Erebus V3 panel!
As you know, the Erebus (as the Nyx) are synths to be played and tweaked rather being used more
statically. They don’t have presets but it is always nice to keep a track of the settings used for a nice
sound and it is even nicer to have a track on the ways of using a particular sound.
Therefore, you will have the possibility to map your settings but also to indicate step by step how to
use your patch (up to 15 steps). Should this not be enough, you can also automatically listen to an
audio file associated to your patch.
The panel is a pure patch mapper as the Dreadbox Erebus V3 does not support the load/save of
programs or the manipulation of its program parameters by Midi NRPN/CC/Sysex messages.
It will support you in saving and retrieving Erebus V3 patches on your PC but gives you also the
possibility to exchange them with other users as they are stored as sysex files.
The look and feel philosophy has been respected as much as possible.
Of course it would also be stupid to not benefit of the computer possibilities. Therefore, you also get
a display of the current parameters value, a graphic display of the envelopes, the ability to store and
indicate the input/output patches, etc…
if you find one so they can be corrected as soon as possible.
the panel.
By that, please have a look on this manual to have an idea of the way of using it and its features.
Enjoy making music with your Erebus V3 and have fun!
Sunny Synths

Dreadbox Erebus V3 Ctrlr panel documentation and instructions v2.0
sunny.synths@gmail.com Page 3 of 49
About this v2.0 version
This 2.0 version provides the following changes to the panel:
─Patch cables drawing with transparency setting
─Ability to switch between full cables or cable plugs
─Support for double inputs / double outputs
─Added the display of Patch From and To changes in the LCD
─Remembers the last file saved path and name so it is used by default at next Save
─The previous Author is now kept when loading a new Init program
─Added Load OK Confirm switch
─Added No program load at panel load switch
─Added Display info: differences only (with an Init program) switch
─Added Welcome message display switch
─Added ability to play AAC, MP3 and AIF files on MacOs
─Patch cables are now restored at panel opening when the user selects No load at panel load
─All labels (Name, LCDs, Synth1/2, FX...) are now restored when user selects No load at panel load
─Consequence of this correction/adaptation: you can now change presets in DAW with correct
Name, Description, LCDs, cables... which was not working previously
─CC mapping of all buttons in order to use the panel with a controller
─VST and AU versions
Information for the users of a previous version
As some images have been replaced by new ones in v2.0, you need to delete the existing temporary
“Dreadbox Erebus V3 v10” folder so that it will be replaced by the new one.
You may have to redo your Midi settings so take note of them before deleting the folder (or copy the
Dreadbox Erebus V3 v10.settings file to a safe place and put it back when the temp directory is
recreated).
On Windows, the temporary folder Dreadbox Erebus V3 v10 is located in the normally hidden
directory C:\Users\your_username\AppData\Roaming. You can display the AppData folder by
selecting to display the hidden elements in the Windows Explorer ribbon under Display.
On MacOS, the temporary folder Dreadbox Erebus V3 v10 is located in your personal
Library/Preferences folder. This is also a hidden folder that you can see/reach by using the Finder and
clicking on Go while pressing the Option (Alt) key.

Dreadbox Erebus V3 Ctrlr panel documentation and instructions v2.0
sunny.synths@gmail.com Page 4 of 49
Table of Contents
Introduction................................................................................................................................. 2
About this v2.0 version ............................................................................................................. 3
Installation and features............................................................................................................... 6
Installation of the Ctrlr panel .............................................................................................................6
Features .............................................................................................................................................7
Way of working............................................................................................................................ 8
Using the buttons and modifying parameters................................................................................8
Quick reset to default value ...........................................................................................................8
Opening and closing the panel .......................................................................................................9
Top panel area..............................................................................................................................10
Loading a Dreadbox Erebus V3 program ......................................................................................11
Saving a Dreadbox Erebus V3 program ........................................................................................12
Program Init..................................................................................................................................13
Program Rename..........................................................................................................................14
Dreadbox Erebus V3 tab...............................................................................................................15
Envelopes and Patches tab...........................................................................................................17
Library and Info tab ......................................................................................................................21
Patch sheet tab.............................................................................................................................23
Installing and using the Erebus V3 panel as plugin....................................................................... 24
Installation....................................................................................................................................24
Tests and identified limitations ....................................................................................................25
Cubase..........................................................................................................................................26
Cakewalk by Bandlab....................................................................................................................30
Reaper..........................................................................................................................................33
Ableton.........................................................................................................................................37
Studio One....................................................................................................................................39
Logic Pro X....................................................................................................................................41
Using a controller to move the buttons....................................................................................... 44
The main Ctrlr menus ................................................................................................................. 45
Appendix ................................................................................................................................... 46
Version history .................................................................................................................................46
Erebus V3 information .....................................................................................................................46

Dreadbox Erebus V3 Ctrlr panel documentation and instructions v2.0
sunny.synths@gmail.com Page 6 of 49
Installation and features
Installation of the Ctrlr panel
The panel is provided as a compressed .zip file containing:
─the Dreadbox Erebus V3 panel as an .exe file on Windows PC
─the Dreadbox Erebus V3 panel as an .app file on Mac OS (zip folder to be uncompressed)
─the Dreadbox Erebus V3 panel as VST 32 bits and 64 bits for Windows PC
─the Dreadbox Erebus V3 panel as VST and AU plugins for Mac OS
─this manual as PDF
─a folder containing some presets and wav files found on internet
For the PC standalone version, decompress the zip file anywhere on your PC then copy the Dreadbox
Erebus V3.exe file in some directory and launch it. The file may be scanned by your antivirus program
(Avast on my computer) and should return no issue. If any, they are false and probably due to the
fact that the program is not officially referenced.
For the Mac OS standalone version, decompress the zip file anywhere on your Mac then decompress
the Dreadbox Erebus V3.app.zip. You may have to open the Dreadbox Erebus V3.app file using
Ctrl+click as it may not be recognized by the OS.
The program will directly display the Ctrlr window with the Erebus V3 panel displaying its main tab.
The panel will most probably not be responding after the initial installation. Simply close the
program and restart it to solve the issue.
For the installation of the plugins, please refer to Installing and using the Erebus panel as plugin on
page 24 further in this manual.

Dreadbox Erebus V3 Ctrlr panel documentation and instructions v2.0
sunny.synths@gmail.com Page 7 of 49
Features
You will find the following features in the Dreadbox Erebus V3 panel:
─Dreadbox Erebus V3 interface with similar way of working as actual synthesizer.
─Top row of support “screens” with old look
─Visual feedback by using “LED” ring buttons and indication of the value (on change or on click)
─Envelopes graphs handled by mouse or classical ADSR rotary encoders
─Load / Save programs from individual .syx files
─Load / Save as DAW presets
─Easy program renaming
─Display and export of program parameters as text file
─Ability to describe 9 input/output colored patch cables with different sources/destinations
─Patch cables drawing directly on main panel with adjustable transparency level
─Ability to display full cables or cable plugs
─Extra input/output patch points from/to external synths, sequencer and FX chain
─Programs have a name, author, save date and description. They can be associated to a category
─Browser of the files on the disk
─Patch sheet tab with patch sheet for Dreadbox Erebus V3 and other gear (external
synths/sequencer/FX)
─Automatic reading of wav/aif*/aac*/mp3* files associated to a patch (*MacOS only)
─Manual/Automatic reading of any wav/aif*/aac*/mp3* file (*MacOS only)
─All buttons associated to a Midi CC controller number so you can adjust them from a hardware
controller (still no impact on the synth of course and unfortunately).

Dreadbox Erebus V3 Ctrlr panel documentation and instructions v2.0
sunny.synths@gmail.com Page 8 of 49
Way of working
As you will discover by yourself, the usage of the panel is straightforward but there are anyway
different specific things you should know…
Using the buttons and modifying parameters
You modify parameters using rotary encoders by clicking on the button then moving the mouse
cursor vertically up or down.
You can also modify any rotary encoder based parameter by hovering the mouse on the button then
using the mouse scroll wheel.
Switches are handled by clicking on them. They will take successive positions as actual switches.
Momentary push buttons are activated by simply clicking on them (what a surprise…). They will
momentary flash.
Parameters presented as pulldowns are modified by opening the pulldown and selecting one of the
pull-down items.
Quick reset to default value
Most of the rotary encoders have default values set and you can quickly revert to this preset default
value by double-clicking on the button. This is also applicable for the sliders as the Osc Mix.

Dreadbox Erebus V3 Ctrlr panel documentation and instructions v2.0
sunny.synths@gmail.com Page 9 of 49
Opening and closing the panel
When closing the panel (either by using File –Quit or by clicking on the upper right red cross) the file
of the last program loaded or saved is stored.
When opening the panel, it is checked if the last file used still exists (could have been renamed or
moved or deleted).
When no file is found, the Init program is loaded (in the same way as when loading the panel for the
first time (unless the button No program load at panel load in the Envelopes and Patches tab is ON).
When the last saved file is found, the panel is restored so you can continue your work where you
saved it (unless the button No program load at panel load in the Envelopes and Patches tab is ON).
The same is done with the root folder of the File browser (see Library and Info tab on p21).

Dreadbox Erebus V3 Ctrlr panel documentation and instructions v2.0
sunny.synths@gmail.com Page 10 of 49
Top panel area
In the top panel area you find 4 feedback “screens”, 4 buttons and 4 tabs:
─The first screen displays the name of the current program
─The second screen displays the category of the current program
─The third one indicates the parameter currently modified and its value
─The fourth one displays the latest sysex file loaded, its author and the save date
─The Load button allows loading a sysex file from disk
─The Save button saves the current program to a sysex file on disk
─The Init button reset all parameters to a Basic program
─The Rename button allows renaming the current program
─The Dreadbox Erebus V3 tab displays the synth main panel including an extension for 12 patch
points related to external synths, a sequencer and an FX chain
─The Envelopes and Patches tab displays the envelopes as graphs, allows the registration of 9
different input/output patches, the identification of two external synths, one FX chain and allows
modifying the Category, the Author and the Description of the current program. It is also there
that you will find the step by step usage of a patch.
─The Library and Info tab provides the file browser that allows the selection of sysex files or the
ability to listen to wav files, the display and the export of the parameters of the current program
as text file and gives About info of the panel. It is also here that you will find the manual panel
zoom that is memorized.
─The Patch sheet tab displays automatically the Dreadbox Erebus V3 patch sheet with all
parameter values (as in the manual) but with the addition of author, date, external synths and FX
chain names and 12 external input/output connections

Dreadbox Erebus V3 Ctrlr panel documentation and instructions v2.0
sunny.synths@gmail.com Page 11 of 49
Loading a Dreadbox Erebus V3 program
The panel loads and saves the program parameters as a 1500 bytes sysex file (.syx) from/to your
computer.
Clicking the Load button opens a classical Open file dialog where you can select the file to load. An
internal check is done to verify that the file is compatible with the Dreadbox Erebus V3 panel. The
parameters are loaded, the top screen is showing the name of the file, the author and the saved date
and a confirmation dialog is shown.

Dreadbox Erebus V3 Ctrlr panel documentation and instructions v2.0
sunny.synths@gmail.com Page 12 of 49
Saving a Dreadbox Erebus V3 program
The panel loads and saves the program parameters as a 1500 bytes sysex file (.syx) from/to your
computer.
Clicking the Save button opens a classical Save file dialog where you can enter the name of the file to
save. At this stage it is needed to select an existing file if you want to overwrite it. In that case, you
will get a confirmation message.
Once the parameters are saved, the top of the screen displays the name of the file, the author (as set
in the Envelopes and Patches tab) and the saved date (thus, the current date) in ISO format yyyy-mm-
dd. A confirmation dialog is also shown.
The panel stays on the current tab after a Save is done.

Dreadbox Erebus V3 Ctrlr panel documentation and instructions v2.0
sunny.synths@gmail.com Page 13 of 49
Program Init
Clicking the Init button loads the parameters for a Basic program that has the following
characteristics:
─All parameters at 0 or OFF except
OSC Mix: 50%-50%
Osc1, Osc2 and Osc3 Tune = 0 semitones
Osc3 Fine = 0 semitones

Dreadbox Erebus V3 Ctrlr panel documentation and instructions v2.0
sunny.synths@gmail.com Page 14 of 49
Program Rename
Clicking the Rename button opens a popup window where you can modify the name of the program.
The name should be maximum 20 characters long (will be truncated if longer).
Please note that the program name can (of course) be different than the file name the program is
saved in.

Dreadbox Erebus V3 Ctrlr panel documentation and instructions v2.0
sunny.synths@gmail.com Page 15 of 49
Dreadbox Erebus V3 tab
In the Dreadbox Erebus V3 tab, you have access to the same parameters as on the actual
synthesizer.
Please refer to the Dreadbox Erebus V3 user manual (https://www.dreadbox-fx.com/erebus3/) for
the explanations of each encoder/button.
The third top screen is showing the name and the value of the parameter you are modifying.
Doing a single click on any rotary encoder is displaying its name and current value without that you
need to modify it.
Clicking on a slider position is directly moving the slider to that position.
Modifying the ADSR encoders of the envelopes is setting identical encoders/buttons in the Envelopes
and Patches tab and adapting the corresponding envelope graph accordingly.
Patch cables drawing
In this tab you can also draw your patch cables.

Dreadbox Erebus V3 Ctrlr panel documentation and instructions v2.0
sunny.synths@gmail.com Page 16 of 49
To draw a patch cable, click on an output patch point, keep the mouse button pressed, drag the cable
to a patch input point then release the mouse button.
Depending on the state of Cables button in the Envelopes and Patches tab, either full cables (Cables
button ON) or cable plugs (Cables button OFF) will be displayed.
You will find 12 additional input/output patch points (CV/Gate for 2 synthesizers, 2 sequencer tracks
and one FX chain). This is allowing you to also indicate when some external gear is also part of a
certain patch.
As soon as you are using the same input or the same output twice, the Cables button will be
locked ON and only full cables will be displayed.
All the patch cables are listed and can be further managed in the Envelopes and Patches tab.
It is always the next free cable that is selected automatically.
You delete an existing cable simply by re-drawing it from its output to its input.
In the Envelopes and Patches tab you can also adjust the transparency level of the cables.

Dreadbox Erebus V3 Ctrlr panel documentation and instructions v2.0
sunny.synths@gmail.com Page 17 of 49
Envelopes and Patches tab
In the Envelopes and Patches tab, you can:
─adjust the envelopes either with encoders or by moving the anchors of the graphs
─set/indicate up to 9 from/to patches
─delete a single patch cable or all at once
─switch between the display of patch cables or just cable plugs
─adapt the name of the external synths that could be connected to your Erebus
─adapt the name of the FX chain that could be connected to your Erebus
─adapt the current program category, author and description (click on the current description to
edit it)
─manage the step by step usage description
─adjust some panel settings
Envelope shapes
You can modify the envelope shape by either turning the ADSR encoders or by using the mouse and
moving the anchors on the graphs either vertically or horizontally.
When moving the anchors, the corresponding ADSR encoders will also turn and the parameter name
and value will be displayed in the screen of the top panel area.

Dreadbox Erebus V3 Ctrlr panel documentation and instructions v2.0
sunny.synths@gmail.com Page 18 of 49
Patch points
You modify the from/to patches as follows:
Clicking anywhere on a patch line (label, input, output, blank space) will select the patch to be
modified and display its values in the pull-downs. You modify the “From” source and/or “To”
destination and press the Proceed button to make the change.
You can also directly select a patch cable in the Patch pull-down then modify the From/To and press
Proceed.
Use the Unpatch button to delete a patch cable or the Unpatch All button to delete all of them at
once.
Use the Cables button to switch the display on the main panel between patch cables and just cable
plugs. This button will be locked on Cables display as soon as the same input or output is used two
times.
Use the Cables transparency rotary to set the transparency of the patch cables (not the end plugs).
Patches are numbered 1 to 9 and have a color assigned to them. When a from/to patch is set in the
Envelopes and Patches tab, corresponding patch cables are displayed on the main Erebus tab and
corresponding colored numbered circles are displayed on the patch sheet.
Numbered circles are used to help colorblind people.

Dreadbox Erebus V3 Ctrlr panel documentation and instructions v2.0
sunny.synths@gmail.com Page 19 of 49
Available “From” sources are the output patch points of the synthesizer plus a few additional
external ones: "Not connected", "Gate output", "Mod Wheel Out", "Filter Envelope Out", "Noise
output", "CV output", "LFO output", "Osc3 output", "Clock output", "VCA Plus output", "VCA Min
output", "S&H output", "Patch X as output", "Patch Y as output", "Patch Z as output ", "Synth1 CV
output", "Synth2 CV output", "Synth1 Gate output", "Synth2 Gate output", "Sequencer track 1",
"Sequencer track 2", "FX output"
Available “To” destinations are the input patch points of the synthesizer plus a few additional
external ones: "Not connected", "Osc1 CV input", "Osc2 CV input", "Osc3 CV input", "CV All OSC
input", "Osc1 PW input", "Echo input", "Osc3 PW input", "Gate input", "Cutoff input", "Resonance
input", "In/Filter input", "In/Amp input", "Clock Rate input", "VCA input", "VCA CV input", "S&H
input”, “S&H Clock input", "SW Clock input", "Mult1 input", "Mult2 input", "Mult3 input", "Patch X as
input", "Patch Y as input", "Patch Z as input", "Synth1 CV input", "Synth2 CV input", "Synth1 Gate
input", "Synth2 Gate input", “FX input”
Current Program
Clicking the Author button opens a popup window where you can modify the name of the author of
the patch. The name should be maximum 15 characters long (will be truncated if longer). If you leave
the Author name empty then a “?“ is displayed.
Clicking the Synth1 button opens a popup window where you can modify the name of a synth
connected to your Erebus. The name should be maximum 11 characters long (will be truncated if
longer). If you leave the Synth1 name empty then a “-“ is displayed.
Clicking the Synth2 button opens a popup window where you can modify the name of a second synth
connected to your Erebus. The name should be maximum 11 characters long (will be truncated if
longer). If you leave the Synth2 name empty then a “-“ is displayed.
If you leave the Synth2 name empty then a “-“ is displayed.
Clicking the FX button opens a popup window where you can modify the name of a FX chain
connected to your Erebus. The name should be 13 characters maximum long (will be truncated if
longer). If you leave the FX name empty then a “-“is displayed.
Usage steps
You can manage describe the usage of the program by using up to 15 usage steps. For example:
gradually increase resonance; increase echo time; increase amp release; decrease cutoff… The idea is
to be able to illustrate the usage of your sound in a more live environment.

Dreadbox Erebus V3 Ctrlr panel documentation and instructions v2.0
sunny.synths@gmail.com Page 20 of 49
The actions to use the usage steps are:
─double-click on a step line to input or modify a step
─Use Up and Down buttons to move a step around
─Use Clear or the Delete key to erase a step
─Use Clear all to erase all steps
Panel settings
Load OK Confirm: by switching this OFF, there is no confirmation popup shown after loading a
program. This avoids clicking on OK.
No load at panel load: by switching this ON, when re-opening the panel, the panel will be left as you
closed it in the previous session. By switching this OFF, the last saved file is restored if found (or an
Init program loaded if not found).
Welcome message: displays the Welcome message or not when opening the panel.
Table of contents
Other Dreadbox Synthesizer manuals

Dreadbox
Dreadbox Erebus User manual

Dreadbox
Dreadbox Nymphes User manual

Dreadbox
Dreadbox HADES User manual

Dreadbox
Dreadbox Erebus User manual

Dreadbox
Dreadbox ANTIPHON User manual

Dreadbox
Dreadbox TYPHON User manual

Dreadbox
Dreadbox DYSMETRIA Instructions for use

Dreadbox
Dreadbox HADES User manual

Dreadbox
Dreadbox Murmux Initiate User manual

Dreadbox
Dreadbox Erebus User manual