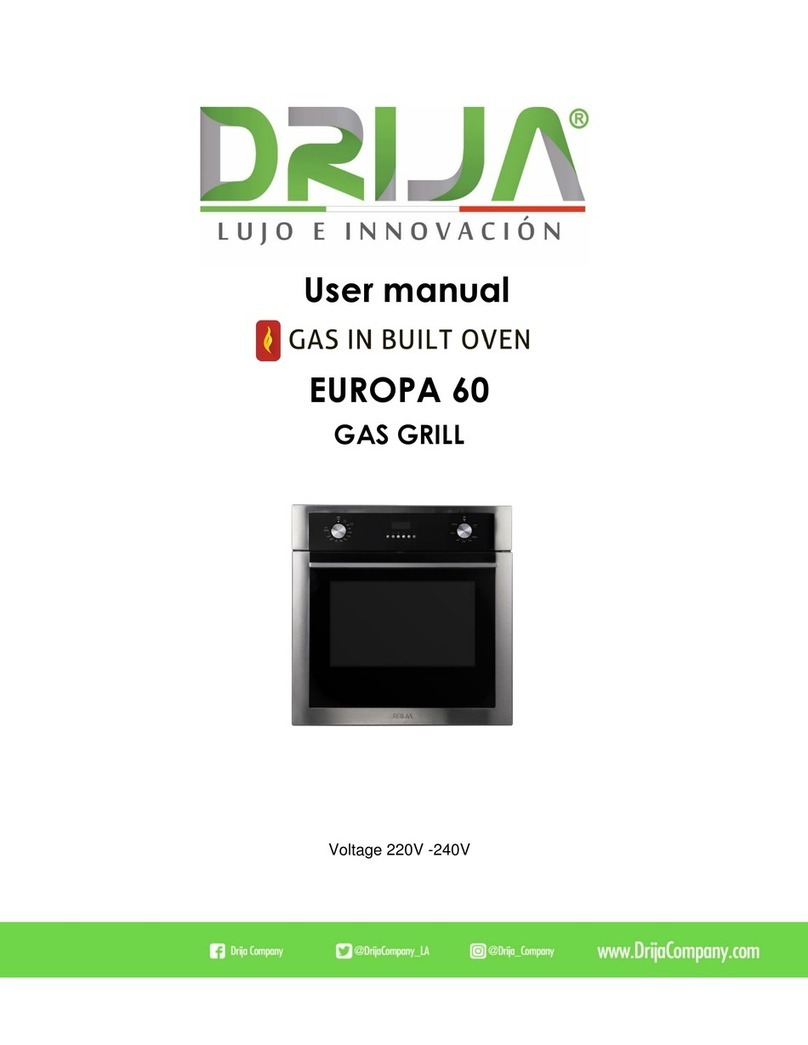
Drija EUROPA 60 GAS GRILL User manual

User Manual
EUROPA 60
GAS
Voltage 110-120V/60Hz

User Manual
GAS IN BUILT OVEN | EUROPA 60 GAS
2
1. PRECAUTIONS FOR USE..............................................................................3
2. ENVIRONMENT- INSTRUCTION FOR ELIMINATION...................................4
3. SAFETY PRECAUTIONS................................................................................5
4. INSTRUCTIONS FOR THE INSTALLATION...................................................6
5. BURNER AND KNOB DATA TABLE............................................................. 12
6. DESCRIPTION OF THE FRONT PANEL......................................................13
7. OVEN USE.................................................................................................... 16
8. CLEANING AND MAINTENANCE.................................................................18
9. TECHNICAL SPECIFICATIONS ...................................................................20

User Manual
GAS IN BUILT OVEN | EUROPA 60 GAS
3
1. PRECAUTIONS FOR USE
THE MANUFACTURER WILL NOT BE RESPONSIBLE FOR USE OTHER THAN
THE INDICATED.
•Never use this appliance to heat spaces.
•Never use packaging waste at home. Separate the different packages by type
and assign them to the nearest recycling center.
•Never block openings provided for ventilation and heat dispersion.
•The data plate must not be removed.
•Do not use metal scouring pads or rough spatulas, which could damage the
surface.
•Use non-abrasive products with wood or plastic utensils if necessary. Rinse
well and dry with a soft cloth.
•Do not allow food spills containing sugar to dry in the oven. They could
damage the enamel and cause internal damage to the oven.
The manufacturer shall not be liable for any injury or damage caused by
failure to comply with the above norms or derived from alteration in any part
of the apparatus as well as the use of non-original parts.

User Manual
GAS IN BUILT OVEN | EUROPA 60 GAS
4
2. ENVIRONMENT-INSTRUCTIONFOR
ELIMINATION.
Disposal Instructions - Environmental Policies
Our products are only packaged using non-polluting, environmentally friendly and
recyclable materials. We urge you to cooperate by arranging the containers
correctly. Contact your local distributor or local competent organizations for
information on collection, recycling and disposal centers.
Never leave all or part of the containers out there. Packaging materials and
especially plastic bags pose a choking hazard to children.
The unusable device must also be disposed of properly.
Important: deliver the device to your local authorized organization to pick up the
discarded devices. Proper disposal allows the intelligent recovery of valuable
materials.
Before disposing of your appliance, it is important to remove the doors and shelves
in use, to ensure that children cannot be trapped inside the oven during play. Also,
cut off the power cord and remove it.

User Manual
GAS IN BUILT OVEN | EUROPA 60 GAS
5
3. SAFETY PRECAUTIONS
Safety precautions
•See installation instructions for safety regulations for electrical or gas
appliances and for ventilation functions.
•For your interest and safety, all electrical equipment must be installed and
serviced by qualified personnel in accordance with current regulations.
•Our authorized installation engineers guarantee a job well done.
•Gas or electrical appliances should always be disconnected by qualified
personnel. The socket used to connect to the power cord plug must be of the
same type and comply with current standards.
•The plug, once fitted, must be in an accessible position.
•Never disconnect the plug by pulling on the power cord.
•The appliance must be earthed in compliance with the safety regulations of
the electrical system.
•Immediately after installation, a brief test of the appliance must be carried out
following the instructions given later in this manual. If the appliance does not
work, disconnect from the mains and contact your nearest service center.
•Never attempt to repair the appliance.
•Never place flammable objects in the oven: if it accidentally ignites, it could
cause a fire.
•The appliance gets very hot during use. Be careful; never touch the elements
inside the oven.
•The appliance is intended for use by adults. Keep children at a safe distance
and never let them play with it.
•When the grill is in operation, accessible parts can get very hot and keep
children at a safe distance.
•Before the appliance is started, all labels and protectors inside and outside
must be removed.
•After each use, always check that the control knobs are in position 0 (off).
The manufacturer shall not be liable for any injury or damage caused by
failure to comply with the above norms or derived from alteration in any part
of the apparatus as well as the use of non-original parts.

User Manual
GAS IN BUILT OVEN | EUROPA 60 GAS
6
4. INSTRUCTIONS FOR THE INSTALLATION
Appliance Installation
The installation must be carried out by a qualified engineer in accordance with the
regulations in force.
Electric connection
The nameplate must not be removed.
This appliance must be grounded in accordance with the safety system
regulations.
If a permanent connection is used, the power supply of the appliance must be
connected to an omnipolar switch with a contact opening of 3 mm, placed in
an accessible position near the appliance. If a plug and socket connection is
used, make sure they are of the same type. Do not use adapters or junctions
as they may cause overheating or burns.
1.5mm2
Operation at 110-120 V ~: use type H05RR-F
three wire wires (Cable of 3 x 1.5 mm²).
20mm
The ground wire (yellow - green) must be at least 20 mm longer than the
other cables at the end to connect to the appliance.
The manufacturer declines all responsibility for the injuries or damages
caused by the breach of the previous norms or derived from the alteration in
some part of the apparatus.
Position of the oven
Only qualified personnel following the instructions provided may install the
appliance. The manufacturer will not be responsible for improper installations that
may cause injury to persons, animals or property damage.

User Manual
GAS IN BUILT OVEN | EUROPA 60 GAS
7
Important:
The power source must be disconnected from the unit when it is adjusted or
maintained.
Air duct should be used in ventilation.
Plywood cabinets should be assembled with tails that withstand temperatures
up to 100 ℃.
Installation of built-in ovens
In order to ensure proper operation of the appliance, the cabinet containing it must
be appropriate. The appliance is designed for recessed installation (class 3) in
cabinets of any heat resistant material. Comply with the dimensions shown in
Figures 1, 2 and 3. When installing under a worktop, comply with the dimensions
shown in Figure 1-3. When installing under a hob incorporating burners, a space of
at least 110 mm should be left from any side wall, as shown in Figure 1. When
installed in units of height, comply with the dimensions shown in Figure 1.2, taking
into account that the top / rear of the unit must have an opening of 45 mm depth.
Screw the 4 screws A into the frame (fig.1). For installation under burners, make
sure that the rear / bottom of the unit has an opening similar to that shown in Figure
1 (B), and that The front / bottom of the unit has an aperture of at least 45 × 560mm
similar to that shown in Figure 1-3 (C), or the aperture similar to the window curtain,
make sure the opening of at least 45 × 560mm. Refer to the instructions supplied
with the hob for placement and attachment procedures.
In compliance with current safety regulations, contact with the electrical parts of the
oven must not be possible once it has been installed.
All parts, which ensure the safe operation of the appliance, must be removable only
with the aid of a tool.

User Manual
GAS IN BUILT OVEN | EUROPA 60 GAS
8
Never use the door as a lever to insert the oven into the cabinet. Never apply too
much pressure on the open door.

User Manual
GAS IN BUILT OVEN | EUROPA 60 GAS
9
Ventilation
The appliance may only be installed in a permanently ventilated room as specified in
the regulations. The air flow in the room where the appliance is installed should be
sufficient for proper gas combustion and ventilation of the area. The air intakes,
protected by grilles, must be of the appropriate size (see relevant regulations) and
placed in such a way that they cannot be even partially obstructed. The kitchen
should be kept adequately ventilated to disperse the heat and moisture produced by
the cooking processes: in particular, a window should be opened or a fan.
Discharge of combustion gas
The flue gases must be removed by means of hoods
connected to a natural draft chimney or fan extraction
system. An effective extraction system requires careful
design by an authorized specialist, and must meet
distances and regulatory positions. After installation, the
engineer must issue a certificate of conformity.
Gas Connection
Connection with copper tube:
The connection to the gas supply network must
be made in such a way that no voltages are
applied to the appliance. The connection can be
made using the adapter of unit D with two conical
elements, always adjusted the board C supplied.
Connection with steel tube:
Only use stainless steel hoses that comply with the relevant regulations, and
always seal C properly fit between fitting A and hose E.
When connecting with a hose, make sure that the length of the pipe is not
more than 2 meters; also make sure that the hose does not touch moving
parts or that it is crushed.
ADAPTING TO OTHER GAS TYPES
Before proceeding with the adaptation, disconnect the device from the electric
current.

User Manual
GAS IN BUILT OVEN | EUROPA 60 GAS
10
The apparatus was tested with G20 (2H) natural gas at a pressure of 20mbar. If it
will be used with another type of gas, its nozzle must be changed and the gas valve
adjusted.
Setting the oven burner
To adjust the oven burner, open the oven door and
proceed as follows:
Remove all accessories (grills, shelves and
any steel corridor).
Lift the bottom plate of the oven and remove
so that the inside of the oven is as shown in
the picture.
Minimum setting setting
The oven thermostat has a screw to regulate the minimum programming, accessible
by removing the thermostat knob. When the type of gas is changed, the minimum
programming must be adjusted following these specifications:
Turn on the oven burner and keep it in operation at high temperatures for 10
to 15 minutes with the door closed. Then turn the knob to the minimum
temperature, remove the knob and use a flat
screwdriver to adjust. First, turn the knob
clockwise tightly counterclockwise to adjust
the flame. For natural gas you should rotate
one circle while 1/8 circle for LPG.
When using butane gas, the set screw should
be turned fully clockwise. The diameter of the
by-pass is indicated in point "5.2, Data table
of burners and knobs".
When using natural gas, adjust the screw so that when the thermostat knob is
turned from maximum to minimum, the flame will always remain stable and
uniform. Close the oven door and check that the burner remains lit at the
minimum setting.
Nozzle change
Unscrew screw A from the oven burner.
Move the burner But outside until the nozzle is
accessible.
Use a wrench 7 to change the nozzle, setting the
correct one for the type of gas to be used. (See point
5.2 of the burners and nozzles table).

User Manual
GAS IN BUILT OVEN | EUROPA 60 GAS
11
Adjusting the oven burner primary air flow
•Unscrew the adjusting screw "A" from the air regulator cover.
•Turn the regulator cover "B" to the position of the type of gas to be used, see
table below.
•Tighten the set screw and restore the seal. When the operation is complete,
reassemble the burner correctly.
NATURAL GAS (N)
G30/G31 (LPG)
In the burner X=
3mm
3mm
Burned X=
3mm
5mm
When the operation is complete, replace the nameplate on the back of the oven with
the new plate provided with the new type of gas.
In compliance with current safety regulations, adapting different types of gas must
be done by professionals trained in the operation

User Manual
GAS IN BUILT OVEN | EUROPA 60 GAS
12
5. BURNER AND KNOB DATA TABLE.
GAS
CATEGORY:
I3+(28-30/37)
I3B/P(30)
I3B/P(37)
I3B/P(50)
TYPES OF
GAS:
□G30
□G31
□G30
□G30
□G30
GAS
PRESSURE
(mbar):
29
37
29
37
50
HEAT
INPUT(Hs)
Top burner:
1.7kW(124g/h)
Bottom burner:
2.5kW(182g/h)
Top burner:
1.7kW(124g/h)
Bottom burner:
2.5kW(182g/h)
Top burner:
1.7kW(124g/h)
Bottom burner:
2.5kW(182g/h)
Top burner:
1.5kW(109g/h)
Bottom burner:
2.5kW(182g/h)
INJECTOR SIZE
Top :0.65mm
Bottom
:0.77mm
Top :0.65mm
Bottom
:0.77mm
Top :0.65mm
Bottom
:0.71mm
Top :0.50mm
Bottom
:0.65mm
GAS
CATEGORY:
I2H
I2E
I2E+
I2L
TYPES OF
GAS:
□G20
□G20
□G20
□G25
□G25
GAS
PRESSURE
(mbar):
20 mbar
20 mbar
20
25
25
HEAT:
INPUT(Hs)
Top
burner:1.5kW
Bottom
burner:2.6kW
Top
burner:1.5kW
Bottom
burner:2.6kW
Top
burner:1.5kW
Bottom
burner:2.6kW
Top
burner:1.5kW
Bottom
burner:2.6kW
INJECTOR SIZE
Top :0.93mm
Bottom
:1.18mm
Top :0.93mm
Bottom
:1.18mm
Top :0.93mm
Bottom
:1.18mm
Top :0.93mm
Bottom
:1.18mm
VOLTAGE / FREQUENCY:AC220-240V/50-60Hz ELECTRIC POWER:1.8kW
I3+(28-
30/37)
I3B/P(30)
I3B/P(37)
I3B/P(50)
I2H
I2E
I2E+
I2L
Ⅱ2H3B/P
✔
✔
Ⅱ2H3+
✔
✔
Ⅱ2E+3+
✔
✔
Burner
Rated heat capacity (kW)
BOTTLED GAS - G30/G31
28/37 mbar
Nozzle diameter
1/100 mm
By-pass 1/100
mm
Reduced heat
capacity (W)
Flow-rate g/h
G30
Flow-rate g/h
G31
Oven
2.5
77
41
700
189
186
Burner
Rated heat capacity (kW)
NATURAL GAS - G20 20
mbar
Nozzle diameter 1/100mm
Reduced heat capacity (W)
Oven
2.6
118
700

User Manual
GAS IN BUILT OVEN | EUROPA 60 GAS
13
6. DESCRIPTION OF THE FRONT PANEL.
THERMOSTAT KNOB
This knob turns the gas burner on inside the oven. The
cooking temperature is programmed by turning the knob
counterclockwise to the desired value, between minimum and
maximum. For instructions on starting the gas oven, refer to
point "7.3 Use of the gas oven.
CHRONOMETER KNOB
To use the timer, program the bell by turning the knob
clockwise. The numbers correspond to minutes (maximum
120 minutes). The adjustment is in a gradual scale and
intermediate positions between the numbers that can be
used. The end of cooking ring does not turn off the oven. The
symbol turns on the light inside the oven during normal
operation (without the timer).
THERMOSTAT KNOB
The cooking temperature is programmed by turning the knob
counterclockwise to the desired value, between minimum and
maximum.

User Manual
GAS IN BUILT OVEN | EUROPA 60 GAS
14
FUNCTION OF THE SELECTION KNOBS
The symbol turns on the light inside the oven during normal
operation (without the timer).
The symbol turns the rotisserie light and spinner into the oven
during normal operation.
ELECTRONIC 6-TIME CHRONOMETER
Manual ignition
Completely open the oven door and turn the thermostat knob counterclockwise.
Place a lighted match near the end of flame tube A in the center of the bottom of the
oven and press the thermostat knob. Once the burner has been turned on, hold
down the knob for a few seconds to allow the thermocouple to warm up and check
that the burner has been properly lit through the inspection hole B. The cooking
temperature is adjusted by turning the knob in If the burner shuts off accidentally,
turn the knob to the off position () and wait at least one minute before attempting to
turn it back on.
Use of grill
Press, the roasting time will be 45 minutes.
Press, the roast is scheduled to end at 2:00 p.m...
After programming, the display will show the real time (hour,
minutes) and "AUTO" will blink which means that the roast
programming has been memorized automatically.
When the clock turns to 13:15 (or between 13: 14-13: 15), the
oven will start automatically.
In steak time the "AUTO" always blinks.
When the clock turns to 14, the roast has finished automatically.
The alarm will sound and "AUTO" will blink, press the button and the alarm will
stop.

User Manual
GAS IN BUILT OVEN | EUROPA 60 GAS
15
Digital clock:
Programmed time (0: 00-24: 00) and minutes.
The display shows 3 bright numbers and "AUTO" when lit.
To set the correct time, press the first button , then + or - to advance or rewind until
the exact time appears.
Programming the manual operation: Press the button to remove the blinking of
“AUTO”.
•If "AUTO" is blinking (automatic or semi-auto program is on), press the button
to remove "AUTO" then the process of manual operation will be on.
Automatic programming (set the time for automatic start and shutdown only
available on the electric grill).
1. Press the program time button to roast.
2. Press the button, finish roasting time.
3. Set temperature and roast mode by turning thermostat knob and selector knob.
After following the above indications, "AUTO" will look bright, which means the oven
roasting process is programmed.
For example: The roast takes 45 minutes and is expected to end at 14:00.
Semiautomatic Programming.
A. Set the time limit for the roast (10 hours maximum).
Press the button to set the roasting time.
The oven starts immediately,
And "AUTO" flashes. Once the roasting is finished, the roasting process will
automatically turn off. Then "AUTO" will flash, alarm will sound.
The alarm will stop sounding after pressing the button.
B. Set completion time (23 hours 59 minute maximum):
Press the button to set the end time. The oven will start immediately and
"AUTO" will blink.
When the completion time is next the roasting process will automatically turn off.
Then "AUTO" will blink, the alarm will sound, and the sound will stop once the button
is pressed.
When the corresponding button is pressed, the display will show the roasting
process. When the button is pressed and the time set back to "0" is set, the set
roasting process will be canceled. Then if the button is pressed, the oven will
revert to the manual operation process.
23 hours 59 minutes can be programmed as maximum.
To set the time, press the button, then + or -, until the required time
Is displayed on the screen. After setting, the correct time (hours, minutes) and the
button
Will be displayed on the screen. When the button is pressed the time moved will
be displayed.
When the set time is reached, it disappears and the alarm sounds again. To stop the

User Manual
GAS IN BUILT OVEN | EUROPA 60 GAS
16
Alarm, press the button .
Note: After pressing the corresponding button, the configuration should be
completed in about 5 seconds. In case of power failure, the configuration process as
well as the real time (hours, minutes) will disappear. Once the current returns, three
"0" and "AUTO" will appear on the display, the oven will automatically reset.
7. OVEN USE.
Precautions and general advice
When the oven and grill are used for the first time, it must be heated to the
maximum temperature for a period long enough to burn any residue of oil left by the
manufacturing process, which can contaminate the food with an unpleasant smell.
To avoid unpleasant contact with the steam inside the oven, open the door in two
steps: keep it open only a little (about 5 cm) for 4-5 seconds and then open it
completely. If you have to check or perform other procedures on the food during
cooking, leave the door open for a short time to avoid a fall in the oven temperature
as it can cause an unevenness in the cooking result.
Cooling system
The appliance is equipped with a cooling system, which is activated a few minutes
after the oven is turned on. The fan operation generates a normal air flow that
comes out above the door and can continue for a short period of time even after the
oven goes off.
Using the gas oven
Ignition by Electric Spark
Completely open the oven door and press the thermostat knob while rotating
counterclockwise to the maximum temperature; this automatically activates the
electric spark ignition device. Once the burner has been turned on, hold down the
knob for a few seconds to allow the thermocouple to warm up. If the burner has not
turned on after 15 seconds, stop trying, leave the oven door open and wait 1 minute
before trying again.
Manual ignition
Fully open the oven door and turn the thermostat knob counterclockwise. Place a lit
match near the end of the flame tube A in the center of the bottom of the oven and
press the thermostat knob. Once the burner has ignited, keep the knob pressed for a
few seconds to allow the thermocouple to warm up and check that the burner has
been properly ignited through the inspection hole B. The cooking temperature is
adjusted by turning the knob on clockwise to the desired value, between 50 ° and

User Manual
GAS IN BUILT OVEN | EUROPA 60 GAS
17
231 °. If the burner is accidentally turned off, turn the knob to the off position ( )
and wait at least one minute before attempting to turn it on again.
To turn on the gas function of the grill, turn the thermostat knob to the position
To turn on the electric function of the grill, turn the thermostat
knob to the
WARNING: OVEN AND GRILL GAS CAN NOT BE USED
SIMULTANEOUSLY.
Grill operation + rotisserie
Place the rod in the rotisserie bush and select the roasting
function (in gas roasting model, you must turn the function
knob to the position
Using the rotisserie with the normal oven
Place rotisserie grill "B" in the second slot on bottom and place
dipstick "A" in hole in back of oven.
Attention
Grilling should not last longer than 60 minutes.
In the enameled models, the operation of grill and grill + rotisserie must be carried out with
the door ajar of the first catch and the supplied control guard mounted in the upper part of the
cavity of the oven.
Accessible parts may be very hot during and after use of the grill; keep children away from
the appliance.
During cooking with a rotisserie, one of the trays supplied with the oven should be placed in
the bottom of the oven to collect the fat or liquid that the roast puts.
When using the oven, remove any trays or grills that will not be used from the inside.
During cooking, do not cover the bottom of the oven with aluminum foil or and do not place
trays over it, this can damage the enamel layer. If you want to use baking paper, place it in a
way that does not interfere with the circulation of hot air inside the oven. Oven.

User Manual
GAS IN BUILT OVEN | EUROPA 60 GAS
18
8. CLEANING AND MAINTENANCE
Before carrying out any operation, disconnect the unit from the power supply. Never
use a steam machine to clean the inside of the oven.
Cleaning stainless steel
To keep the stainless steel in good condition, it must be cleaned regularly, every
time the oven is used and after it has cooled.
Cleaning routine
When cleaning the stainless steel surface, use only products that do not contain
chlorine or abrasive substances.
Instructions: Pour some of the product into a cloth and wipe over the surface, rinse
properly and dry.
Food stains or spills
Do not use metal scouring pads or rough spatulas, which could damage the
surface.
Use non-abrasive products with wood or plastic utensils if necessary. Rinse
thoroughly and wipe dry with a soft cloth.
Do not allow spills of sugar-containing foods to dry inside the oven, they may
damage the enamel and cause internal damage to the oven.
Cleaning the oven
To keep the oven in good condition, it should be cleaned regularly, and then cooled.
Remove the removable parts. Clean oven racks with hot water and non-abrasive
detergent, rinse and dry.
Cleaning the door glass
The door glass should always be clean. Use absorbent kitchen paper; Remove dirt
adhering with a damp and ordinary sponge.
EXTRAORDINARY MAINTENANCE
Occasionally, the furnace will require less service for the replacement of parts
subject to use or breakage, such as gaskets, light bulbs, etc. Specific instructions for
each procedure are provided below.
Before carrying out any operation involving access to electrical parts, disconnect the
unit from the power source.

User Manual
GAS IN BUILT OVEN | EUROPA 60 GAS
19
Oven Lamp Replacement
Disconnect the oven from the power source using the omnipolar switch used to
connect the appliance to the mains or unplug the appliance if it is accessible.
Remove the glass cover from the lamp holder.
Remove the lamp and replace it with a high temperature resistant lamp (300 ℃) with
the following characteristics.
Replace the glass cover and reconnect the oven to the power source.
Voltage: 220-240V
Power: 25W
Type: E 14
Remove oven door
For better cleaning, you can remove the oven door. Choose the appropriate method
to remove or assemble oven door according to purchased model. Proceed as
shown:
Structure Procedure 1 for removing or assembling the furnace door:
Open the door completely.
Lift and turn the levers located on the two hinges.
Grip the door on both sides, close slowly but not completely.
Pull the door toward you, out of its base.
Reassemble door following reverse instructions.
Remove gasket
To allow proper cleaning of the oven, the door gasket can be removed. Before
removing the gasket, remove the oven door as described above. Once the door has
been removed, lift the tabs at the corners as shown in the figure.

User Manual
GAS IN BUILT OVEN | EUROPA 60 GAS
20
9. TECHNICAL SPECIFICATIONS
Oven internal dimension:
• Width 43.5cm
• Depth 40cm
• Height 32cm
Internal oven volume:
• 70 liters
Voltage and Frequency of Power Supply:
• 110-120V ~ 50 / 60Hz or 50Hz.
Other manuals for EUROPA 60 GAS GRILL
1
Table of contents
Other Drija Oven manuals

Drija
Drija OCEANIA 60 User manual

Drija
Drija USA 76 User manual

Drija
Drija Europa 60 User manual

Drija
Drija Roma 76 User manual

Drija
Drija EUROPA 60 Electrico User manual

Drija
Drija EUROPA 60 GAS GRILL User manual

Drija
Drija CARIBE 76 User manual

Drija
Drija Latino 60 Electrico User manual

Drija
Drija america 90 User manual

Drija
Drija america 90 User manual