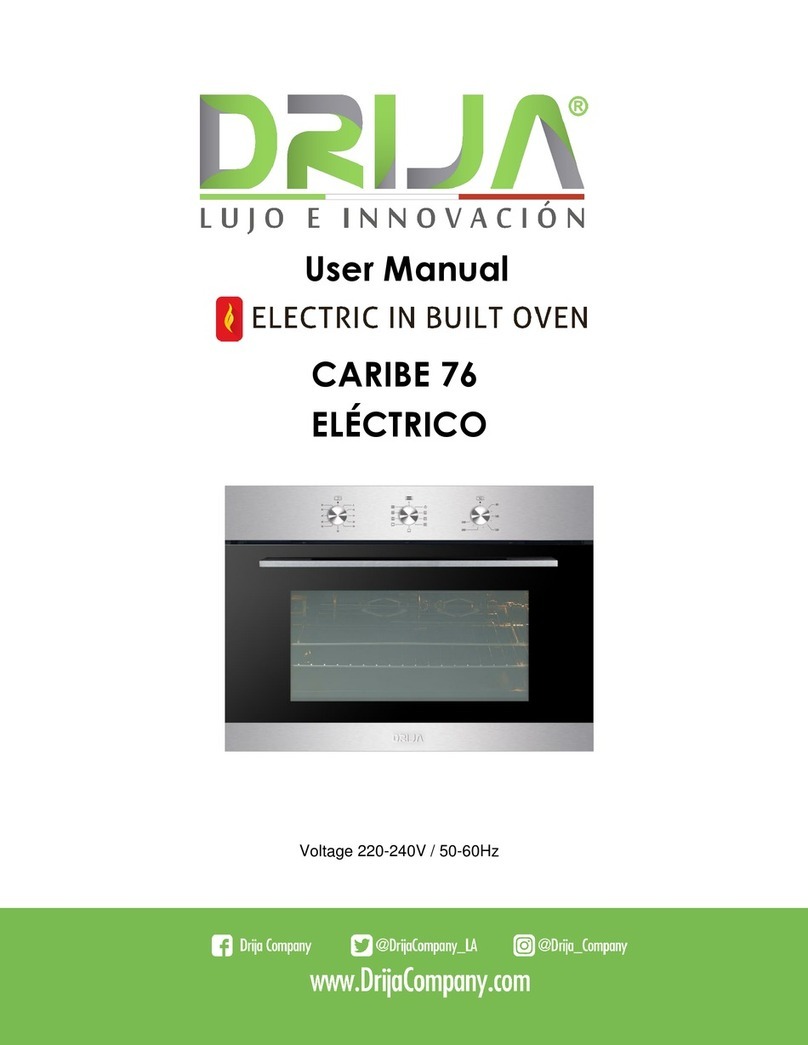
Drija USA 76 User manual

User Manual
USA 76
Voltage220V-240V

User manual
ELECTRIC IN BUILT OVEN | USA 76
2
1. INTRODUCTION.............................................................................................3
2. INSTRUCTION FOR USE...............................................................................6
3. START / CONTROL ........................................................................................7
4. USING THE OVEN........................................................................................13
5. VIEW THE OVEN..........................................................................................15
6. TEMPERATURE PROBE..............................................................................15
7. GENERAL CLEANING.................................................................................. 31
8. PROBLEM SOLVING.................................................................................... 36

User manual
ELECTRIC IN BUILT OVEN | USA 76
3
1. INTRODUCTION
We recommend carefully read this manual before using for better performance and extend
the life of the device, as it will provide the necessary instructions for installation, use and
maintenance. Always keep this manual handy as you may need it in the future.
Security is a good habit in which you have to get involved, however not taken into
consideration:
Children playing with the appliance.
Using the appliance for very young children.
Using the appliance unsupervised children.
Maintenance by children, including cleaning.
To maintain efficiency and safety of the appliance, we recommend the following:
Just call the Service Center authorized by the manufacturer.
Only use original spare parts.
In case of damage to the power cord, cable special purpose vehicles or any
component, or buy it from Fabricate maintenance department is to replace him.
A circuit breaker omnipolar with minimum contact opening 3mm must be
incorporated between the apparatus and the mains. The circuit omnipolar switch
should be according to the load and comply with regulations (the earth wire must
not be interrupted by the circuit breaker).
When handling the device, it is recommended to always use the handles provided on
the sides of the oven to avoid harming people or damage the appliance.
The device was designed for one will not only professional home use and function
should not be changed.
The electrical system of the apparatus can only be used safely when connected to
a system ground efficiently under standard security measures.
WARNING: The apparatus and accessible parts are heated to use. Take safety
measures to avoid touching parts that are hot. Children under 8 years must stay
away unless they are supervised. Make sure the appliance is off when replacing the
lamps to avoid possible electric shock.
The following items are potentially dangerous, and therefore should take appropriate
measures to prevent children and people with disabilities come into contact with these
measures:

User manual
ELECTRIC IN BUILT OVEN | USA 76
4
And controls the overall apparatus.
Packaging (bags, polyethylene, nails, etc.).
The device itself, immediately after use of the oven or grill due to the heat
generated.
The apparatus itself, when not in use (potentially dangerous parts must be
secure).
Avoid the following:
Touch the appliance with wet parts of the body.
Using the appliance with bare feet.
Pull the cord or unplug it from the electrical outlet.
incorrect or dangerous operations:
Obstructing the ventilation or heat dissipation.
Allow power cords of small appliances come into contact with hot parts of the
appliance. Expose the appliance to atmospheric agents such as rain, or sunlight.
Using the oven for storage purposes.
Using flammable liquids near the appliance.
The use of adapters, multiple sockets and / or extension cords.
Attempting to install or repair the appliance without the assistance of qualified
personnel.
Qualified personnel must be contacted in the following cases:
Installation (following the manufacturer's instructions)
When in doubt the operation of the apparatus.
Replacing the electrical outlet when it is not compatible with the appliance plug.
The temperature probe is a part of the thermostat, if damaged; it should be
replaced by authorized personnel.
Authorized Service Center by the manufacturer should be contacted in the following
cases:
If in doubt about the soundness of the appliance after removing it from its
packaging.
If the power cord is damaged or needs to be replaced.
If the appliance breaks down or malfunctions; ask for original spare parts.
It is a good idea if it meets the following:
Steam cleaners cannot be used to clean the oven.

User manual
ELECTRIC IN BUILT OVEN | USA 76
5
Do not use abrasive or sharp metal scrapers to clean the glass of the oven door
as it can scratch the surface, which can cause glass breakage.
Only use the device for cooking food and nothing else.
Check the solidity of the device after being unpacked.
Unplug from the mains if it is not functioning properly and before cleaning or
maintenance.
When not used, disconnect the appliance from the mains.
Use oven mitts to place the container or removing it.
Always handle grip the oven door in the center as the ends thereof may be hot
due to leakage of hot air.
Make sure the knobs are in position " "/" "When the apparatus is not in use.
Unplug the power cord from the mains when you decide not to use the device for a
while.
The manufacturer is not liable for damage due to: incorrect installation, improper,
wrong and irrational use.

User manual
ELECTRIC IN BUILT OVEN | USA 76
6
2. INSTRUCTION FOR USE
A. Oven mode controls
B. screen
C. Cooking time
D. Start Time
E. Start / Control lock (press and
hold 3 seconds)
F. Cancel
G. settings
H. Light
I. timer
J. Conversion mode controls
convection
K. Self-cleaning
OVEN MODE CONTROLS
Select Bake oven modes (Bake), Broil (Grilling) Convection
(Convection) and Warm / Proof (Heat / Leudar)
NOTE: Warm / Proof (Heat / Leudar) control is used for both modes oven.
SCREEN
When power is first supplied to the furnace or in case of power outage, will show
"12:00" on the screen.
See "Clock" later in this section for instructions to set the time of day. When the
oven is not in use, the display will show the time of day.

User manual
ELECTRIC IN BUILT OVEN | USA 76
7
3. START / CONTROL
START
The Start control (Start) will activate any oven function. If Start (Start) is pressed in
less than 2 minutes after pressing a key, the function will be canceled and the time
of day appear on the screen.
CONTROL PANEL LOCKOUT
The control panel can be locked to prevent accidental use of the oven.
NOTES:
• You cannot lock the control if the oven is in use or is active Cook Time (cooking
time) function.
• The time now remain on the screen when control is locked.
To lock the control panel:
• Hold START (Start) for 3 seconds or until "LOCKED" (Locked) appears on the
screen. "LOCKED" (Locked) remain on the screen.
To unlock the control panel:
• Hold START (Start) for 3 seconds or until "LOCKED" (Locked) appears on the
screen.
CANCEL
• Press the Cancel (Cancel) button to stop any function except to
Cook Time (cooking time) and Control Panel Lockout (Control Panel Lock).
LIGHT
The oven lights turn on and off automatically when the oven door is opened and
closed.
• Press the Light button (light) to turn on / off lights oven when the oven door is
closed.

User manual
ELECTRIC IN BUILT OVEN | USA 76
8
TIMER
The timer (Timer) can be set in hours or minutes to 11 hours and
59 minutes.
To set the timer:
1. Press TIMER (Timer).
2. Use the numeric keypad to enter the length of time in hours and minutes.
3. Press TIMER (Timer) to start the countdown. If activated, it will sound the tone
timer at the end of the countdown.
Four. Press TIMER (Timer) to cancel the timer and return to the time of day.
NOTE: No press CANCEL (Cancel), as doing so will turn off the oven.
COOKING TIME
Cook Time (cooking time) function allows the oven to be programmed to turn on at a
certain time of day, cook for a certain period of time and then turn off automatically.
IMPORTANT: You must select a mode the oven before you can program a cooking
time.
NOTES:
• Cook Time (cooking time) can be set in hours or minutes to 11 hours and 59
minutes.
• To change the cooking time during cooking, press CANCEL (Cancel). Enter the
new cooking time and press START (Start).
• At the end of the programmed cooking time, the oven will turn off automatically
tone sounds cycle end and the legend "Cooking Complete" (finished cooking) in the
text area.
SETTING A TIME OF COOKING:
1. Select the cooking mode.
2. Select the temperature.
3. Press COOK TIME (cooking time). Enter the desired cooking time by pressing the
keypad.
Four. Press START (Start). The oven will begin preheating.

User manual
ELECTRIC IN BUILT OVEN | USA 76
9
NOTES:
• The format of the Cook Time (cooking time) option is H: MIN, and switches to MIN:
SEG during the last minute.
• The alert tone will sound until the Cook Time (cooking time) option is canceled.
START TIME
This feature allows you to set the oven to come on later.
IMPORTANT: The clock must be set to the correct time of day.
1. Select a mode from the oven.
2. Select the temperature.
3. Set the cooking time.
Four. Press START TIME (Start Time).
5. Enter the desired start time by pressing the keypad. "Press START" (Press Start)
appears on the screen. If you have not programmed Cook Time (cooking time), the
control will indicate "Set Cook Time" (Set cooking time).
6. Place food in the oven and close the door of this.
7. Press START (Start). Start Time (Start Time) will begin counting down until it
reaches the scheduled time of day.
NOTE: At the end of the cooking time, the oven will automatically turn off, the alert
tone will sound and "Cooking Complete" (Complete Cooking) appear on the screen.
Danger of food poisoning
Do not leave food in the oven for more than an hour before or after cooking.
Failure to do so can cause food poisoning or illness.
ADJUSTMENTS
The Control Settings (Settings) lets you access the menu to use additional functions
and features.
Press SETTINGS (Settings) to display the menu options 1 to 6. Then press START
(Start) to display options 7 to 9.
CLOCK
The clock can be programmed to display time in a 12 or 24 hours. The clock is
factory set at the 12-hour format.

User manual
ELECTRIC IN BUILT OVEN | USA 76
10
To set the clock:
NOTE: Before setting the clock, make sure the oven and Timer are off.
1. Press SETTINGS (Settings). They appear several options on the screen.
2. Press "1" on the keypad. "Clock" (Clock) appear on the screen.
3. Press the keypad to enter the time of day.
Four. Press START (Start) to toggle between AM and PM.
5. Press SETTINGS (Settings) to confirm and thus has been scheduled time of day.
To change the clock to 24-hour format:
1. Press SETTINGS (Settings). They appear several options on the screen.
2. Press "5" on the numeric keypad. "12/24 HOUR" (12/24 hours) and "12" appear in
the display.
3. Press "1" on the numeric keypad to change the setting 12/24 hours to 24 hours.
Four. Press SETTINGS (Settings) to confirm. 12/24 hour setting has changed.
SHADES
The tones are audible signals, indicating the following:
Number of
Ringtones
indicates
1
valid button
It has entered
a function
The oven
It preheated
2
Invalid touch button
4
End of cycle
End Account
regressive
TURNING ON / OFF THE SOUND:
The sound of the oven is factory set to the on position (On), per se can switch to the
off (Off) position.
1. Press SETTINGS (Settings). They appear several options on the screen.
2. Press "3" on the keypad. "SOUND" (Sound) and "ON" (On) will appear on the
screen.

User manual
ELECTRIC IN BUILT OVEN | USA 76
11
3. Press "1" on the keypad. "ON / OFF" (On / off) appears on the screen.
Four. Press "1" on the keypad to turn off the sound.
5. Press SETTINGS (Settings) to confirm. Now the sound is off.
6. Press SETTINGS (Settings), and then follow the instructions on the screen to
reactivate the sound.
TO REGULATE THE VOLUME OF SOUND:
The sound of the oven is factory set to High (High), but can be changed to Low
(Low).
1. Press SETTINGS (Settings). They appear several options on the screen.
2. Press "4" on the numeric keypad. "SOUND VOLUME" (volume of sound) and
"HIGH" (high) appear on the screen.
3. Press "1" on the keypad. "HIGH / LOW" (High / Low) appears on the screen.
Four. Press "1" on the keypad to place the sound Low (Low).
5. Press SETTINGS (Settings) to confirm. Now it changed the sound volume.
6. Press SETTINGS (Settings), and then follow the instructions on the screen to
reposition the sound setting in High (High).
And CELSIUS DEGREES FAHRENHEIT
The control panel is factory set to display the temperature in degrees Fahrenheit, but
can be changed to display in Celsius.
CHANGING DISPLAY FAHRENHEIT CELSIUS A:
1. Press SETTINGS (Settings). They appear several options on the screen.
2. Press "2" on the numeric keypad. "TEMP UNIT" (unit temperature) and
"Fahrenheit" (F) appear on the screen.
3. Press "1" on the keypad. "DEGREE F / C" (Fahrenheit / Celsius)
appears on the screen.
Four. Press "1" on the numeric keypad to change the setting unit
to degrees Celsius temperature.
5. Press SETTINGS (Settings) to confirm. Changed unit

User manual
ELECTRIC IN BUILT OVEN | USA 76
12
temperature.
6. Press SETTINGS (Settings), and then follow the instructions on the
screen to return to Fahrenheit.
SABBATH MODE
The Sabbath (Rest day) mode is designed for those whose
religious practices require disable certain features of the oven. To the
activate the Sabbath mode (Rest day), the oven will comply with the requirements
Jewish rest according Star-K.
NOTE: The oven is factory set with the Sabbath mode (Rest day)
disabled.
To turn on / off the Sabbath (Rest day) mode:
1. Make sure the oven is off and the meat probe is not plugged.
NOTE: The Sabbath (Rest day) mode cannot be set when the
oven is on. The oven will not recognize the meat probe while
On the Sabbath (Rest day) mode.
2. Press SETTINGS (Settings)> press START (Start)> press 7 and
then press 1 to toggle ON / OFF (On / off).
3. Press SETTINGS (Settings) to activate the Sabbath mode again (Day
Rest). The only cooking function works while the oven is
set in Sabbath mode (Rest day) is Bake (Bake).
Baking while the oven is in the Sabbath (Rest day) mode:
1. Hold BAKE (Baking) for 3 seconds.
2. Enter the desired oven temperature by pressing the keypad.
3. After selecting Bake (Bake) and a temperature you have the option to set Cook
Time (cooking time) and Start Time (Start Time) before pressing START (Start). See
"Cooking time" and "Start Time".
Four. Press START (Start). Pressing Start (Start), the Sabbath (Rest day) mode is
activated.

User manual
ELECTRIC IN BUILT OVEN | USA 76
13
Only Cancel (Cancel) control is active.
• Press CANCEL (Cancel) twice to exit the Sabbath (Rest day) mode and resume
normal operation of the furnace. The display will return to the time of day.
NOTE: In case of a power outage while the oven is in Sabbath (Rest day) mode, the
oven will exit the Sabbath (Rest day) mode and resume normal mode when power is
restored.
DIOMA
The language is factory set to English, but can be changed to French.
To change the language from English to French:
1. Press SETTINGS (Settings). They appear several options on the screen.
2. Press "6" on the keypad. "LANGUAGE, English1, and French 2" (Language,
English 1 and French 2) "appears on the screen.
3. Press "2" on the numeric keypad to select French.
Four. Press SETTINGS (Settings), and then follow the prompts on the screen to
return the Language setting (language) English (Ingles).
SELF-CLEANING
Controls the automatic self-cleaning. See "Oven Care".
4. USING THE OVEN
BEFORE USING THE OVEN
1. Turn the temperature control to the highest setting.
2. Turn the cooking mode selecting a cooking mode.
3. Allow the oven to run for 30 minutes with the door closed and no food in the
cavity.
NOTE: Any odor that can be detected during this first use, due to evaporation of the
substances used to protect the oven during storage.
Four. Turn off oven and allow cooling.
GENERAL

User manual
ELECTRIC IN BUILT OVEN | USA 76
14
IMPORTANT: Do not place any objects, including plates, paper and baking trays at
the bottom of the oven when it is operating to avoid damaging the enamel.
1. Place bake ware with food in one or both grills provided with the oven.
2. Press control oven mode to select the desired oven function.
3. Use the numeric keypad to enter the oven temperature.
Four. Press START (Start).
PREHEAT THE OVEN
• Preheat the oven when using modes baking, convection baking and convection
Grill.
• Select a higher temperature does not shorten preheat time.
• Preheating is needed to obtain good results when baking cakes, cookies, pastries
and breads.
• Preheated help sear roasts and meat retain its juices.
• Place oven racks in their proper position before preheating.
• During preheat the display shows the selected cooking temperature.
• A beep will confirm that the oven is preheated and the display "PREHEAT" will be
disabled.
SUGGESTIONS FOR USE
• Use cooking tables as a guide
• Do not place containers on the open oven door
• Use the internal oven light to look at food through the oven window instead of
opening the door frequently.

User manual
ELECTRIC IN BUILT OVEN | USA 76
15
5. VIEW THE OVEN
A. Oven vent
B. Broil element
C. Control Panel
D. halogen lamps
E. Convection fan and element
F. Bake element (not visible)
G. Plate with model and serial #
H. Door gasket
I. Temperature sensor
J. Grid background
K. Front grid
L. Grill tray
M. Roasting tray
6. TEMPERATURE PROBE
Burning danger
Use an oven mitt to remove temperature probe.
Do not touch the broil element.
Failure to follow this instruction can cause burns

User manual
ELECTRIC IN BUILT OVEN | USA 76
16
The temperature sensor controls the internal temperature of the food, which is often
used as an indicator of cooking, especially for meat and poultry and turns the oven
off when the internal temperature of the food reaches the set temperature. The
temperature probe works with all oven modes except the Warm / Proof (Heat /
Leudar), Sabbath (Rest) and Self-Clean (self-cleaning) modes.
IMPORTANT: Always disconnect and remove the probe oven temperature when
removing food.
To use the temperature sensor:
1. Insert the probe into the food.
NOTE: For meat, to insert the probe tip in the center of the thickest part of the meat.
Make sure the tip of the probe is not in fat or touching the bone.
2. Place food in the oven. Keep the temperature sensor as far as possible from the
heat source and plug into the outlet of the furnace. Close the oven door.
3. Select the oven mode.
Four. Enter the oven temperature; by pressing numbers on the keypad.
5. Press START (Start). The set oven temperature appears on the display during
cooking.
6. Press the numbers on the keypad to enter the desired internal food temperature
and then press START (Start) again.
NOTES:
• The internal temperature of the food can be set between 110 ° F and 200 ° F (43 °
C
and 93 ° C).
• When the set temperature of the probe is reached, the oven will shut.
7. Press CANCEL (Cancel) when finished. Unplug the temperature probe and
remove the food from the oven.
NOTE: Probe icon will remain on the display until the probe is unplugged.
VESSELS
• Glass containers absorb heat baking. Reduce oven temperature 25 ° F (15 ° C)
when baking with glass molds.

User manual
ELECTRIC IN BUILT OVEN | USA 76
17
• Use containers that produce the desired browning. The type of container finish
helps determine the amount of gold to be produced in the oven.
- Bright molds, smooth metal or slightly antia- adherents / Anodized reflect heat and
result in a lighter and more delicate gold. Cakes and cookies require this type of
mold.
- The dark, rough or brightness been heat absorb containers and produce a more
golden and crispy crust. Use this type for pies.
• No bake with roast empty tray in the oven as this can change the baking
performance. Keep roasting tray out of the oven.
HIGH ALTITUDE BAKING A
• When baked at high altitude, recipes and cooking times vary with respect to
standards.
OVEN RACKS
IMPORTANT: To avoid permanent damage to the porcelain finish, place food or
bake ware on a broiler. Do not place food or bake ware directly on the door or the
oven floor.
• Oven racks can be placed in any of six positions of oven height.
• Position racks before turning on the oven.
• Make sure oven racks are level.
• Oven racks are capped to prevent them from being inadvertently removed
completely.
To remove the grids
• Hale out rack to the stop, lift the front edge, and then lift it out.
To get a grid
• Place oven rack on the wire supports located on the sides of the oven. Slightly lift
the front edge and the slide rack back past the stop position. Lower front and slide
In the oven.

User manual
ELECTRIC IN BUILT OVEN | USA 76
18
COOLING FAN COMPONENTS
It is activated in any cooking or cleaning mode auto cool internal components and
the exterior surfaces of the doors. This air is expelled through the duct located
above the oven door. It continues to operate until the components have cooled
sufficiently. The fan runs double speed (or RPM) mode whenever self cleaning and
increase the temperature of the internal components.
GLASS OVEN DOOR
To avoid glass breakage of the oven door:
• Do not close the oven door if the grids are not fully within the oven cavity or when
bake ware protrude from the front edge of the oven rack.
• Do not place objects on the glass surface of the oven door.
• Do not strike the glass surfaces with bake ware or other objects.
• Not clean glass surfaces until the oven is completely cooled.
PIPELINES furnace exhaust
Block or cover the kiln exhaust ducts generates a poor air circulation, which will
affect the results of cooking, cleaning and cooling.
• Exhaust ducts upper and lower oven allow entry of fresh air to the cooling system.
• The vent allows lower furnace hot air outlet from the cooling system.
OVEN TEMPERATURE CONDENSATION
• It is normal for a certain amount of moisture evaporates from the food during the
cooking process. The amount depends on the moisture content in the foods.
• The moisture may condense on a cooler or in the oven and the control panel
surface.
• Your new oven has an electronic temperature sensor that can maintain the desired
temperature accurately. His previous oven maybe had a mechanical thermostat
gradually changing to a higher temperature. It will be normal that you have to adjust
your favorite recipes when you start cooking with your new oven.
TEMPERATURE CONTROL OVEN

User manual
ELECTRIC IN BUILT OVEN | USA 76
19
The oven provides accurate temperatures; however, it may cook faster or slower
than the previous oven, so that it can adjust the temperature calibration. It can be
adjusted in degrees Fahrenheit or Celsius.
A minus sign means the oven will be cooler with the amount shown on the screen.
The absence of the minus sign means the oven will be hotter with the amount shown
on the screen temperature.
Use the following table as a guide:
ADJUSTMENT ° F (ADJUSTMENT ° C)
FOOD KITCHEN
10 ° F (6 ° C)
a little more
20 ° F (12 ° C)
moderately
30 ° F (17 ° C)
much more
-10 ° F (-6 ° C)
a little less
-20 ° F (-12 ° C)
moderately less
-30 ° F (-17 ° C)
a lot less
TO ADJUST calibration Oven temperature:
1. Press SETTINGS (Settings). They appear several options on the screen.
2. Press "9" on the keypad. "CALIBRATION" (Calibration) "PRESS TO INCREASE 3
/ PRESS TO DECREASE 6" (Press 3 to increase / decrease Press 6 to) is displayed
on the screen.
3. Press the number 3 on the keyboard to increase or decrease the number 6 for the
temperature in increments of 5 ° F (3 ° C). The setting can be set between 30 ° F
(18 ° C) and -30 ° F (-18 ° C).
Four. Press SETTINGS (Settings) to save the setting and then exit the menu
Temperature Calibration (calibration temperature).
MODES OVEN

User manual
ELECTRIC IN BUILT OVEN | USA 76
20
The illustrations show the heating elements and fans used for each mode of the
oven.
NOTE: The lower element is hidden beneath the base of the furnace.
BAKE (BAKE)
Baking is cooking with hot air. Both upper and lower parts of the oven are used to
heat the air, but the fan is used for circulation.
Select the baking temperature, time and position of the grid according to recipe
instructions or precooked foods. Baking time will vary with the temperature of the
ingredients, and the size, shape and finish of bake ware being used.
1. Press BAKE (Baking) to select the bake mode. "BAKE" (Bake) appears on the
screen and displays 350 ° F (177 ° C). Will appear in the "Set temp or Press Start"
screen (Set the temperature and press Start).
2. Press START (Start), if desired bake at 350 ° F (177 ° C). OR Enter the desired
temperature by pressing the keypad, then press START (Start). The temperature
can be between 170 ° F (77 ° C) and 500 ° F (260 ° C).
NOTES:
• The temperature can be changed at any time during cooking.
Press CANCELS (Cancel) to delete the settings. Select the oven mode, and then
enter the desired temperature by pressing the keypad, then press START (Start).
• After selecting an oven mode and temperature, you have the option to set Cook
Time (cooking time) and Start Time (Start Time) before pressing START (Start). See
"Cooking time" and "Start Time".
3. Press CANCEL (Cancel) when finished cooking and remove food from the oven.
BROIL (ROASTED)
Mode broiling uses direct radiant heat to cook food. The lower the temperature, the
slower the cooking. Thicker cuts and pieces of meat, fish and poultry irregularly may
cook better at lower temperatures for grilling.
• For best results, use only the broiler pan on the grill and grill. It is designed to drain
juices and help prevent spatter and fumes.
Table of contents
Other Drija Oven manuals

Drija
Drija Europa 60 User manual

Drija
Drija Latino 60 Electrico User manual

Drija
Drija OCEANIA 60 User manual

Drija
Drija italia 94 professionale User manual

Drija
Drija EUROPA 60 Electrico User manual

Drija
Drija EUROPA 60 GAS GRILL User manual

Drija
Drija america 90 User manual

Drija
Drija CARIBE 76 User manual

Drija
Drija OCEANIA 60 User manual

Drija
Drija EUROPA 60 GAS GRILL User manual