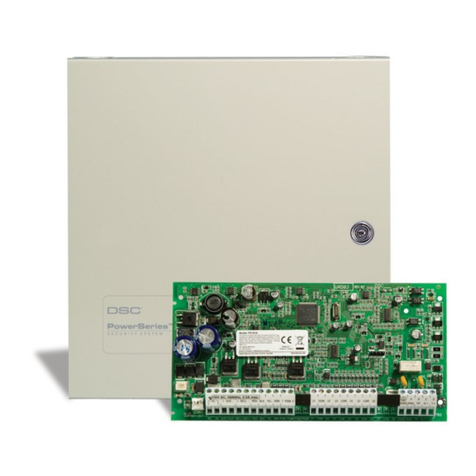
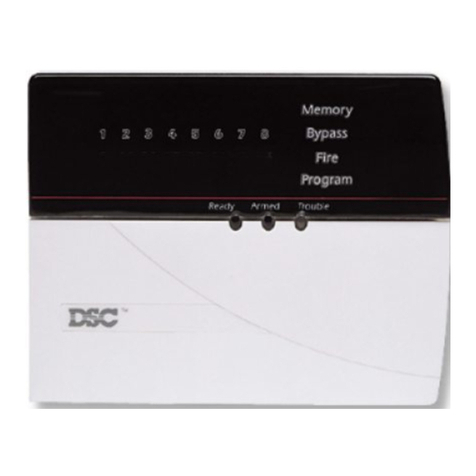
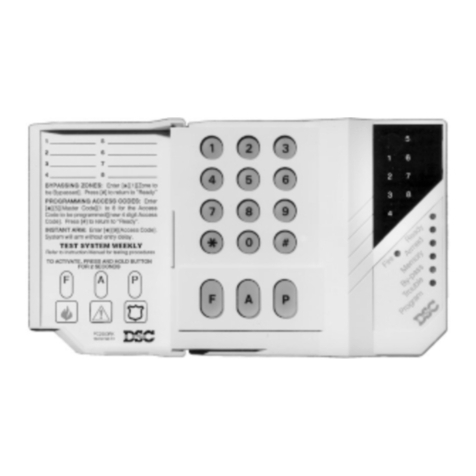
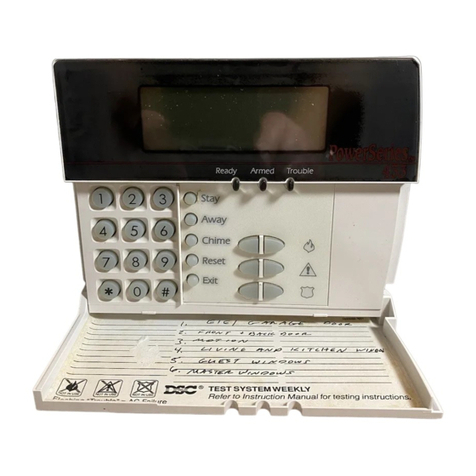
DSC PC5008 User manual

1
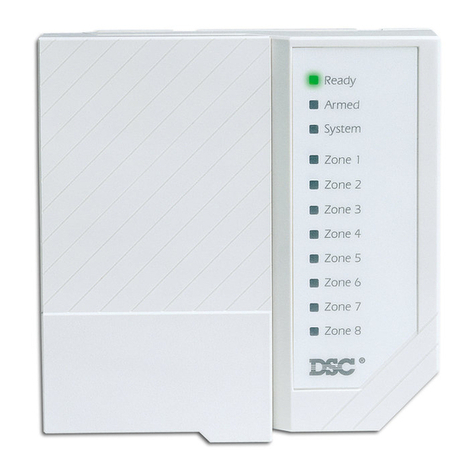
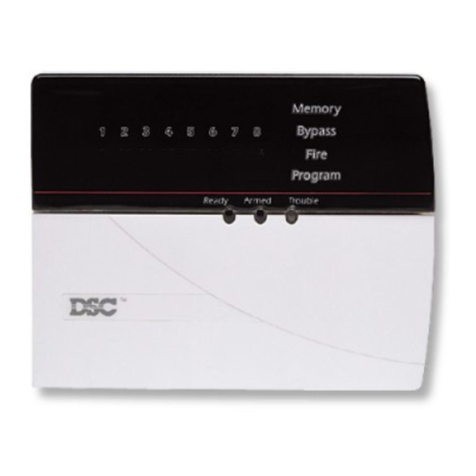
1.1 Specifications
Downloading Software Support
• PC5008 uses DLS-1 v6.5 and up.
Flexible Zone Configuration
• Six fully programma le zones; system expanda le to eight
zones using keypad zone inputs and wireless zones
• 38 access codes: one master code, one maintenance code,
two duress codes, two supervision codes and 32 general
access codes
• 27 zone types; 8 programma le zone attri utes
• Normally closed, single EOL and dou le EOL zone wiring
• Eight wireless zones availa le using the PC5132 Wireless
Receiver
Audible Alarm Output
• 700mA Supervised Bell Output (current limited at 3 amps),
12VDC
• Steady or Pulsed Output
EEP OM Memory
• Does not lose programming or system status on complete AC
and Battery failure
Programmable Outputs
• One programma le voltage output and one programma le
voltage output/input; 22 programma le options
• PGM1 = 50mA; PGM2 = 50mA
• Eight additional low current (50mA) outputs availa le using
the PC5208 module
• Four additional high current (300mA) outputs availa le using
the PC5204 module; one PC5204 output fully supervised for
siren
Powerful 1.5 Amp egulated Power Supply
• 550 mA Auxiliary Supply, 12 VDC
• Positive Temperature Coefficient (PTC) components replace
fuses
• Supervision for loss of AC power, low attery
• Internal clock locked to AC power frequency
Power equirements
• Transformer = 16.5 VAC, 40VA
• Battery = 12 volt 4 Ah minimum rechargea le sealed lead
acid attery
emote Keypad Specifications
• Two keypads availa le:
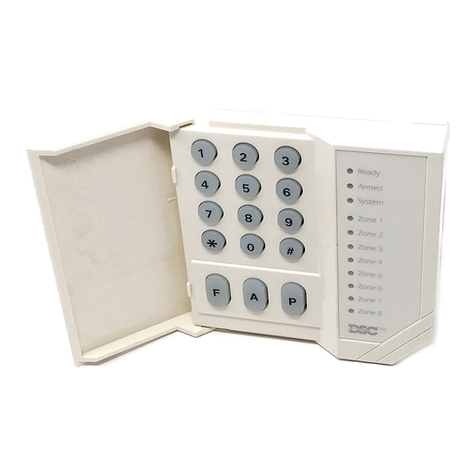
- PC5508Z eight zone LED keypad with zone input
- LCD5500Z Alphanumeric keypad with zone input
• All keypads have five programma le function keys
• Connect up to eight keypads
• 4-wire (Quad) connection to Key us
• Built in piezoelectric uzzer
Digital Communicator Specifications
• Supports major communication formats including SIA and
Contact ID
• Event-initiated personal paging
• Three programma le telephone num ers
• Two account num ers
• Supports LINKS1000 cellular communication
• Supports LINKS2X50 Long Range Radio Transmitter
• DTMF and pulse dialing
• DPDT line seizure
• Anti-jam feature
• Split reporting of selected transmissions to each telephone
num er
System Supervision Features
The PC5008 continuously monitors a num er of possi le trou le
conditions including:
• AC power failure
• Trou le y zone
• Tamper y zone
• Fire trou le
• Telephone line trou le
• Failure to communicate
• Low attery condition
• Bell output trou le
• Module fault (supervisory or tamper)
• Loss of internal clock
• AUX Power Supply Trou le
False Alarm Prevention Features
• Audi le Exit Delay
• Audi le Exit Fault
• Communication Delay
• Urgency on Entry Delay
• Quick Exit
• Cross Zone Burglary Alarm
• Rotating Keypress Buffer
Additional Features
• Auto Arm at specified time
• Keypad-activated alarm output and communicator test
• All modules connect to the system via a four wire Key us up
to 1000’/330m from main panel
• An event uffer which records the past 128 events with oth
the time and date at which they occurred; uffer can e
printed using PC5400 serial interface module, or viewed with
the LCD5500Z keypad.
• Supports the addition of the PC5132 Wireless receiver for
integration of wireless devices
• Uploading and downloading capa ility
• Local downloading capa ility through the use of the PC-LINK
adaptor
• Supports the Escort5580 Voice Prompt Module with
Automation/Lighting Control
• Supports the addition of the PC5928 Audio Interface Module
to integrate intercom stations
• Added Key us fault protection: clock and data outputs have
een programmed to withstand shorts to +12v to prevent
control panel damage
System Introduction
S E C T I O N 1

SYSTEMVINTRODUCTION
2
1.2 Additional Devices
In addition to the information elow, see the ack cover for a
DSC module compati ility ta le.
PC5132 Wireless eceiver
The PC5132 Wireless Receiver can e used to connect up to 8
wireless devices to the system. All devices are spread spectrum,
900 MHz, fully supervised devices which use standard ‘AAA’ or
‘AA’ alkaline atteries
.
Seven additional devices are availa le. They are as follows:
WLS904 Wireless Motion Detector
WLS905 Wireless Universal Transmitter
Adds wireless door or window contacts to your system.
WLS906 Wireless Smoke Detector
WLS907 Wireless Slimline Universal Transmitter
A smaller wireless door or window contact.
WLS908 Wireless Panic Pendant
Adds personal protection to the system. When used, the unit will
indicate a non-medical emergency to the central station.
WLS909 Wireless Key
Adds a simple and mo ile method of arming and disarming to
the system, as well as one- utton access to several
programma le functions.
WLS910 Wireless Handheld Keypad
PC5400 Printer Module
The PC5400 Printer Module will allow the panel to print out all
events that occur on the system to any serial printer. The
printout will contain the time, date and the event that occurred.
PC5204 Power Supply Output Module
The PC5204 can provide up to 1 Amp of additional power for
modules or devices connected to the control panel. The module
requires a 16.5 volt AC 40 VA transformer and 4 AH attery. In
addition, the module provides 4 programma le high current
voltage outputs. Each output is individually programma le with
19 different output options availa le
(See Section 5.11 “PGM
Outputs”). (See PC5204 Installation Instructions Sheet.)
PC5208 Eight Low Current Output Module
Adds eight low current outputs (50 mA) to the control. Each
output is individually programma le with 19 different output
options availa le
(See Section 5.11 “PGM Outputs”). (See
PC5208 Installation Instructions Sheet.)
Escort5580 Module
This Escort5580 module will turn any touch tone phone into a
fully functional keypad. The module also includes a uilt-in
interface to control up to 32 line carrier type devices for lighting
and temperature control
. (See Escort5580 Installation Manual.)
PC5928 Audio Interface Module
The PC5928 Audio Interface module is a simple way to incorporate
paging, intercom, a y listen-in and door answer to the PC5008
control panel. The module also has uilt-in talk/listen voice
capa ility for central station
.
Four additional devices are availa le:
PC5921 Intercom Audio Station
Used in conjunction with the PC5928 Audio Interface Module
.
PC5921 EXT Door Box Audio Station
Used in conjunction with the PC5928 Audio Interface Module
.
PC5921 EXT/R Door Box Audio Station
Used in conjunction with the PC5928 Audio Interface Module. The
Door Box contains a relay so the normal door ell can e used
instead of the internal one generated y the PC5928 module.
PC5904 Central Station Talk/Listen Module
Used in conjunction with the PC5928 audio interface module for
Talk/Listen-In purposes. This station provides an added level of
volume to the central station operator’s voice.
Each station has a separate microphone and speaker. Each
station must e home run to the interface module using shielded
22 gauge, 4 conductor wire. All stations can e used to sound an
alarm follower.
LINKS 1000 Cellular Communicator
The LINKS 1000 Cellular Communicator can e used three
different ways: as the sole communicator for the panel, as a
ackup for either or oth telephone num ers or as a redundant
ackup to the land line communicator where the panel will call
oth the land line and via the LINKS.
LINKS2X50
Either the LINKS2150 or LINKS2450 may e used to transmit
alarm information over a long range radio network.
Cabinets
Several different ca inets are availa le for the PC5008 modules.
They are as follows:
PC5003C Cabinet
Main control ca inet for the PC5008 main panel. Dimensions
288mm x 298mm x 78mm / 11.3” x 11.7” x 3” approximately.
PC500 Cabinet with Removable Door
Main control ca inet for the PC5008 main panel. Dimensions
213mm x 235mm x 78mm / 8.4” x 9.25” x 3” approximately.
PC5004C Cabinet
Ca inet to house the PC5400 Printer Module. Dimensions
229mm x 178mm x 65mm / 9” x 7” x 2.6” approximately.
Backplates
There are two different ackplates availa le for keypads to
locate an Audio Station next to the keypad:
PC55BP1 Backplate
This ackplate is to e used when an Audio Station is to e
located next to a keypad. Dimensions 208mm x 115mm x 18mm
/ 8.2” x 4.5” x 0.25” approximately.
PC55BP2 Backplate
This ackplate is to e used when an Audio Station is to e
located next to a keypad. In addition the ackplate will allow
you to mount a PC5108 Zone Expander Module or the PC5208
Eight Low Current Output Module. Dimensions 208mm x 115mm
x 18mm / 8.2” x 4.5” x 0.7” approximately.
1.3 Out of the Box
Please verify that the following components are included in
your system:
• one PC5003C main control ca inet
• one PC5008 main control circuit oard
• one Power keypad with zone input
• one Installation Manual with programming worksheets
• one Instruction Manual for the end user
• one hardware pack consisting of:
- one mylar ca inet la el
- four plastic circuit oard standoffs
- fourteen 5600Ω (5.6K) resistors
- one 2200Ω (2.2K) resistor
- one 1000Ω (1K) resistor
- ground connection assem ly
- one ca inet door plug

3
Getting Started
S E C T I O N 2
The following sections provide a thorough description of how to
wire and configure devices and zones.
2.1 Installation Steps
Read this section completely efore you egin. Once you have
an overall understanding of the installation process, carefully
work through each step.
Step 1: Create a Layout
Draw a rough sketch of the uilding to get an idea of where all
alarm detection devices, keypads and other modules are to e
located.
Step 2: Mounting the Panel
Locate the panel in a dry area close to an unswitched AC power
source and the incoming telephone line. Before attaching the
ca inet to the wall, e sure to press the four circuit oard
mounting studs into the ca inet from the ack. After you have
attached the ca inet to the wall, stick the provided DSC logo
sticker on the front of the ca inet.
You must complete all wiring before connecting
the battery, or applying AC to the panel
.....
Step 3: Wiring the Keybus
(Section 2.3)
Wire the Key us to each of the modules following the guidelines
provided in Section 2.3 of this manual.
Step 4: Zone Wiring
(Section 2.8)
You must power down the control panel to complete all zone
wiring. Please refer to Section 2.8 when connecting zones using
normally closed loops, single EOL resistors, dou le EOL resistors,
Fire zones and Keyswitch Arming zones.
Step 5: Complete Wiring
(Section 2.2)
Complete all other wiring including ells or sirens, telephone
line connections, and ground connections following the
guidelines provided in Section 2.2 (“Terminal Descriptions”).
Step 6: Power up the Control
Once all zone and Key us wiring is complete, power up the
control panel. First, connect the red attery lead to the positive
terminal and the lack lead to negative. Then, connect the AC.
Connect the battery before connecting the AC.
The panel will not power up on the battery
connection alone.
Step 7: Keypad Assignment
(Section 2.5)
In order for keypads to e properly supervised, each must e
assigned to a different slot. Please follow the guidelines provided
in Section 2.5 when assigning keypads.
Step 8: Supervision (
Section 2.6
)
The supervision of every module y the panel is automatically
ena led upon power up. Please verify that all modules appear
on the system according to the instructions in Section 2.6.
Step 9: Programming the System
(Sections 4 and 5)
Section 4 explains how to program the panel. Section 5 contains
a complete description of the various programma le features,
which options are availa le and how they function. The
Programming Worksheets should e filled out completely efore
attempting to program the system.
Step 10: Testing the System
The panel must e thoroughly tested to ensure that all features
and functions are operating as programmed.
2.2 Terminal Descriptions
Battery Connection
A 12V 4Ah recharga le attery is used as a ackup source of
power in the event of an AC power failure. The attery also
provides additional current when the panel’s demands exceed
the power output of the transformer, such as when the panel is
in alarm.
The High Current Charge/Standard Battery Charge option
(section [701], option [7]) allows you to choose etween a high
current attery charge and the standard attery charge rate.
Do not connect the battery until all other wiring is
complete. Connect the battery before connecting
the AC.
Connect the RED attery lead to the positive attery terminal;
connect the BLACK lead to negative.
AC Terminals – AC
The panel requires a 16.5 volt, 40VA transformer. Connect the
transformer to an unswitched AC source and connect the
transformer to these terminals.
The panel can e programmed to accept a power line frequency
of either 50Hz AC or 60Hz AC in programming section [701],
option [1].
Do not connect the transformer until all other
wiring is complete
.....
Auxiliary Power Terminals – AUX+ and AUX-
These terminals provide up to 550 mA of additional current at 12
VDC for devices requiring power. Connect the positive side of
any device requiring power to the AUX+ terminal, the negative
side to AUX- (ground). The AUX output is protected. This means
that if too much current is drawn from these terminals (such as
a wiring short), the panel will temporarily shut off the output until
the pro lem is corrected.
Bell Output Terminals – BELL+ and BELL-
These terminals provide up to 700 mA of continuous current at
12 VDC for powering ells, sirens, stro es or other warning-type
equipment. Connect the positive side of any alarm warning
device to BELL+, the negative side to BELL–. Please note that
the Bell output is protected: if too much current is drawn from
these terminals (such as a wiring short), the Bell PTC will open.
Three amps can e drawn for short periods only.
The Bell output is supervised. If no alarm warning devices are
in use, connect a 1000Ω resistor across BELL+ and BELL– to
prevent the panel from displaying a trou le condition. For more
information, please refer to Section 3.4 (“[✱] [2] Trou le Display”).
Keybus Terminals – AUX+, AUX-, YEL, G N
The Key us is used y the panel to communicate with modules
and vice versa. Each module has four Key us terminals that
must e connected to the four Key us terminals on the panel.
For more information, see Section 2.3 (“Key us Operation and
Wiring”).

G E T T I N G S T A R T E D
4
Programmable Output Terminals – PGM1 and
PGM2
Each PGM output is designed so that when activated y the
panel, the terminal will switch to ground.
PGM1 can sink up to 50mA of current.
Connect the positive side of the LED or
uzzer to AUX+, the negative side to PGM1.
If more than 50 mA of current are required,
a relay must e used. Please study PGM
wiring in the accompanying diagram.
PGM2 operates similarly to PGM1. For a
list of the programma le output options,
please see Section 5.11 “PGM Output
Options.”
Zone Input Terminals – Z1 to Z6
Each detection device must e connected to a zone on the
control panel. We suggest that one detection device e
connected to each zone; wiring multiple detection devices to a
single zone, however, is possi le. For zone wiring specifics,
please see Section 2.8 (“Zone Wiring”).
Telephone Connection Terminals –
TIP, ING, T-1, -1
If a telephone line is required for central station communication
or downloading, connect an RJ-31X telephone jack in the
following manner:
Connect the PC5008 and modules which use the telephone
line(s) in the following order:
For example, if you are installing a PC5008 with a LINKS1000
and a PC5928 Intercom module, connect the incoming line to
the LINKS1000, then from the LINKS1000 to the PC5008, then
from the PC5008 to the PC5928 Intercom and then from the
PC5928 to the house telephones.
For proper operation, no other telephone equipment
should be connected between the control panel and
the telephone company facilities
.
Do not connect the
alarm panel communicator to telephone lines
intended for use with a fax machine.These lines may
incorporate a voice filter which disconnects the line
if anything other than fax signals are detected,
resulting in incomplete transmissions
.
2.3 Keybus Operation and Wiring
The Key us is used y the panel to communicate with all
connected modules and vice versa. The red (AUX+) and lack
(AUX-) terminals are used to provide power, while the yellow
(YEL) and green (GRN) terminals are clock and data respectively.
The four Keybus terminals of the panel must be
connected to the four Keybus terminals or wires
of all modules.
The following restrictions apply to Key us wiring:
• Key us should e run in minimum 22 gauge quad (0.5mm);
two pair twist is preferred.
• The modules should e home-run to the panel ut can e
connected in series or T-tapped.
• Any module can e connected anywhere along the Key us. You
do not need to run a separate Key us wire for keypads, etc.
• No module can e more than 1,000'/330m (in wire length)
from the panel.
• Shielded wire should not e used.
Example of Keybus Wiring
NOTE:
Module (A) is correctly
wired within 1,000'/330m of
wire from the panel.
Module (B) is correctly
wired within 1,000'/330m of
wire from the panel.
Module (C) is NOT wired correctly as it is further than 1,000'/
330m from the panel, in wire distance.
2.4 Current atings – Modules and
Accessories
In order for the PC5008 system to operate properly, the power output
capa ilities of the main control and the expansion devices must not
e exceeded. Use the data presented elow to ensure that no part
of the system is overloaded and cannot function properly.
PC5008 (12 VDC)
AUX+: ........... 550mA: Su tract the listed rating for each keypad,
expansion module and accessory connected to
AUX+ or Key us.
BELL: ........... 700mA continuous rating; 3.0A short term.
Availa le only with stand y attery connected.
PC5008 Device Ratings (at 12 VDC)
• LCD5500Z Keypad: 85mA max.
• PC5508Z Keypad: 85mA max.
• PC5400 Serial Module: 65mA
• Escort5580 Audio Assistant: 65mA stand y / 130mA on-line
• PC5204 High Current Output module: 20mA
• PC5208 Low Current Output module: 50mA
• PC5132 Wireless Receiver: 125mA
• PC5928 Audio Interface module: 65mA
• PC5921/EXT Door Box Audio Station: 20mA
• PC59X1EXT/R Door Box Audio Station: 35mA
• PC5904 Central Station Talk/Listen Module: 30mA stand y,
130mA max.
Other Devices
Please read the manufacturer’s literature carefully to determine
the maximum current requirements for each device—during
activation or alarm—and include the proper values for loading
B
C
A
PANEL
500’
500’
150’
150’
B
C
A
PANEL
500’
500’
150’
150’

G E T T I N G S T A R T E D
5
calculations. Connected devices must not exceed system
capa ilities during any possi le operational mode.
2.5 Keypad Assignment
There are eight availa le slots for keypads. LED keypads y
default are always assigned to slot 1. LCD5500Z keypads are
always assigned to slot 8. You will need to assign each keypad
to its own slot (1 to 8). Keypad assignment is required, as it tells
the panel which slots are occupied. The panel can then generate
a fault when a keypad supervisory is not present.
One LCD keypad must be assigned to slot 8 in
order to upload keypad programming using
DLS-1 software.
How to Assign Keypads
Do the following at each keypad installed on the system:
1. Enter [✱][8][installer’s code] to go to installer programming
2. Enter [000] for Keypad Programming
3. Enter [0] for Slot Assignment
4. Enter a two digit num er (11-18) to specify which supervisory
slot the keypad will occupy.
5. Press [#] twice to exit installer programming.
After assigning all keypads, perform a supervisory reset y
entering section [902] in installer’s programming. The panel will
now supervise all assigned keypads and enrolled modules on
the system.
How to Program Function Keys
By default, the 5 function keys on each keypad are programmed
as Stay Arm (03), Away Arm (04), Chime (06), Quick Exit (14)
and Sensor Reset (16). You can change the function of each key
on every keypad:
1. Go to the keypad where you want to change the function key
programming and enter Installer Programming.
2. Press [000] for Keypad Programming.
3. Enter [1] to [5] to select a function key to program.
4. Enter the 2 digit num er, [00] to [17] to select the feature you
want the function key to have. For a complete list of Function
Key options
See Section 3.5 “Function Keys” .
5. Continue from step 3 until all function keys are programmed.
6. To exit Installer Programming, press [#] twice.
2.6 Supervision
By default, all modules are supervised upon installation.
Supervision is ena led at all times so that the panel can indicate
a trou le if a module is removed from the system.
To check on which modules are currently connected and
supervised, enter programming section [903] from installer’s
programming. The LCD keypad will allow you to scroll through
the display of connected modules. A connected module which
does not show as eing present will appear as a trou le
condition and the Trou le light on the keypad will turn ON. This
condition may e due to one or more of the following reasons:
• the module is not connected to the Key us
• there is a Key us wiring pro lem
• the module is more than 1,000'/330m from the panel
• the module does not have enough power
For more information regarding module supervision trou les,
please refer to Section 3.4 (“[✱] [2] Trou le Conditions”).
2.7 emoving Modules
The panel must e instructed to no longer supervise a module
eing removed from the system. To remove the module, disconnect
it from the Key us and reset the supervision field y entering [902]
in the installer’s programming
.
The panel will e reset to recognize
and supervise all existing modules on the system.
2.8 Zone Wiring
For a complete description of the operation of all zone types,
please refer to Section 5.2 (“Zone Programming”).
There are several different ways in which zones may e wired,
depending on which programming options have een selected.
The panel can e programmed to supervise normally closed, End
of Line, or Dou le End of Line loops. Please refer to the following
diagrams to study each type of individually supervised zone wiring.
Any zone programmed for Fire or 24 Hour Supervi-
sory must be wired with a single End of Line (EOL)
resistor regardless of the type of zone wiring
supervision selected for the panel (section [013]:
[1] -[2]). See Section 5.2 “Zone Programming.”
If you change the zone supervision options from
DEOL to EOL or from NC to DEOL (section [013],
options [1] or [2]), you should power down the
system completely, and then power it back up. If
you do not, the zones may not work correctly.
Normally Closed (NC) Loops
To ena le normally closed loops, programming section [013],
option [1] must e ON.
This option should only be selected if Normally
Closed (NC) detection devices or contacts are
being used
.....
Single End Of Line (EOL) esistors (5600Ω)
To ena le panel detection of single end of line resistors,
programming section [013], options [1] and [2] must e OFF.

G E T T I N G S T A R T E D
6
This option should be selected if either Normally
Closed (NC) or Normally Open (NO) detection
devices or contacts are being used
.
Double End of Line (DEOL) esistors
Dou le End of Line resistors allow the panel to determine if the
zone is in alarm, tampered or faulted.
To ena le panel detection of dou le end of line resistors,
programming section [013], option [1] must e OFF and option
[2] must e ON.
If the Double EOL supervision option is enabled,
all hardwire zones on the main panel must be
wired for Double EOL resistors, except for Fire
and 24 Hour Supervisory zones.
Do not wire DEOL resistors on keypad zones.
Do not use DEOL resistors for Fire zones or 24
Hour Supervisory zones. Do not wire Fire zones
to keypad zone terminals if the DEOL supervision
option is selected.
This option can only be selected if Normally
Closed (NC) detection devices or contacts are
being used.
Only one NC contact can be connected to each
zone.Wiring multiple detection devices or
contacts on a single loop is not allowed
.
The following chart shows zone status under certain conditions:
Loop Resistance Loop Status
0Ω (shorted wire, loop shorted) Fault
5600Ω (contact closed) Secure
Infinite ( roken wire, loop open) Tamper
11200Ω (contact open) Violated
○○○○○○○○○○○○○○○○○○○○○○○○○○○○○○○○
End of Line Resistors ................................. Section [013]: [1]
○○○○○○○○○○○○○○○○○○○○○○○○○○○○○○○○
Dou le End of Line Resistors .................... Section [013]: [2]
2.9 Fire Zone Wiring
4-Wire Smoke Detectors
All fire zones must e wired according to the following diagram:
2.10 24-Hr Auxiliary Input Wiring (PGM2)
If PGM2 has een programmed
for 24-hour operation, the zone
must e wired according to the
following diagram:
2.11 LINKS Zone Wiring
LINKS Support
When using the LINKS 1000
cellular communicator, connect
the LINKS to the main panel
according to the following
diagram:
LINKS Supervision (24 Hour Supervisory)
When using the LINKS 1000 cellular
communicator, any main oard
zone may e configured for LINKS
Supervision. Program this zone as
zone type [09], 24 Hour Supervisory
in section [001].
With a LINKS Supervisory zone, if
the LINKS 1000 experiences a
trou le, the zone will e violated,
causing the panel to report the
event to the central station. This
type of zone
always
requires a
single EOL resistor (5600Ω).
Wire this zone according to the a ove diagram.
LINKS Answer
When using the LINKS 1000
cellular communicator, any main
oard zone may e configured
for LINKS Answer.
A zone configured for LINKS
Answer allows downloading to
e performed in the event of
telephone line failure. When the
LINKS receives a telephone call,
it will activate the RING terminal
on the LINKS circuit oard. The
zone programmed as LINKS
Answer
always
requires a single
EOL resistor (5600Ω).
Wire the LINKS Answer zone according to the a ove diagram.
The LINKS Answer zone is only required for
downloading to the panel via the LINKS.
When using the LINKS, BusyTone Detection must
not be used.
Keypad zones cannot be used for 24 Hour
Supervisory or LINKS Answer.

G E T T I N G S T A R T E D
7
2.12 Keypad Zones
Each “z” keypad on the system has a zone input to which a
device - such as a door contact - can e connected. This saves
you from running wires ack to the control panel for every
device.
To install the keypad, open the keypad plastic y removing the
screw at the ottom of the unit. Locate the five terminals on the
keypad circuit oard. Connect the four Key us wires from the
control panel: the red wire to R, the lack to B, the yellow to Y
and the green to G.
To connect the zone, run one wire to the Z terminal and the other
to B. For powered devices, use red and lack to supply power
to the device. Run the red wire to the R (positive) terminal and
the lack wire to the B (negative) terminal.
When using end of line supervision, connect the zone according
to one of the configurations outlined in Section 2.8 “Zone
Wiring.” End of line resistors must be placed on the device
end of the loop, not at the keypad.
Keypad zones do not support DEOL resistors.
Assigning Keypad Zones
When using keypad zone inputs, each input used must e
assigned a zone num er in Installer’s Programming.
First, ensure that you have enrolled all installed keypads into the
desired slots. (See Section 2.5 “Keypad Enrollment.”)
Next, enter programming section [020] to assign the zones.
There are eight programming locations in this section, one for
each keypad slot. Enter a 2-digit zone num er for each of the
keypad zones. This num er must e entered in the location
corresponding to the keypad to which each zone is connected.
Keypad zones 1-6 will replace zone terminals Z1-
Z6 on the control panel.
Once the keypad zones are assigned, you must
also program zone definitions and zone attributes.
(See also Section 5.4 “Assigning Keypad Zones”).

8
Keypad Commands
SECTION3
Use any system keypad to enter commands and/or program the
PC5008 security system. The LED keypad uses function and
zone indicator lights to represent alarm functions and status. If
you have a PC1555RKZ keypad, the System light acts as a
Trou le, Memory, Program and Bypass indicator. Unlike other
LED keypads, these conditions will only e represented y the
System light. The LCD keypad provides a written description on
the liquid crystal display and uses function indicator lights to
communicate alarm status to the user.
The PC5008 Instruction Manual provides asic directions for
arming and disarming the system, ypassing zones and
performing user functions from the keypads. The following
sections provide additional details on these functions.
3.1 Arming and Disarming
For a description of asic arming and disarming, please see the
PC5008 Instruction Manual. For other methods of arming, please
refer to Section 3.4 (“[✱] [0] Quick Arm” and “[✱] [9] Arming
Without Entry Delay”) and Section 3.5 (“Function Keys”).
The Event Buffer will log“Armed in Stay Mode”or
“Armed in Away Mode” whenever the system is
armed.
In an attempt to prevent false alarms, the Audible Exit Fault will
notify the user of an improper exit when they arm their system.
If a non force-arming Delay 1 or Delay 2 type zone is left open
at the end of the exit delay, the entry delay will egin immediately
and the ell or siren will sound a steady alarm for the entry delay
period. At the end of the entry delay period, if the system has not
een disarmed it will go into alarm. This feature can e turned
OFF in programming section [013], option [6]. (See section 5.17
“Arming / Disarming Options” for more information.)
3.2 Auto Bypass – Stay Arming
Stay arming allows the user to arm the system without leaving the
premises. All zones programmed as stay/away will e ypassed
when the user stay arms the system, so that the user does not
have to ypass interior zones manually. (See section 5.2 “Zone
Programming”.)
When the system is armed using a valid access code, if any
zones on the system have een programmed as stay/away
zones, the Bypass light will turn ON. The panel will then monitor
all zones programmed as Delay 1 and Delay 2 zones, such as
designated entry/exit doors. If a delay zone is not violated y the
end of the exit delay, the panel will ypass all stay/away zones.
The Bypass light will remain ON to inform the user that the interior
zones have een automatically ypassed y the panel. If a
delay zone is violated during the exit delay, the system will arm
in Away mode and all stay/away zones will e active after the exit
delay expires.
The user can arm the stay/away zones at any time y entering
the [✱]
[1] keypad command (see Section 3.4 “[✱] [1] Zone
Bypass”).
Stay arming can also e initiated y pressing and holding the
Stay function key for two seconds on the PC5508Z and LCD5500Z
keypads, if programmed y the installer. For more information
regarding Stay arming, please see Section 3.5 (“Function Keys”).
3.3 Automatic Arming
The system can e programmed to Auto-Arm at a specific time
every day if it is in the disarmed condition. In order for the Auto-
Arm function to work properly, you must program the correct
Time of Day. For programming the clock and auto-arm times,
see Section 3.4 (“[✱]
[6] User Functions”).
When the system’s internal clock matches the Auto-Arm Time,
the panel will check the system status. If the system is armed,
the panel will do nothing until the next day at the Auto-Arm
Time, when it will check the system again. If the system is
disarmed at the auto-arm time, the panel will sound the uzzer
of all keypads for one minute. If the Bell Squawk During Auto
Arm option is ena led (section [014], option [2]), the ell will
squawk once every 10 seconds while the system is auto-arming.
If a valid Access code is entered, Auto-Arming will e a orted.
If Auto-arm is cancelled, the number of the user
who cancelled the auto-arm will be logged in the
Event Buffer.
If no code is entered, the panel will auto-arm. If a zone is
violated, the panel will transmit a Partial Closing Reporting
Code – if programmed – to indicate to the central station that the
system is not secure. If the zone is restored, the panel will add
the zone ack into the system.
Auto arming can only be cancelled by entering a
valid access code at any keypad.
3.4 [✱]
Commands
The [✱]
key commands provide an easy way for the user to
access asic system programming – such as programming
access codes or ypassing zones. The user can also use the
[✱]
key commands to check on the system’s status, including
viewing trou le conditions and displaying the event uffer on
the LCD keypad.
The [✱]
key commands can e performed from oth LCD and
LED keypads. The LED keypad uses the zone indicator lights to
display command information. The LCD display provides written
information, guiding the user through each command. The
commands in this section are explained as viewed from an LED
keypad. When using an LCD keypad, use the arrow keys (< >)
to scroll through information provided. Otherwise, the functions
remain the same for oth keypad types.
[✱]
[1] Bypassing and Activating Stay/Away Zones
Use the [✱]
[1] keypad command to ypass individual zones. A
ypassed zone will not cause an alarm.
Zones can only be bypassed when the system is
not armed.
If the Code Required for Bypass option is ena led (section
[015], option [5]), only access codes with the ypass attri ute
ena led will e a le to ypass zones (see Section 5.1
“Programming Security Codes”).
If the BypassStatus Displayed WhileArmed option is chosen,
the Bypass (or System) light will e ON while the system is
armed to indicate any ypassed zones (see Section 5.17
“Arming / Disarming Options”).
When you disarm the system, all manually-
bypassed zones will be unbypassed.
Activate Stay/Away Zones
If the system is armed in stay mode
,
the [✱]
[1] command can e
used to activate the stay/away zones.
KEYPADVCOMMANDS
9
[✱]
[2] Trouble Display
The panel constantly monitors itself for several different trou le
conditions. If a trou le condition is present, the Trou le (or
System) light will e ON and the keypad will eep twice every 10
seconds. The trou le eep can e silenced y pressing any key
on any keypad. If Bell Squawk on Trouble is ena led (section
[014], option [5]), the ell will squawk every 10 seconds when a
trou le condition is present.
To view trouble conditions from an LED keypad:
1. Press [✱]
[2].
2. The keypad will flash the Trou le (or System) light. The zone
indicator lights corresponding to the present trou le
conditions will e ON.
When using an LCD keypad, the trou le conditions will e listed
on the display; simply use the arrow (< >) keys to scroll through
the list of present trou le conditions.
Troubles can be viewed while armed using the
LCD keypad, provided the keypad is version 2.0 or
later. Older keypads will incorrectly display “Fire
Trouble”. If using older LCD keypads, program-
ming section [013], option [3] as OFF will ensure
troubles are displayed correctly.
The various trou les are descri ed elow:
Light Trouble
1
Service Required
: Press [1] to determine the specific
trou le. Lights 1 - 5 will light up to indicate the trou le:
• Light [1] – Low Battery: Main panel ackup attery
charge is low ( elow 11.5 volts under load). Trou le is
restored when the attery charges over 12.5 volts.
• Light [2] – Bell Circuit Trou le: The ell circuit is open
(see Section 5.13 “Siren”).
• Light [3] – General System Trou le: This trou le will e
present if the PC5204 Power Supply module has an
AUX failure, PC5204 Output #1 Trou le, or a printer
connected to the PC5400 Printer module has a fault
(off-line).
• Light [4] – General System Tamper: Tamper has een
detected in a module.
All tamper conditions must be physically restored
before the trouble condition can be cleared.
• Light [5] – General System Supervisory: The panel
has lost communication with a module connected to
the Key us (see Section 2.6 “Supervision”). The event
uffer will log the event.
• Light [6] – Not used
• Light [7] - PC5204 Low Battery: The PC5204 module
has a low ackup attery.
• Light [8] - PC5204 AC Failure: The PC5204 module
has lost AC power.
If you remove and then restore power to the main
panel in order to service any PC5204 module, or
any module being powered by a PC5204, you must
also remove and then restore power to the PC5204
and any connected modules.
This ensures that any troubles present on the
module are correctly logged and/or annunciated.
2
AC Failure
: AC power is no longer eing supplied to the
control panel. The Trou le (or System) light will flash if
an AC Failure is present, if the Trou le Light Flashes if
AC Fails option is programmed (section [016], option
[2]). This trou le will not e displayed if the AC Trou le
Displayed option is disa led (section [016], option [1]).
See section 5.8 “Communicator Reporting Codes” for
information on AC trou le reporting.
3
Telephone Line Monitoring Trou le (TLM)
: There is a
pro lem with the telephone line (See section 5.12
“Telephone Line Monitor”.)
4
Failure to Communicate (FTC)
: The communicator failed
to communicate with any of the programmed telephone
num ers (see section 5.5 “Communicator - Dialing”).
5
Zone Fault (including Fire Zone)
: A zone on the system
is experiencing trou le, meaning that a zone could not
provide an alarm to the panel if required to do so (if a fire
zone is open, or there is a short on a DEOL zone, or a
supervisory fault on a wireless zone). When a zone fault
trou le condition occurs, the keypad(s) on the system
will start to eep. Press [5] while in Trou le mode to view
the affected zones.

A Fire zone trouble will be generated and dis-
played in the armed state.
6
Zone Tamper
: A zone configured for Dou le End Of Line
resistor supervision has a tamper condition, or the
tamper switch is open on a wireless device. When a
tamper condition occurs, the keypad(s) will start to
eep. Press [6] while in the Trou le mode to view the
affected zones. If a zone is tampered or faulted, it must
e fully restored to clear the trou le.
By enablingTampers/Faults Do Not Show as Open
in section [013], option [4],Faults andTampers will
not show as open on the keypad, and will be
hidden from the end user. If the option is disabled,
Faults and Tampers will show as open.
Once a zone is tampered or faulted, it must be
completely restored before the trouble condition
will clear.
7
Device Low Battery
: A wireless device has a low attery
condition. Press [7] one, two, or three times to view
which devices are experiencing attery failure. An LED
keypad will indicate attery failure using zone lights 1 to
8. The following will occur:
Keypad eeps: Keypad displays:
Press [7] 1 Zones with low atteries (LED
keypad - zone lights 1 to 8)
Press [7] again 2 Handheld keypads with low
atteries (LED keypad - zone
lights 1 to 4)
Press [7] again 3 Wireless keys with low atteries
(LED keypad - zone lights 1 to
8)
To view the attery conditions
of wireless keys 9 through 16,
you must use an LCD keypad.
8
Loss of System Time
: When the panel is powered up, the
internal clock needs to e set to the correct time. This
trou le is cleared when an attempt is made to reset the
clock.

KEYPADVCOMMANDS
10
[✱]
[3] Alarm Memory
The Memory (or System) light will e on if any alarm occurred
during the last armed period or – in the case of 24 hour zones –
if an alarm occurred while the panel was disarmed.
To view alarm memory, press [✱]
[3]. The keypad will flash the
Memory (or System) light and the zone indicator lights
corresponding to the alarm or tamper conditions which occurred
during or since the last armed period. To clear the Memory (or
System) light, arm and disarm the system.
[✱]
[4] Door Chime On/Off
The door chime feature is used to sound a tone from the keypad
whenever a zone programmed as a chime zone is activated (see
Section 5.3 – “Zone Attri utes”). If the door chime feature is
ena led, the keypad will emit five short eeps whenever a chime
zone is activated. Designated entry/exit doors are often defined
as chime zones. The feature can e turned on or off while the
system is armed or disarmed.
[✱]
[5] Programming Access Codes
There are 37 access codes availa le to the user. They are:
Access code (40) ............. One master code
Access codes (01)-(32) ... 32 general access codes
Access codes (33)-(34) ... Two duress codes
Access codes (41)-(42) ... Two supervisor codes
All access codes have the a ility to arm or disarm the system
and can activate the PGM Outputs using the [✱]
[7] commands.
Access codes can e either four or six digits (see section 5.1
“Programming Security Codes).
For a description of how to program access codes from LCD or
LED keypads, see the PC5008 Instruction Manual.
Master Code – Access Code (40)
By default, the Master Code is ena led to perform any keypad
function. This code can e used to program all Access codes.
If the Master Code Not Changeable option is ena led, the
Master Code can only e changed y the Installer.
General Access Codes – Access Codes (01) to (32)
General access codes can arm and disarm the system. When
the Code Required for Bypassing option is ena led, users will
need to enter a valid access code when ypassing zones.
Individual access codes can have the Zone Bypassing attri ute
disa led under Access Code Attri ute programming.
For more information regarding access code options, please
see Section 5.1 – “Programming Security Codes.”
Duress Code – Access Code (33) and (34)
Duress codes will send a duress reporting code to the central
station when entered.
If a duress code is programmed, when it is used,
the panel will always send a reporting code to the
central station, even if the attributes of the duress
code are turned off.
Supervisor Codes – Access Code (41) and (42)
These codes can e used to program general access and
duress codes. The two supervisor codes have master code
attri utes y default. These settings can e changed.
Access Code Attributes
There are three access code attri utes which can e programmed
for each code. To program each attri ute, enter [✱] [5] [Master
Code] [9] to enter the attri ute programming mode. Then enter
the code num er [01-32,33,34,41,42]. Enter the attri ute num er:
Attri ute [1] ... User ena led for arming, disarming, alarm reset,
[✱] [7] [1-4] options, auto arm cancellation
Attri ute [2] ... Not used
Attri ute [3] ... Zone ypassing ena led
Attri ute [4] ... Escort5580 access ena led
Master code attributes cannot be changed.
[✱]
[6] User Functions
This command can e used to program several different functions:
To program User Functions:
1. Press [✱]
[6] [Master Code]. The Program (or System) light
will flash.
2. Press the num er [1] to [6] for the item to e programmed.
• [1] – Time and Date
The time and date must e accurate for the auto-arm or test
transmission functions to work properly and for the event
uffer to time and date stamp all events.
- Enter the time (hour and minute) using 24hr format [HH MM]
from 00:00 to 23:59.
- Enter the date y month, day and year [MM DD YY].
• [2] – Auto-Arm Ena le/Disa le
To ena le or disa le auto-arming, press [2]. The keypad will
sound three short eeps when auto-arm is ena led and one
long eep when disa led. For more information, see Section
3.3 – “Auto-Arming”.
• [3] – Auto-Arm Time
The system can e programmed to arm automatically at a
preset time. When programming the auto-arm time, enter the
time (hour and minute) using 24hr format [HH MM]. For more
information, see Section 3.3 – “Auto-Arming”.
• [4] – System Test
When [4] is pressed the panel will test the ell output, keypad
lights and the communicator for two seconds. The panel will
also send a System Test Reporting code, if programmed (see
Section 5.8 – “Communicator – Reporting Codes”).
• [5] – Ena le DLS (Downloading)
When [5] is pressed, the panel will ena le the downloading
option for one or six hours depending on the option selected
in programming section [702]: [7]. During this time, the panel
will answer incoming downloading calls (see Section 5.10
“Downloading”).
• [6] – User Initiated Call-Up
When [6] is pressed, the panel will initiate a call to the
downloading computer.
• [7] – Ena le Background Music
If ena led on the PC59XX Audio Interface Module, when [7] is
pressed, the user can turn ackground music On or Off.
Additional Features Available from the LCD
Keypad
Additional features, including access to the event uffer, are
availa le using the LCD keypad. Use the arrow keys (< >) to
scroll through the [✱]
[6] menu and press the [✱]
key to select the
following commands:
Viewing the Event Buffer from an LCD Keypad
Select “View Event Buffer” from the [✱] [6] menu. The keypad will
display the event, event num er, time and date along with the
zone num er and access code, if applica le. Press [✱] to toggle
etween this information and the event itself. Use the arrow keys
(<>) to scroll through the events in the uffer. When you have
finished viewing the Event Buffer, press [#] to exit.

KEYPADVCOMMANDS
11
Brightness Control
You can select from 10 different acklighting levels. Use the
arrow keys (< >) to scroll to the desired acklighting level. Press
[#] to exit.
Contrast Control
You can select from 10 different display contrast levels. Use the
arrow keys (< >) to scroll to the desired contrast level. Press [#]
to exit.
Keypad Sounder Control
You can select from 21 different keypad tones. Use the arrow
keys (< >) to scroll to the desired keypad sound level and press
[#] to exit. This feature can e accessed on LED keypads y
pressing and holding the [✱]
key.
[✱]
[7] Command Output Functions
The user can activate programma le output functions using the
[✱][7][1-2] commands. The outputs may e activated when the
system is either armed or disarmed.
[✱] [7] [1] – Command Output Option #1:
Press [✱]
[7] [1] [Access Code, if required] to activate outputs
programmed as PGM output option [19]. This output can e
used for operating devices such a garage door opener, lighting
or door strikes.
[✱] [7] [2] – Command Output Option #2:
Press [✱]
[7] [2] [Access Code, if required] to activate all outputs
programmed as
one of
PGM output options [03] or [20].
Special Note: Traditionally, [✱] [7] [2] has een reserved for
resetting smoke detectors. Smoke detectors should now e
programmed as output [03] “Sensor Reset”. If using output
option [03],
do not
program [20] Command Output Option #2.
Please see Section 5.11 “PGM Output Options” for more
information.
[✱]
[8] Installer’s Programming
Enter [✱]
[8] followed y the Installer’s Code to access Installer’s
Programming. See sections 4 and 5 for more information.
[✱]
[9] Arming Without Entry Delay
When the system is armed with the [✱]
[9] command, the panel
will cancel the entry delay. Once the exit delay has expired,
Delay 1 and Delay 2 type zones will e instant and Stay/Away
zones will e ypassed (see Section 5.2 – “Zone Programming”).
A valid access code must e entered after pressing [✱]
[9].
[✱]
[0] Quick Arm
If the Quick Arm option is ena led, enter [✱]
[0] to arm the panel
without an access code (See Section 5.17 “Arming / Disarming
Options”).
Quick Arm cannot be used to cancel auto arm.
[✱]
[0] Quick Exit
The Quick Exit function, if ena led, will allow someone to leave
an armed premises through a Delay type zone without having to
disarm and re-arm the system (See Section 5.17 “Arming /
Disarming Options”).
When [✱]
[0] is entered, the panel will provide a two minute
window for the user to exit the premises. During this time, the
panel will ignore
only one
activation of a Delay zone. When the
Delay zone is secured, the panel will end the two minute quick
exit delay.
If a second Delay zone is tripped, or if the zone is not restored
after two minutes, the panel will egin the entry delay.
If the Exit Delay is in progress, performing a Quick
Exit will not extend the Exit Delay.
3.5 Function Keys
There are five function keys on each keypad la elled Stay,
Away, Chime, Reset and Exit. Each of these keys is programmed
y default to perform one of the functions descri ed elow.
Press and hold the appropriate key for two seconds to activate
a function.
On the PC1555RKZ keypad, use number keys 1 - 5
for the function keys.
“Stay” – (03) Stay Arm
The system will arm in the Stay mode (see section 3.2). Ena le
the Quick Arm feature (programming section [015], option [4])
to have this key function without the need to enter an access
code. If Quick Arm is not ena led, the user will have to enter an
access code efore the system will stay arm.
“Away” – (04) Away Arm
The system will arm in the Away mode (see section 3.2). Ena le
the Quick Arm feature (programming section [015], option [4])
to have this key function without the need to enter an access
code. If Quick Arm is not ena led, the user will have to enter an
access code efore the system will away arm.
“Chime” – (06) Door Chime On / Off
The Door Chime feature will turn ON or OFF (see Section 3.4 –
“[✱] [4] Door Chime”).
“Reset” – (14) Sensor Reset or [✱] [7] [2]
The panel will activate all PGM outputs programmed as option
[03] Sensor Reset or [20] Command Output Option #2. (See
Section 3.4 – “[✱] [7]Command Output Functions”).
“Exit” – (16) Activate Quick Exit
The panel will activate the Quick Exit feature (See Section 3.4 –
“[✱] [0] Quick Exit”).
Additional Function Key Options
The programming of any function key on any keypad may e
changed to one of the options listed elow. (See section 2.5,
“Keypad Enrollment” for instructions on changing function key
programming.) Each option is listed according to the
programming code, followed y the corresponding [✱] key
command. For more information regarding each function, please
refer to the appropriate part of Section 3.4, “[✱] Commands”.
[00] NullKey:The key is not used and will perform no function
when pressed.
[01]-[02] For Future Use
[03] Stay Arm: As descri ed a ove.
[04] Away Arm: As descri ed a ove.
[05] [✱]
[9] No-Entry Delay Arm: A valid access code must
also e entered.
[06] [✱]
[4] Door Chime On / Off: As described above.
[07] [✱]
[6] [----] [4] System Test: A valid master code must
also e entered.
[08] [✱]
[1] Bypass Mode: A valid access code may need to
be entered.
[09] [✱]
[2] Trouble Display
[10] [✱]
[3] Alarm Memory
[11] [✱]
[5] Programming Access Codes: A valid master
code must also e entered.
[12] [✱]
[6] User Functions: A valid master code must also
e entered.
[13] [✱]
[7] [1] Command Output Option #1: A valid access
code must also e entered.

KEYPADVCOMMANDS
12
[14] [✱]
[7] [2] Reset (Command Output Option #2): As
descri ed a ove.
[15] General Voice Prompt Help: This feature can only e
programmed if oth the Escort5580 and the PC5928
Audio Matrix module are eing used. The intercoms will
perform a Help page. The user must then press the Page/
Answer utton on any intercom station to egin the help
session with the Escort.
[16] [✱]
[0] Quick Exit: As described above.
[17] [✱]
[1] Reactivate Stay/Away Zones
[18] IdentifiedVoicePromptHelp: Can only e programmed
if oth the Escort5580 and the PC5928 Audio Matrix
module are eing used. The Escort will egin a help
session from the intercom station closest to the keypad.
You must also program PC5928 Section [802], su section
[14] “Keypad Port Assignments.” For more information,
please refer to the PC5928 Installation Manual.
This function key cannot be programmed for
PC55XX LED keypads with software version 1.0.
[19] [✱]
[7] [3] Command Output Option #3
[21] [✱]
[7] [4] Command Output Option #4
3.6 Features Available for the LCD5500Z
These features are only availa le for LCD5500Z keypads with
zone inputs:
Automatic Scrolling of Alarms in Memory
The LCD5500Z keypad allows automatic scrolling through
alarms in memory while the keypad is idle. This feature, if
ena led, will override the clock display. This option can e
programmed in LCD programming section [66], option [4].
24 Hour Time Display Option
The LCD5500Z can e programmed to display time using a 24-
hour clock, instead of a 12-hour, am/pm clock. This option can
e programmed in LCD programming section [66], option [3].
Keypad Zones
See section 2.12 “Keypad Zones”.
Viewing Troubles While Armed
See section 3.4 “[✱][2] Trou le Display” for information on how
to view trou les.
Backlighting Boost
The LCD5500Z and PC5508Z zone input keypads will provide
extra num er pad lighting when any key is pressed. The
acklighting oost will last for an additional 30 seconds after
the last keypress.

13
How to Program
SECTION4
The following section of the manual descri es the Installer’s
Programming function and how to program the various sections.
You must read the following section of the manual
very carefully before you begin programming.We
also recommend filling out the Programming
Worksheets section before you program the panel.
○○○○○○○○○○○○○○○○○○○○○○○○○○○○○○○○
For your reference, the corresponding programming
sections for the functions listed are highlighted in text
○○○○○○○○○○○○○○○○○○○○○○○○○○○○○○○○
oxes such as this one.
4.1 Installer’s Programming
Installer’s Programming is used to program all communicator
and panel options. The Installer’s Code is [5008] y default ut
should e changed to prevent unauthorized access to
programming.
○○○○○○○○○○○○○○○○○○○○○○○○○○○○○○○○
○○○○○○○○○○○○○○○○○○○○○○○○○○○○○○○○
Installer’s Code ................................................. Section [006]
From an LED Keypad:
1. Enter [✱] [8] [Installer’s Code].
• The Program light will flash to indicate that you are in
programming mode.
• The Armed light will turn ON to indicate that the panel is
waiting for the three-digit programming section num er.
2. Enter the three-digit section num er corresponding to the
section you wish to program.
• The Armed light will turn OFF.
• The Ready light will turn ON to indicate that the panel is
waiting for the information required to complete programming
the selected section.
3. Enter the information required to complete section
programming (ie: num ers, HEX data, or ON/OFF options).
If the three-digit section number entered is
invalid, or if the module which pertains to the
section is not present, the keypad will sound a
two second error tone.
From an LCD Keypad:
1. From any keypad, enter [✱] [8] [Installer’s Code]. The
Keypad will display ‘Enter Section’ followed y three dashes.
2. Enter the three-digit num er corresponding to the
programming section num er you wish to program. The
keypad will now display the information required to complete
programming the selected section.
3. Enter the information required to complete section
programming (ie: num ers, HEX data, or ON/OFF options).
If you enter information into a section and make a mistake, press
the [#] key to exit the section. Select that section again and re-
enter the information correctly.
There must be one digit in each box in the
programming section in order for the change to
be valid.
4.2 Programming Decimal Data
A set num er of programming oxes are allotted for each
section requiring decimal data (e.g.: codes, telephone num ers).
If a digit is entered for each program ox, the panel will
automatically exit from the selected programming section. The
Ready light will turn OFF and the Armed light will turn ON.
On the PC5508Z keypad, you can also press the [#] key to exit
a programming section without entering data for every ox. This
is handy if you only need to change digits in the first few
programming oxes. All other digits in the programming section
will remain unchanged.
4.3 Programming HEX Data
On occasion, hexadecimal (HEX) digits may e required. To
program a HEX digit press the [✱] key. The panel will enter HEX
programming and Ready light will egin to flash.
The following are the num ers which should e pressed to enter
the appropriate HEX digit:
1 = A 2 = B 3 = C 4 = D 5 = E 6 = F
Once the correct HEX digit has een entered, the Ready light
will continue to flash. If another HEX digit is required, press the
corresponding num er. If a decimal digit is required, press the
[✱] key again. The Ready light will turn ON and the panel will
return to regular decimal programming.
Example:
To enter ‘C1’ for a closing y user 1, you would enter:
[✱] [3] [✱], [1]:
•[✱] to enter Hexadecimal mode (Ready light flashes)
• [3] to enter C
•[✱] to return to decimal mode (Ready light is solid)
• [1] to enter digit 1
If Ready light is flashing, any number you enter
will be programmed as the HEX equivalent.
If you are using a pulse communications format, a decimal zero
[0] does not transmit. Programming a zero [0] tells the panel not to
send any pulses for that digit. Decimal zero [0] is a filler digit. To
transmit a zero [0], it must e programmed as a Hexadecimal ‘A’.
Example:
For the three digit account num er ‘403’, you would enter:
[4], [✱] [1] [✱] [3], [0]:
• [4] to enter the digit 4
•[✱] to enter Hexadecimal mode (Ready light flashes)
• [1] to enter A
•[✱] to return to decimal mode (Ready light is solid)
• [3] to enter the digit 3
• [0] to enter the digit 0 as a filler digit.

HOWVTOVPROGRAM
14
4.4 Programming Toggle Option Sections
Some programming sections contain several toggle options.
The panel will use zone lights 1 through 8 to indicate if the
different options are ena led or disa led. Press the num er
corresponding to the option to turn it ON or OFF. Once all the
toggle options have een selected correctly, press the [#] key
to exit the section and save the changes. The Ready light will
turn OFF and the Armed light will turn ON.
Refer to Section 5 in this manual to determine what each option
represents and whether the light should e ON or OFF for your
application.
4.5 Viewing Programming
LED Keypads
Any programming section can e viewed from an LED keypad.
When a programming section is entered, the keypad will
immediately display the first digit of information programmed in
that section.
Press any of the Emergency Keys (Fire, Auxiliary or Panic) to
advance to the next digit. When all the digits in a section have
een viewed, the panel will exit the section; the Ready Light will
turn OFF and the Armed light will turn ON, waiting for the next
three-digit programming section num er to e entered. Press
the [#] key to exit the section
LCD Keypad
When a programming section is entered, the keypad will
immediately display all the information programmed in that
section. Use the arrow keys (< >) to scroll through the data eing
displayed. Scroll past the end of the data displayed or press the
[#] key to exit the section.
The keypad displays the information using a inary format,
according to the following chart:
Value
Zone 1
Zone 2
Zone 3
Zone 4
Light On
Light Off
* See Hex Data Entry instructions
Hex Data Entry*

15
Program Descriptions
The following section explains the operation of all programma le
features and options and provides a summary of all
corresponding programming locations.
5.1 Programming Security Codes
There are three codes which can e programmed y the
installer in the Installer’s Programming function: the Master
code, the Installer’s code, and a Maintenance code. All other
access codes can e programmed through the [✱] [5] command
(see Section 3.4).
The master code can also e programmed y the user as access
code (40). If the MasterCodeNotChangeable option is ena led,
the system master code can only e changed y the installer.
General access codes can arm and disarm the system. When
the CodeRequired for Bypassing option is ena led, users will
need to enter a valid access code when ypassing zones.
Individual access codes can have the Zone Bypassing attri ute
disa led under Access Code Attri ute programming (see
section 3.4 “[✱][5] Programming Access Codes”).
If the 6-Digit User Access Codes option is ena led, all the access
codes may e programmed with six digits instead of four, with the
exception of the Panel ID code and the Downloading Access Code.
○○○○○○○○○○○○○○○○○○○○○○○○○○○○○○○○
Installer’s Code .................................................. Section [006]
Master Code ...................................................... Section [007]
Maintenance Code ............................................ Section [008]
Master Code Not Changea le ................... Section [015]: [6]
No Code Required for Bypassing ............. Section [015]: [5]
○○○○○○○○○○○○○○○○○○○○○○○○○○○○○○○○
6-digit User Access Codes ........................ Section [701]: [5]
The Maintenance code is limited to arming and
disarming the system.The Maintenance code
cannot use [
✱✱
✱✱
✱
][9] to arm the system, bypass
zones, or perform [
✱✱
✱✱
✱
][7] command functions.
5.2 Zone Programming
All eight zones are ena led y default. Unused zones should e
disa led in programming section [202].
Section [001] will allow you to select how each of the zones you
use will operate. Each zone requires a two-digit code to e
programmed, which descri es the zone definition. Select a
definition from the list elow.
In addition, each zone has eight different attri utes which may
e programmed in sections [101] to [108] (see Section 5.3 –
“Zone Attri utes”).
Zone Definitions
[00] Null Zone
The zone is vacant. Unused zones should e programmed as
Null zones.
[01] Delay 1 Zone
This zone type, normally used for entry/exit doors, can e
violated during the exit delay time without causing an alarm.
Once the exit delay has expired, opening the zone will start the
entry delay timer. During the entry delay time, the keypad
uzzer will sound steadily to advise the user that the system
should e disarmed. If the panel is disarmed efore the entry
time expires, no alarm will e generated.
[02] Delay 2 Zone
The Delay 2 entry delay time can e set independently of Delay
1 in programming section [005] (System Times).
S E C T I O N 5
[03] Instant Zone
This zone type will cause an instant alarm if it is violated when
the panel is armed. Typically, this zone is used for windows,
patio doors or other perimeter zones, and glass reak detectors.
[04] Interior Zone
This zone will not cause an alarm if violated during the entry
delay. If the zone is violated efore the entry delay has egun,
it will cause an instant alarm. Typically, this zone is used for
interior protection devices, such as motion detectors.
[05] Interior Stay/Away Zone
This zone type works similarly to the Interior zone type, except
that it will e automatically ypassed under the following
conditions:
• When the panel is armed in the Stay Mode (see Section 3.5
“Function Keys”).
• When the panel is armed without entry delay (see Section 3.4
“[✱] [9] Arming Without Entry Delay”).
• When the panel is armed with an access code and a Delay
type zone is NOT tripped during the exit delay.
The automatic ypass prevents the user from having to manually
ypass interior type zones when arming at home. This zone is
typically used for interior protection devices, such as motion
detectors.
[06] Delay Stay/Away Zone
This zone type will operate similarly to Interior Stay/Away zones,
except that it will always provide an entry delay. Typically, this zone
is used for interior protection devices, such as motion detectors.
This zone option will help prevent false alarms since it always
provides an entry delay time for the user to turn off the panel.
Hardwire motion detectors covering entry/exit
doors that are using wireless transmitters must
be programmed as Delay Stay/Away. If not, the
panel may see the motion detector violation
before the entry/exit transmitter has time to
transmit to the receiver, causing a false alarm.
[07] Delayed 24 Hour Fire Zone
Do not wire Fire zones on keypad zone terminals
if the DEOL supervision option is enabled for the
panel (section [013], option [2]).
When this zone is violated, the alarm output will e immediately
activated (pre-alert) ut the communicator will e delayed for
30 seconds. If the user presses any key on any keypad during
this delay, the alarm output and the communicator will e
delayed an additional 90 seconds, giving the user time to
correct the pro lem. If the zone is still violated after the 90
second delay, the panel will sound the alarm output and delay
the communicator for 30 seconds.
If the user does not press a key during the 30 second pre-alert,
the alarm output will latch and the panel will communicate the
alarm to the central station. The alarm will sound until the Bell
Cutoff time expires (Section [005] “System Times”), or until a
code is entered (see Section 5.13 “Siren”).
If a second Fire type zone is violated or if the Fire
keys are pressed during the delay period, the
panel will latch the alarm output and will immedi-
ately communicate the alarm.

P R O G R A M D E S C R I P T I O N S
16
A violated Fire zone will e displayed on all keypads and can
e delayed at any keypad. Typically this zone is used for
latching smoke detectors.
[08] Standard 24 Hour Fire Zone
Do not wire Fire zones on keypad zone terminals
if the DEOL supervision option is enabled for the
panel (section [013], option [2]).
When this zone is violated, the panel will immediately latch the
alarm output and communicate to the central station. The alarm
will sound until the Bell Cutoff time expires (Section [005]
“System Times”), or until a code is entered (see Section 5.13
“Siren”).
A violated Fire zone will e displayed on all keypads. Typically
this zone is used for pull stations.
[09] 24 Hour Supervisory Zone
If this zone is violated when the system is either armed or
disarmed, the panel will report to the central station, and will log
the zone alarm to the Event Buffer. This zone gives a silent alarm
y default.
Do not wire 24-Hour Supervisory zones on
keypad zone terminals.
[10] 24 Hour Supervisory Buzzer Zone
If this zone is violated when the system is either armed or
disarmed, the panel will immediately latch the keypad uzzer
until a valid access code is entered and will immediately
communicate to the central station.
[11] 24 Hour Burglary Zone
If this zone is violated when the system is either armed or
disarmed, the panel will immediately latch the alarm output and
communicate to the central station. The alarm will sound until
the Bell Cutoff time expires (Section [005] “System Times”), or
until a code is entered (see Section 5.13 “Siren”).
[12] - [20]
The following zone definitions operate similar to the 24 Hour
Burglary except for the System Event output type and the SIA
identifier:
[12] 24 Hour Holdup Zone - This zone gives a silent alarm y
default.
[13] 24 Hour Gas Zone
[14] 24 Hour Heat Zone
[15] 24 Hour Medical Zone
[16] 24 Hour Panic Zone
[17] 24 Hour Non-Medical Emergency Zone
[18] 24 Hour Sprinkler Zone
[19] 24 Hour Water Flow Zone
[20] 24 Hour Freezer Zone
[21] 24 Hour Latching Tamper
If this zone is violated, the installer must enter Installer’s
Programming efore the system can e armed.
Wireless zones should not be programmed as
zone types [22] - [24].
[22] Momentary Keyswitch Arm Zone
Momentary violation of this zone will alternately arm/disarm the
system.
[23] Maintained Keyswitch Arm Zone
When this zone is violated, the system will arm. When this zone
is secured, the system will disarm.
[24] LINKS Answer Zone
Downloading can e performed via the LINKS1000 Cellular
Communicator (if used) when the conventional telephone line is
disconnected. If this operation is desired, connect the RING
terminal of the LINKS1000 to a LINKS Answer zone (see Section
2.11 “LINKS Zone Wiring”). Refer to the LINKS 1000 Installation
Manual for more information.
Do not wire LINKS Answer zones on keypad zone
terminals.
[25] Interior Delay Zone
This zone type is normally used with motion detectors and has
a standard exit delay time.
If the panel is Away armed (a delay zone is violated during the
exit delay, or the Away function key is used), the Interior Delay
zone will work the same as the Interior zone [04].
If the panel is Stay armed (a delay zone is NOT violated during
the exit delay, the Stay key is used, or [✱][9] is used for arming),
a violation of the zone will initiate Entry Delay 1.
[87] Delayed 24 Hour Fire (Wireless)
This zone type operates the same as [07] Delayed 24 Hour Fire
Zone and must e used if the smoke detector is wireless.
[88] Standard 24 Hour Fire (Wireless)
This zone type operates the same as [08] Standard 24 Hour Fire
Zone and must e used if the smoke detector is wireless.
○○○○○○○○○○○○○○○○○○○○○○○○○○○○○○○○
Zone Definitions ............................................................. [001]
○○○○○○○○○○○○○○○○○○○○○○○○○○○○○○○○
Zone Assignments ......................................................... [202]
5.3 Zone Attributes
All zones, with the exception of 24 Hour and Fire,
will provide an exit delay.
Attributes for Fire Zones should never be
changed from the default settings.
Additional zone attri utes can e programmed to customize
the operation of a zone for a specific application. The following
attri utes are programma le for each zone:
• Audible/Silent–This attri ute determines whether or not the
zone will activate the alarm output.
• Pulsed / Steady – This attri ute determines whether the alarm
output will e steady or will pulse on and off every second.
• Activate Chime – This attri ute determines whether or not
the zone will activate the chime feature (see Section 3.4 – “[✱]
[4] Door Chime On/Off”).
• BypassEnable–This attri ute determines whether or not the
zone can e manually ypassed (see Section 3.4 – “[✱] [1]
Bypassing and Reactivating Stay/Away Zones”).
• Force Arm Enable – This attri ute determines whether or not
the system can e armed while a zone is violated. At the end
of the exit delay, if this type of zone is violated, it will e
ignored y the panel. Once the zone is secured, it will e
monitored y the system. This zone attri ute, for example,
will allow the user to arm the system with the garage door
open. Later, when the door is closed, it will e armed along
with the rest of the system. Do not program thisattributefor
24Hr zones.
• Swinger Shutdown Enable – This attri ute determines
whether or not the panel will shut down the communicator and
ell for a zone once its swinger limit has een reached (see
Section 5.19 “Swinger Shutdown”)

P R O G R A M D E S C R I P T I O N S
17
•Transmission Delay Enable – This attri ute determines
whether or not the panel will delay communicating the alarm
reporting code for the programmed Transmission Delay Period
(see Section 5.15 “Transmission Delay”).
•WirelessZone– This attri ute determines which zones are to
have wireless devices. This allows the panel to generate a low
attery trou le and zone supervisories for the wireless zones.
Any zone with the wireless attribute enabled will
not cause an alarm for a fault condition when
armed (or any time for 24-hour zones).
○○○○○○○○○○○○○○○○○○○○○○○○○○○○○○○○
○○○○○○○○○○○○○○○○○○○○○○○○○○○○○○○○
Zone Attri utes ...................... Sections [101] - [108]: [1] - [8]
5.4 Assigning Keypad Zones
“Z” keypads have zone inputs to which devices—such as door
contacts—can e connected. (See Section 2.12 “Keypad Zones”
for wiring information.)
Once the keypad zones are installed, assign the zone in
programming section [020] Keypad Zone Assignments.
Enter the 2 digit zone designated for each keypad (slot address)
from 01-08.
○○○○○○○○○○○○○○○○○○○○○○○○○○○○○○○○
○○○○○○○○○○○○○○○○○○○○○○○○○○○○○○○○
Keypad Zone Assignments ........................................... [020]
5.5 Communicator – Dialing
If the Communicator Disable option is selected, the panel will
not attempt to call central station. If communication is ena led,
the panel will attempt to call central station when an event with
a valid Reporting Code occurs (See Section 5.8 “Communicator
– Reporting Codes”).
The Communicator Call Direction options are used to select
which telephone num er the panel will dial when an event
occurs.
If the DTMF Dialing option is ena led, the panel will dial using
DTMF (touch tone). If the Switch to Pulse Dial option is
ena led, the panel will switch to pulse dialing on the fifth
attempt to call the central station. When this option is disa led,
the panel will always dial using DTMF. If DTMF Dialing is
disa led, the panel will always pulse dial.
When the ForceDialing option is ena led, the panel will dial out
regardless of the presence of dial tone. Each dialing attempt
will follow this pattern:
a) the panel pick up the telephone line and search for dial
tone for 5 seconds
) if no dial tone is found, the panel will hang up and wait for
20 seconds
c) the panel will pick up the telephone line again and search
for a dial tone for 5 seconds
d) the panel will then dial regardless of the presence of dial
tone
If there is no initial handshake recognized within 40 seconds the
panel will then hang up the line.
If the Force Dialing option is disa led, each attempt will still
follow the a ove pattern, except that the panel will not dial in
step d if no dial tone is detected.
The Delay Between Dialing Attempts timer adds a delay
efore the next call is dialed.
If the Busy Tone Detection option is ena led, the panel will
hang up after detecting usy tone for 5 seconds and will redial
after the amount of time programmed in the Delay Between
Dialing Attempts section.
Maximum Dialing Attempts determines the maximum num er
of attempts the panel will make to send a signal to the central
station efore indicating a Failure to Communicate (FTC) trou le
condition. The 3rd Telephone Num er can e used to ack up
the 1st in this situation
.
(see Section 5.7 “Communicator –
Telephone Num ers”). If a later communication attempt is
successful, the FTC reporting code(s) programmed in section
[351] will e transmitted along with the unreported events from
an earlier unsuccessful communication.
When Bell on FTC when Armed is ena led in programming
section [702], option [8], an FTC during the armed period will
sound an Audi le Alarm for the length of Bell time-out or until the
system is disarmed. If FTC Trouble Only when Armed is
ena led, only the keypad uzzer will sound trou le eeps
every 10 seconds until a key is pressed.
Post Dial Wait for Handshake determines the amount of time
the panel will wait for a valid handshake from the receiver. If the
panel does not hear the handshake it will consider the call a
failed attempt, hang up and try again.
The Pulse Dialing Make/Break Ratio option can change the
Make/Break ratio to 33/67 from the North American ratio of 40/60.
With ID Tone Enabled the panel will pulse a tone on the
telephone line to indicate that the panel is on the line.
The 2100Hz/1300Hz ID Tone option selects the frequency of
the ID tone that is pulsed on the line.
Contact your local telephone company to confirm
which settings should be used.
○○○○○○○○○○○○○○○○○○○○○○○○○○○○○○○○
DTMF or Pulse Dialing ............................... Section [380]: [3]
Switch to Pulse Dialing on Fifth Attempt ... Section [380]: [4]
Communicator Ena le/Disa le .................. Section [380]: [1]
Communicator Call Direction Options .... Section [361]-[368]
Force Dialing .............................................. Section [702]: [2]
Delay Between Dialing Attempts ...................... Section [703]
Busy Tone Detect ....................................... Section [701]: [6]
Maximum Dialing Attempts ............................... Section [160]
Post Dial Wait for Handshake ........................... Section [161]
Pulse Dialing Make/Break Ratio ................ Section [702]: [1]
ID Tone Ena led ......................................... Section [702]: [5]
2100Hz/1300Hz ID Tone ............................ Section [702]: [6]
○○○○○○○○○○○○○○○○○○○○○○○○○○○○○○○○
Bell on FTC/Trou le Only ........................... Section [702]: [8]
5.6 Communicator – Account Numbers
The account num er is used y the central station to distinguish
etween panels. There are two account num ers programma le
for the PC5008.
○○○○○○○○○○○○○○○○○○○○○○○○○○○○○○○○
First Account Code (4 digits) ............................ Section [310]
○○○○○○○○○○○○○○○○○○○○○○○○○○○○○○○○
Second Account Code (4 digits) ...................... Section [311]
5.7 Communicator – Telephone Numbers
The panel can use three different telephone num ers for
communicating with the central station. The First Telephone
Numberis the primary num er, the SecondTelephoneNumber
is the secondary num er and the ThirdTelephoneNumberwill
ack up the First telephone num er if ena led.
TheThirdTelephone Number will NOT back up the
Second Telephone Number.
If the Alternate Dial option is ena led, the panel will alternate
etween the first and third telephone num ers when attempting

P R O G R A M D E S C R I P T I O N S
18
to call the central station. If the option is disa led, the panel will
only attempt to call the Third telephone num er after failing to
communicate with the first telephone num er.
To use the ThirdTelephone Number, you must
enable it in section [380], option [5], and program
it in section [303].
Telephone num ers can e up to 32 digits. This allows you to
add special digits if required. To program the telephone num er,
enter the num ers 0 through 9 as required. The following is a list
of programma le HEX digits and the functions they perform:
HEX (B) - simulates the [✱] key on a touch tone telephone
HEX (C) - simulates the [#] key on a touch tone telephone
HEX (D) - forces the panel to search for dial tone
HEX (E) - forces the panel to pause for 2 seconds
HEX (F) - marks the end of the telephone num er
Two-way Voice Monitoring
The PC5928 module has uilt-in two-way voice for central
station monitoring. The central station can select the audio
station, listen/talk, extend on-line time and hang up.The Listen-
In feature can be enabled separately for telephone numbers 1/
3 and 2.
○○○○○○○○○○○○○○○○○○○○○○○○○○○○○○○○
First Telephone Num er .................................... Section [301]
Second Telephone Num er .............................. Section [302]
Third Telephone Num er .................................. Section [303]
Third Telephone Num er Ena le ............... Section [380]: [5]
Alternate Dial .............................................. Section [380]: [6]
Telephone # 1 & 3 Listen-In Ena le ........... Section [381]: [5]
○○○○○○○○○○○○○○○○○○○○○○○○○○○○○○○○
Telephone # 2 Listen-In Ena le ................. Section [381]: [6]
The first digit of all telephone numbers must be
the HEX digit ‘D’ for dial tone search, or HEX digit
‘E’ for a two-second pause.
5.8 Communicator – eporting Codes
The panel can e programmed to report events to the central
station y sending the Reporting Code programmed for a
particular event.
Reporting codes can e one or two digits and can use HEX
digits (A through F). For a complete description of reporting
codes which can e programmed and lists of automatic Contact
ID and SIA format codes, please see Appendix A.
Do not use the digit C in a reporting code when
using Pager Format. In most cases, the digit C
will be interpreted as a [#], which will terminate
the page before it has finished.
○○○○○○○○○○○○○○○○○○○○○○○○○○○○○○○○
○○○○○○○○○○○○○○○○○○○○○○○○○○○○○○○○
Reporting Codes ................................. Section [320] to [353]
Cross Zone Police eporting Code
The Cross Zone Police Code Alarm will e sent when two
different alarms occur during any armed-to-armed period.
When an alarm occurs while the panel is armed and a second
alarm occurs on a different zone during the same armed period,
or after the system is disarmed, this code will e sent. All zone
types contri ute to this alarm. The cross zone police code will
e transmitted immediately unless either or oth zones have
the Transmission Delay attri ute ena led. If so, the code will
e delayed for the programmed transmission delay time.
○○○○○○○○○○○○○○○○○○○○○○○○○○○○○○○○
○○○○○○○○○○○○○○○○○○○○○○○○○○○○○○○○
Cross Zone Police Code Alarm ........................ Section [328]
Zone estorals
If the Restoral on Bell Time-out option is selected, the panel
will send the Zone Restoral Reporting Code for the zone if the
ell cut-off time has expired
and
the zone is secured. If the zone
is not secured when the ell cut-off time expires, the panel will
send the restoral immediately once the zone is secured, or
when the system is disarmed. If the Restoral on Bell Time-out
option is not selected, the panel will immediately send the Zone
RestoralReporting Code when the zone is secured, regardless
of whether or not the alarm output is active.
24 Hour type zones will report the restoral
immediately when the zone is secured.
○○○○○○○○○○○○○○○○○○○○○○○○○○○○○○○○
○○○○○○○○○○○○○○○○○○○○○○○○○○○○○○○○
Restoral on Bell Time-out ........................... Section [380]: [2]
Closings (Arming Codes)
If the Closing Confirmation option is ena led, once the exit
delay expires, the keypad will sound a series of eight eeps to
confirm to the user that the closing code was sent and received
y the central station.
○○○○○○○○○○○○○○○○○○○○○○○○○○○○○○○○
○○○○○○○○○○○○○○○○○○○○○○○○○○○○○○○○
Closing Confirmation.................................. Section [381]: [4]
Openings/Closings by Wireless Key
If you are using a PC5132 v3.0 or higher, wireless keys with
access codes may e identified when they are used to arm or
disarm the system: the panel will log and transmit opening or
closing y access code (the same as if an access code had
een used to arm/disarm the system). If wireless keys with no
access code are used, the event will e logged and transmitted
as opening or closing y keyswitch.
The Function Keys Require Code option must e selected
(section [015], option 4 OFF) in order for wireless keys to e
identified for arming. Disarming will always e logged y
access code, if one is programmed for the Key, regardless of
this option.
AC Failure Trouble Alarm Code
To prevent the panel from transmitting an AC Failure Trouble
Alarm reporting code during short power outages, the panel will
not send the signal unless AC power is lost for the amount of
minutes programmed for the AC Failure Communication Delay.
The AC Failure Trouble Restoral reporting code follows the AC
failure communication delay as well.
If AC Failure Communications Delay is pro-
grammed as “000,” then the AC failure transmis-
sion will be immediate.
○○○○○○○○○○○○○○○○○○○○○○○○○○○○○○○○
○○○○○○○○○○○○○○○○○○○○○○○○○○○○○○○○
AC Failure Communication Delay ..................... Section [370]
Wireless Maintenance
The panel will transmit a General Zone Low Battery Alarm
reporting code if a low attery condition is indicated y a detector.
The transmission of the trou le will e delayed y the num er of
days programmed for Zone Low Battery Transmission Delay.
The General Zone Low Battery Restoral reporting code will e
transmitted when the pro lem is corrected. The specific zone that
caused the trou le will e recorded in the event uffer.

P R O G R A M D E S C R I P T I O N S
19
The restoral will not be transmitted until all
detectors indicate good battery conditions.
○○○○○○○○○○○○○○○○○○○○○○○○○○○○○○○○
Wireless Maintenance Reporting Codes .......... Section [353]
○○○○○○○○○○○○○○○○○○○○○○○○○○○○○○○○
Zone Low Battery Transmission Delay ............. Section [370]
Arming and Activity Delinquency
When Delinquency Follows Arming (Days) is selected, the
Delinquency reporting code is sent whenever the panel is not
armed within the num er of days programmed for the
Delinquency Transmission Cycle.
If the DelinquencyTransmission Cycle is set for one
day, there must be 24 hours of no arming or
disarming before the Delinquency Code will be sent.
After a Delinquency Code has been transmitted, it
will not be sent again until the system has been
armed and disarmed.
When Delinquency Follows Zone Activity (hours) is ena led, if
there is no activity on zones in the system, the Delinquency
Transmission Cycle Timer in Section [370] will egin counting in
hours. When the counter reaches the programmed time, the panel
will communicate the Delinquency reporting code to the central
station, if programmed. If there is a closing or zone activity present
on the system at any time, the counter will e reset.
Activity Delinquency will not be reported while
the panel is armed in Away mode.
Activity on manually bypassed zones will not
reset the timer.
This timer is reset when the panel is armed, or if
Installer Programming is entered.
When using the SIA FSK communication format
with Activity Delinquency, the Closing Delin-
quency identifier is transmitted.
○○○○○○○○○○○○○○○○○○○○○○○○○○○○○○○○
Miscellaneous Maintenance Reporting Codes Section [351]
Delinquency Follows Zone Activity.......................... [380]: [8]
○○○○○○○○○○○○○○○○○○○○○○○○○○○○○○○○
Delinquency Transmission Cycle .................................. [370]
5.9 Communicator – eporting Formats
Each communication telephone num er can e programmed to
report using any one of eight formats availa le. Two 20 BPS pulse
formats and two 10 BPS formats are supported, in addition to
Contact ID, SIA, Pager and a Residential Dial formats.
Do not program the 2nd telephone number to use
Contact ID or SIA reporting code formats (section
[360]) if Automatic reporting codes are selected
for either Contact ID or SIA (section [381]).
○○○○○○○○○○○○○○○○○○○○○○○○○○○○○○○○
Communicator Format Options ......................... Section [360]
○○○○○○○○○○○○○○○○○○○○○○○○○○○○○○○○
Communicator Call Directions ............ Section [361] to [368]
The following is a description of each reporting format:
Pulse Formats
Depending on which pulse format is selected, the panel will
communicate using the following specifications:
• 3/1, 3/2, 4/1 or 4/2
• 1400 or 2300 Hz handshake
• 10 or 20 its per second
• non-extended
With the 1600HzHandshakeoption ena led, the communicator
will respond to 1600Hz handshakes when using the reporting
Communication Formats 01 and 02 only. When the Standard
Handshake option is ena led, the communicator will respond
to the handshake specified y the BPS format (1400Hz or
2300Hz).
Additional Notes on Pulse Formats
1. The digit ‘0’ will send no pulses and is used as a filler digit.
2. When programming account num ers, enter four digits.
When programming a three digit account num er, the fourth
digit must e programmed as ‘0’.
• 3 digit account num er [123] - program [1230]
3. If an account num er has a ‘0’ in it, su stitute a HEX digit ‘A’
for the ‘0’. For example:
• 3 digit account num er [502] - program [5A20]
• 4 digit account num er [4079] - program [4A79]
4. Reporting codes are two digits. When programming single-
digit Reporting Codes, the second digit must e programmed
as a ‘0’. If a ‘0’ is to e transmitted, su stitute HEX digit ‘A’.
For example:
• 1 digit Reporting Code [3] - program [30]
• 2 digit Reporting Code [30] - program [3A]
5. To prevent the panel from reporting an event, the Reporting
Code should e programmed as [00] or [FF].
○○○○○○○○○○○○○○○○○○○○○○○○○○○○○○○○
○○○○○○○○○○○○○○○○○○○○○○○○○○○○○○○○
1600Hz/Standard Handshake ................... Section [702]: [4]
Contact ID
Contact ID is a specialized format that will communicate information
using tones rather than pulses. This format allows more information
to e sent faster than other formats. For example, in addition to
reporting an alarm in zone one, the Contact ID format will also
report the type of alarm, such as an Entry/Exit alarm.
If the Contact ID uses Programmed Reporting Codes option
is ena led, a two digit num er from Appendix A must e entered
in programming sections [320] to [353] for each event to e
transmitted. The two digit num er determines the type of alarm.
The panel will automatically generate all other information,
including the zone num er.
If the Contact ID uses Automatic Reporting Codes option is
ena led, the panel will operate as follows:
1. If an event’s reporting code is programmed as [00], the
panel will not attempt to call the central station.
2. If the reporting code for an event is programmed as anything
from [01] to [FF], the panel will
automatically
generate the
zone or access code num er. See Appendix A for a list of
the codes which will e transmitted.
If the Automatic Contact ID option is selected, the
panel will automatically generate all zone and
access code numbers, eliminating the need to
program these items.
If the Contact ID uses Programmed Reporting Codes option
is ena led, the panel will operate as follows:
1. If an event’s reporting code is programmed as [00] or [FF],
the panel will not attempt to call central station.
2. If the reporting code for an event is programmed as anything
from [01] to [FE], the panel will send the programmed
reporting code.

P R O G R A M D E S C R I P T I O N S
20
Additional Notes on Contact ID
1. Account num ers must e four digits.
2. All reporting codes must e two digits.
3. Su stitute the HEX digit ‘A’ for the ‘0’.
4. To prevent the panel from reporting an event, the reporting
code should e programmed as [00].
Please refer to Appendix A for a list of Contact ID Identifiers.
○○○○○○○○○○○○○○○○○○○○○○○○○○○○○○○○
○○○○○○○○○○○○○○○○○○○○○○○○○○○○○○○○
Contact ID Uses Programmed/Automatic Codes ... [381]: [7]
SIA
SIA is a specialized format that will communicate information
quickly using Frequency Shift Keying (FSK) rather than pulses.
The SIA format will automatically generate the type of signal eing
transmitted, such as Burglary, Fire, Panic etc. The two digit
reporting code is used to identify the zone or access code num er.
If the Automatic SIA option is selected, the panel
will automatically generate all zone and access
code numbers, eliminating the need to program
these items.
If the SIASendsAutomaticReportingCodes option is ena led,
the panel will operate as follows:
1. If an event’s reporting code is programmed as [00], the
panel will not attempt to call the central station.
2. If the reporting code for an event is programmed as anything
from [01] to [FF], the panel will
automatically
generate the
zone or access code num er.
The Communicator Call Direction options can e used to
disa le the reporting of events such as Openings and Closings.
If all of the Opening and Closing Reporting Codes are
programmed as [00], the panel will not report.
If the SIASendsAutomaticReportingCodes option is disa led,
the panel will operate as follows:
1. If an event’s reporting code is programmed as [00] or [FF],
the panel will not attempt to call central station.
2. If the reporting code for an event is programmed as anything
from [01] to [FE], the panel will send the programmed
reporting code.
Please refer to Appendix A for a list of SIA identifiers.
○○○○○○○○○○○○○○○○○○○○○○○○○○○○○○○○
○○○○○○○○○○○○○○○○○○○○○○○○○○○○○○○○
SIA Sends Automatic Reporting Codes .... Section [381]: [3]
Pager Format
The CommunicatorFormatoption for either telephone num er
can e programmed as Pager format. If an event occurs and the
Communicator Call Direction options direct the call to a
telephone num er with the Pager Format selected, the panel
will attempt to page.
When calling a pager, extra digits will e required in order for
the format to function properly. The following is a list of Hex
digits and the functions they perform:
• Hex [B] - simulates the [✱] key on a touch tone telephone
• Hex [C] - simulates the [#] key on a touch tone telephone
• Hex [D] - forces the panel to search for dial tone
• Hex [E] - two second pause
• Hex [F] - marks the end of the telephone num er
The panel will attempt to call the pager once. Once the
appropriate telephone num er is dialed, the panel will send the
account num er and Reporting Code followed y the [#] key
(Hex [C]).
The panel has no way of confirming if the pager was called
successfully. A Failure To Communicate trou le will only e
generated if the panel detects a usy tone on all dialing
attempts, or if no dial tone is detected on all dialing attempts.
The pager format will not cause any form of ring ack.
The Pager Format cannot be used with the LINKS
1000 cellular communicator.
Do not use the digit C in a reporting code when
using Pager Format. In most cases, the digit C
will be interpreted as a [#], which will terminate
the page before it has finished.
If the panel detects a busy signal, it will attempt to
page again. It will make the maximum number of
attempts programmed in section [160].
Force dialing should be disabled when using
Pager format.
When using Pager format, you must program two
hex digit E’s at the end of the telephone number
esidential Dial
If Residential Dial is programmed, and an event occurs that is
programmed to communicate, the panel will seize the line and
dial the appropriate telephone num er(s). Once the dialing is
complete, the panel will emit an ID tone and wait for a handshake
(press a 1, 2, 4, 5, 7, 8, 0, ✱ or # key from any touchtone
telephone). It will wait for this handshake for the duration of Post
Dial Wait for Handshake timer.
Once the panel receives the
handshake, it will emit an alarm tone over the telephone line for
20 seconds. If several alarms occur at the same time, only one
call will e made to each telephone num er the panel is
programmed to call.
5.10 Downloading
The required downloading software is DLS-1 version 6.5
and up.
Downloading allows you to program the entire control panel via
a computer, a modem and a telephone line. All functions,
features, their changes and status – such as trou le conditions
and open zones – can e viewed or programmed through
downloading.
Downloading is always enabled for six hours each
time the panel is powered up, unless the User
Can Enable DLS Window option is disabled
The panel will answer calls for downloading when the
programmed Number of Rings is heard y the panel.
If the Answering Machine/Double Call option is ena led (or
during the first six hours after power up), the panel will answer
incoming calls for downloading in the following manner:
1. The panel hears one or two rings then misses a ring.
2. At this point the panel will start a the dou le-call timer.
3. If the panel hears another ring efore the Answering
Machine Double-Call Timer expires, it will answer on the
first ring of the second call.
Other manuals for PC5008
1
This manual suits for next models
1
Table of contents
Other DSC Security System manuals

DSC
DSC neo HS2016 User manual

DSC
DSC iOtega User manual

DSC
DSC iotega WS900UL User manual

DSC
DSC PowerSeries PC1404 User manual

DSC
DSC PowerSeries Neo HS2TCHP User manual

DSC
DSC PowerSeries PC4020 User manual

DSC
DSC PC5928 Installation instructions

DSC
DSC GSM 1000 User manual

DSC
DSC Impassa WT8911 User manual

DSC
DSC MAXSYS PC4020 User manual
Popular Security System manuals by other brands

Monacor
Monacor AS-362 quick start guide

Whelen Engineering Company
Whelen Engineering Company 295HFS6 Series Installation & operating manual

NextgenID
NextgenID BioAxs 9750 Installation & operation manual

Trine
Trine 206-3 instruction sheet

Sieza
Sieza Peridect+ installation manual

EDM
EDM 03204 instruction manual