Dudek Universal 1.1 25.5 User manual

user manual
V 07.07.2018
BASIC risers

index
2
INDEX page
introduction 3
on the wing 4
paraglider design 5
before first use 10
free flights - launch 15
free flights - flight 16
lfree flights - landing 18
lfree flights - winching 18
powered flights - launch 19
powered flights - climbing 23
powered flights - flight 25
activating the trimmer 27
steering influence on airfoil 28
speed modes 29
powered flights 31
golden rules 32
quick descent methods 33
extreme manoeuvres 35
paraglider care 37
warranty and aerocasco 40
page
enviromental care 42
what have you bought 43
technical data 44
rigging scheme 45
summary 47

Congratulations!
We are pleased to welcome you among the growing number of
DUDEK PARAGLIDERS pilots. You’ve become a proud owner of a
sport paraglider, designed according to recent trends among
paramotor canopies.
Extensive development, application of the modern production
methods and thorough testing resulted in a friendly behaving
paraglider, offering the pilot a lot of fun combined with great
performance.
We wish you many enjoyable and safe flying hours.
Please read this manual carefully and note following details:
<The purpose of this manual is to offer guidelines to the pilot
using the paraglider. By no means it is intended to be used as a
training manual for this or any other paraglider.
<You may only fly a paraglider when qualified to do so or when
undergoing training at an accredited school.
<Pilots are personally responsible for their own safety and their
paraglider's airworthiness.
<The use of this paraglider is solely at the user's own risk! Neither
the manufacturer nor dealer do accept any liabilities involved.
<This paraglider on delivery meets all the requirements of the EN
926-1 and 926-2 regulations or has an airworthiness certificate
issued by the manufacturer. Any alterations to the paraglider
will render its certification invalid.
<Other documents concerning this paraglider can be found on
attached pendrive or on our website www.dudek.eu.
Note: Dudek Paragliders warns that due to the constant
process of development the actual paraglider may differ
slightly from the one described in the manual. However,
those differences cannot affect the basic design
parameters: technical data, flight characteristics or strength.
In case of any doubts contact us please.
3
introduction
!

For whom the Universal 1.1?
Universal is the first free flying (EN B) paraglider ever which can be
converted by its user into a full-blood paramotor canopy
(conforming to the DGAC standard).
Universal us the first paraglider ever to smoothly and efficiently
merge two aspects:
- nicely hadling free-flying paraglider (with EN/B certificate),
- full-blood paramotor canopy (conforming to DGAC standard).
Universal is dedicated for beginner and recreational pilots who fly:
- exclusively free (but want to benefit from moderate reflex ability)
- mostly free, sometimes with paramotor
- both free and paramotor
- mostly with paramotor, sometimes free
- exclusively paramotor (but appreciate better economy, easier
launch and nicer handling than in standard paramotor wing.
Universal is a great free-flying recreational paraglide. Beginning
pilots will surely appreciate exceptional comfort in uneasy thermals,
resulting from considerable amount of reflex traits present in the
design.
On activating the trimmers, Universal 1.1 becomes a full reflex
paramotor wing, good for both leisure and cruise flying,
thermalling, last but not least for initial paramotor training.
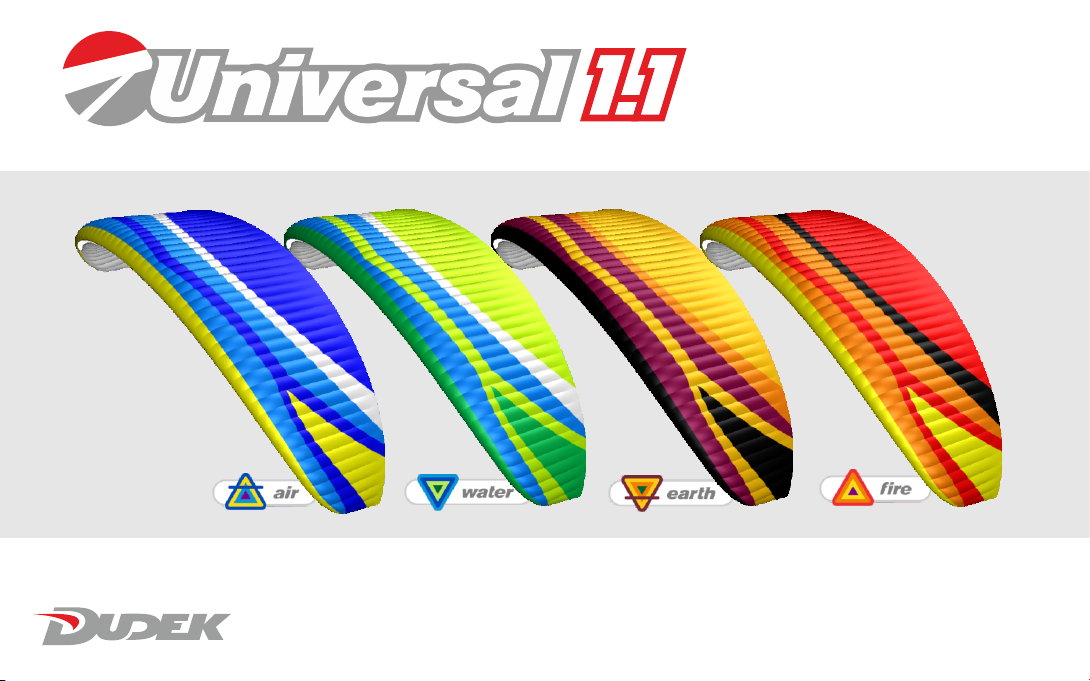
Universal 1.1 is refreshed version of its predecessor with upgraded
risers and new colour design in four elements schemes. Dominico
cloth is replaced by Porcher, colours of the lines are changed too
(according to PMA standards). We have modernized risers
equipment, make it more simple and comfortable. Basic
parametres of the wing are the same.
As is the case of all our paragliders, the design draws on our long-
time experience, simultaneously incorporating state-of-the-art
technologies. The Universal is certified EN-B and LTF-B, and is in
last stages of receiving paramotor (DGAC) certificates.
on the wing
4

harness
rib
trailing edge
brake handle
steering line
cell
suspension
lines
risers
inlets
leading edge
5
paraglider design
The Universal 1.1 is produced in new technology, utilizing capabilities
of precise laser cutter. All stages of the production process take place
as our Polish plant under close supervision of the designer himself,
thus ensuring highest European quality.
Careful selection of modern fabrics and design solutions brings about
great strength and durability of the canopy.
All materials used come from marked production batches, and each
production step can be verified down to identification of individual
worker and controller.

covered trimmer
buckle
pulley loop (1)
speed
system
pulleys
brake
handle
pulley loop (2)
pulley loop (3)
speed
system
hooks
upper
carabiner
loop
lower carabiner
loop
steering line
riser scheme
6
pulley in position (1)
lengthened
taśma
trymera
carabiner
D B
CA' A
sviwel
trimmer
strap handle
Easy Keeper
magnets

7
riser scheme
For the Universal 1.1 we have chosen four-way risers equipped
with:
<ELR (Easy Launch Riser) system. It is a specially
marked A riser (with red cover);
<speed-system affecting A, B and C risers when engaged,
featuring ball-beared pulleys and a dedicated line;
<trimmers of red band marked with appropriate scale,
designed for easy and fast replacement in case of
deterioration;
<three levels of the pulleys, to be used depending on the
hangpoint level;
For quick and easy recognition in emergency, some of the risers are
distinguished with coloured covers as follows:
A - red (used for launching)
A' - red (used for big ears)
B - yellow (used for B-stall),
D - blue (needed to keep the glider down in strong wind –
aborted launch).
Other systems
This paraglider has no other systems which can be adjusted,
exchanged or removed.
7

Easy Keeper is our indigenous way to hold
the brake handles at the risers by using
strong neodymium magnets. It keeps the
handles firmly at the risers, while both
attaching and releasing goes smoothly
and easily.
The system allows for easy placing the
brake handles on risers during flight, when
they are not used, thus minimalizing the
danger of getting into running propeller.
riser scheme
8

9
Addressing different needs of our clients
we have created a TCT system - Triple
Comfort Toggle, making it possible to
have your brake handles in rigid, half-rigid
or soft configuration without need to
purchase additional handles.
swivel against twisting
of the steering line
Neodymium magnet of the Easy Keeper
exchangeable insert
slit for the inserts
semi-soft
PVC insert
rigid insert
The soft handle is obtained when no insert is used.
toggle

Operation
Correct matching of the canopy and the paramotor belongs to the
pilot.
Dudek Paragliders cannot take responsibility for all possible
combinations, but if you contact us we are always ready to help.
Weight range
Each size of the canopy is certified for specific weight range,
meaning total take-off weight including the pilot, harness,
paramotor, equipment and the canopy itself.
Exceeding maximum take-off weight described in technical data of
the paraglider (“Pilot’s weight incl. equipment”) increases risk of an
accident in case of pilot’s error.The smaller canopy area as
compared to take-off weight, the greater the risk.
Paragliders considerably change their character due to increased
load and each experienced pilot should perfectly understand that.
The biggest danger induced by overloading the canopy is its
hyperreactivity.
Caution: Check your real take-off weight! Some pilots
calculate their take-off weight by just summing up catalogue
numbers, e.g.: paramotor 29 kg + canopy 6 kg + pilot 87 kg
= ca. 120 kg. In fact your actual take-off weight can be
umpteen kilograms bigger. Most often we forget the
clothing, electronics, backpacks, sometimes even such basic
things like fuel or rescue chute weight are omitted!
What harness?
For free flying you can use any certified harness which has its
hangpoints at 40-45 centimeters from the seatplate.The width
between carabiners should be somewhere between 40 and 45 cm.
CAUTION: Please note that any modification of seat/hang
point distance changes the position of the brakes as related
to pilot's body. You must remember that in each harness
your steering range will be different.
!
before first use
10
!

11
Adjustment of the steering handles, the pulley and the speed
system.
CAUTION! Before first use check whether steering lines and
pulleys are set for higher or lower hangpoint, and adjust
them to your preferences if necessary.
The Universal risers are shorter than in most paragliders, thus
alleviating potential problem with different hangpoints. There are
four places to fix the steering lines pulley – upper lengthened
upper, lower, and middle (see risers diagram on p. 6). On the main
steering line there are three points marked, indicating where to fix
steering handle depending on pulley placement.
For free flying you shouls fix the pulley on the end of the extending
loop, placed at the first upper hangpoints, and the steering handles
on upper positions marked on the steering lines (so that steering
lines are effectively shortened). This is the factory setting of the
paraglider (unless ordered otherwise).
See adjusting the pulley and steering line marks according to the
hangpoints on next page.
Generally speaking, upper hangpoints require longer steering lines,
while the lower hangpoints – shorter lines.
Before you will take on powered flight it is recommended to try the
setup out.
Hang up the entire PPG unit with ropes, sit in the harness and ask
someone to pull the risers up. You must make sure that in flight you
will always be able to reach the brake handles, even if the airflow
blows them away.
Being suspended in this way you have a perfect opportunity to
adjust the speed system lines too. The speedbar when not in use
must not pull the lines nor risers. Neither should it be too loose, for
it could then get into rotating propeller.
An additional way to check the whole configuration out is to visit a
take-off site in steady winds of ca. 3 m/s. With the engine off, inflate
the wing and take it up over your head.When it stabilizes, check
that the brakes are completely loose and do not affect the trailing
edge. There should be a spare inch or so before they activate.
Remember that it is always safer to set the margin of play too big
than too small. And, most importantly, the setting must always be
symmetrical.
Caution: Ill-adjusted steering lines can be a reason for
wrong assessment of the canopy state, and/or can cause
dangerous deflations on high speeds when too short.
before first use
!
!

How to match the pulley level and steering line mark
with the suspension height.
before first use
12

13
before first use
123
Pulley in first position
(upper lengthened), EK
magnet mounted over
second pulley position.
Pulley in first position, EK
magnet mounted over
buckle of the trimmer.
Pulley in second position
(middle), EK magnet
mounted over buckle of
the trimmer.
4
Pulley in third position
(lower), EK magnet
mounted over buckle of
the trimmer.

14
Pre-flight check
Pre-flight check
Having chosen a place to launch accordingly to the terrain as well
as wind speed and direction clear it of any obstacles that could
damage your canopy or tangle in the lines.
After laying out your paraglider in a horseshoe directed against the
wind following checks must be made:
<canopy, lines and risers condition. Do not launch if the
slightest damage is noticed,
<the paraglider should be arranged so that the centre section
A-lines will strain earlier that the outer ones. This ensures easy
and symmetrical launch,
<the leading edge should stay taut and even,
<all lines and risers should be separated. Make sure they are
not tangled, and checked against catching anything. It is
equally important to check the brake lines. They must be
firmly attached to the brake handles and run freely through
the pulleys to the trailing edge,
<make sure the risers are not twisted,
<it is very important to check that no lines are looped around
the canopy. The so-called ”line-over” may have disastrous
consequences during take off.
<always put on and fasten your helmet before clipping in to
the harness,
<make sure that all quick links (maillons) of the risers are tight,
<Check main carabiners. They must be properly mounted,
closed and locked.
<make sure the launch area is clear and free.
When launching with a paramotor, additionally check if:
<the trimmers are properly set?
<nothing will collide with the propeller?
<full engine power is available?
before first use

Free flight
The main difference between the Universal and other paragliders is
that due to its increased tuck-resistance (both during launch and
flight) and greater speed range (when using the trimmers) it can be
safely flown in strong conditions too.
Classic (forward) launch
Should be used with little or no wind. After pre-flight check, facing
the wind place the risers over your shoulders (A riser should lay on
top).
Clip it into carabiners and lock them. Grip the brake handles and
A-risers, holding them at the stitching, just under the quick-links. To
make things easier, A-risers have been markedwith a red cover.
Spread out your slightly bent hands, keeping them down and back.
All other risers should be placed near your elbow joints.
Apply some tension to check if the A risers stay on top and the
lines are not tangled. Take a step back, bow down a little and run
forward. After the initial inflation smoothly move the hands with
the risers up and over your head until the wing will be directly
above you. Let the A risers loose and check the wing.
Pump out possible faults and keep an eye on position of the
paraglider. Side drift is corrected best by moving yourself always
under center of the canopy. In order to keep wing in the air the
suspension lines must stay taut all the time, so in light winds you
will have to run forward. With stronger winds you can control the
wing while standing still.
When leaving the ground apply some brakes, then release it after
gaining some distance from the ground. Keep your hands relaxed.
Reverse launch
To be used when wind speed exceeds 3 m/s.
After clipping the risers into carabiners as for the forward launch,
turn back to face the wing, moving one riser group over your head.
As a consequence, you will have the risers crossed.
Unclip the brake handles from rear risers and grip it outside of the
risers without crossing neither arms nor lines. In this way you steer
the left side with you left hand and vice versa. Now take
corresponding A risers on both sides (still keeping brake handles in
your hands).
Make sure that the wing inflates symmetrically and the lines are not
tangled. Building up tension with a few steps back and
free flights - launch
15

simultaneously lifting the A risers (do not pull them towards you)
will make the paraglider rise.
When it arrives over your head, stabilize it with the brakes, check
again if all
lines are clear and the cells inflated.
When turning into wind, remember to turn the right way
(hint: always do it the same direction) and to keep the lines strained
at all times. The turn itself should be quick and smooth. While
turning you have to release the brake handles and grip them again
facing forward, so that again the left one is in the left hand etc. Last
check of the wing & free space to launch and off you go, running
into wind with eventual light braking when taking off.
Remember!
When deflating the canopy in strong winds (e. g. aborting a
launch), use the C risers, not the brakes. Using the brakes in strong
wind can lift the pilot up and drag him/her back.
Caution: When clipping in the crossed risers, you can find
proper connection of the speed system particularly hard. Be
careful not to confuse the risers!
Caution: During start, especially winched or with a motor,
always remember to bring the wing directly over your head.
The aerofoil and its angle of attack were arranged so as to
give maximum lift coefficient with relatively high safety level.
As a result it can stay behind a pilot, if he neglects bringing it
directly over head during launch.
Flight
The increased speed range of Universal (in case of trimmers
operation) may demand some attention in flight. Nevertheless,
once you have mastered these additional assets, flying will become
pure fun. Good handling will let you make best use of thermals,
and increased speed on transitions means that your presence in
sinking air will be shorter. To avoid stalls when braking with closed
trimmers, their movement is restricted by the tape sewing.
Turns
Universal 1.1 is an agile wing, with smooth reactions to all pilot’s
actions. Handling is actually easy and forces grow proportionally to
position of the brakes. Adding some weight shift will make the
paraglider turn really quick and tight.
free flight - flight
!
3
1
Brakes
!
16

The combined technique (weight shifting and brake input) is by far
the most efficient method of turning. Turn radius is then determined
by the amount of inside brake used and weight shift. Additional
application a little outside brake after initiating the turn with
maximum weight shift increases turn efficiency and the outboard
wing’s resistance to collapse (in turbulence, the edge of a thermal
etc).
In case of necessary turning in confined area at slow speed (e.g.
slope soaring), it is recommended to steer the decelerated canopy
by loosening the brake at the outside of the turn while applying just
a little more brake on the inside.
Caution: when entering a turbulent area you should brake
a little to put up the tension. It will allow you to react
instantly in case of a problem. Too hard or too quick pulling
of one brake can cause the wing to enter a spin.
Thermalling and soaring
When flying the Universal 1.1 minimum sink is reached with slight
brake pressure applied (10 to 15 cm, depending on pilot’s weight).
In turbulent conditions the canopy should be flown with a small
amount of brake applied. This improves overall stability by
increasing the angle of attack of the canopy. The canopy should
neither rock back nor surge forwards, but always stay above the
pilot. In order to achieve it, the pilot should accelerate the canopy
by letting off the brakes when entering a thermal (according to its
strength) and brake it on exiting. This is part of basic active flying
that can spare you many potential collapses.
When soaring the slope, minimum height of 50 m above the
ground is recommended for safety reasons. It is important to
comply with air traffic rules, especially when many pilots share
airspace close to the hill.
The avoidance manoeuvres often happen to be impossible in such
conditions.
Trimmers and speed-system operation
When flying into head wind or through sink it is advisable (for the
sake of best glide angle) to increase speed, as long as conditions
are not too turbulent.
Full application of the speed system increases flight speed by some
30%. In contrast to most paragliders it does not decrease wing
stability significant, but if you meet some serious trouble, it is
advisable to release the speedbar. The faster you fly, the more
dynamic colapses can happen. With application of the speed
17
free flight - flight
!

system the brake forces increase, and brake effectiveness
decreases.
At maximum speedbar and fully opened trims all steering
inputs should be smooth and easy, especially at high
speeds.
Landing
Just make sure that last turn into the wind is done with sufficient
altitude. At about 1 meter over ground flare out by gently braking
both sides. The glider may climb again for a while gaining some
height, if too much brake is used.
Caution: Strong wind landings hardly require braking, if at
all! Use D-risers to deflate the canopy after landing. Using
the brakes will probably result in pilot being lifted again and
dragged backwards.
The final glide of the landing approach should be straight and
smooth. Steep or alternating turns can result in a dangerous
pendulum effect near the ground.
WINCHING
Our paraglider has been successfully tested for foot launching by
winch.
During winching trimmers should be set in closed position (0).
First phase of the winch take-off is analogous to classic launch.
After rising the canopy you will be taken off the ground, as the
winch line gets loaded. Avoid large heading corrections in first
stage of flight up to altitude of 50 meters.
During this stage do not sit deep in the harness in order to be
ready for emergency landing in case of e.g. winch line break.
Make sure that your brakes are fully released, so that angle of
attack does not increase above safe level.
During all winch it is recommended to control the direction by
weightshifting only. Steering lines should be used only for
considerable heading corrections, but even then do not pull them
too much in order to avoid danger of stalling your wing.
free flights - landing
18
!
!

Adjust your heading regularly when winched, so no large
corrections are necessary. Remember there are several
conditions to be met when winching:
npilot should be properly trained for winching,
nthe winch with all gear should be in good condition and
specialized for paraglider winching,
nthe winch operator must be properly trained in winching and
servicing the gear,
nUniversal 1.1 must not be winched with forces exceeding 90
daN, and under any circumstances must not be towed by any
vehicle not equipped properly or controlled by unskilled
operator.
First powered flights
In order to get familiar with your wing we recommend at first flying
with the trimmers closed since in this configuration the Universal
1.1 behaves as a classic wing.
Once you feel confident with your wing, you can start
experimenting with faster trim settings and speed system. Use all
additional speed and vigor of the Universal 1.1.
Caution: Before each launch it is necessary to have a
thorough check of the paraglider, harness and power unit
(see page 14).
Classic launch with no wind
Even when it seems that there is no wind at all, it is rarely so.
Therefore always be careful in determining the conditions, since in
PPG flying it is most important that the launch and initial climb are
performed with a head wind (the danger of losing your airspeed
while steep crossing of the wind gradient is greatly reduced then).
Special attention must be paid to trees, power lines and other
powered flights - launch
19
!

obstacles, including the possibility of emerging rotors.
Preparing the canopy
Lay out the paraglider downwind of the power unit, with all
suspension lines taut and pointing toward center of the power unit.
The risers are to be laid on the ground. Trimmers must be fully
closed (0). In strong conditions faster settings can be advised. Make
sure that you warm up the engine while standing windward of the
wing. Stop the engine before clipping in the risers. Now run the
pre-launch checklist (see page 14).
When you are sure everything is OK, you can clip the risers in the
paramotor’s harness.
Applying steady and equal pressure on both A risers move forward.
The wing practically does not overshoot, so the front collapses that
otherwise happen quite often during launches are rarely seen with
Universal 1.1. Instead it kind of waits for you to catch up.
From now on you should steer the paraglider facing forward,
without looking back over your shoulders. When the canopy lies
low behind you and you will try to turn, some lines can get in the
propeller. On the other hand, possible fall on your back and
damaging the propeller is dangerous (and costly!) so it should be
avoided at any price, even that of some damaged lines!
During take-off, when you feel that the strain on both risers to be
equal, open up full power and lean back to counter the engine
thrust, so that it can push you forward rather than towards the
ground. The best option is not to use the brakes, allowing the
paraglider to rise as it was laid out. If it starts to swerve from its
course, just pull the opposite riser and run under
the centre of the wing while observing starting direction. If the wind
lulls, give a stronger pull on the risers.
If the paraglider drops to one side or back too far to rise again, kill
the engine, interrupt launch and assess the conditions once again.
As the wing rises, the forces grow lighter and it should stabilise
above your head without overshooting. This is the best moment to
check if it is inflated in full and the lines are not tangled, but do so
neither stopping nor looking back over your shoulder. Once you
feel the forces on the risers decrease, run faster and let go of the
risers. See if there is already any opposition on the brakes and, if
powered flights - launch
20
This manual suits for next models
4
Table of contents
Other Dudek Aircraft manuals

Dudek
Dudek Nucleon WRC User manual

Dudek
Dudek VOX-25S User manual

Dudek
Dudek FreeWay User manual

Dudek
Dudek Coden User manual

Dudek
Dudek Synthesis User manual

Dudek
Dudek Run&Fly 2 User manual

Dudek
Dudek NEMO2 User manual

Dudek
Dudek NEMO 5 User manual

Dudek
Dudek Nemo XX 23 User manual

Dudek
Dudek Nemo 4 Series User manual

Dudek
Dudek Hike&Cruise User manual

Dudek
Dudek Colt 23 S User manual

Dudek
Dudek WARP ENERGY User manual

Dudek
Dudek Orca XX User manual

Dudek
Dudek Universal User manual

Dudek
Dudek GLOBE 120 User manual

Dudek
Dudek Cabrio Synthesis User manual

Dudek
Dudek Snake XX User manual

Dudek
Dudek Shark User manual

Dudek
Dudek Nucleon WRC cabrio User manual