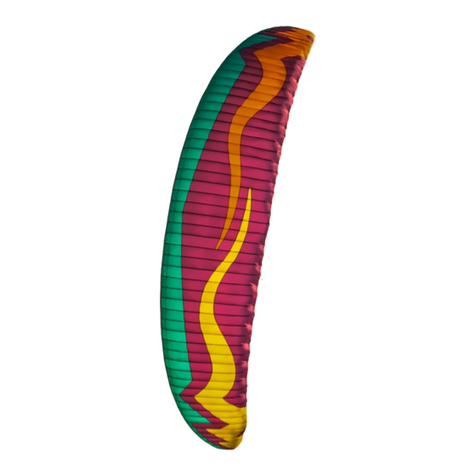
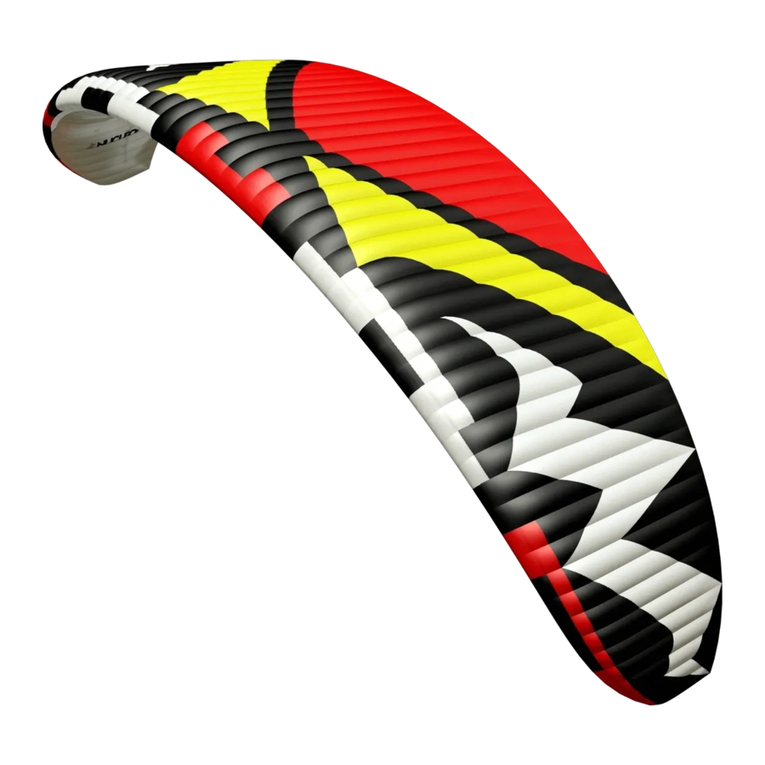
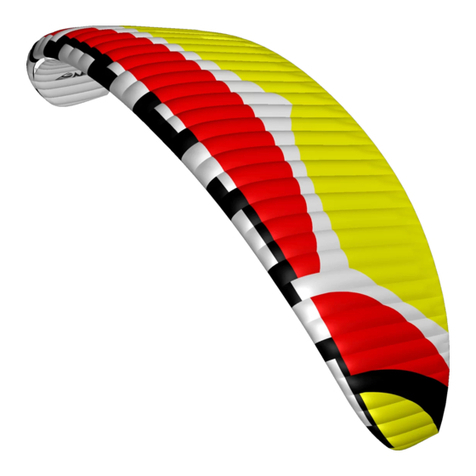
Dudek Run&Fly Series User manual

user manual
V 08.2019

index
2
INDEX page:
introduction 3
the wing 4
design 5
before first use 8
take-off 11
flight 13
landing 14
D-break system 15
risers length 16
winching and powered paragliding 17
quick descent methods 18
extreme manoeuvres 20
paraglider care 22
warranty 24
environmental care 25
what have you bought 26
technical data 2 7
rigging scheme 28
summary 30

Congratulations!
We are pleased to welcome you among the growing number of
DUDEK PARAGLIDERS pilots. You’ve become a proud owner of a
sport paraglider, designed according to recent trends.
Intensive development, application of the modern production
methods and thorough testing resulted in a friendly behaving
paraglider, offering the pilot a lot of fun combined with great
performance.
We wish you many enjoyable and safe flying hours.
Please read this manual carefully and note following details:
< The purpose of this manual is to offer guidelines to the pilot
using the paraglider. By no means it is intended to be used as a
training manual for this or any other paraglider.
<You may only fly a paraglider when qualified to do so or when
undergoing training at an accredited school.
<Pilots are personally responsible for their own safety and their
paraglider's airworthiness.
<The use of this paraglider is solely at the user's own risk! Neither
the manufacturer nor dealer do acceptany liabilities involved.
<This paraglider on delivery meets all the requirements of the EN
926-1 and 926-2 regulations or has an airworthiness certificate
issued by the manufacturer. Any alterations to the paraglider
will render its certification invalid.
<Other documents concerning this paraglider can be found on
attached pendrive or on our website: www.dudek.eu.
NOTE: Dudek Paragliders warns that due to the constant
process of development the actual paraglider may differ
slightly from the one described in the manual.
However, those differences must not affect the basic design
parameters: technical data, flight characteristics or strength.
In case of any doubts contact us please.
3
introduction
!

on the wing
4
For whom the Run&Fly?
We’ve designed the first ever wing under 1 kg (986g), meaning it’s
the lightest and most compact aircraft of the world. It is much more
intuitive than a normal paraglider, at an affordable price at that.
The Run and Fly is not a typical paragliding canopy: it has a single skin.
Therefore it’s lighter while displaying much stronger tendency to stay
over head and recover from any surges than a regular paraglider. In this
way, the Run&Fly offers safe take-offs, great maneuverability in flight and
smooth landings. It is exceptionally light, so that you can carry the wing
on your back during trail running or climbing sessions almost without
noticing the load. It is so compact, that it fits in a 4-litre bag. The Run and
Fly is perfect for trail running, hike & fly and necessary travelling, or just
as a second wing you will always have with you (you can easily place it in
your hand luggage while travelling by plane).
DESIGN
Designed by JB Chandelier, Team Dudek and Jacques Peugeot (airframe
sizing engineer), in close collaboration with Porcher Sport, the Run&Fly
project had been a real challenge for us. We decided to set ourselves
very aggressive goals in order to propose a really different, outstanding
product. The main specifications were a total weight below 1 kg (the
internal project name was 999gr), with speed and flare comparable to
standard wings. The wing also had to be affordable, in order to give
access to the sky to a wider public. With such an ambitious target, we
knew we couldn’t simply “make another single skin wing”: we had to
think out of the box. As a result, the Run&Fly needed hours and hours of
engineering discussions, debates, analyses, comparisons and numerical
simulations, then obviously completed with a lot of flight & load tests.
Ultimately, the wing turned out to exceed our expectations. The biggest
mono skin problems have been resolved; Run&Fly has good speed, nice
landing and offers a lot of fun. Besides reaching our goals we also
achieved a good glide ratio - above 6. Although we usually avoid
publishing the glide ratio of our paragliders, because this parameter is
sometimes subject to manipulation, we made an exception with Run &
Fly. We want to give potential pilots at least a rough understanding of
what they can expect from the fact that such an innovative wing exists.
IMPORTANT: Run&Fly belongs to the single-surface canopy
class. There is fundamental difference between classic double skin
and modern single skin canopies. All the launch, landing and
steering techniques look a bit different. If you are an established
paraglider pilot, you shouldn’t have any problems with adapting
to the wealth of new possibilities brought to you by the Run&Fly.
However, this doesn’t work both ways: if you started your
paragliding experience with the single-skin gliders, be aware that
you are not qualified to safely fly standard double-surface
canopies.
!
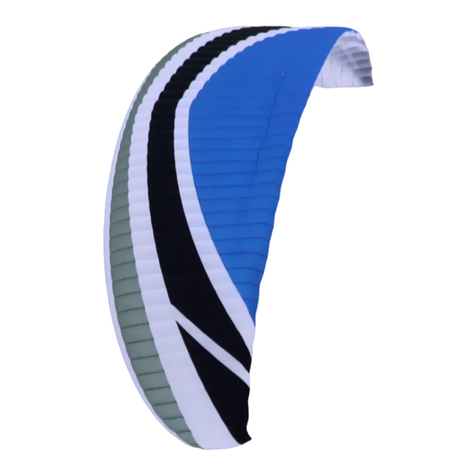
paraglider design
Run&Fly is produced in new technology, utilizing capabilities of
precise laser cutter. All stages of the production process take
place as our Polish plant under close supervision of the designer
himself, thus ensuring highest European quality.
Careful selection of modern fabrics and design solutions brings
about great strength and durability of the canopy. All materials
used come from marked production batches, and each
production step can be verified down to identification of
individual worker and controller.
harness
rib
trailing edge
brake handle
steering line
suspension lines
risers
intakes
leading edge
5
DBSDBSDBS
D Brake System
BEABEABEA
Brake Elastic Attachment
3-13-13-1
3 to 1 Pannel

riser scheme
steering line
carabiner
light
brake handle
hangpoint
cover
6
guide of the
D-Brake system line
FL line of the
D-Brake system
BEA part fixing
the handle to the riser
B
CA
D

7
riser scheme
The Run&Fly features four-way, extremely light risers, equipped
with:
<DBS (D Brake System) – additional steering lines,
led through guides attached to D risers.
The system is there to help obtain better
flare and soft landing.
<BEA (Brake Elastic Attachment)
– elastic parts fixing the brake
handles to respective risers
(instead of magnets).
Brake handles are attached to the steering lines at an optimal point,
guaranteeing safe and effective action.This point is marked on the
line with a black dot and this setting should not be altered.
Attaching the handles above factory markings will cause constant
braking of the paraglider, possibly cause
of an accident. Overly loose setting of the brake lines is not
advised too, since the much lower load on the trailing edge lines
can sometimes be dangerous too.
For quick and easy recognition in emergency, some of the risers are
distinguished with coloured covers as follows:
A - red (used for launching if necessary)
B - yellow (used for B-stall).
DBSDBSDBS
D Brake System
BEABEABEA
Brake Elastic Attachment

Operation
It’s pilot responsibility to choose a canopy matching his skills.
Dudek Paragliders cannot take responsibility for a wrong choice,
but we are always ready to advise you – just contact us.
Weight range
Each size of the Run&Fly paraglider is dedicated for a
corresponding pilot skill level. In this case a calculation of real take-
off weight is necessary before using the size selection table, shown
below:
For the Run&Fly, the generale rule of selection says: the better pilot
skills, the bigger wing load is acceptable. With the wing load, the
speed and agility (response to steering inputs) grow accordingly.
The structural strength certificate of the Run&Fly is valid up to 105
kg take-off weight. This mass cannot be exceeded.
CAUTION: Check your real take-off weight! Some pilots
calculate their take-off weight by just summing up catalogue
numbers, e.g.: harness 5 kg + canopy 6 kg + pilot 89 kg =
ca. 100 kg. In reality your actual take-off weight can be
umpteen kilograms more. Most often we forget the clothing,
electronics, backpacks, sometimes even such basic things
like fuel or rescue chute weight are omitted!
What harness?
You can use any certified harness which has its hangpoints at 40-45
centimeters from the seatplate.The width between carabiners
should be somewhere between 40 cm and 45 cm. For the Run&Fly
we suggest using a light harness with separate leg placing, as this
increases stability and somewhat limits the amount of kinesthetic
sensations affecting pilot’s body.
before first use
8
!
45 55 65 75 85 95 105
14 m²
16 m²
18 m²
20 m²
skills and experience of the pilot
absolute novice
beginner
middle
experienced
expert
extreme experienced
load [kg]
size

9
CAUTION: Please note that any modification of seat/hang
point distance changes the position of the brakes as related
to pilot's body. You must remember that in each harness
your steering range will be different.
Other systems
This paraglider has no other systems which can be adjusted,
exchanged or removed.
!
before first use

Pre-flight check
Having chosen a place to launch accordingly to the terrain as well
as wind speed and direction clear it of any obstacles that could
damage your canopy or tangle in the lines.
After laying out your paraglider in a horseshoe directed against the
wind following checks must be made:
<canopy, lines and risers condition. Do not launch if the
slightest damage is noticed,
<the paraglider should be arranged so that the centre section
A-lines will strain earlier that the outer ones. This ensures
easy and symmetrical launch,
<the leading edge should stay taut and even,
<all lines and risers should be separated. Make sure they are
not tangled, and checked against catching anything. It is
equally important to check the brake lines. They must be
firmly attached to the brake handles and run freely through
the pulleys to the trailing edge,
<Make sure the risers are not twisted. Coloured hangpoint
covers will help you clip the risers to the carabiners correctly,
as shown beside:
pre-flight check
10
Red cover
indicating
leading edge
Carabiner
Yellow FL
line on the
outer side
Flight direction
Harness hangpoint
(right side)

<it is very important to check that no lines are looped around
the canopy. The so-called ”line-over” may have disastrous
consequences during take off.
<always put on and fasten your helmet before clipping in to
the harness,
<check main carabiners. They must be properly mounted,
closed and locked,
<the risers and the brake handles cannot be twisted. For the
correct grip of the handles, take the yellow FL line as it is fixed
to the carabiner. Move your hand along over the guide, until
you grab the handle. While moving along the line you should
not encounter any other line or riser, otherwise it would
probably be twisted.
Classic (forward) launch
Should be used with little or no wind. Facing the wind place the
risers over your shoulders (A riser must lay on top).
Clip it into carabiners and lock them. Grip the brake handles. Due
to its outstanding design, the Run&Fly rises so fast and easy that
pulling the A risers is not suggested. It can easily lead to a frontal
collapse! The best way is to spread your hands a bit down and
back, with slightly bent elbows. All risers are to be placed near the
elbows.
With a soft pull check whether the A risers are the topmost and all
the lines are cleared. For easier orientation the A risers have a red
cover.
Then in fluid movement lean forward and run, until the canopy
rises. Look up and try to keep it directly over your head. Side drift is
corrected best by moving yourself always under center of the
canopy. In order to keep wing in the air the suspension lines must
stay taut all the time, so in light winds you will have to run forward.
With stronger winds you can control the wing while standing still.
When leaving the ground apply some brakes, then release it after
gaining some distance from the ground. Keep your hands relaxed.
launch
11

Reverse launch
May be used once the pilot feels confident enough, after
groundhandling the canopy for a couple of hours.
After clipping the risers into carabiners as for the forward launch,
turn back to face the wing, moving one riser group over your head.
As a consequence, you will have the risers crossed.
Unclip the brake handles from rear risers and grip it outside of the
risers without crossing neither arms nor lines. In this way you steer
the left side with you left hand and vice versa. Make sure that the
wing inflates symmetrically and the lines are not tangled.
By taking a few steps back you will strain the risers and
consequently get the canopy up. Dedicated pulling the A risers is
not necessary. When rising, the canopy should stop over your head
on itself without your intervention. To make sure you have full
control, you can keep the brakes slightly strained.
When turning into wind, remember to turn the right way (hint:
always do it the same direction) and to keep the lines strained at all
times. The turn itself should be quick and smooth. While turning
you have to release the brake handles and grip them again facing
forward, so that again the left one is in the left hand etc. Last check
of the wing & free space to launch and off you go, running into
wind with eventual light braking when taking off.
Caution: To get the canopy down in strong wind, pull the
brakes down abruptly & forcefully to disrupt creating lift. You
may also use the D risers by pulling them at least 25 cm
down.
launch
12
!

flight
13
Turns
Turns on the Run&Fly are dynamic, but exceptionally stable. The
wing eagerly reacts to even smallest steering inputs. Handling is
pleasant, and the steering forces grow linear with the pull. Adding
some weight shift will make the paraglider turn really quick and
tight.
The combined technique (weight shifting and brake input) is by far
the most efficient method of turning. Turn radius is then determined
by the amount of inside brake used and weight shift. Additional
application a little outside brake after initiating the turn with
maximum weight shift increases turn efficiency and the outboard
wing’s resistance to collapse (in turbulence, the edge of a thermal
etc).
In case of necessary turning in confined area at slow speed (e.g.
slope soaring), it is recommended to steer the decelerated canopy
by loosening the brake at the outside of the turn while applying just
a little more brake on the inside.
Caution: when entering a turbulent area you should brake a
little to put up the tension. It will allow you to react instantly
in case of a problem. Too hard or too quick pulling of one
brake can cause the wing to enter a spin.
Thermalling and soaring
Although the Run&Fly was not designed with this in mind, thermal
flying is well possible. During thermalling the wing will be intensively
communicating to the pilot everything what’s going on around. Still,
perfect autostabilization will instantly bring the canopy back to its
place over your head when necessary.
When flying minimum sink is reached with brake pressure applied
(about 10 cm).
In turbulent conditions the canopy should be flown with a small
amount of brake applied. This improves overall stability by
increasing the angle of attack of the canopy. The canopy should
neither rock back nor surge forwards, but stay above the pilot. In
order to achieve it, the pilot should accelerate the canopy by letting
off the brakes when entering a thermal (according to its strength)
and brake it on exiting. This is part of basic active flying that can
spare you many potential collapses.
Hang flying is pure fun on the Run&Fly. You will stay afloat even at
relatively low windspeed. Remember that in order to minimize the
canopy weight we’ve resigned on the speed system, so you don’t
have the usual margin of increased penetration in case of gusts in
turbulent winds.
!

14
When soaring the slope, minimum height of 50 m above the
ground is recommended for safety reasons. It is important to
comply with air traffic rules, especially when many pilots share
airspace close to the hill.
The avoidance manoeuvres often happen to be impossible in such
conditions.
Landing
Just make sure that last turn into the wind is done with sufficient
altitude. It is of highest importance to gain as much speed as
possible on approach (by releasing the brakes to the max), so that
you will have proper energy to flare and land softly.
At about 1 meter over ground flare out by gently braking both
sides. The glider may climb again for a while gaining some height,
if too much brake is used.
Caution: Too early braking will impair or completely negate
potential for correct flaring and adversely affect its dynamic.
The final glide of the landing approach should be straight and
smooth. Steep or alternating turns can result in a dangerous
pendulum effect near the ground.
!
landing

D-brake system
15
In order to optimalise parameters of the
Run&Fly canopy on landing approach we’ve
created a dedicated D-Brake system. It is
activated somewhere in half of the braking
range, gradually pulling down the D-risers.
Because of this, the wing airfoil is flattened in
the rear area, generating additional lift
needed for good flare and soft landing.
B
CA
DB
CA
DBR BR
.
DBSDBSDBS
D Brake System

risers' length
16
Risers' lenght:
A - 496
A’ - 496
B - 1852
C - 2195
B
CA
D

winching and motoparagliding
17
WINCHING
Run&Fly has been successfully tested for foot launching by winch.
First phase of the winch take-off is analogous to classic launch.
After rising the canopy you will be taken off the ground, as the
winch line gets loaded. Avoid large heading corrections in first
stage of flight up to altitude of 50 meters.
During this stage do not sit deep in the harness in order to be
ready for emergency landing in case of e.g. winch line break. Make
sure that your brakes are fully released, so that angle of attack does
not increase above safe level.
During all winch it is recommended to control the direction by
weightshifting only. Steering lines should be used only for
considerable heading corrections, but even then do not pull them
too much in order to avoid danger of stalling your wing.
Adjust your heading regularly when winched, so no large
corrections are necessary. Remember there are several
conditions to be met when winching:
npilot should be properly trained for winching,
nthe winch with all gear should be in good condition and
specialized for paraglider winching,
nthe winch operator must be properly trained in winching and
servicing the gear,
nThe wing must not be winched with forces exceeding 90 daN,
and under any circumstances must not be towed by any vehicle
not equipped properly or controlled by unskilled operator.
Important: While winching, the wing load is even greater
than usual and the airsped is increased relatively to
standard flight. Be aware that in this circumstances the
wing is much more agile and sensitive, so be cautious on
the brakes!
MOTOPARAGLIDING
The Run&Fly paraglider was not designed with paramotoring in
mind. Theoretically this should be possible, but you can find it very
hard to stay within maximal allowed take-off weight limit.
TANDEM FLYING
Run&Fly is not certified for tandem flying.
!

quick descent methods
18
Quick descent methods
Big Ears
The big ears can be induced by simultaneous pulling the outer A
lines (red cover on the risers) by ca. 20-50 cm. While inducing big
ears you should never let the brakes out of your hands. After
tucking the tips in, the wing will continue to fly straight with
increased sink rate (up to 5 m/s). You can steer the wing pretty
efficiently by weight-shifting.
After releasing lines, the paraglider will usually open up on its own
or you can assist it with a long stroke of the brakes, until the tips
unfold.
B-stall
To enter a B-stall, simultaneously pull down both B-risers (yellow
cover) by ca. 10-15 cm. The canopy will collapse across the entire
span along its B-row, the airflow over top surface will break and
projected canopy surface will be decreased. Forward movement
will be almost completely stopped.
Further pulling B-risers is not advised, as testes have shown it to
increase wing instability. If the canopy forms a horseshoe, gently
pull both brakes to recover.
To exit a B-stall, the risers should be released in a smooth and
decisive manner.
On quick and symmetrical releasing B-lines the airflow will be
reinstated and the wing will surge forward, returning to normal
flight. The initial surge forward can be dynamic, but due to its
inherent auto-stabilizing ability the wing does not require braking.
The canopy will stop over your head.
Spiral dive
Run&Fly is an agile paraglider, so entering spiral dive happens very
quickly. Because of its stability the paraglider returns to normal
flight as soon as the inner brake is released.
A spiral is characterised by reaching the highest sink rates possible.
Significant G-forces, however, make it difficult to sustain a spiral
dive for a long time, as it can place high loads on both pilot and
glider, to degree of losing consciousness by the pilot. Never do this
manoeuvre in turbulence or at too high bank angles.

Control the dive and do not exceed 16 m/s sink. In case of the
classic double-skin surface paragliders releasing the inner brake is
sometimes not enough to exit the spiral; is recommended then to
aid this process by pulling the outer brake. On the contrary, strong
auto-stabilizing tendency of the single-skin means that it is highly
improbable to encounter such situation.
Caution: Never do spirals with big ears pulled. That’s
another example of concentrating whole load on reduced
wing area, which - combined with high G manoeuvres -
shifts the peak loads unnecesarily close to their maximum
values.
Wing over
You make a standard wingover by performing a series of
consecutive, alternating turns with increasing bank angle. Due to
aforementioned autostabilizing of the Run&Fly, executing classic
wingovers is practically impossible.
Important: Forcing the wingovers by too strong, alternating
brake inputs may end with an asymmetric stall!
Aerobatics
Run&Fly was not designed to do any aerobatics.
Caution: All rapid descent techniques should be practiced
in smooth air and only with sufficient altitude margin! Full
stalls and spins are to be avoided as they are not
recommended techniques of clearing dangerous situations.
Irrespective of paraglider type they may lead to dangerous
consequences!
BY FAR THE BEST TECHNIQUE IS SAFE AND CORRECT
FLYING, SO THAT YOU WILL NEVER NEED TO DESCEND
RAPIDLY!
19
!
quick descent methods
!
!

Extreme manoeuvres
EXTREME FLYING MANOEUVRES SHOULD ONLY BE
CARRIED OUT DURING SAFETY TRAINING COURSES
(INSTABILITY TRAINING) UNDER PROPER GUIDANCE!
Behaviour of the Run&Fly is more dynamic than that of
the classic double-skin paragliders. Still, exceptional traits
of its design result in good auto-stabilization. Therefore
the best way to fly it is to allow the wing find its own
path, with minimal pilot inputs.
One sided collapse
Can happen in strong turbulence.
With collapses up to 50% pilot has a couple of seconds to react
before the wing will enter rotation. Standard counter-steering is
enough to keep the paraglider on course.
Under normal conditions the canopy will reinflate instantly and
spontaneously..
Frontal collapse
Can happen in strong turbulence. Active piloting will usually
prevent its occurrence.
Run&Fly is a modern paraglider with significantly stiffened leading
edge. Performed tests demonstrated an automatic refilling of the
air tank on the leading edge as well as full reopening of the
canopy; nevertheless, in some specific turbulence it can happen
that the air stream will keep the collapsed part in. That’s why an
instant pilot’s reaction is advised – a measured braking at the right
moment will greatly speed up the recovery.
Full stall and negative spin
Practically do not occur, may happen only as a result of serious
neglect or intentional action of the pilot. You have to be careful
when flying at very low speeds until fully familiar with brake
operation.
The canopy recovers spontaneously in initial phase of stall,
otherwise use standard procedures.
extreme manoeuvres
20
!
This manual suits for next models
4
Table of contents
Other Dudek Aircraft manuals

Dudek
Dudek GLOBE 120 User manual

Dudek
Dudek Colt 23 S User manual

Dudek
Dudek Nemo 4 Series User manual

Dudek
Dudek WARP ENERGY User manual

Dudek
Dudek Run&Fly 2 User manual

Dudek
Dudek NEMO2 User manual

Dudek
Dudek Hike&Cruise User manual

Dudek
Dudek Coden User manual

Dudek
Dudek Universal User manual

Dudek
Dudek Synthesis User manual

Dudek
Dudek Shark User manual

Dudek
Dudek Nemo XX 23 User manual

Dudek
Dudek VOX-25S User manual

Dudek
Dudek Cabrio Synthesis User manual

Dudek
Dudek Universal 1.1 25.5 User manual

Dudek
Dudek FreeWay User manual

Dudek
Dudek Snake XX User manual

Dudek
Dudek Nucleon WRC User manual

Dudek
Dudek NEMO 5 User manual

Dudek
Dudek Nucleon WRC cabrio User manual