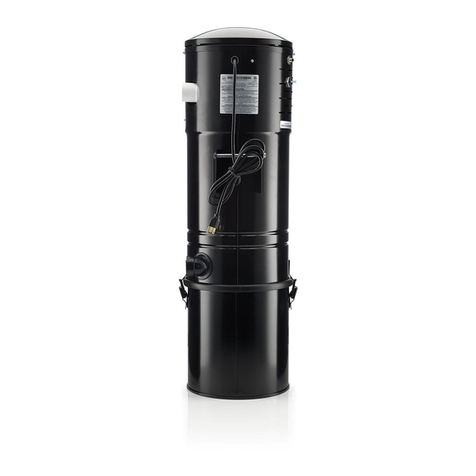
DUOVAC A10-130I User manual

EN
2000868
Conforms to: UL Std. 1017
Certied to:
CAN/CSA Std. C22.2 No. 243-M91
CAN/CSA Std. C22.2 No. 243-10
USER MANUAL
Central Vacuum System
Made in Canada
DOC-568 REV04

2 | DOC-568_EN REV04 ORIGINAL INSTRUCTIONS
TABLE OF CONTENTS
IMPORTANT SAFETY INSTRUCTIONS ������������������������������������������������������������������������������������������������������������������������������������������������������������������������������������������������������������������������� 3
GENERAL GUIDELINES & REFERENCE������������������������������������������������������������������������������������������������������������������������������������������������������������������������������������������������������������������������� 4
GROUNDING REQUIREMENTS���������������������������������������������������������������������������������������������������������������������������������������������������������������������������������������������������������������������������������� 4
ELECTRICAL REQUIREMENTS������������������������������������������������������������������������������������������������������������������������������������������������������������������������������������������������������������������������������������ 4
GENERAL GUIDELINES TO BE OBSERVED AT ALL TIMES
MODELS������������������������������������������������������������������������������������������������������������������������������������������������������������������������������������������������������������������������������������������������������������������������������������������������������� 5
INSTALLATION�������������������������������������������������������������������������������������������������������������������������������������������������������������������������������������������������������������������������������������������������������������������������������������� 5
POWER UNIT�������������������������������������������������������������������������������������������������������������������������������������������������������������������������������������������������������������������������������������������������������������������������������� 5
MUFFLER����������������������������������������������������������������������������������������������������������������������������������������������������������������������������������������������������������������������������������������������������������������������������������������� 6
FLEXIBLE HOSE WITH ERGONOMIC HANDLE ���������������������������������������������������������������������������������������������������������������������������������������������������������������������������������������������������� 6
LOW VOLTAGE WIRE CONNECTION ������������������������������������������������������������������������������������������������������������������������������������������������������������������������������������������������������������������������������� 6
SYSTEM OPERATING INSTRUCTIONS ������������������������������������������������������������������������������������������������������������������������������������������������������������������������������������������������������������������������� 6
SYSTEM MAINTENANCE ������������������������������������������������������������������������������������������������������������������������������������������������������������������������������������������������������������������������������������������������������������ 7
FILTRATION SYSTEM ����������������������������������������������������������������������������������������������������������������������������������������������������������������������������������������������������������������������������������������������������������� 7
PERMANENT FILTER; DISPOSABLE FILTRATION BAG
MOTOR���������������������������������������������������������������������������������������������������������������������������������������������������������������������������������������������������������������������������������������������������������������������������������������������� 7
TROUBLESHOOTING���������������������������������������������������������������������������������������������������������������������������������������������������������������������������������������������������������������������������������������������������������������������� 8
LED INTERPRETATION GUIDE������������������������������������������������������������������������������������������������������������������������������������������������������������������������������������������������������������������������������������ 8
SERVICE & COMMITMENT�������������������������������������������������������������������������������������������������������������������������������������������������������������������������������������������������������������������������������������������������������� 9
OUR COMMITMENT: SATISFYING YOUR NEEDS
RECYCLING INSTRUCTIONS��������������������������������������������������������������������������������������������������������������������������������������������������������������������������������������������������������������������������������������������������� 9

3 | DOC-568_EN REV04 ORIGINAL INSTRUCTIONS
1. IMPORTANT SAFETY INSTRUCTIONS
READ ALL INSTRUCTIONS BEFORE USING YOUR CENTRAL VACUUM SYSTEM
When using an electrical appliance, basic precautions should always be followed.
WARNING TO REDUCE THE RISK OF FIRE, ELECTRIC SHOCK OR INJURY:
• Unplug and disconnect the power unit from the electrical outlet before servicing or maintenance.
• Do not install outdoors and do not use on wet surfaces.
• This appliance can be used by children aged from 8 years and above and persons with reduced physical, sensory or mental
capabilities or lack of experience and knowledge if they have been given supervision or instruction concerning use of the
appliance in a safe way and understand the hazards involved.
• Children shall not play with the appliance.
• Cleaning and user maintenance shall not be made by children without supervision.
• Use only as described in this manual. Use only manufacturer’s recommended accessories.
• Do not use with damaged cord or plug. If appliance is not working as it should, has been dropped, damaged, left outdoors,
or dropped into water, return it to a service centre.
• If the supply cord is damaged, it must be replaced by the manufacturer, its service agent or similarly qualied persons in
order to avoid a hazard.
• The removal of the plug has to be such that an operator can check from any of the points to which he has access that the
plug remains removed (for commercial use models).
• Do not pull or carry by power cord, use cord as a handle, close a door on cord, or pull cord around sharp edges or corners.
• Check inlet openings for small objects that may not have been vacuumed in order to keep openings clear of airow
reducing factors.
• Keep power cord away from heated surfaces.
• Do not unplug by pulling on power cord. To unplug, grasp the plug, not the cord.
• Do not handle system or accessories with wet hands.
• Keep hair, loose clothing, ngers, and all parts of body away from openings and moving parts.
• Turn o all controls before unplugging.
• Use extra care when cleaning on stairs.
• Do not use to pick up ammable or combustible liquids such as gasoline or use in areas where they may be present.
• Connect to a properly grounded outlet only. See grounding requirements in section 2.
• Do not exhaust into a wall, a ceiling or concealed space of a building or structure, use appropriate installation to exhaust
outside the residence.
• Make sure that the air exhaust is never obstructed.
• Do not pick up anything that is burning or smoking, such as cigarettes, matches, or hot ashes.
• Do not place or store anything on top or around of the power unit, overheating of motor could occur.
SAVE THESE INSTRUCTIONS
INTENDED FOR HOUSEHOLD USE ONLY

4 | DOC-568_EN REV04 ORIGINAL INSTRUCTIONS
2. GENERAL GUIDELINES & REFERENCE
GROUNDING REQUIREMENTS
This power unit must be grounded. If it should malfunction or breakdown, grounding provides
a path of least resistance for electric current to reduce the risk of electricshock.This power
unit has a power cord of 5.4’/ 1.65 m in length and is equipped with a grounding conductor
and grounding plug. The plug must always be inserted directly into an electrical outlet that is
properly installed and grounded in accordance with all local codes and regulations.
DO NOT USE AN EXTENSION CORD.
WARNING:
Improper connection of the equipment grounding conductor can
result in a risk of electric shock. Check with a qualied electrician
or service person if you are in doubt as to whether the outlet is
properly grounded. Do not modify the plug provided with the
power unit – if it will not t the outlet, have a proper outlet
installed by a qualied electrician.
The unit has a grounding attachment plug. Make sure that the
power unit is connected to an outlet having the same conguration
as the plug. No adapter should be used with this power unit. The
power unit should be connected to an independent circuit breaker.
ELECTRICAL REQUIREMENTS
The following models are to be used on a nominal circuit of 15 A at 110-120Volts A.C. and
60Hz: A10-130-NA-D, A10-260I-NA-ED, SEN-260I-NA-D, STR-190I-NA, SIG-290I-NA, A50-170I-
NA, SYM-150I-NA.
The following model is to be used on a nominal circuit of 15 A at 220-240Volts A.C. and 60Hz:
DIS-200-NA-D.
The following models are to be used on a nominal circuit of 10 A at 220-240Volts A.C. and
50Hz: A10-260I-EU/CH/UK/SE-ED, SEN-260I-EU/CH/UK/SE-D, STR-190I-EU/CH-UK/SE-D, SYM-
270-EU/CH/UK/SE-D, SIL-280-EU/CH/UK/SE-D.
The following models are to be used on a nominal circuit of 15 A at 220-240Volts A.C. and
50Hz: SIG-200-EU/CH/UK/SE-D, DIS-200-EU/CH/UK/SE-D.
NOTE
»Other optional suffixes can be used, on all models, to denote
cosmetic changes�
generaL guideLineS tO Be OBSerVed at aLL timeS
1� The power unit must be installed in a ventilated area away from any
heat source;
2� The Duovac central vacuum system must be used only on dry
surfaces. At no time should the system be used to draw up liquids
nor should it be used to vacuum wet carpets or oors.
3� It is mandatory that the ltration cage (as applicable) be equipped
with its permanent lter at all times when the system is in use;
4� The motor housing must never be obstructed in any way to avoid
overheating or damaging;
5� DO NOT vacuum gypsum dust, our, mud, or any sludgy materials
as they will cake onto the lter and obstruct the ltration system
resulting in the overheating of the motor and thus failure of the
power unit to function properly;
6� Do not attempt to shorten or modify the electrical power cord;
7� As a security measure, unplug the electrical power cord before
proceeding with any maintenance;
8� In order for the warranty to be valid, only a Duovac authorized
service personnel may carry out the necessary repairs or
maintenance on the motor;
9� The warranty will be void if non-recommended products such as
lters or any other after-sale parts as carbon brushes and motors
are used to repair the unit. Duovac recommends strongly to use
only Duovac certied lters and replacement parts;
10� Power unit must be so positioned that the plug is always easily
accessible.
11� Pertaining to a 110V/24V valve (intended for the connection of a
current-carrying hose/motorized nozzle combination):
• Connect only a current-carrying hose to this wall valve;
• Do not install a wall valve outdoors;
• Do not use with a damaged hose. Return hose to a service centre;
IMPORTANT
Duovac is not responsible for damages resulting from improper
use. The warranty does not cover damage resulting from misuse
or problems resulting from installation that does not conform
to specications, or any functional alterations and / or physical
changes to the power unit. Improper or non-recommended
installation of the system and / or power unit done against
predened principles of the user manual is also considered misuse.
All conditions and restrictions are set forth in the Duovac limited
warranty, the user manual and the system installation guide. To
optimize the performance and life of your Duovac power unit, it
is important to do regular maintenance and cleaning of the lter
according to the guidelines listed in this user manual.
5 | DOC-568_EN REV04 ORIGINAL INSTRUCTIONS
3. MODELS
NOTE
»APPLICABLE TO ALL POWER UNITS: in order to avoid overheating, we
recommend 12in / 30cm clearance all around the power unit�
4. INSTALLATION
POWER UNIT
Fig.1 Mounting bracket is the same for all units
The power unit must be installed in a ventilated area, easily accessible and away from any heat
source. It should also be close to an accessible electrical outlet.
1� Determine the location of the power unit on the wall; we recommend that the power unit
be fastened at 60”/ 1,5m from the ground in order for the dust canister to be readily
accessible; allow 12”/ 30cm clearance on all sides of the power unit. When possible, it is
advisable to install the power unit on a concrete wall in order to minimize the vibrations;
2� Gypsum wall:
• Prepare the wall by installing a plywood mounting board (not provided) 16”/ 40cm high
by 3/4”/ 2cm thick and wide enough to be screwed to at least 2 studs;
• Fasten the mounting bracket to the mounting board with the provided screws;
3� Concrete wall:
• Drill the holes with a concrete drill bit;
• Insert the provided wall anchors into the drilled holes;
• install the mounting bracket with the provided screws into the anchors;
NOTE
»You can still install a plywood mounting (16”/ 40cm x 10” / 25cm x
3/4” / 2cm) board if desired;
»You can use provided screws to x mounting board on the wall, but
cannot use them for installing the mounting bracket on the mounting
board because of their length� You need to use shorter screws (not
provided)�
IMPORTANT
Always use the right type of screws for the surface you are working with (wood,
concrete, metal…)
4� Insert the power unit bracket into the mounting bracket (Fig. 1).
5� Insert the PVC pipe into the air intake coupling; DO NOT GLUE!
Machine washable
permanent lter
Aluminum canister
Disposable ltration
bag (optional)
Internal control
module
Air intake
Air outlet
Machine washable
permanent lter
Aluminum canister
Disposable ltration
bag (optional)
Internal control
module
Air intake
Air outlet

6 | DOC-568_EN REV04 ORIGINAL INSTRUCTIONS
5. FLEXIBLE HOSE WITH ERGONOMIC HANDLE
At Duovac, we understand that your cleaning
experience with a central vacuum system
begins above all with the use of the exible
hose and accessories.This is why we oer
products above market standards, on top of
having unequalled advantages like the best
warranty in the industry.
Fig.3 Low voltage technology handle
Your Duovac exible hose comes with a uniquely designed ergonomic handle, which makes its
use pleasant and worry free.
In your Duovac hose handle, you will nd the same quality, durability and solid design made
with rst-quality materials. The top-of-the-line nish of your Duovac exible hose is perfectly
harmonized with a series of accessories chosen by Duovac to make a perfect cleaning kit. The
performance, simplicity and durability are the three principles which led to the development
of your Duovac accessory kit.We are convinced that your cleaning experience will be improved
by it.
6� Connect the control module (see section 6)
7� Install the muffler (optional);
8� Connect the power unit directly into an electrical outlet;
MUFFLER OPTIONAL
The installation of a muffler is optional. Its purpose is to reduce the sound emitted by the
system.To install a muffler on your power unit, follow these simple steps:
1� Turn o and unplug the unit;
2� Attach the 90° long elbow upwards or downwards onto the central vacuum outlet;
3� Secure the muffler onto the elbow:
• If the inlet pipe of the muffler is made of PVC, secure the muffler onto the PVC elbow
using a PVC solvent glue;
• If the inlet pipe of the muffler is made of metal, secure the muffler onto the metal elbow
using the provided self-tapping screw;
4� OPTIONAL - If you plan on exhausting the central vacuum outside, install more piping
starting from the other end of the muffler.
NOTE
»The muffler can be oriented in the
direction of the exterior vent� The 90° elbow is
not mandatory�
»In case of space restriction around the power
unit, install the muffler at any convenient
distance�
IMPORTANT
DO NOT use any plastic piping (e.g. PVC) along the
full length of the Distinction (2 serial-mounted motors)
central vacuumexhaust piping.
Fig.2 Installing the muer.
6. LOW VOLTAGE WIRE CONNECTION
Before connecting the low-voltage wires,
make sure that the power unit is disconnected
from the electrical outlet.
1� First, strip the low voltage wires
approximately 3/8in / 10mm.
2� Refer to Fig. 4 for visual aid:
• 2a: The power unit is an EZ connector-type,
leave the wires stripped.
• 2b: The power unit is a PIN connector-type,
you must crimp the connectors onto the wires
in order to hook-up the system.
Fig.4 Low voltage wire connection
3� Insert the low-voltage wires into the power unit’s low voltage terminal. Slightly pull on
the low-voltage wires to verify that they are properly fastened to the terminal.
4� To remove the wires:
• 4a (EZ connector): Gently press the tabs above each terminal with a screwdriver and pull
the wires out.
• 4b (PIN connector): gently pull the connector out of the socket.
7. SYSTEM OPERATING INSTRUCTIONS
Your new system is ready to be used, here are some simple guidelines to follow when using your
power unit:
• Insert the exible hose in one of the wall or oor vacuum inlets installed in your home;
• If you use a hose tted with a remote switch on the handle, use the interrupter on the
hose’s handle to turn the power unit on/o.

7 | DOC-568_EN REV04 ORIGINAL INSTRUCTIONS
FILTRATION SYSTEM
In order to maintain good air quality in your home, the power unit is equipped with a ltration
system. It consists of a permanent lter and an optional disposable ltration bag.The lter
separates dust from the air.The lters rene the ltration process retaining extra ne dust
particles, as minute as 0.1 micron (the diameter of one hair is approximately 60 microns).
Permanent fiLter
Duovac’s ltration system will maintain its high performance as long as it is well looked after.
The permanent lter can be machine-washed and tumble dried.
A natural protection (GREEN) against odour-causing
bacteria, SILPURE exploits the natural power of silver in
stopping the growth of a wide range of bacteria. It is
recommended that the dust canister be emptied every three
(3) months or more often depending on the use you make of
your system.
IMPORTANT
DO NOT vacuum gypsum dust, our, mud, or any sludgy materials as they cake onto
the lter and obstruct the ltration system resulting in the overheating of the
motor and thus failure of the power unit to function properly;
If you are not using a disposable ltration bag in addition to the permanent lter,
empty the dust canister regularly to ensure a longer-lasting life of the motor.
If you are using the disposable ltration bag, it should be checked / changed as
often as you would empty the dust canister.
While emptying the power unit’s dust canister, the permanent lter should also be cleaned:
1� Unlatch the dust canister;
2� Wrap a plastic / paper bag around the lter and gently pat the lter to dislodge any loose
dust into the bag.
3� Empty the dust canister into a garbage bag.
NOTE
»We recommend that the permanent lter be deep-cleaned once a
year;
a�Remove the dust from the lter by gently patting it into a bag as
mentioned above;
b�Remove the lter by pulling it down;
c�Drop it into the washer.
d�Set the washer to a normal wash cycle (warm or cold water) then,
spin dry (regular cycle) for 10 minutes;
e�Before replacing the lter, clean the inside of the ltration cage;
IMPORTANT
Do not turn lter inside out. It must be replaced over the cage on the same fabric
side as initially mounted in the factory.
It is very important that the lter be slipped over the metal rim located at the top of
the cage. In order to prevent any dust inltration into the motor, the cage must be
completely covered by the lter;
f�Clip the dust canister back onto the casing.
diSPOSaBLe fiLtratiOn Bag
In order to maximize your system’s ltration capabilities, all Duovac power units (except
the SIG-200) come with a disposable ltration bag. See below instructions on replacing the
disposable ltration bag depending on the system being used:
DISPOSABLE FILTRATION BAG VACUUM MODEL
FILTRE-189 A10-130I
A10-260I(-NA/-EU/-CH/-UK/-CN)-ED
FILTRE-196 A10-260I(-NAEDSN/-NAEDSO)
A50
DIS
SEN
SIL
STR
SYM
The disposable ltration bag must be changed at least every 3 months to ensure proper
functioning of the power unit.
To change the ltration bag, please proceed as follows:
1� Unlatch the dust canister;
2� Remove the disposable bag from the elbow attachment by gently pulling on both sides of
the cardboard cu;
3� Dispose of the used bag;
4� Slip the new disposable ltration bag onto the elbow xture by gently pressing on both
sides of the cardboard cu until it reaches the stop notch on the elbow.
IMPORTANT
The warranty will be void if non-recommended lters are used to repair the unit.
Duovac recommends strongly to use only Duovac certied lters.
MOTOR
All units are equipped with a soft-start control module and have a LED communicating the
system status (see g. 5 in section 9 for more details on LED colour interpretation). When the
LED changes to amber, it is time to make an appointment with a Duovac certied technician for
a complete check-up of the unit. This mandatory maintenance will extend the life of the unit
and keep the warranty valid. If it is still not carried out after 20 hours of additional operating,
the device will automatically switch o as a safety measure.
All systems also have a mini breaker (power cut-o) directly connected to the module which
protects the motor against an overload and prevents overheating.
8. SYSTEM MAINTENANCE

8 | DOC-568_EN REV04 ORIGINAL INSTRUCTIONS
9. TROUBLESHOOTING
Failure of the power unit could be caused by:
• Inadequate power level (voltage / amperage) (ensure that power level complies with the power unit’s electrical requirements);
• Malfunction of the motor or control module.
Simple checks can often help you nd out why your power unit is inoperative.We invite you to verify the following before calling a service technician.
SITUATION VERIFICATION
NO POWER Check that the power unit’s electrical cord is plugged directly into a power outlet;
The power unit is equipped with a mini breaker (button on the side of the motor housing) which protects the motor against an overload. To reset the mini breaker, simply
push the button. If the power goes o one more time, call a service centre near you;
Using a screwdriver tted with a rubber handle, touch both pins of the low voltage terminals (short circuit the 2 pins) on the side of the motor housing. If the power unit
starts, the problem lies with the low voltage wiring (installed along the piping).
You should then verify if the 24 Volts circuit is adequately connected by checking each inlet. Open the inlet cover, touch the small contacts with the head of a pair of metal
pliers with rubber handles.This will establish power and start the motor. Repeat for each vacuum inlet;
NOTE
»If all vacuum inlets are functional and your exible hose is a low-voltage technology handle, then there may be a defect in the hose
cut-off switch or in the hose itself;
Check the breaker on your electric circuit panel;
DECREASED
SUCTION
The exible hose may be blocked. If you cannot unblock it, try inserting the opposite end of the hose into the wall inlet; touch the contacts which are located on the inside
of the inlet with the hose wand in order to start the power unit;
NOTE
»Frame the inlet with your hands or a large enough piece of cloth (such as a towel) to ensure the maximum suction to unblock the
hose;
Check whether the dust canister / disposable ltration bag / permanent lter needs to be emptied / cleaned;
Check that the canister is clipped properly to the motor housing and that the gasket, which ts around it, is in good condition;
Make sure all inlets are airtight.
If the pipes are visible in certain areas: check if the ttings are well glued and that there are no air leaks;
If the pipes should be blocked behind the walls, it is possible to determine where the blockage is located by starting from the furthest inlet from the central vacuum. Insert
a tissue paper and check to see if the tissue paper reaches the dust canister. Repeat the same for each inlet.
SIGNIFICATION NIVEAU
LEVEL
DEL
LED MEANING
Brancher le cordon
d’alimentation à une
prise électrique.
0Plug power cord to electrical
outlet.
Le cordon d’alimentation
vient d’être branché à une
prise électrique.
1
Power cord has just
been connected to electrical
outlet.
Système opérationnel. 2System operational.
Vidange/nettoyage requis.
Remise à zéro: Garder le 3
Cleaning/emptying required.
Reset: hold button pressed
Vidange/nettoyage requis.
l’unité motrice reviendra au
niveau 2.
4
Cleaning/emptying required.
No reset required: Power unit
will return to level 2.
5Schedule service.
Service requis. 6Service required.
Constante
Solid
Clignotement Lent
Blinks Slowly
Clignotement Rapide
Blinks Fast
LED INTERPRETATION GUIDE
All Duovac power units with internal control module come with an explicative sticker (inside the module casing cover where
applicable).
NOTE
»The indicator in step 4 will only appear on A50 power units�
Fig.5 LED interpretation guide

2019�06�03 // DOC-568_EN REV04
10. SERVICE & COMMITMENT
Our COmmitment: SatiSfying yOur needS
In an eort to always provide customers with the best products available we welcome comments and suggestions from our customers all over the world. We want to develop a strong commitment
in providing all of our customers the products which are always of the nest quality that meets or exceeds their needs.
So, if you have any comments or suggestions related to our products or distributors, please contact us.
For any inquiries:
E-mail us at: info@duovac.com
Send us your comments to : NUERA AIR INC. - Customer Service
3695 Desserte des Laurentides (A-15) E
Laval, QC H7L 3H7 CANADA
You can also visit our website
to see all our products or nd a
local distributor: www.duovac.com
11. RECYCLING INSTRUCTIONS
Old power units contain valuable materials that can be recycled.
DO NOT dispose of such appliances with the normal domestic waste but rather by way of appropriate collecting points.

UK
Recycling Instructions
Old appliances contain valuable materials that can be
recycled. DO NOT dispose of such appliances with the normal
domestic waste but rather by way of appropriate collecting points.
CN
回收说明
老设备包含一些可以回收的有用材料。请勿将这样的设备与
普通的生活垃圾一起处理,而是通过适当的收集站处理。
FR
Instructions de recyclage
Les vieux appareils contiennent les matériaux importants qui
peuvent être réutilisés. Ne vous débarrassez pas de tels appareils
avec le débarras domestique normal mais plutôt par les centres de
rassemblement appropriés.
SA
ES
Instrucciones de Reciclaje
Los viejos aparatos contienen los materiales importantes que pue-
den reutilizarse. No quita tales aparatos con el trastero doméstico
normal sino más bien por los centros de reunión convenientes.
PL
Rekolarskie Polecenia
Zużyte urządzenia zawierają wartościowe materiaty, które
nadają się do powtórnego przerobu. Urządzenia nie wyrzucać
z odpadami domowymi, lecz należy je oddać w odpowiednim
punkcie zbiórki surowców wtórnych.
DE
Recycling Hinweise
Die alten Geräte beinhalten wiederverwendbare Materialien. Werfen
Sie die Geräte nicht in den Hausmüll, sondern entsorgen Sie diese
an geeigneten Sammelstellen.
PT
Instruções Recicladoras
Aparelhos usados contém materiais valiosos, que são apro-
priados para reprocessamento. Não colocar o aparelho no lixo
doméstico normal, mas sim descartar correctamente através
dos sistemas de colecta adequados.
SE
Återvinning
En centraldammsugare består av material och komponenter som
kan återvinnas. Använd därför alltid lämplig sorteringsmetod eller
återvinningscentral.
HU
Újrahasznosításra
A használt készülékek értékes anyagókat tartalmaznak, melyek
újrahasznosításra alkalmasak. A készüléket ne tegyük
háztartási szemétbe, hanem megfelelö gyüjtörendszerek
igénybevételével szakszerüen ártalmatlanitsuk.
CZ
Recycling Pokyny
Staré přístroje obsahují cenné materiály, které jsouvhodnék opětov-
nému zpracování. Přístroj neodkládat k běžnému domácímu odpadu,
nýbrž nechat zlikvidovat prostřednictvím vhodných sběrných systémů.
GR
Οδηγίες της ανακύκλωσης
Oι παλαιές συσκευές περιέχουν τα σημαντικά υλικά που μπο-
ρούν να ανακυκλωθούν. Δεν απαλλάσσετε τέτοιες συσκευές με
τις εσωτερικές φύρες αλλά μάλλον από τα κατάλληλα κέντρα
της συγκέντρωσης.
IT
Istruzioni di Riciclaggio
I vecchi apparecchi contengono i materiali importanti che possono
essere riutilizzati. Débarrassez tali apparecchi con il sgabuzzino
domestico normale ma piuttosto con i centri di raccolta adeguati.
DK
Genanvendelse Instruks
Gamle apparater indeholder værdifulde materialer der er egnet
til genbrug. Bortdkaf ikke apparatet via det det normale
hushldningsaffald, men fagmæssigt korrekt via egnede
samlesystemer
This manual suits for next models
8
Table of contents
Popular Central Vacuum System manuals by other brands

NuTone
NuTone VX3000C installation instructions

TECNOPLUS
TECNOPLUS Sistem-Air revo block professional Technical manual

Drainvac
Drainvac Automatik Series owner's manual

Lindsay
Lindsay VacuMaid owner's manual

Retraflex
Retraflex Retractable Hose System installation guide

Hoover
Hoover 59132-297 owner's manual