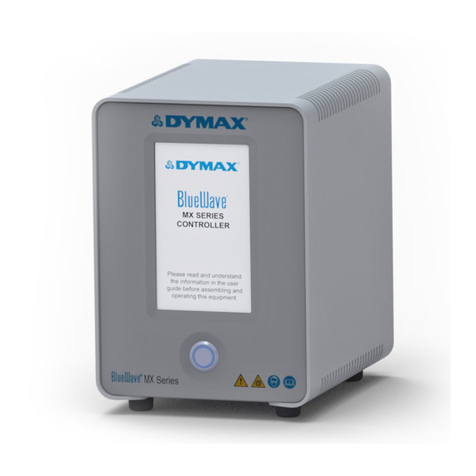
dymax BlueWave MX-Series User manual

BlueWave® MX-Series Multichannel Controller
User Guide
2- & 4-Channel Controllers for Use with BlueWave®MX-Series Emitters
Instructions for Safe Use
Setup and Operation
Maintenance
Ordering Spare Parts and Accessories

2
BlueWave® MX-Series Multichannel Controller User Guide
About Dymax
UV/Visible light-curable adhesives. Systems for light curing, fluid dispensing, and fluid packaging.
Dymax manufactures industrial adhesives, light-curable adhesives, epoxy resins, cyanoacrylates, and activator-cured adhesives. We also manufacture a complete
line of manual fluid dispensing systems, automatic fluid dispensing systems, and light-curing systems. Light-curing systems include UV broad-spectrum and LED
curing sources configured in, spot, flood, and conveyor systems designed for compatibility and high performance with Dymax adhesives.
Dymax adhesives and light-curing systems optimize the speed of automated assembly, allow for 100% in-line inspection, and increase throughput. System designs
enable stand-alone configuration or integration into your existing assembly line.
Please note that most dispensing and curing system applications are unique. Dymax does not warrant the fitness of the product for the intended application. Any
warranty applicable to the product, its application, and use is strictly limited to that contained in the Dymax standard Conditions of Sale. Dymax recommends that
any intended application be evaluated and tested by the user to ensure that desired performance criteria are satisfied. Dymax is willing to assist users in their
performance testing and evaluation by offering equipment trial rental and leasing programs to assist in such testing and evaluations.

3
BlueWave® MX-Series Multichannel Controller User Guide
Contents
Introduction.................................................................................................................................................... 5
Introduction to the User Guide..................................................................................................................... 5
Where to Get Help ........................................................................................................................................ 5
Safety ............................................................................................................................................................. 5
General Safety Considerations...................................................................................................................... 5
Safety Symbol Index...................................................................................................................................... 6
Specific Safety Considerations ...................................................................................................................... 6
Dymax UV Light-Curing General Safety Considerations................................................................................ 6
Product Overview ........................................................................................................................................... 8
Description of BlueWave MX-Series Multichannel Controller ...................................................................... 8
Features & Benefits..................................................................................................................................... 10
Control Panels ............................................................................................................................................. 11
Unpacking..................................................................................................................................................... 13
Unpacking and Inspecting Your Shipment .................................................................................................. 13
Parts Included ............................................................................................................................................. 13
System Setup ................................................................................................................................................ 14
System Connections .................................................................................................................................... 14
Modes of Operation ..................................................................................................................................... 15
Manual Mode.............................................................................................................................................. 15
Timed Mode................................................................................................................................................ 15
PLC (Programmable Logic Controller) Operation........................................................................................ 15
Input/Output Interface ............................................................................................................................... 16
Examples of PLC Wiring............................................................................................................................... 18
Examples of Master interlock / System Health Wiring ............................................................................... 20
Operation ..................................................................................................................................................... 21
Admin Screen .............................................................................................................................................. 21
Touch Screen Interface ............................................................................................................................... 21
Irradiation ................................................................................................................................................... 24
Loading and Saving Programs ..................................................................................................................... 25
System Screens ............................................................................................................................................. 25
System Information..................................................................................................................................... 25
Curing Time Screen ..................................................................................................................................... 26
Power Level Screen ..................................................................................................................................... 26
Cure Delay Screen ....................................................................................................................................... 27
Production Screen....................................................................................................................................... 28
PLC Screen................................................................................................................................................... 28
Program Screen........................................................................................................................................... 29
Program Name Screen ................................................................................................................................ 29
Settings Screen............................................................................................................................................ 30
User Screen ................................................................................................................................................. 30
New Password Screen................................................................................................................................. 31

4
BlueWave® MX-Series Multichannel Controller User Guide
Troubleshooting & Maintenance .................................................................................................................. 31
Product Cleaning ......................................................................................................................................... 31
System Information..................................................................................................................................... 31
Alarms Screen ............................................................................................................................................. 32
Troubleshooting .......................................................................................................................................... 33
Spare Parts & Accessories ............................................................................................................................. 34
Accessories.................................................................................................................................................. 34
Components & Spare Parts ......................................................................................................................... 34
Specifications................................................................................................................................................ 35
Validation ..................................................................................................................................................... 36
Set Exposure Time, Determine Intensity..................................................................................................... 36
Set Intensity, Determine Exposure Time..................................................................................................... 36
Control ........................................................................................................................................................ 36
Warranty ...................................................................................................................................................... 37

5
BlueWave® MX-Series Multichannel Controller User Guide
Introduction
Introduction to the User Guide
This guide describes how to set up, use, and maintain BlueWave® MX-Series 2CH & 4CH Multichannel Controller
safely and efficiently.
Intended Audience
This user guide is meant for experienced process engineers, technicians, and manufacturing personnel. If you are
new to high-intensity LED light sources and do not understand the instructions, contact Dymax Application
Engineering for answers to your questions before using the equipment.
Where to Get Help
Dymax Customer Support and Application Engineering teams are available by phone in the United States, Monday
through Friday, from 8:00 a.m. to 5:30 p.m. Eastern Standard Time. You can also email Dymax at [email protected].
Contact information for additional Dymax locations can be found on the back cover of this user guide.
Additional resources are available to ensure a trouble-free experience with our products:
Detailed product information on www.dymax.com
Dymax adhesive product data sheets on our website
Safety data sheets (SDS) provided with shipments of Dymax materials
Safety
WARNING! Using this LED controller with the associated light sources may result in injury without
first reading and understanding the information in this user guide. Please read and understand the
information in this guide prior to assembly and use of this device.
General Safety Considerations
All users of Dymax LED light sources should read and understand this user guide before assembling and using the
system.
To learn about the safe handling and use of light-curable formulations, obtain and read the SDS for each product.
Dymax includes an SDS with each fluid product sold. In addition, fluid product SDS can be requested through our
website.

6
BlueWave® MX-Series Multichannel Controller User Guide
Safety Symbol Index
The following symbols are displayed on BlueWave MX-Series 2CH or 4CH systems. Please see below for their
meanings.
Refer to Equipment Manual Before
Operating Equipment
Warning! Use Caution When Operating
Equipment
Eye Protection Required
Product Contains an Electrostatic
Sensitive Device (ESD) Internally
Complies with All Listed European
Directives
Warning! UV Light Hazard (Do not look
directly at light)
WEEE Directive (Waste electrical and
electronic equipment must be disposed of
or recycled at the nearest collection
facility)
Warning! Hot Surface
Specific Safety Considerations
The BlueWave MX-Series curing systems are designed to maximize operator safety and minimize exposure to light-
curing energy. To use the unit safely, it must be set up and operated in accordance with the instructions in this and
the respective emitter user guide. Please also read and understand the safety considerations unique to LED-curing
systems as described below.
WARNING! The controller is cooled by natural convection. If you block the air flow from the controller,
equipment damage and malfunction can result. To prevent damage and malfunction, ensure adequate
space around controller vents to allow the free flow of air. Typically, 1.5 in (38 mm) of space around all
sides of the controller is sufficient.
Dymax UV Light-Curing General Safety Considerations
Operators must understand these three concepts to use the LED light source safely: UV exposure, high-
temperature surfaces, and bright, visible light.
UV Exposure
Figure 1. UV Spectrum

7
BlueWave® MX-Series Multichannel Controller User Guide
Standard Dymax UV light-curing systems have been designed primarily to emit UVA and Visible energy (Figure 1).
Depending on the model of LED head used, the energy emitted from a BlueWave MX-Series curing system can
either be in the upper end of the UVA portion of the spectrum (PrimeCure® and RediCure®) or in the lower portion
of the visible spectrum (VisiCure®). UVA energy is generally considered the safest of the three UV ranges: UVA,
UVB, and UVC. Although OSHA does not currently regulate UV-light exposure in the workplace, the American
Conference of Governmental Industrial Hygienists (ACGIH) does recommend Threshold Limit Values (TLVs) for
ultraviolet light.
The strictest interpretation of the TLV (over the UVA range) for workers’ eyes and skin allows continuous exposure
up to 1 mW/cm2(intensity). Unless you are placing bare hands into the curing area, it is unusual to exceed these
limits. To put 1 mW/cm2limit into perspective, a cloudless summer day will typically exceed 3 mW/cm2of UVA
light, and also include the more dangerous UVB light (primarily responsible for sun tans, sun burns, and skin
cancer).
Checking the Workstation
The human eye cannot detect "pure" UV light, only visible light. A radiometer should be used to measure stray UV
light to confirm the safety of a UV light-curing process. A workstation that exposes an operator to more than 1
mW/cm2of UVA continuously should be redesigned.
Protecting Operators
Light-curing technology can be a regulatory compliant, "worker-friendly" manufacturing process when the proper
safety equipment and operator training is utilized. There are two ways to protect operators from UV exposure:
shield the operator and/or shield the source.
Shield the Operator
UV-Blocking Eye Protection —UV-blocking eye protection is recommended when operating UV light-curing
systems. Both clear and tinted UV-blocking eye protection is available from Dymax.
UV-Blocking Skin Protection —Opaque, UV-blocking clothing, gloves, and full-face shields are recommended
when skin may potentially be exposed to UV light.
Shield the Source of UV
Any substrate that blocks UV light can be used as a shield to protect workers. The following materials can be used
to create simple shielding structures:
Rigid Plastic Film —Transparent or translucent/UV-blocking plastics (typically polycarbonate or acrylic) are
commonly used to create shielding where some level of transparency is also desired.
Flexible Film —Translucent UV-blocking, flexible urethane films can be used to quickly create workstation
shielding. This UV-blocking, flexible urethane film is available from Dymax, call for assistance.
High-Temperature Surfaces
Surfaces exposed to high-intensity curing energy may rise in temperature. The intensity, distance, exposure time,
cooling fans, and composition of the surface can all affect the rise in surface temperature. In some cases, exposed
surfaces can reach temperatures capable of producing a burn or causing damage to a substrate. In these cases,
operators should try to minimize exposure to maintain a cooler surface temperature or they should have the

8
BlueWave® MX-Series Multichannel Controller User Guide
appropriate protection/training to avoid injury from the heat. Empirical testing should be used to verify the
temperature rise in each application.
Bright Visible Light
The bright visible energy emitted by curing systems can cause eyestrain if proper eye protection or shielding is not
used. The use of tinted eye protection and/or opaque/ tinted shielding can be utilized to reduce eyestrain and
address this concern.
Dymax tests all LED equipment per IEC62471 and will mark risk group and appropriate warning on each emitter.
Product Overview
Description of BlueWave MX-Series Multichannel Controller
The BlueWave® MX Series multichannel controller, when combined with MX Series emitters, provides
manufacturers with the curing flexibility they need in a smaller more efficient design. The unit is comprised of two
main parts; a multichannel controller with an easy-to-use touchscreen interface and up to 4 high-intensity LED
emitters.
With this new controller, the system can be truly tailored to users’ curing needs – allowing them to choose from
any of the different emitter types and different wavelength LED emitters (365, 385, or 405 nm) in three cure
pattern formats; Spot, Mini-Flood and Line emission patterns. This flexibility ensures optimal cures are achieved
across a variety of bond-line geometries and fluid product offerings. Users also have greater set up flexibility; for
automated curing processes, the emitter can be mounted to robotic arms or further from the controller without
fear of intensity variations. When used as a bench-top curing system, the unit can be paired with a stand and
shielding for large area curing. It can also be used with multiple pathway lightguides for specialized applications
when paired with MX spot emitters.
MX Series controllers are available in two different model variants –a two channel (MX Series 2CH) that is capable
of independently controlling up to two emitters, and a four channel (MX Series 4CH) for up to four emitters.
Figure 2. BlueWave® MX-250 System with 4-Channel Controller

9
BlueWave® MX-Series Multichannel Controller User Guide
Compatible MX Series Emitters
The BlueWave® MX-150 functions as a high-intensity spot-curing system. Can be used with lightguides to
provide setup flexibility.
The BlueWave® MX-250 functions as a mini- flood-curing system with a 50 mm x 50 mm (2 in x 2 in) curing
area for large area coverage.
The BlueWave® MX-275 functions as a line pattern flood-curing system with a 5 mm x 50 mm (0.2 in x 2
in) asserted curing area.
To support the use of the multichannel controller emitters must be of firmware revision 1.08 or higher,
updates can be performed at Dymax.
Figure 3. Main Components of an MX Curing System
2/4 CHANNEL
MX-150 MX-250 MX-275
CONTROLLER
EMITTERS
MX Single Emitter Stand MX Array Stand
INTERCONNECT CABLE
ACCESSORY STANDS

10
BlueWave® MX-Series Multichannel Controller User Guide
Features & Benefits
BlueWave® MX-Series modular curing systems are engineered for precise performance and long service life. Key
features include:
Features
Benefits
Powers up to 4 Emitters
Reduces the number of Controllers required.
Reduces equipment footprint and cost.
Run up to 4 Emitters independently or
as an integrated light bar
Allows up to 4 Emitter work stations to operate independently with 4
separate foot pedals.
4 MX-250 Emitters can be integrated to produce a 50mm x 200mm light
bar.
Compatible with MX-150 and MX-250
Emitters
Utilize existing MX-150 and MX-250 Emitters with firmware at version
1.08 or higher. Dymax can upgrade Emitter firmware to the latest
versions by returning to our one of our service facilities.
Provides greater flexibility to switch between LED Spot and Flood curing
configurations.
All MX Series Emitters available in 365, 385 and 405nm versions
Provides for growth and flexibility
Each Emitter is automatically recognized when plugged into the
Controller.
Users can start with 1 Emitter and add others as their applications grow.
Allows various combinations of different Dymax Emitters.
MX-150 Emitters compatible with 4-
Pole Light Guides
4 MX-150 Emitters, each with a 4-Pole lightguide, gives you 16 cure spots
from a single controller.
Future compatibility with MX-275 Line
Arrays in development
4 MX-275 Emitters produces a high-intensity 5mm x 200 light bar.
Protects your investment by allowing usage with future MX Series
Emitters.
Admin and production modes
Production Mode for simple on/off operation.
Curing programs can be saved and recalled.
Units can be password protected in Production Mode to limit process
modification.
Touch screen with full keyboard
Improved user interface.
Curing programs can be entered, stored, and recalled when needed.
Stylus aids menu navigation and attaches to unit.
Immediate LED on-off
Cold start capable.
More energy efficient
LED temperature management
and system monitoring
Maximized continuous operation without overheating.
Temperature monitoring assures maximum LED life.
Monitors critical system functions.
Remote I/O interface
May be incorporated into automated systems
Improved PLC interface provides additional flexibility for automated
applications.

11
BlueWave® MX-Series Multichannel Controller User Guide
Control Panels
Front Panel
The front panel (Figure 4) features the power button and a touchscreen display through which the unit can be
operated.
Power Button —Press the power button to power up the controller. Press the button a second time to turn the
unit off.
Figure 4. Front Control Panel
Touchscreen
Power Button

12
BlueWave® MX-Series Multichannel Controller User Guide
Back Panel
Figure 4 shows the interface connections at the back of the multichannel controller.
Figure 5. BlueWave® MX-Series 4-Channel Controller Rear Panel
Figure 6. System Status (Located on Rear of Controller)
PIN 1 - Master Interlock input asserted low (NOTE: MUST BE
ASSERTED FOR UNIT OPERATION, Factory Jumper Provided)
PIN 2 - ISO Return 1
PIN 3 - Reserved
PIN 4 - Reserved
PIN 5 - System Health Output (Asserted Low No Alarms)
PIN 6 - ISO Return 1
Emitter Interface
Connector
Power Input
Channel I/O
Interface
System Status

13
BlueWave® MX-Series Multichannel Controller User Guide
Figure 7. I/O Interface
PIN 1 - Trigger Enable Input (Asserted Low)
PIN 2 - ISO Return 3
PIN 3 - Interlock Input (must be asserted for unit operation,
individual channel interlock, Factory Jumper Provided)
PIN 4 - ISO Return 3
PIN 5 - Analog (0 to 10 Volts) Intensity input
PIN 6 - ISO Return 2
PIN 7 - Emitter Health Output (Asserted Low No Alarms)
PIN 8 - ISO Return 3
PIN 9 - LED State Output (Asserted Low LED In on)
PIN10 - ISO Return 3
Unpacking
Unpacking and Inspecting Your Shipment
Upon arrival, inspect all boxes for damage and notify the shipper of box damage immediately. Open each box and
check for equipment damage. If parts are damaged, notify the shipper and submit a claim for the damaged parts.
Contact Dymax customer service for replacement parts.
The parts below are included in every package/order. If parts are missing from your order, contact your local
Dymax representative or Dymax Customer Support to resolve the problem.
Parts Included
Controller
Power Supply
Power Cord
BlueWave® MX-Series Multi-Channel Controller User Guide
I/O interface connectors
Stylus Kit
Goggles
NOTE: Interconnect cables and footswitches are sold separately.

14
BlueWave® MX-Series Multichannel Controller User Guide
System Setup
System Connections
NOTE: Although this product is designed with protection against ESD (Electrostatic Discharge) it is recommended to
take precautions against static when handling the BlueWave MX-Series controller or LED emitter independently.
Once these devices are attached together through the interconnect cable, then the threat of ESD damage is
eliminated.
1. Attach the power cord to the power supply and attach the DC to the Power Input Receptacle located on the
unit’s back panel (Figure 5).
2. At the top of the Controller’s Rear Panel, there are connectors labeled “Emitter” (Figure 5). Connect the male
end of the Emitter Cable to this connector and the female end to the Emitter. Each “Emitter” uses its own
cable, the system supports four separate emitters.
3. When not using PLC controls or footswitches, install the supplied PLC connector with installed Interlock
jumpers into the Channel I/O interface terminal for each channel that is installed.
WARNING! Under no circumstance should the interconnect cable from the BlueWave® MX-Series controller
to the LED emitter be connected or disconnected while power to the unit is on. This procedure is usually called
“hot-swapping” and should not be performed as it could cause damage to the controller or the LED emitter.
Always power down the equipment before disconnecting any of these devices.
4. The Master Interlock input must be installed using the supplied connector with jumper. (PIN 1) must be
connected to common (PIN 2) for normal operation. The Master Interlock will shut off all 4 emitters if not
installed.
5. Plug the power cord from the power supply into an appropriate AC power source. The unit is now powered and
ready to be turned on with the On/Off Switch located on the front of the unit.
WARNING! If the BlueWave® MX-Series controller is powered on with no LED emitter connected, the
controller screen will not show the banner containing the information of the emitter type or wavelength and
indicate NOT READY.
6. If using the optional foot pedal, plug it into the Channel I/O interface terminal on the rear panel of the
controller. This will have an integral interlock jumper.
If you are using a PLC, there are input and output, (I/O) Connection Terminals that can be used to integrate the
unit to an automated assembly line. Refer to the PLC Section of this manual.
Refer to Table 1 and Figure 11 - Figure 17 for more complete description of the I/O interface and wiring
examples.
7. Your unit is now ready for operation.

15
BlueWave® MX-Series Multichannel Controller User Guide
Modes of Operation
The system has three basic modes of operation: Manual, Timer, and PLC. The controller can have each channel
triggered independently or in groups based on trigger settings. Trigger actions can be via touch screen, footswitch
or PLC command interface.
Manual Mode
When in manual mode, the time indicator will start at zero. The time will count up if the associated trigger input is
actuated (asserted) and the LED is energized. When the associated input trigger; touch screen, foot pedal or PLC
Input, is deactivated (deasserted) the time will stop counting and LED is de-energized.
Timed Mode
In timed mode, the LED is energized for a specific time each time the channel trigger input is asserted. The specific
time is set by adjusting the time variable through the touchscreen user interface. Momentarily asserting the
channel trigger input starts the timer, energizes the LED and counts down. See the Input/Output Interface section
for timing details.
When the timer counts down to zero, the LED is de-energized, and no curing energy is emitted. The timer is reset
to the pre-set value, and the system is immediately ready to run another exposure cycle. The LED can be de-
energized at any time during the curing cycle by simply reasserting the correct trigger input a second time.
PLC (Programmable Logic Controller)
Operation
When in PLC mode, an external PLC can control the unit. The PLC
provides input signals to the BlueWave MX-Series 2CH & 4CH system
to control the on/off signals and intensity of the LEDs. The PLC
monitors the status of the system by reading output signals provided
by the unit.
An example of the appearance of the PLC Mode screen is shown in
Figure 8. See PLC Screen section for detailed description of content.
The PRG-EXT Display Button, shown in grey background on the PLC mode
screen is used to choose between programmed or externally controlled
intensity.
NOTE: When you initiate PLC mode you have the option to SET PROG/EXT.
PROG mode will use the program that has been selected via the GUI. EXT
mode will use analog intensity inputs to set intensity, the LED will be on as
long as the trigger input is asserted. Minimum LED on/off time is 200 msec.)
Figure 8. PLC Mode Screen

16
BlueWave® MX-Series Multichannel Controller User Guide
Input/Output Interface
Figure 9. Channel I/O Interface (Located on Rear of Controller)
PIN 1 - Trigger Enable Input (Asserted Low)
PIN 2 - ISO Return 3
PIN 3 - Interlock Input (must be asserted for unit operation,
individual channel interlock, Factory Jumpers Provided)
PIN 4 - ISO Return 3
PIN 5 - Analog (0 to 10 Volts) Intensity input
PIN 6 - ISO Return 2
PIN 7 - Emitter Health Output (Asserted Low No Alarms)
PIN 8 - ISO Return 3
PIN 9 - LED State Output (Asserted Low LED In on)
PIN10 - ISO Return 3
Table 1. I/O Interface
Signal Name / Description
Isolated Inputs/
outputs
Connector-Pin
Signal GND
Signal Level
Asserted
De-
Asserted
I/O INPUTS
Trigger (Minimum pulse width = 30 msec.)
Used to start and stop curing cycles
IN
1
2
0 VDC
(Shorted to pin2)
24 VDC
(Open)
Interlock Input
Signal must be asserted for emitter function
Momentarily breaking the connection via customer supplied
relays or switch contacts will deactivate the emitter.
FACTORY JUMPERS PROVIDED WITH UNIT.
IN
3
4
0 VDC
(Shorted to pin4)
24 VDC
(Open)
Intensity Input
Only used in PLC –EXT mode
Sets Emitter intensity level (1V=10% output, 10V=100%)
IN
5
6
0 –10 VDC
N/A
I/O Outputs
Emitter Health Output (Max. 100msec for update)
Indicates Health of each emitter
OUT
7
8
NO Alarm
0 VDC
24 VDC
Alarm
LED State Output (Max. 100msec after state change)
Indicates current state of each emitter
OUT
9
10
0 VDC
On
24 VDC
Off

17
BlueWave® MX-Series Multichannel Controller User Guide
Figure 10. System Status (Located on Rear of Controller)
PIN 1 - Master Interlock input asserted low (NOTE: MUST BE
ASSERTED FOR UNIT OPERATION, Factory Jumper Provided)
PIN 2 - ISO Return 1
PIN 3 - Reserved
PIN 4 - Reserved
PIN 5 - System Health Output (Asserted Low No Alarms)
PIN 6 - ISO Return 1
Table 2. Master & System Health inputs and outputs
Signal Name / Description
Isolated Inputs/
outputs
Connector-Pin
Signal Level
Signal GND
Asserted
De-Asserted
Master Interlock Input
Momentarily breaking the connection via customer
supplied relays or switch contacts will deactivate all
emitters
FACTORY JUMPER PROVIDED
IN
1
2
0 VDC
(Shorted to pin 2)
24 VDC
(Open)
RESERVED
No Connection
n/a
3
4
n/a
n/a
System Health Output
Asserted while there are no Errors always active
OUT
5
6
0 VDC
24 VDC

18
BlueWave® MX-Series Multichannel Controller User Guide
Examples of PLC Wiring
Figure 11. PLC Interface Using Dry Contact Switches
Figure 12. PLC Interface for intensity Control

19
BlueWave® MX-Series Multichannel Controller User Guide
Figure 13. PLC Discrete Status Outputs Typical Relay and Optical Isolation
Figure 14. Emitter Health and UV LED Status Output
NOTE: The PLC status outputs have a maximum sink current of 5 mA each. It is recommended
to use a solid-state relay with a control current <5 mA where relays are shown in Figure 13
and Figure 16.
Recommended Relays: Weidmuller 8820710000, Phoenix Contact 2980636

20
BlueWave® MX-Series Multichannel Controller User Guide
Examples of Master interlock / System Health Wiring
Figure 15. Master Interlock Switch Input
Figure 16. System Health Output typical relay / typical PLC Connection
Figure 17. System Health Output to PLC Digital
Other manuals for BlueWave MX-Series
4
Table of contents
Other dymax Controllers manuals