manuals.online logo
Brands
  1. Home
  2. •
  3. Brands
  4. •
  5. Dynabrade
  6. •
  7. Power Tools
  8. •
  9. Dynabrade 51370 User manual

Dynabrade 51370 User manual

45 N•m
T
34 N•m
T
34 N•m T
Parts Page Reorder No. PD03•22
Effective June, 2003
Always operate, inspect and maintain this tool in accordance with the Safety Code for portable air tools
(ANSI B186.1) and any other applicable safety codes and regulations. Please refer to Dynabrade
’
s
Warning/Safety Operating Instructions for more complete safety information.
Air Motor and Machine Parts
1.3 Horsepower Tools
Models:
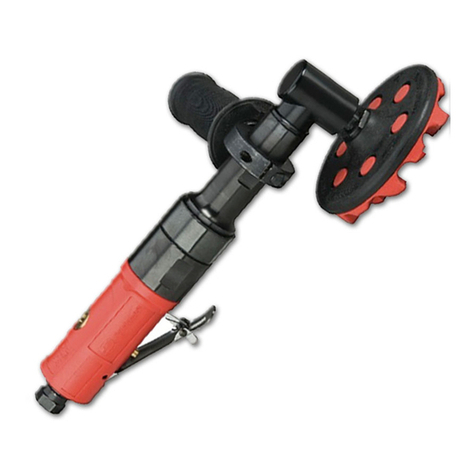
51370 - 4" Roloc®Disc Sander
51371 - 4-1/2" Disc Sander
52620 - 5" Depressed Center Wheel Grinder (5/8" x 11)
52625 - 5" Depressed Center Wheel Grinder (M14 x 2)
1Lock Flange
53696 5/8" x 11
53631 M14 x 2
2Flange
53697 5/8" x 11
53630 M14 x 2
354979 Guard
450192 4" Pad
594592 Spring
654896 Pin
754895 Button
896513 Shaft
954978 Lock Ring
10 54975 Rotor Nut
11 02552 Bearing
12 54899 Shim
13 54889 Shim
14 01277 Shim Pack (3/pkg.)
15 54974 Front Bearing Plate
16 52467 Rotor Spacer
17 Rotor
54971 Disc Sander
54965 DCWG - 5/8"-11
54632 DCWG - M14 x 2
54080 Roloc®Sander
18 54972 Rotor Vane 5/Pkg.
19 54976 Cylinder
(Incl. 51046 Pin)
20 51046 Pin
21 54977 Rear Bearing Plate
22 02651 Bearing
23 52609 Housing
24 96328 O-Ring
25 54803 Shim
26 54093 Lock Nut
27 54969 Rear Exhaust Insert
28 54897 Spring
29 54970 Plunger
30 03029 O-Ring
31 53209 Side Handle
32 51949 Safety Lock Lever
33 96444 Pin
34 Housing (Includes Labels)
54926 Model - 51370
54925 Model - 51371
54924 Model - 52620
54927 Model - 52625
35 51946 Valve Stem Assembly
(Incl. 96443 O-Ring)
36 51945 Seat
37 51944 Tip Valve
38 51943 Spring
39 96442 O-Ring
40 51940 Retainer
41 51939 Air Diffuser
42 51937 Inlet Adapter
Index Key
No. Part # Description
Adhesive: A1= Loctite #609
A8= Loctite #567
A10 = Loctite #243
Torque: N•m x 8.85 = In. - lbs.
Oil: O1= Air Lube
O
A
T
KEY
A1
O1
A1
A8
A10 O1
4" Roloc
®
4-1/2" Disc Sander
50288 Disc Pad Assembly
Includes: Flange Set & Back-Up Pad
Depressed Center
Wheel Grinder(s)
4
36
11
12
13
8
7
5 6
14
15
16
17
20 31
19
21
22
23
24
25
26 27 28 29 30
34
32
35
33
37 38 39 40 41
3
2
1
42
9
10
34 N•m
T
Housing Labels
Warning Label
00001180 - For Models: 51370, 51371
00001243 - For Models: 52620, 52625
Specification Label
00001181 - For All Models
18
2
Important Operating, Maintenance and Safety Instructions
Carefully read all instructions before operating or servicing any Dynabrade®Abrasive Power Tool.
Warning: Hand, wrist and arm injury may result from repetitive work motion and overexposure to vibration.
Important: All Dynabrade Rotary Vane air tools must be used with a Filter-Regulator-Lubricator to maintain all warranties.
Operating Instructions:
Warning: Eye, face, respiratory, sound and body protection must be worn while operating power tools. Failure to do so may result in serious injury or death.
Follow safety procedures posted in workplace.
1. With power source disconnected from tool, securely fasten abrasive/accessory on tool.
2. Install air fitting into inlet bushing of tool. Important: Secure inlet bushing of tool with a wrench before attempting to install the air fitting to avoid
damaging valve body housing.
3. Connect power source to tool. Be careful not to depress throttle lever in the process.
4. Air tools are not intended for use in explosive atmospheres and are not insulated for contact with electrical power sources. Sanding/Grinding certain
materials can create explosive dust. It is the employers responsibility to notify the user of acceptable dust levels. Sanding/Grinding can cause sparks
which can cause fires or explosions. It is the users responsibility to make sure the work area is free of flammable materials.
Maintenance Instructions:
1. Check tool speed regularly with a tachometer. If tool is operating at a higher speed than the RPM marked on the tool, the tool should be serviced to
correct the cause before use.
2. Some silencers on air tools may clog with use. Clean and replace as required.
3. All Dynabrade Rotary Vane air motors should be lubricated. Dynabrade recommends one drop of air lube per minute for each 10 SCFM (example: if
the tool specifications state 40 SCFM, set the drip rate of your filter-lubricator at 4 drops per minute).
Dynabrade Air Lube (P/N 95842: 1 pt. 473 ml.) is recommended.
4. An Air Line Filter-Regulator-Lubricator must be used with this air tool to maintain all warranties. Dynabrade recommends the following: 11411 Air Line
Filter-Regulator-Lubricator — Provides accurate air pressure regulation, two-stage filtration of water contaminants and micro-mist lubrication of
pneumatic components. Operates 55 SCFM @ 100 PSIG has 1/2" NPT female ports.
5. Use only genuine Dynabrade replacement parts. To reorder replacement parts, specify the Model #, Serial #, and RPM of your machine.
6. A Motor Tune-Up Kit (P/N 96504) is available which includes assorted parts to help maintain motor in peek operating condition. Please refer to
Dynabrade's Preventative Maintenance Schedule for a guide to expectant life of component parts.
7. Mineral spirits are recommended when cleaning the tool and parts. Do not clean tool or parts with any solvents or oils containing acids, esters,
keytones, chlorinated hydrocarbons or nitro carbons.
8. DO NOT clean or maintain air tools with chemicals that have a low flash point (example: WD-40®).
Full One Year Warranty
Following the reasonable assumption that any inherent defect which might prevail in a product will become apparent to the user within one year from the date of purchase,
all equipment of our manufacture is warranted against defects in workmanship and materials under normal use and service. We shall repair or replace at our factory, any
equipment or part thereof which shall, within one year after delivery to the original purchaser, indicate upon our examination to have been defective. Our obligation is con-
tingent upon proper use of Dynabrade tools in accordance with factory recommendations, instructions and safety practices. It shall not apply to equipment which has been
subject to misuse, negligence, accident or tampering in any way so as to affect its normal performance. Normally wearable parts such as bearings, contact wheels, rotor
blades, etc., are not covered under this warranty.
•
Important: User of tool is responsible for following accepted safety codes such as those published by the American National Standards Institute (ANSI).
•
Always disconnect power supply before changing abrasive/accessory or making machine adjustments.
•
Inspect abrasives/accessories for damage or defects prior to installation on tools.
•
Please refer to Dynabrade’s Warning/Safety Operating Instructions Tag (Reorder No. 95903) for more complete safety information.
Notice
All Dynabrade motors use the highest quality parts and metals available and are machined to exacting tolerances. The failure of quality pneumatic motors can most
often be traced to an unclean air supply or the lack of lubrication. Air pressure easily forces dirt or water contained in the air supply into motor bearings causing
early failure. It often scores the cylinder walls and the rotor blades resulting in limited efficiency and power. Our warranty obligation is contingent upon proper use
of our tools and cannot apply to equipment which has been subjected to misuse such as unclean air, wet air or a lack of lubrication during the use of this tool.
Safety Instructions:
Products offered by Dynabrade should not be converted or otherwise altered
from original design without expressed written consent from Dynabrade, Inc.
Model Motor Motor Sound Maximum Air Flow Air Pressure Spindle Weight Length Height
Number HP (W) RPM Level CFM/SCFM (LPM) PSIG (Bars) Thread Pound (kg) Inch (mm) Inch (mm)
51370 1.3 (969) 12,000 85 dB(A) 8/50 (1,416) 90 (6.2) 3/8" -24 4.5 (2.0) 10-7/16 (265) 4-7/16 (112)
51371 1.3 (969) 12,000 85 dB(A) 8/50 (1,416) 90 (6.2) 5/8" -11 4.5 (2.0) 10-7/16 (265) 4-7/16 (112)
52620 1.3 (969) 12,000 85 dB(A) 8/50 (1,416) 90 (6.2) 5/8" -11 4.5 (2.0) 10-7/16 (265) 4-7/16 (112)
52625 1.3 (969) 12,000 85 dB(A) 8/50 (1,416) 90 (6.2) M14 x 2 4.5 (2.0) 10-7/16 (265) 4-7/16 (112)
Additional Specifications: Air Inlet Thread 3/8" NPT • Hose I.D. Size 1/2" (13 mm)
Disassembly Instructions – 1.3 Hp Tools
Important: Manufacturer’s warranty is void if tool is disassembled before warranty expires.
Notice: All of the special tooling referenced to in these instructions can be ordered from Dynabrade. See page 4 in manual.
Disconnect tool from the air supply before servicing.
Motor Disassembly:
1. Secure the 52609 Housing in a vise with aluminum or bronze jaws. Carefully hold the housing between the two handle bosses so that the motor
spindle is pointing up.
2. Use the 96348 Adjustable Face Pin Spanner Wrench to remove the 54978 Lock Ring by turning it counterclockwise.
3. Remove the tool from the vise, and turn it over to allow the motor assembly to slide out of the housing.
4. Fasten the 96319 Bearing Separator (4") around the portion of the 54976 Cylinder that is closest to the 54977 Rear Bearing Plate.
5. Use parallel blocks under the bearing separator, positioning them on the table of the 96232 Arbor Press (#2). Place the bearing separator and
motor assembly on the blocks so that the motor spindle is pointing down.
6. Use a 5/16" dia. drive punch as a press tool and push the rotor out of the 02651 Bearing.
7. Secure the body of the rotor in a vise with aluminum or bronze jaws so that the spindle is pointing up. Use a
heat gun
to heat the 54975 Rotor Nut
and remove it with an adjustable wrench by turning it counterclockwise.
8. Remove the 54974 Front Bearing Plate, bearing, shims, and 52467 Rotor Spacer. Note: The motor bearings are a slip fit into the bearing plates.
Motor Disassembly Compete.
Valve Disassembly:
1. Place the 51989 Repair Collar around the air inlet end of the valve housing. Secure the collar and housing in a vise so that the 51937 Inlet
Adapter is pointing up.
2. Warm the inlet adapter with a
heat gun
and remove it with an adjustable wrench by turning it counterclockwise.
3. Remove the valve components. Note: Use a hook shaped tool to remove the 51945 Seat.
4. Use the 96344 Pilot Punch (3/32" dia.) to remove the 96444 Roll Pin and the 51949 Safety Lock lever.
5. Push the 51946 Valve Stem Assembly out of the housing.
Valve Disassembly Compete.
Assembly Instructions – 1.3 Hp Tools
Important: Clean and inspect all parts before assembly. Note: Follow oil, adhesive, and torque specifications.
Motor Assembly:
1. Use a clean cloth to wipe the rotor, 54974 Front Bearing Plate, 52467 Rotor Spacer, and 02552 Bearing dry of any oil or grease film.
2. Slip the 52467 Rotor Spacer onto the rotor spindle making sure that it lays flat against the face of the rotor.
3. Select .003" (.08mm) thickness in shims from the 01277 Shim Pack and install these into the 54974 Front Bearing Plate.
4. Install the 02552 Bearing into the front bearing plate.
5. Install the front bearing/plate assembly onto the rotor spindle making sure that this assembly fits all the way down onto the rotor spindle.
6. Apply a small amount of the Loctite #609 (or equivalent) onto the rotor nut threads of the rotor.
7. Secure the body of the rotor in a vise with aluminum or bronze jaws so that the rotor spindle is pointing up and install the 54975 Rotor Nut.
Note: Install the rotor nut so that the wrench flats are exposed toward the threads of the spindle. (Torque to 34 N•m/300 in lbs.)
8. Check the rotor/plate clearance with a .001" (0.03mm) feeler gage. The correct clearance should be .001"-.0015" (0.03 - 0.04mm).
If the rotor/plate clearance needs adjustment, repeat shimming process adding or removing shims as required.
9. Once the correct rotor/plate clearance is achieved, install the 54972 Rotor Vanes (5/Pkg.) that have been lubricated with the 95842 Dynabrade
Air Lube (10W/NR or equivalent).
10. Install the 54976 Cylinder so that the line-up pin will mate with the 54977 Rear Bearing Plate.
11. Install the 02651 Bearing into the 54977 Rear Bearing Plate.
12. Position the rotor nut on the 96231 Tool Plate of the arbor press. Use the 96239 Bearing Press Tool so that the raised center portion rest against the
inner race of the 02651 Bearing. Press the bearing/plate assembly down onto the rotor until the 54977 Rear Bearing Plate touches the cylinder.
This should create a snug fit between the bearing plates and the cylinder. A loose fit will not achieve the correct preload on the motor bearings.
13. Use a marking pen to mark the location of the motor line-up pinhole on the edge of the 52609 Housing. Also make a mark on the top of the 54974 Front
Bearing Plate to show the position of the 51046 Pin. Sight the line-up marks and slide the motor assembly into the 52609 Housing making sure that the
pin enters the pinhole that is located near the air supply inlet and exhaust ports of the housing.
14. Secure the 52609 Housing in a vise with aluminum or bronze jaws. Carefully hold the housing between the two handle bosses so that the motor
opening is facing up.
15. Apply a small amount of the Loctite #567 (or equivalent) to the threads of the 54978 Lock Ring. Install the 54899 and/or 54889 Shim or a combination
of these and the lock ring. (Torque to 34 N•m/300 in lbs.) Note: These shims are used to set the location of the shaft lock mechanism.
16. Install an approved accessory.
Motor Assembly Compete.
(continued on next page)
3
DYNABRADE
®
DYNABRADE, INC.,
8989 Sheridan Drive
•
Clarence, NY 14031-1490
•
Phone: (716) 631-0100
•
Fax: 716-631-2073
•
International Fax: 716-631-2524
DYNABRADE EUROPE S.àr.l.,
Zone Artisanale
•
L-5485 Wormeldange—Haut, Luxembourg
•
Telephone: 352 76 84 94 1
•
Fax: 352 76 84 95 1
© DYNABRADE, INC., 2005 PRINTED IN USA Rev.01_PD03.22_05/05
Visit Our Web Site: www.dynabrade.com Email: Customer[email protected]
Dynaswivel
®
Swivels 360° at two locations which
allows an air hose to drop straight to
the floor, no matter how the tool is held.
•
95461: 3/8" NPT.
96348 Pin Spanner Wrench
•
An adjustable 6mm pin wrench that can
be used to remove motor lock rings
and accessories.
96504 Motor Tune-Up Kit
•
Includes assorted parts to
help maintain and repair motor.
96232 (#2) Arbor Press
•
This arbor press is ideal for the disassembly
and assembly of air motors.
96319 Bearing Separator
•
Use the separator to remove gears
and bearings.
96239 Bearing Press Tool
•
This tool is designed to safely press a
bearing into a bearing plate and onto a shaft.
Dynabrade Air Lube
•
Formulated for pneumatic equipment.
•
Absorbs up to 10% of its weight in water.
•
Prevents rust and formation of sludge.
•
Keeps pneumatic tools operating longer
with greater power and less down time.
95842: 1pt. (473 ml)
95843: 1gal. (3.8 L)
Optional Accessories
Motor Assembly/Disassembly Instructions – 1.3 Hp (continued)
Valve Assembly:
1. Apply a small amount of lubricant (oil or grease) to the 51946 Valve Stem Assembly O-Ring 96443 and install the o-ring end of the assembly into the
valve housing. Note: If the 51946 Valve Stem Assembly is being reinstalled, replace the 96443 O-Ring.
2. Install the 51945 Valve Seat into the valve-housing inlet by aligning and inserting three prongs into the corresponding slots.
3. Install the 51944 Tip Valve so that the long portion fits under the end of the valve stem.
4. Place the smaller end of the 51943 Spring against the tip valve.
5. Install the 51939 Air Diffuser, 51940 Retainer, and 96442 O-Ring onto the 51937 Inlet Adapter.
6. Apply a small amount of the Loctite #567 (or equivalent) to the male threads of the inlet adapter and install these parts into the valve-housing inlet.
Use the 51989 Repair Collar to hold the valve housing in a vise. Tighten the inlet adapter into the valve housing. (Torque to 34 N•m/300 in lbs.)
7. Reposition the valve housing and install the 51949 Safety Lock Lever securing it with the 96444 Roll Pin.
Valve Assembly Complete.
Throttle Lever Positioning Procedure:
1. Refer to the exploded view to identify the required parts and their order of assembly. Use only one or a combination of the 54803 Shim to position
the throttle lever in a desired location.
Tool Assembly Complete.
Please allow 30 minutes for adhesives to cure before operating tool.
Important: Motor should now be tested for proper operation at 90 PSIG. If motor does not operate properly or
operates at a higher RPM than marked on the tool, the tool should be serviced to correct the cause before use. Before operating, place 2-3 drops of
Dynabrade Air Lube (P/N 95842) directly into air inlet with throttle lever depressed. Operate tool for 30 seconds to determine if tool is operating properly and
to allow lubricating oils to properly penetrate motor
Loctite®is a registered trademark of Loctite Corp.

This manual suits for next models

3

Other Dynabrade Power Tools manuals

Dynabrade Dynafile 14000 Guide

Dynabrade

Dynabrade Dynafile 14000 Guide

Dynabrade Electric Dynafile II 40501 Guide

Dynabrade

Dynabrade Electric Dynafile II 40501 Guide

Dynabrade Mini-Dynorbital Supreme User manual

Dynabrade

Dynabrade Mini-Dynorbital Supreme User manual

Dynabrade 52050 User manual

Dynabrade

Dynabrade 52050 User manual

Dynabrade Mini-Dynisher 13300 User guide

Dynabrade

Dynabrade Mini-Dynisher 13300 User guide

Dynabrade RED-TRED 18067 User manual

Dynabrade

Dynabrade RED-TRED 18067 User manual

Dynabrade Dynafile II 40500 Guide

Dynabrade

Dynabrade Dynafile II 40500 Guide

Dynabrade Wet Dynafile II User manual

Dynabrade

Dynabrade Wet Dynafile II User manual

Dynabrade Nitro Series Guide

Dynabrade

Dynabrade Nitro Series Guide

Dynabrade Dynangle II 14300 Installation instructions

Dynabrade

Dynabrade Dynangle II 14300 Installation instructions

Dynabrade 13400  3 Manual

Dynabrade

Dynabrade 13400 3 Manual

Dynabrade VirtuScaler Webscaler 30200 User manual

Dynabrade

Dynabrade VirtuScaler Webscaler 30200 User manual

Dynabrade 13511 Guide

Dynabrade

Dynabrade 13511 Guide

Dynabrade 51580 User manual

Dynabrade

Dynabrade 51580 User manual

Dynabrade 51332 Guide

Dynabrade

Dynabrade 51332 Guide

Dynabrade 53514 User manual

Dynabrade

Dynabrade 53514 User manual

Dynabrade Grinder Series User manual

Dynabrade

Dynabrade Grinder Series User manual

Dynabrade 13201 User guide

Dynabrade

Dynabrade 13201 User guide

Dynabrade 52196 Operating instructions

Dynabrade

Dynabrade 52196 Operating instructions

Dynabrade 51735 User manual

Dynabrade

Dynabrade 51735 User manual

Dynabrade Dynastraight 13501 Installation guide

Dynabrade

Dynabrade Dynastraight 13501 Installation guide

Dynabrade Dynisher 50730 Installation instructions

Dynabrade

Dynabrade Dynisher 50730 Installation instructions

Dynabrade 52576 User manual

Dynabrade

Dynabrade 52576 User manual

Dynabrade 40324 User manual

Dynabrade

Dynabrade 40324 User manual

Popular Power Tools manuals by other brands

King Tony 9TY522-40 Operation manual

King Tony

King Tony 9TY522-40 Operation manual

DUSTLESS BLASTING MOBILE Series user manual

DUSTLESS BLASTING

DUSTLESS BLASTING MOBILE Series user manual

Evolution R210 CMS Original instructions

Evolution

Evolution R210 CMS Original instructions

Drill Master JOURNEYMAN 400 user guide

Drill Master

Drill Master JOURNEYMAN 400 user guide

Suzuki HRT-10 manual

Suzuki

Suzuki HRT-10 manual

Coleman Powermate P024-011SP operating instructions

Coleman

Coleman Powermate P024-011SP operating instructions

Makita AN450H instruction manual

Makita

Makita AN450H instruction manual

Josef Kihlberg JK24-690 manual

Josef Kihlberg

Josef Kihlberg JK24-690 manual

Chicago Pneumatic CP3119-12ES3 manual

Chicago Pneumatic

Chicago Pneumatic CP3119-12ES3 manual

Victaulic RG2100 Operating and maintenance instructions

Victaulic

Victaulic RG2100 Operating and maintenance instructions

Prebena SLIDER 4C-Z50 Operating note

Prebena

Prebena SLIDER 4C-Z50 Operating note

TAKIMA TKBGS-75 owner's manual

TAKIMA

TAKIMA TKBGS-75 owner's manual

Makita HM1205C technical information

Makita

Makita HM1205C technical information

Yokota YX-380SE manual

Yokota

Yokota YX-380SE manual

Wen 3702 Operator's manual

Wen

Wen 3702 Operator's manual

Hilti SC 70W-A22 operating instructions

Hilti

Hilti SC 70W-A22 operating instructions

DeWalt XR DCH481 Original instructions

DeWalt

DeWalt XR DCH481 Original instructions

WABECO F1200 high speed operating instructions

WABECO

WABECO F1200 high speed operating instructions

manuals.online logo
manuals.online logoBrands
  • About & Mission
  • Contact us
  • Privacy Policy
  • Terms and Conditions

Copyright 2025 Manuals.Online. All Rights Reserved.