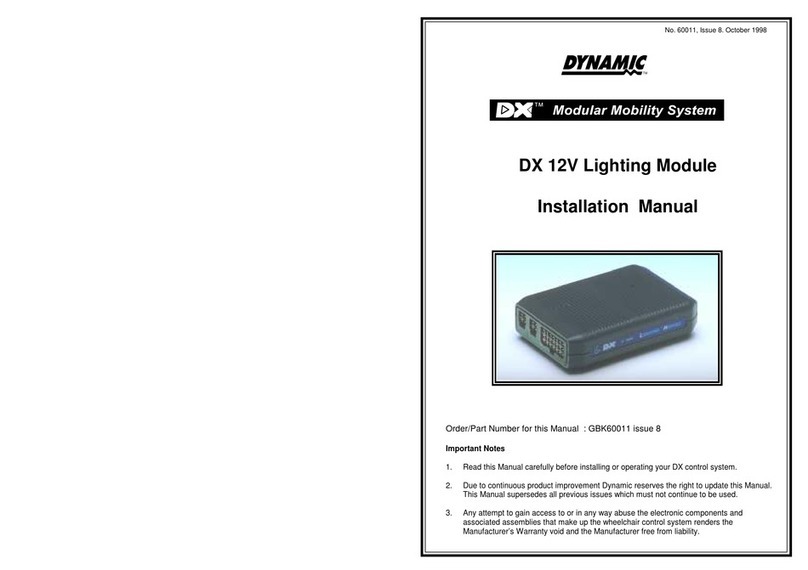
Dynamic DX User manual

No. 60027, Issue 4. January 1998
TM
DX Servo Lighting Module (SLM)
Installation Manual
Order/Part Number for this Manual : GBK60027 issue 4
Important Notes
1. Read this Manual carefully before installing or operating your DX control system.
2. Due to continuous product improvement Dynamic reserves the right to update this Manual.
This Manual supersedes all previous issues which must not continue to be used.
3. Any attempt to gain access to or in any way abuse the electronic components and
associated assemblies that make up the wheelchair control system renders the
Manufacturer’s Warranty void and the Manufacturer free from liability.

No. 60027, Issue 4. January 1998
Contents
1Introduction ...................................1
2Related Documentation ...........................2
3General Description ..............................3
3.1 General Features ........................................4
3.2 Safety and Protection Features ..............................4
4Specification ..................................6
4.1 Electrical Specifications ...................................6
4.2 Mechanical Specifications .................................8
4.3 Environmental Specifications ...............................9
5Installation ...................................10
5.1 Introduction ...........................................10
5.2 Mounting .............................................10
5.3 SLM Connection with the DX System .......................12
5.3.1 DXBUS Connections ...............................12
5.3.2 DX Module Interconnection Topology ..................13
5.3.3 DXBUS Length and Voltage Drop Restrictions ...........15
5.4 SLM 21 Way Connector .................................18
5.4.1 21 Way Connector Pin Definitions .....................18
5.4.2 21 Way Connector Wires and Terminations ..............18
5.4.3 Power Supply from the DXBUS .......................19
5.4.4 Power Supply form the Battery .......................20
5.5.5 SLM Connection to Lights ...........................21
5.5 SLM Servo Connector ...................................24
5.5.1 Servo Connector Pin Definitions ......................24
5.5.2 Servo Connector Wires and Terminations ...............24
5.5.3 SLM Connection to Servo Devices ....................25
6Operation ....................................26
6.1 SLM Activation ........................................26

No. 60027, Issue 4. January 1998
7Programming .................................27
7.1 Introduction ...........................................27
7.1.1 Adding an SLM to the DX System .....................28
7.2 DX Remote PCD Parameters ..............................29
7.2.1 Lighting Parameters ................................29
7.2.2 Drive Program Parameters ...........................30
7.3 SLM PCD Parameters ...................................32
7.3.1 Steering Profile Parameters ..........................32
7.3.2 Other PCD Parameters ..............................35
7.4 Using the PCD ........................................43
7.5 Calibrating the SLM using the HHP .........................44
7.5.1 Initial Operation ...................................44
7.5.2 Calibrating Parameters ..............................46
8Diagnostics ..................................48
8.1 Troubleshooting ........................................48
8.2 Flash Codes ...........................................48
8.3 PCD Diagnostics .......................................53
8.3.1 Status Report .....................................53
8.3.2 Fault History .....................................54
9Maintenance ..................................57
10 Safety and Misuse Warnings .......................58
11 Warranty ....................................59
12 Sales and Service Information .....................60

No. 60027, Issue 4. January 1998
1 Introduction 1
DX
RemoteSLMDX-PM-(S)
Servo
MotorDrive
Motor1
Drive
Motor2
DXBUSDXBUS
optional
24 V
Battery
Left
Indicator
Lights
Side Lights
Right
Indicator
Lights
1Introduction
The Servo Steering and Lighting Module (SLM) controls the steering and lighting
for servo steered power wheelchairs. It is part of a DX System also comprising a
DX Power Module and a DX Remote as a minimum system.
Example of Minimum DX System with the SLM
The servo wheelchair has one motor for steering, and either one or two motors to
provide the driving power of the wheelchair. Both functions are controlled by the
DX Remote. If two drive motors are used then a dual channel DX Power Module
(DX-PM) is required. If only one drive motor is used then a single channel DX
Power Module (DX-PM-S) is required.
The lighting consists of side lights and turn indicators. The indicators can be flashed
together to provide a hazard warning. The lights are also controlled by the DX
Remote.
The SLM has two standard DXBUS connectors so that it may be connected to the
DX System.
This manual and others listed in Section 2 must be read and understood. For more
information contact Dynamic Controls Ltd or an agent as listed in section 12.

No. 60027, Issue 4. January 1998
2 Related Documentation2
2Related Documentation
A DX based wheelchair control system may comprise between two and sixteen DX
compatiblemodulesdependingontheapplication.EachDXcompatiblemodulehas
its own Installation Manual which describes the installation requirements of that
particular module.
This manual describes the installation of the SLM only and must be read in
conjunction with the :
!Relevant DX Remote Installation Manual
!DX Power Module (PM) Installation Manual
!DX Hand Held Programmer (HHP) Manual
!DX Programming Configuration Diagnostic (PCD) Manual
!Installation Manuals for all other DX modules to be used in your system.

No. 60027, Issue 4. January 1998
3 General Description 3
3General Description
The SLM is designed to enable the DX System to run on a servo steered power
wheelchair, with lights. The wheelchair will have: a servo motor, a position sense
potentiometer, a steering release microswitch, one or two drive motors with integral
park brakes, a 24 V battery supply, and optional lights.
There are two versions of the SLM. The SLM utilises 24 V lights while the SLM-
TÜV utilises 12 V lights and has an internal voltage regulator.
The DX system will comprise of a minimum of a DX Remote, a DX Power Module,
a SLM and may also have up to 13 other DX modules.
The DXBUS is used to control and monitor all DX Modules. The DX Power
Module has two identical DXBUS connectors and is connected in a chain type
arrangement with the SLM. The SLM can be powered from an independent 24 V
power supply, but low power steering requirements can be powered from the
DXBUS 24 V supply. The lighting can also be supplied from: the DXBUS, an
internal or external regulated 12 V supply, or from the 24 V wheelchair battery. See
section 5.4.3 and 5.4.4.
In a servo system the speed and direction data from a DX Remote is passed to the
SLM rather than directly to the DX Power Module. The SLM processes the speed
data and then sends it directly to the DX Power Module. The direction signal is
processed by the SLM and applied to the servo steering motor. A position sense
potentiometer tells the SLM the steering position.
Amicroswitch is attached to the steering clutch so that when the clutch is released
for manual wheelchair manoeuvring, the system is inhibited and will not drive.
When the clutch is restored, the system must be turned off then on again to drive.
The DX System allows up to five preset Drive Programs to be selected, depending
on the type of remote. Each Drive Program contains an associated Steering Program
that defines the maximum steering lock available at different speeds, for safe
driving. The SLM controls the steering lock to conform to the Steering Program,
and also controls the speed output so that the speed can not exceed that allowable
for a particular lock.
The SLM can control a full lighting system of side lights (front and rear) and
indicator lights (left and right). The activation of the lights is via the DX Remote.
The SLM can be used with a two channel (60 A per channel) DX Power Module
(DX-PM) or a single channel 120 A DX Power Module (DX-PM-S). If only one
drive motor is used in the system then the DX-PM-S will be used.

No. 60027, Issue 4. January 1998
3 General Description4
3.1 General Features
The SLM has the following general features:
!Servo output capable of supplying 5 A continuous and 30 A peak to a 24 V
servo actuator.
!Fully DXBUS compatible.
!Two identical DXBUS sockets for Daisy Chain connection to the DX System.
!Powered by a 24 V wheelchair battery via the DXBUS connection, or directly
from the battery for high current applications.
!Fully programmable for optimum driving performance.
!LightingoutputsareTÜVapprovedwhenfittedwithapprovedregulatedpower
supply (SLM-TÜV).
!Electromagnetically compatible:
-not susceptible to high levels of RFI
-emitting low levels of RFI
-protected against high levels of ESD.
!Compact case for mounting under the wheelchair seat.
3.2 Safety and Protection Features
The SLM has the following safety and protection features:
!Motor current limit and current limit timeout set to prevent overheating of
motors.
!Thermal protection to reduce current limit.
!Short circuit protection of all inputs and outputs except between motor and
battery negative while driving.
!Open circuit motor detection when not driving.
!Driving is inhibited if steering clutch is disengaged.
!Over voltage, under voltage and reverse battery protected.

No. 60027, Issue 4. January 1998
3 General Description 5
!Detection of broken steering position feedback potentiometer connections or
short circuit of the potentiometers` terminals.
!Driving inhibit if Steering Module is not connected and responding.
!Compliance with ISO 7176 requirements.
!Controlled power down in event of DXBUS disconnection or communication
failure.
!Hazard lights can be operated by an external switch.
!HazardlightswilloperateautomaticallyifcommunicationwiththeDXRemote
is lost while turned on.
!Indicator flash rate will double if a rear indicator bulb has failed.
!Side lights will come on if battery charger is over-charging the batteries or
duringregenerativebrakingifthebatterycannotabsorbtheregeneratedpower.

No. 60027, Issue 4. January 1998
4 Specifications6
4Specifications
4.1 Electrical Specifications
Power Supply Input
Symbol Parameter Conditions Min Nom Max Units
VBAT Battery voltage 18.0 24.0 32.0 V
IQQuiescent Current No servo load 150 mA
IOOperating Current + servo load 250 mA
IDXBUS DXBUS Current RMS Continuous to entire system 12 A
Servo Motor + / - Output
Symbol Parameter Conditions Min Nom Max Units
SM+ Output Voltage When not in current limit VBAT-1.2V VBAT V
IAV Continuous Over programmable 5 A
Average Current time period
ÎPeak Output Current For up to 5 sec. 30 A
Servo Pot Input / Output
Symbol Parameter Conditions Min Nom Max Units
SP+ Pot Supply + Open circuit 4.5 5.0 5.5 V
Output Voltage
SP- Pot Supply - 0.0 V
Output Voltage
ZSP+ SP+ Output impedance 950 1 K 1050 Ohms
ZSP- SP- Output Impedance 10 Ohms
ZSP Acceptable Pot 4 K 10 K 12 K Ohms
Impedance

No. 60027, Issue 4. January 1998
4 Specifications 7
Steering Clutch Switch
Symbol Parameter Conditions Min Nom Max Units
VLO Low level switch voltage Microswitch closed 00.5 V
VHI High level switch voltage Microswitch open 3.5 5.0 V
Lighting Specification
Symbol Parameter Conditions Min Nom Max Units
Turn Indicator Outputs (each output)
VTIO Output Voltage 13.5 V regulator fitted 13.1 13.5 13.9 V
VTIO Output Voltage 13.5 V regulator not fitted VBAT-1 VBAT-0.1 VBAT V
ITIO Continuous Output 2.3 2.5 A
Current
Sidelight (Head / Tail Light) Output
VSLO Output Voltage 13.5 V regulator fitted 13.1 13.5 13.9 V
VSLO Output Voltage 13.5 V regulator not fitted VBAT-1 VBAT-0.1 VBAT V
ISLO Continuous Output 2.3 2.5 A
13.5 V Regulated Power Supply (SLM TÜV only)
VREG Output voltage Voltage In 18-32V 13.1 13.6 14.0 V
IMAX Maximum output Max. total lighting 7.5 9.0 11.0 A
current load (Note 1)
Note 1 The nominal lighting current corresponds to the sidelights and hazard
flashing. The supply will current limit at 9 A (nominal) to blow fuses. It is not
intended to be used at this level for any extended period of time.

No. 60027, Issue 4. January 1998
4 Specifications8
4.2 Mechanical Specifications
Size: 210 * 123 * 38 mm
Weight: 0.530 Kg
Mounting: M5 screws four places, or placed in tray
Case material: Aluminium sheet, powder coat finish
Case sealing: Tamper proof, IP54 if mounted as per mounting instructions
SLM Configuration

No. 60027, Issue 4. January 1998
4 Specifications 9
4.3 Environmental Specifications
Parameter Minimum Maximum Units
Operating ambient temperature range -25 50 C
Storage temperature range -25 70 EC
Operating and storage humidity 0 90 %RH
Electromagnetic Compatibility prEN12184 : 1997 (pending)
Specification (EMC)
Durability ISO7176 part 14
Vibration Specification 120 minutes @ 4 g’s random vibration without
damage.

No. 60027, Issue 4. January 1998
5 Installation10
5Installation
5.1 Introduction
Installing a SLM requires the following steps:
1. Mounting the SLM Refer Section 5.2
2. SLM Connection with the DX system Refer Section 5.3
3. SLM 21 Way Connector Refer Section 5.4
4. SLM Servo Connector Refer Section 5.5
5. Programming the SLM related parameters Refer Section 7.0
5.2 Mounting
Optimum mounting orientation
Fit the SLM with the top label facing up.
Unacceptable Mounting Orientation
Do not mount with connectors facing up.
Do not mount with the top label facing down.
Other orientations are acceptable.

No. 60027, Issue 4. January 1998
5 Installation 11
Securing the SLM
The SLM can be mounted using the four mounting holes and mounting screws
provided, or placed in a suitable tray. Do not use screws which protrude into the
SLM case by more than 12 mm.
The SLM must be mounted in a position which offers the maximum protection from
water and mechanical abuse. Since there are no user accessible controls on the
SLM, it can be mounted in a position which is inaccessible to the user e.g. under the
seat.
Note For ease of diagnosis, it is recommended that the SLM be mounted where
the SLM Status LED can be seen without having to remove covers.

No. 60027, Issue 4. January 1998
5 Installation12
2xDXBUSConnectors
5.3 SLM Connection with the DX System
5.3.1 DXBUS Connections
Note If only one DXBUS connector is used on the SLM and the remaining
connector is accessible to the wheelchair user, a dummy DXBUS plug should be
fitted to the unused connector. This will comply with ISO 7176.
A dummy DXBUS plug can be made from:
DXBUS Connector Boot Part/Order Number GCN 0789
DXBUS Connector Housing Part/Order Number GCN 0792
Like all other DX Modules the SLM is connected to the DX system using the
DXBUS. Cables are available in the following standard lengths:
DXBUS CABLE, Straight, 0.1 M Part/Order Number GSM 63001
DXBUS CABLE, Straight, 0.3 M Part/Order Number GSM 63003
DXBUS CABLE, Straight, 0.5 M Part/Order Number GSM 63005
DXBUS CABLE, Straight, 1.0 M Part/Order Number GSM 63010
DXBUS CABLE, Straight, 1.5 M Part/Order Number GSM 63015
DXBUS cables are also available with ferrites fitted.
Note The order and positioning of the SLM within the DX system is important and
must be based on the rules discussed in section 5.3.2 and 5.3.3.

No. 60027, Issue 4. January 1998
5 Installation 13
DX
Power
Module
DX
Module
DX
Module
DX
Module
DXBUSCableNote:
Battery
24V
SplitterBox
SplitterBox
DX
Power
ModuleDX
ModuleDX
ModuleDX
Module
DX
ModuleDX
Module
DX
ModuleDX
ModuleDX
Module
DX
ModuleDX
Module
DX
Remote
Battery
24V
5.3.2 DX Module Interconnection Topology Options
The battery and DX Power Module combination are always considered the heart of
a DX system. Other DX Modules can be arranged in several ways:
Star DXBUS Topology
In-line DXBUS Topology

No. 60027, Issue 4. January 1998
5 Installation14
DX
Module
DX
Module
DX
ModuleDX
Module
DX
Module
DX
Module
DX
ModuleDX
Module
DX
Module
DX
Power
Module
Battery
24V
SplitterBox
Mixed DXBUS Topology
DX modules normally have one or two DXBUS sockets for system
interconnections. Smaller DX modules may have a permanently mounted cable
terminated in a DXBUS plug, rather than DX sockets.
The star and mixed topologies both require the use of one or more DX Splitter
Boxes. A Splitter Box is a separate panel of four DXBUS sockets that may be
purchased from Dynamic or a Dealer.
The DX Splitter Box Part/Order Number is: DX-SKT-X4.
For lowest cost and simplicity the In-line topology is generally preferred, provided
the DXBUS length and voltage drop requirements described below can be met.
Warning If the SLM is between the PM and the Battery Charger:
1. Have as few as possible DXBUS cables between the SLM and the PM.
2. The DXBUS cables between the SLM and the PM must not total more
than 1 metre.
This will avoid unintended interaction between the SLM and the Battery Charger.

No. 60027, Issue 4. January 1998
5 Installation 15
Rct
Rct
Rca
Rca
5.3.3 DXBUS Length and Voltage Drop Restrictions
Due to signal distortion that increases with increasing DXBUS length, the total
length of all DXBUS cables must not exceed 15 metres in any topology.
Two of the DXBUS's four cores (DXB+ and DXB-) are used to supply power to the
modules and to the loads connected to them. A Positive Temperature Coefficient
(PTC) device in the Power Module limits the total DXBUS current to 12 A, to
protect the DXBUS wiring and connectors. The topology and cable lengths used
may reduce the DXBUS's upper limit to below 12 A.
For correct DX System operation the voltage drop on the DXBUS's DXB- wire due
to return currents, must not exceed 1.0 V between any two modules within the DX
System. Use a topology and module placement that reduces this voltage drop as low
as reasonably possible.
Voltage drops occur along the DXBUS due to the return of current back to the
battery through the small but finite resistance of the DXBUS cable and connectors.
A DXBUS connector can be modelled as:
DXBUS Cable Model
Rct = contact resistance = 5 mOhm
Rca = cable resistance = 12 mOhm / metre

No. 60027, Issue 4. January 1998
5 Installation16
DX
ModuleDX
ModuleDX
ModuleDX
Module
DX
Module
Battery
24V
I
SLM
ServoMotor
DXPowerModule
Example:
Consider a Power Module connected to an SLM via five other DX Modules using
1 metre cables.
Example of DX Module interconnection
The total resistance of the 0 V return path, between the Power Module and SLM is:
6 X (2 * Rct + Rca) = 132 mOhms
This means that the maximum load that the SLM can drive and not exceed the
1.0 V drop requirement is 1 / 0.132 = 8 A.
If, for example, the servo motor and lighting that the SLM is required to drive has
apeak current of 10 A the interconnection order of the DX modules will have to be
changed to place the SLM closer to the Power Module.
The above example illustrates a fundamental rule of DX Module interconnection
All DX Modules that connect to high current loads (e.g. actuators / motors and
lights) must be connected as close to the Power Module as possible.
The above example is simplified and does not include current to other DX Modules.
The DXBUS maximum current rating of 12 A is for the entire DX System.
Operation of the SLM at its maximum rating of 30 A peak current is not possible
from the DXBUS supply. To supply greater than the 12 A DXBUS current, see
section 5.4.4.

No. 60027, Issue 4. January 1998
5 Installation 17
DX
Power
Module
Battery
24V
High CurrentModules
NearestPowerModuleLowCurrentModules
Furthestawayfrom
PowerModule
H H H L L
DX
Power
Module
Battery
24V
HL L
HLL
DX
Power
Module
Battery
24V
H
H
H
HLL
SplitterBox
This favours topologies such as:
Rationalised In-line Topology
Two way star Topology
Multi Star Topology
Other manuals for DX
1
Table of contents
Other Dynamic Control Unit manuals