89
USING YOUR DYSON APPLIANCE
PLEASE READ THE ‘IMPORTANT SAFETY INSTRUCTIONS’ IN THIS DYSON
OPERATING MANUAL BEFORE PROCEEDING.
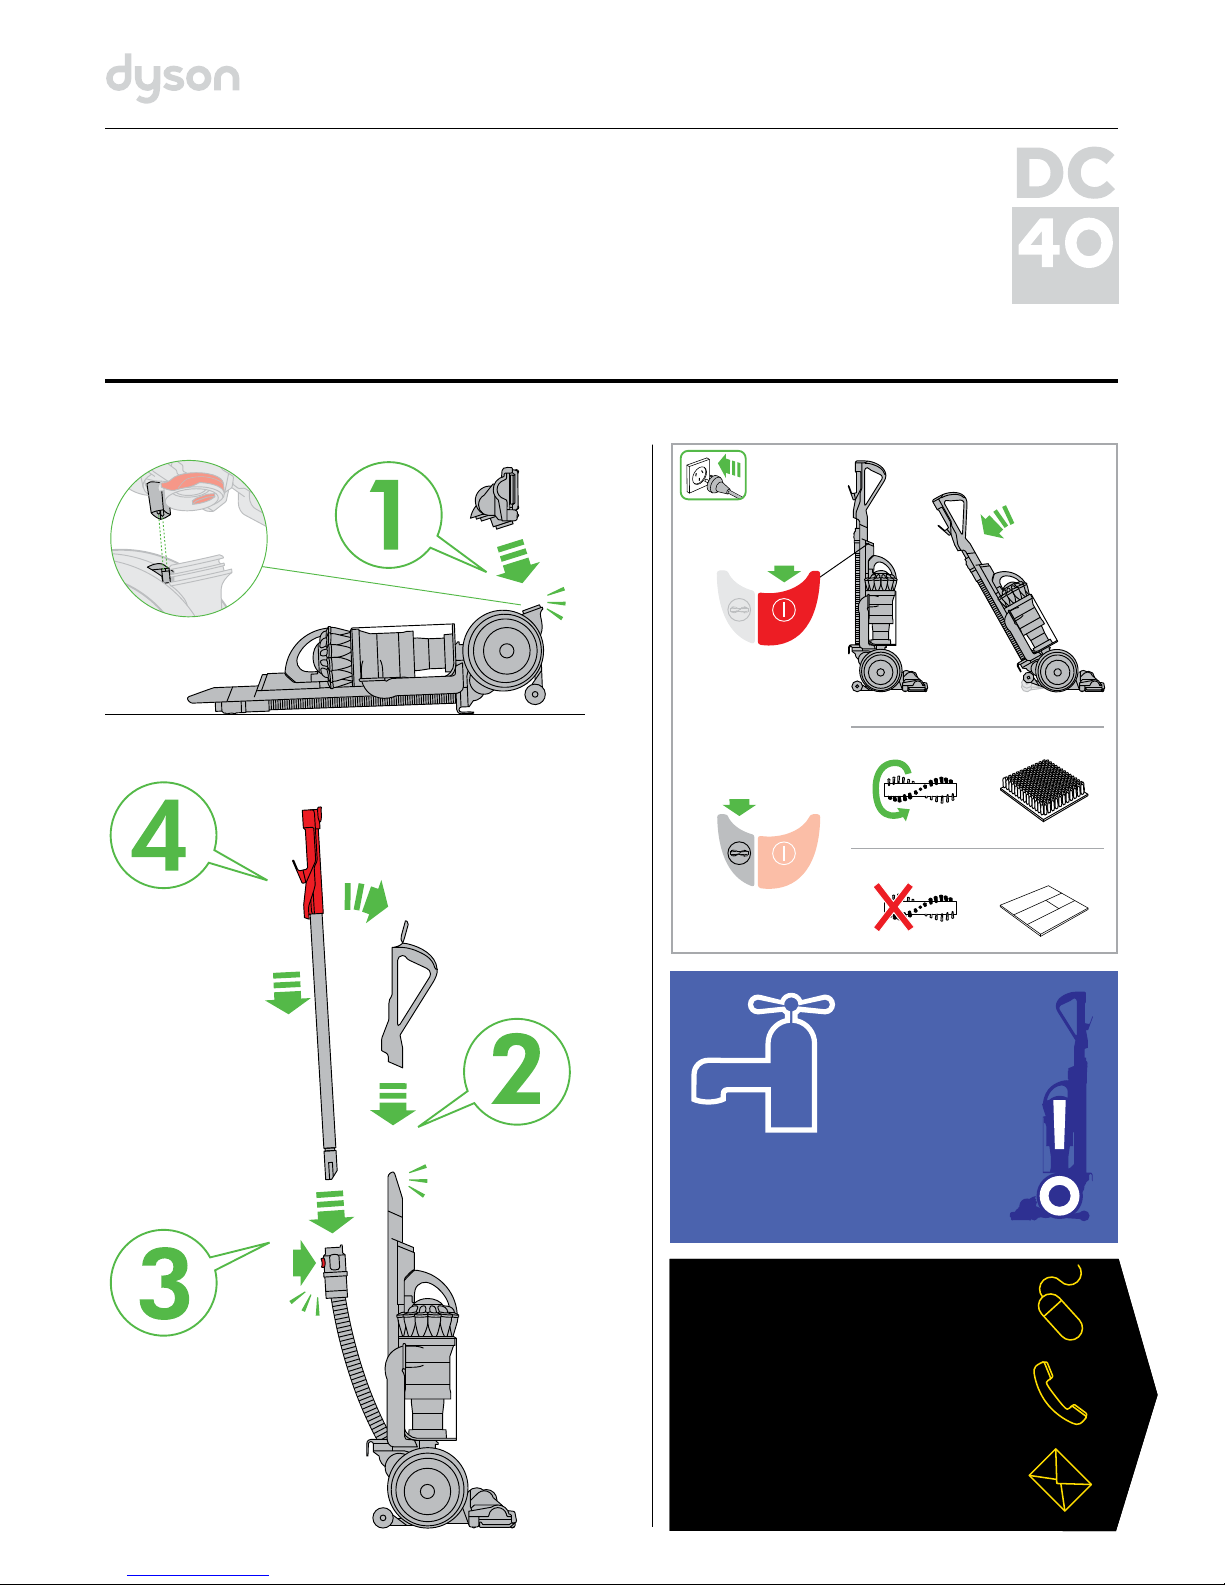
ASSEMBLY
• Lie the appliance on its back.
• Attach the cleaner head by sliding it on to the connections on the lower front part
of the ball. Ensure the electrical plug on the cleaner head fits into the twin-block
connection on the body of the appliance, which is directly above the airway. Push
firmly: the cleaner head will click into place.
• Stand the appliance up straight.
• Attach the wand handle by sliding it on to the top of the appliance. The spring
clip in the handle will click into place.
• Ensure the hose is straight. Press the red button on the hose. Slide the wand into
the hose.
• Ensure the hose and wand sit in the recess of the handle. Slide the end of the
wand down into the handle to secure it.
• Close the wand cap.
• Slide the tool holder onto the side of the duct as shown. Attach accessory tools
to the holder as shown. In use, the tools can be attached to either the hose or
the wand.
• Ensure the cyclone and clear bin unit is secured to the main body of the
appliance.
• Wind the cable anti-clockwise around the cable hooks. Secure with the clip.
• To watch a short online video visit:
www.dyson.com.au/DC40gettingstarted
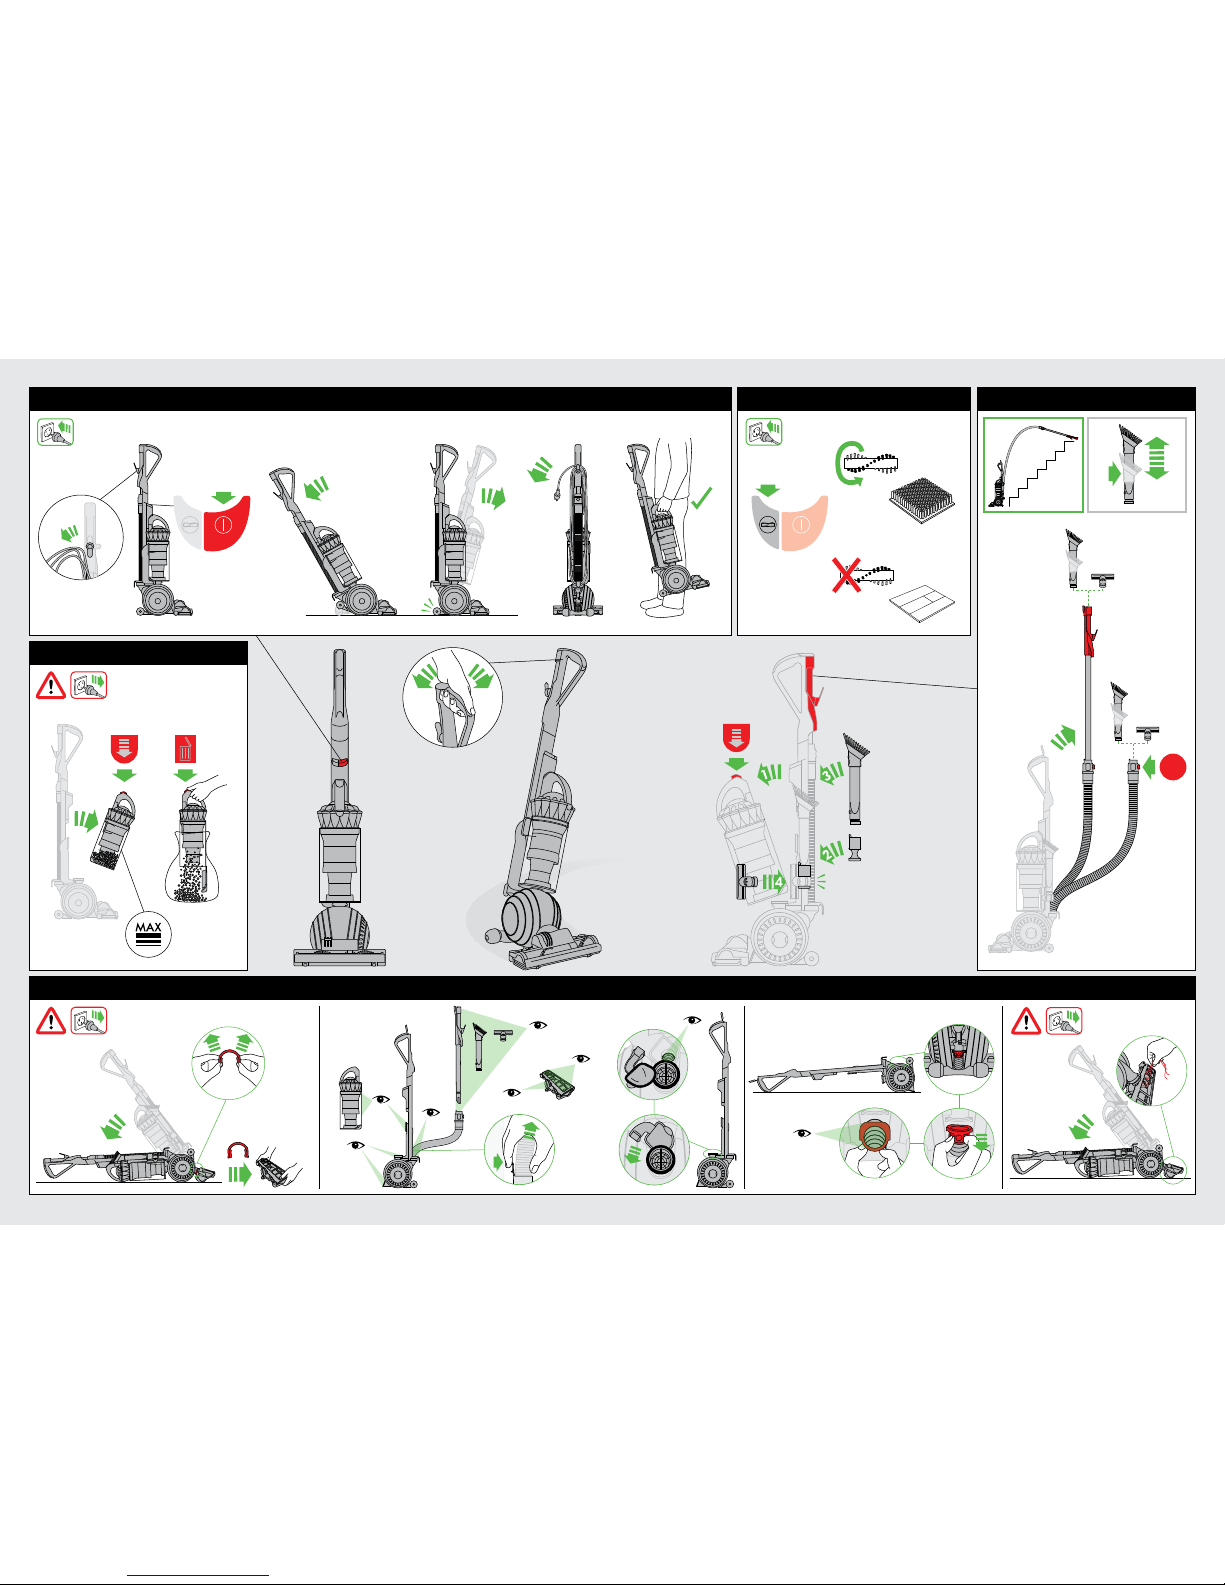
OPERATION
• Unwind the cable.
• Plug the appliance into the mains electricity supply.
• To switch ‘ON’ or ‘OFF’ press the power button, located as shown.
• To use, recline the handle. The stabiliser stand will automatically lift up.
• After use, return the appliance to the upright position, pushing it firmly into
place. The stabiliser wheels will automatically lower.
• Then unplug the appliance, coil the cable safely and put the appliance away.
Switch ‘OFF’ the appliance, unplug and ensure it is upright before:
– Changing or using tools.
– Removing the hose or air way inspection parts.
• Use the cyclone carry handle to carry the appliance.
ATTACHMENTS
• To release the wand, open the wand cap and pull the red tube up and away from
the handle until it clicks into place.
• Should you wish to use the hose without the wand, follow the above instruction
and press the red button to release the wand from the hose.
CARPETS OR HARD FLOORS
• The brush bar will always default to ‘ON’ (spinning) each time you switch the
appliance ‘ON’ and recline it for cleaning.
• The brush bar will not rotate when the appliance is upright.
• To switch the brush bar ‘OFF’ (e.g. for delicate rugs and hard floors):
– Switch the appliance ‘ON’.
– Recline the appliance.
– Press the silver brush bar ‘ON/OFF’ button – the brush bar will stop spinning.
• The brush bar will automatically stop if it becomes obstructed. See ‘Brush bar –
clearing obstructions’ on page 5 of this Dyson Operating Manual.
• Before vacuuming your flooring, rugs and carpets, check the manufacturer’s
recommended cleaning instructions.
• Some carpets may fuz z if a rotating brush bar is used when vacuuming.
If this happens, we recommend vacuuming in ‘hard floor' mode and
consulting with the flooring manufacturer.
• The brush bar on the appliance may damage some carpet types. If you are
unsure, turn ‘OFF’ the brush bar.
LOOKING AFTER YOUR DYSON APPLIANCE
• Do not carry out any maintenance or repair work other than that shown in this
Dyson Operating Manual, or advised by the Dyson Customer Care Helpline.
• Only use parts recommended by Dyson. If you do not this could invalidate your
Dyson guarantee.
• Store the appliance indoors. Do not use or store it below 0°C. Ensure the
appliance is at room temperature before operating.
• Clean the appliance only with a dry cloth. Do not use any lubricants, cleaning
agents, polishes or air fresheners on any part of the appliance.
• If used in a garage, always wipe the base plate, ball and stabiliser wheels with
a dry cloth after vacuuming to clean off any sand, dirt or pebbles that could
damage delicate floors.
VACUUMING
CAUTION:
• Do not use without the clear bin and filters in place.
• Fine dust such as plaster dust or flour should only be vacuumed in very small
amounts.
• Do not use the appliance to pick up sharp hard objects, small toys, pins, paper
clips, etc. They may damage the appliance.
• When vacuuming, certain carpets may generate small static charges in the
clear bin or wand. These are harmless and are not associated with the mains
electricit y supply. To minimise any effect from this, do not put your hand or insert
any object into the clear bin unless you have first emptied it and rinsed it out
with cold water. See ‘Cleaning the clear bin’ on page 8 of this Dyson Operating
Manual.
• Powerful suction can cause the hose to ‘pull back’ – please take care.
• Do not work with the appliance above you on the stairs.
• Do not put the appliance on chairs, tables, etc.
• Before vacuuming highly polished floors, such as wood or lino, first check that
the underside of the floor tool and its brushes are free from foreign objects that
could cause marking.
• Do not leave the cleaner head in one place on delicate floors during use.
EMPTYING THE CLEAR BIN
• Empty as soon as the dirt reaches the level of the MAX mark – do not over fill.
• Switch ‘OFF’ and unplug before emptying the clear bin.
• To remove the cyclone and clear bin unit, press down on the red button at the
rear of the carrying handle on the cyclone.
• To release the dirt, press all the way down on the same red button at the rear of
the carrying handle on the cyclone.
• To minimise dust/allergen contact when emptying:
– Encase the clear bin tightly in a plastic bag and empty.
– Remove the clear bin carefully.
– Seal the bag tightly, dispose as normal.
• To refit the clear bin:
– Close the clear bin base so it clicks into place.
– Push the cyclone and clear bin unit into the main body of the appliance;
it will click into place.
– Ensure the cyclone and clear bin unit is secure.
CLEANING THE CLEAR BIN
• Remove the cyclone and clear bin (instructions above).
• To separate the cyclone unit from the clear bin press the red button to open
the clear bin base. This exposes a small silver button behind the red opening
mechanism. Press the silver button and separate the cyclone unit from the clear bin.
• Clean the clear bin with cold water only.
• Ensure the clear bin is completely dry before replacing.
• Do not use detergents, polishes or air fresheners to clean the clear bin.
• Do not put the clear bin in a dishwasher.
• Do not immerse the whole cyclone unit in water or pour water into the cyclones.
• Clean the cyclone shroud with a dry cloth or dry brush to remove lint and dust.
• To refit the bin to the cyclone unit:
– Close the clear bin base so it clicks into place.
– Fit the cyclone shroud into the clear bin so that the silver button clicks
and engages.
– Push the cyclone and clear bin unit into the main body of the appliance;
it will click into place.
– Ensure the cyclone and clear bin unit is secure.
WASHING YOUR FILTERS
• Your appliance has two washable filters, located as shown on pages 6 and 7 of
this Dyson Operating Manual.
• Check and wash the filters regularly according to instructions to
maintain performance.
• Switch ‘OFF’ and unplug before checking or removing the filters.
• The filters may require more frequent washing if vacuuming fine dust.
• Wash with cold water only. Do not use detergents.
• Do not put the filters in a dishwasher, washing machine, tumble dryer, oven,
microwave or near a naked flame.
• To remove filter A see the ‘Wash filters’ section on pages 6 and 7 of this Dyson
Operating Manual.
• After washing lay filter A on its side and leave for at least 24 hours to dry
completely before refitting.
• To remove filter B:
– Turn the central locking dial on the outer cover of the ball anti-clockwise until
the cover is released.
– Lift off the cover.
– Turn the filter one-quarter anti-clockwise to release.
• Filter B should be rinsed and tapped out until the water runs clean, then tapped
out again to ensure all excess water is removed. Leave to dry completely for
24hours.
• It is normal for filter B in the ball to turn grey in colour.
• To refit filter B:
– Refit the filter on to the ball.
– Secure the filter by turning it one-quarter turn clockwise.
• When refitting the outer cover of the ball, keep turning the central locking dial
clockwise. When it starts to click it is locked.
• To watch a short online video visit:
www.dyson.com.au/DC40filterwash
LOOKING FOR BLOCK AGES
• Switch ‘OFF’ and unplug before looking for blockages. Failure to do so could
result in personal injury.
• Beware of sharp objects when checking for blockages.
• Refit all parts securely before using.
• Clearing blockages is not covered by your Dyson guarantee.
CLEARING BLOCKAGES – THERMAL CUT-OUT
• This appliance is fitted with an automatically resetting thermal cut-out.
• Large items may block the tools or wand inlet. If any part becomes blocked the
appliance may overheat and automatically cut-out.
• Switch ‘OFF’ and unplug. Leave to cool down for 1-2 hours before checking
filters or for blockages.
• Clear any blockages before restarting.
• Clearing blockages is not covered by your Dyson guarantee.
BRUSH BAR – CLEARING OBSTRUCTIONS
• If your brush bar is obstructed, it may shut 'OFF'. If this happens, you will need
to remove the blockage.
• Switch ‘OFF’ and unplug before proceeding. Failure to do so could result in
personal injury.
• Beware of sharp objects when clearing obstructions.
• If you still cannot clear the obstruction, please follow the instructions below to
remove the base plate. This gives more access to the obstruction. Alternatively,
contact us via the Dyson Customer Care Helpline or visit the Dyson website.
• Clearing brush bar obstructions is not covered by your Dyson guarantee.
BASE PLATE – DISASSEMBLY/REASSEMBLY
• Switch ‘OFF’ and unplug before proceeding. Failure to do so could result in
personal injury.
• Lay the appliance on its front.
• Detach the red ‘C’ clip which is on the connection between the cleaner head
and the appliance; see pages 6 and 7 of this Dyson Operating Manual.
It is quite firm, but do not pull it off roughly. Use a constant, firm pressure.
• Pull the cleaner head away from the appliance. Use a constant, firm pressure.
• Turn the cleaner head over so you are looking at the brush bar.
At each end of the cleaner head are two red levers:
– From the groove swing the levers up and in towards the middle of the cleaner
head until they click.
– The base plate will disengage.
– Lift up the top edge, so it rotates to the upright position.
– Lift out.
• Beware of sharp objects when clearing obstructions.
To refit the base plate:
– Fit the 3 lugs on the lower edge of the base plate into the 3 slots in the base
of the cleaner head.
– Swing the upper edge of the base plate down; it will click into place.
• To secure the base plate push both red levers back into position so they are flush
with the surface of the cleaner head.
• Refit the red ‘C ‘clip onto the cleaner head. The flatter edge of the clip fits
against the cleaner head. It is easier to slide one lug into its slot before the other.
• Lie the appliance on its back.
• Attach the cleaner head by sliding it on to the connections on the lower front
part of the ball. Ensure the electrical plug on the cleaner head fits into the
twin-block connection on the body of the appliance, which is directly above the
airway. Push firmly: the cleaner head will click into place.
BRUSH BAR – TROUBLESHOOTING
• If the brush bar has stopped spinning, follow the instructions above on clearing
obstructions. Alternatively, contact the Dyson Customer Care Helpline or visit
the Dyson website.
• To watch a short online video visit:
www.dyson.com.au/DC40brushbarmaintenance
AUSTRALIAN CONSUMER LAW
The details of the Dyson guarantee are set out below. In addition to your rights
under the Dyson guarantee, we also provide the following statement as required
by the Australian Consumer Law: In Australia, your Dyson appliance comes with
statutory guarantees that cannot be excluded under the Australian Consumer
Law. You are entitled to a replacement or refund for a major failure and for
compensation for any other reasonably foreseeable loss or damage. You are
also entitled to have your Dyson appliance repaired or replaced if it fails to be of
acceptable quality and the failure does not amount to a major failure.
DYSON 2 YEAR GUARANTEE
TERMS AND CONDITIONS
Terms and conditions of your Dyson 2 year guarantee.
• The Dyson guarantee becomes effective from the date of purchase.
• All work will be carried out by Dyson Appliances (Aust) Pty Ltd., Avery
Robinson Ltd. (NZ), Singapore’s authorised agent – Service @Home Pte Ltd. or
Indonesia’s authorised agent – PT Higienis Indonesia or their authorised agents.
• Any parts replaced will become the property of Dyson Appliances (Aust) Pty Ltd.,
Avery Robinson Ltd. (NZ), Dyson Singapore Pte Ltd. or PT Higienis Indonesia.
• The repair and replacement of your Dyson appliance under Dyson guarantee
will not extend the Dyson guarantee period.
• The Dyson guarantee provides benefits which are additional to and do not affect
your statutory rights and remedies as a consumer.
• You must provide proof of (both the original and any subsequent) delivery/
purchase before any work can be carried out on your Dyson appliance.
Without this proof, any work carried out pursuant to the Dyson guarantee and
any associated delivery charges (both to and from us) will be at your cost,
subject to your statutory rights and remedies as a consumer. Please keep your
receipt or delivery note.
WHAT IS COVERED
Your Dyson guarantee covers:
• The repair or replacement of your Dyson appliance if your Dyson appliance is
found to be defective due to faulty materials, workmanship or function within
2 years of purchase or delivery (if any part is no longer available or out of
manufacture, Dyson will replace it with a functional replacement part).
• Use of the appliance in the country of purchase.
WHAT IS NOT COVERED
Under your Dyson guarantee, Dyson shall not be liable for costs of repair or
replacement of a product incurred as a result of:
• Accidental damage, faults caused by negligent use or care, neglect, careless
operation or handling of the Dyson appliance which is not in accordance with
this Dyson Operating Manual.
• Use of the Dyson appliance for anything other than normal domestic purposes
in the country of purchase.
• Use of parts not assembled or installed in accordance with the instructions of
Dyson.
• Use of parts and accessories other than those produced or recommended by
Dyson.
• Repairs or alterations carried out by parties other than Dyson or its authorised
agents.
• Damage from external sources such as transit, weather, electrical outages or
power surges.
• Failures caused by circumstances outside Dyson’s control.
• Blockages – please refer to pages 4 and 5 of this Dyson Operating Manual for
details on how to unblock your Dyson appliance.
• Normal wear and tear (e.g. fuse, belt, brush bar, etc).
• Industrial use of the Dyson appliance such as vacuuming gyprock dust or
builders’ dust may void your Dyson guarantee.
If your Dyson guarantee does not apply, you may have statutory rights and
remedies available to you as a consumer.
If you are in any doubt as to what is covered by your guarantee, please call the
Dyson Customer Care Helpline (see details on page 10).
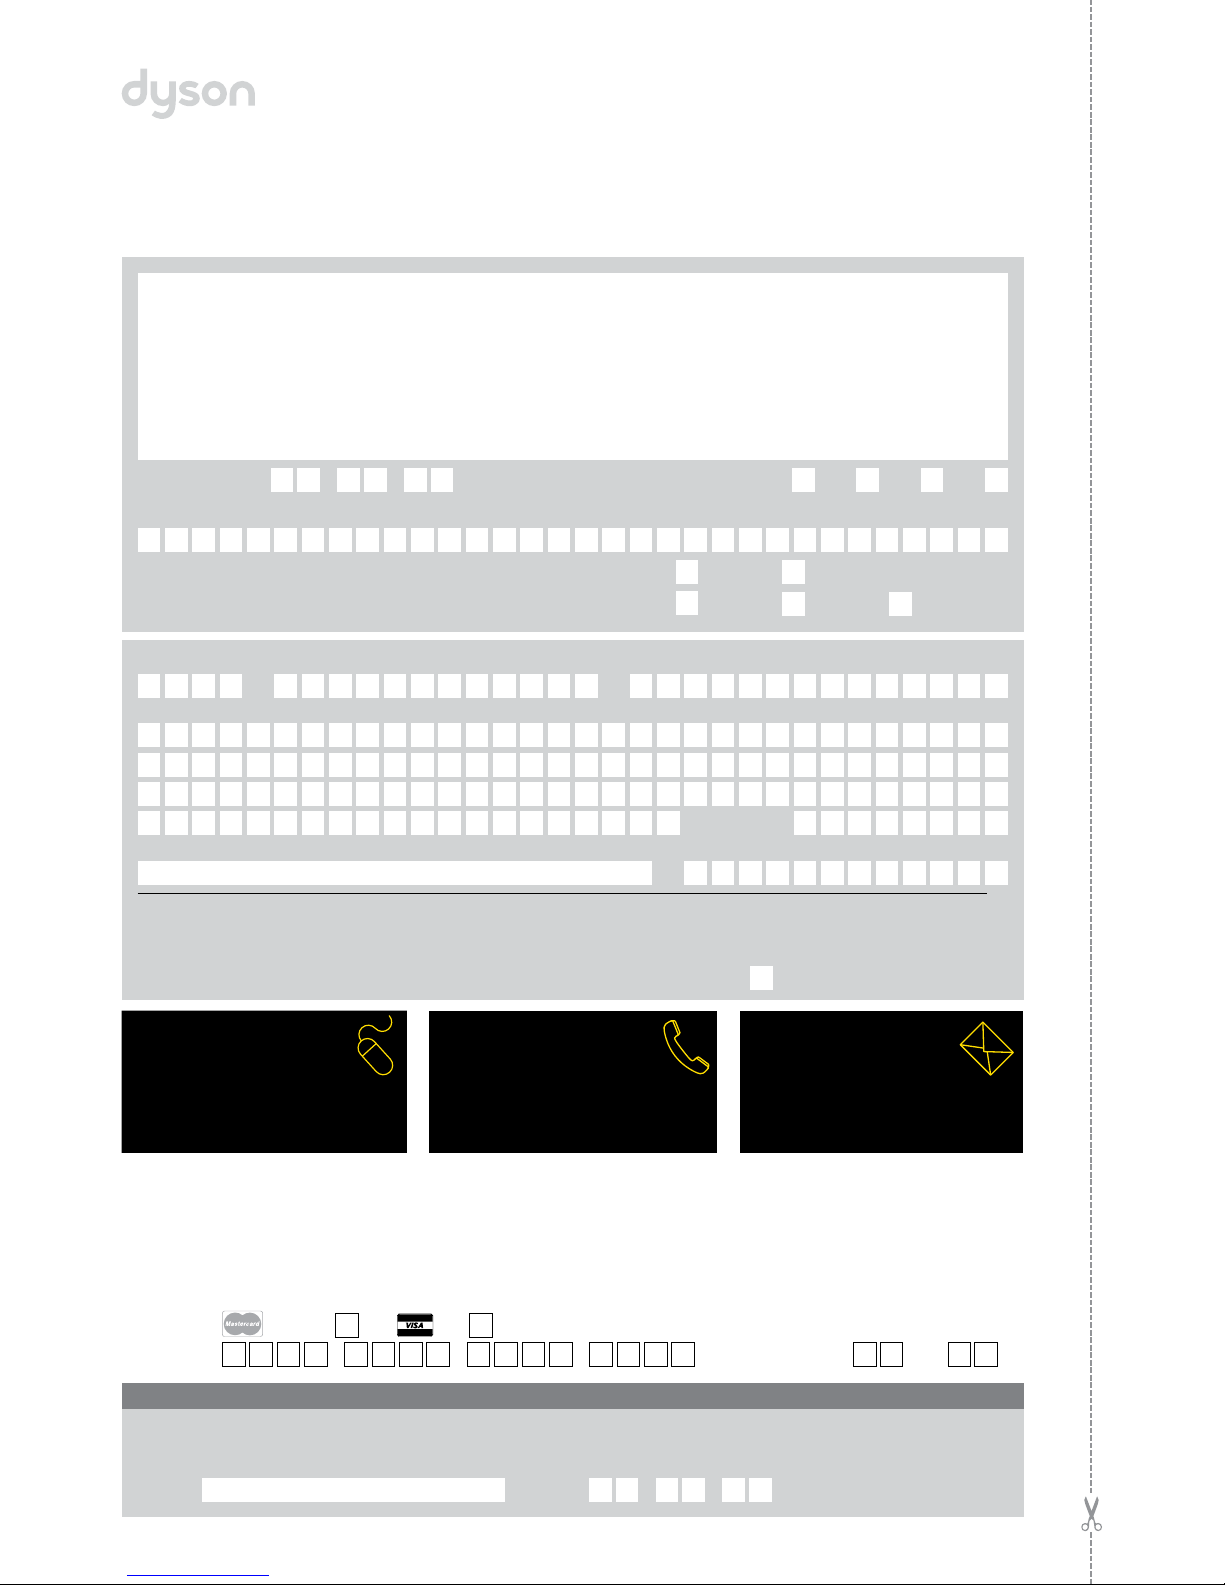
REGISTERING YOUR DYSON GUARANTEE
To help us ensure you receive prompt and efficient service, please register as a
Dyson appliance owner. There are three ways to do this:
• Online (Australia and New Zealand only)
AU: www.dyson.com.au/register
NZ: www.dyson.co.nz/register
• By calling the Dyson Customer Care Helpline.
• By completing and returning the enclosed form to us by mail.
This will confirm ownership of your Dyson appliance in the event of an insurance
loss and enable us to contact you if necessary.
DYSON CUSTOMER CARE
• If you have a query about your Dyson appliance, call the Dyson Customer Care
Helpline quoting your serial number and details of where and when you bought
the appliance or contact us via the website.
• Most queries can be solved over the phone by one of our Dyson Customer Care
Helpline staff.
• If your Dyson appliance needs a service, call the Dyson Customer Care Helpline
so we can discuss the available options.
• Your serial number can be found on the main body of the appliance, behind the
clear bin.
• To enable us to carry out work on your appliance, please contact the Dyson
Customer Care Helpline to obtain a reply paid delivery address in your state
(available in Australia only).
If your Dyson appliance is under Dyson guarantee and the repair or
replacement is covered, it will be repaired or replaced at no cost. If the repair or
replacement is found not to be covered under the Dyson guarantee, the repair
or replacement of the Dyson appliance and any associated delivery charges
(both to and from us) will be at your cost, subject to your statutory rights and
remedies as a consumer.
ABOUT YOUR PRIVACY
Dyson may use this information for future marketing and research purposes
(including sending commercial electronic messages) and may disclose it to third
parties for the purposes of providing the services you have requested or to our
business partners or professional advisers. If you wish to access your personal
information or see our full privacy policy, please contact us at:
customercare@dyson.com.au
DISPOSAL INFORMATION
Dyson products are made from high grade recyclable materials. Please dispose
of this product responsibly and recycle where possible.
When your Dyson appliance reaches the end of its life, we are responsible for
its safe disposal. You can send your old Dyson appliance back to us (at our cost)
and we will organise for it to be recycled.*
*Please note that not all parts are recyclable. Recycling of parts is subject to the
capabilities of 3rd party suppliers. Available in Australia only.
Simply:
1. Box up your old Dyson appliance.
2. Take the package to your local post office and send to the address below:
Dyson We Recycle
Reply Paid 83215
Dyson Service Centre
8-10 Mangrove Lane
Taren Point, NSW 2229
PRODUCT INFORMATION
Please note: Small details may vary from those shown.