Dyson Omni-glide User manual

User manual
In the box
Getting started
Charging your machine
Changing your click-in battery
Emptying your bin
Cleaning your bin
Washing your filter
Washing your brush bars
Cleaning your tools
Clearing blockages
Looking after your machine
SV12 JN.00000 PN.000000-00-00
00.00.00 VERSION NO.01
Top view of the Dyson
Omni-glide™machine,
showing cleaner head,
wand, bin and main body.
Dyson
Omni-glide™

In the box
Vacuum cleaner WandDyson omnidirectional
Fluffy™cleaner head
Engineered for hard floors.
Glides in all directions -
forwards, backwards,
even sideways.
Charger
Charges your vacuum
with or without a dock.
Combination tool
Two tools in one –wide
nozzle and brush,
for quick switching
between cleaning and
dusting tasks around
your home or car.
Mini motorised tool
Motorised brush bar,
concentrated in a
smaller head to remove
stubborn dirt from
mattresses, upholstery
and stairs.
Worktop tool
Engineered for
cleaning kitchen
worktops, tables and
hard surfaces.
You can buy additional tools at www.dyson.com.
Main body
showing the
handle and
bin attached.
The narrow connector end at the top, this connects
to the bin and the wider end at the bottom that
connects to the cleaner head or tool.
The charger is a one
piece unit with the plug,
connector end and cable.
This tool is angled
and has a nozzle
end.
A small cleaner head
with a body housing the
motor and an electrical
connector to attach to
the wand or directly to
the machine.
This tool has a
combination of brush
head and crevice tool
together in one unit.
The brush head slides
down the crevice tool
when needed.
The Dyson omni-
directional Fluffy™
cleaner head with two
brush bars and the
connector end pointing
upwards.

Getting started
Power modes
Max mode
Press the button to change
power modes.
Delivers maximum power.
For intensive cleaning of ground-in dirt.
Power button
We’ve removed the trigger,
so you can swap hands easily
while cleaning around obstacles
Eco mode
The optimum balance of power and
run time
Dyson omnidirectional
Fluffy™cleaner head
Engineered for hard floors.
Glides in all directions -
forwards, backwards,
even sideways.
Arrow showing the main body
of the Dyson Omni-glide
connecting to the Omni-
directional fluffy™cleaner head.
The Dyson Omni directional
floor tool showing the release
button at the flexible neck,
connected to the main body
of the cleaner head.
Pointers to demonstrate
that the tools can be
connected directly to the
main body or to the end
of the wand.
Location of the power
button on the base of the
handle of the machine.
The connection of the
wand onto the main body,
with the the wand release
button aligned with the
buttons on the handle of
the main body.
The Dyson Omni-glide ™
cordless vacuum cleaner
main body with the
power button and mode
button at the base of the
handle and bin witth the
bin base closed.

Charging your machine
Changing your click-in battery
For the best experience, we recommend fully charging your machine, and
any additional batteries, as soon as you open the box and after every clean.
If you have additional click-in batteries, we recommend that you alternate the
batteries to maintain even performance.
Refitting your battery
Removing your battery
Align your battery with the handle and slide it in.
Push firmly until it clicks into place.
Push the Battery release button on the handle and slide the battery off
your machine.
Charge the battery.
The LED light on the end of the handle will flash when the power is running
low and you need to put your battery on to charge.
Connect the charger directly to the charging point on the base of the
handle of your machine. You can also connect to your dock as shown in the
installation instructions supplied with your dock.
The LED light on the end of the handle will pulse with a blue LED light when
charging, and the light will go out when fully charged.
It can take up to four hours to fully charge your battery. Your battery has
been designed to be left on charge.
Your machine won’t operate or charge if the ambient temperature is below
5°C (41°F). This is designed to protect both the motor and battery.
You can help prolong the battery life by leaving your machine to cool down
before recharging.
The button on the end of the
handle is pushed upwards to
release the battery in the handle.
The charger connected from
the power supply directly into
the base of the handle.

Emptying your bin
Empty your bin as soon as the dirt reaches the MAX mark.
You may need to clean the filter more often if you use your
machine with a full bin.
Reassemble your machine
Minimise dust contact
To remove the bin for emptying:
Release the dirt
Remove your wand
If you have removed your bin, slide it back on to the runner. Make sure that
the bin and lid are both securely in position.
Push the bin base upwards until the bin and lid both click into place.
Reconnect the wand.
Cover your bin tightly in a dust proof bag while you empty. Remove the bin
carefully, seal the bag tightly and dispose.
If the bin doesn't empty fully, remove the bin and empty the dirt.
Press the red button located on the bin runner to release the bin and slide
your bin off the runner.
Hold your vacuum over a bin.
Push the red bin release button, taking care not to press the power button.
The bottom of the bin will open and the shroud will slide down inside the bin,
wiping away any dirt.
If the bin doesn’t open, check the bin release button is pushed down fully.
Press the red wand release button, on the top of the wand,
and pull the wand away from the bin.
Don’t put any part of your machine in a dishwasher or use detergents,
polishes or air fresheners.
Cleaning your bin
Clean your bin
Replace your bin
If it is necessary to clean your bin, empty it as shown in the ‘Emptying your
bin’ section.
Press the red button located on the bin runner to release the bin and slide
your bin off the runner.
Only clean your bin with a damp cloth.
Make sure that the bin and seals are completely dry before replacing.
Insert the spine on to the bin runner.
Close your bin by pushing the bin base upwards until the bin and bin base
click into place.
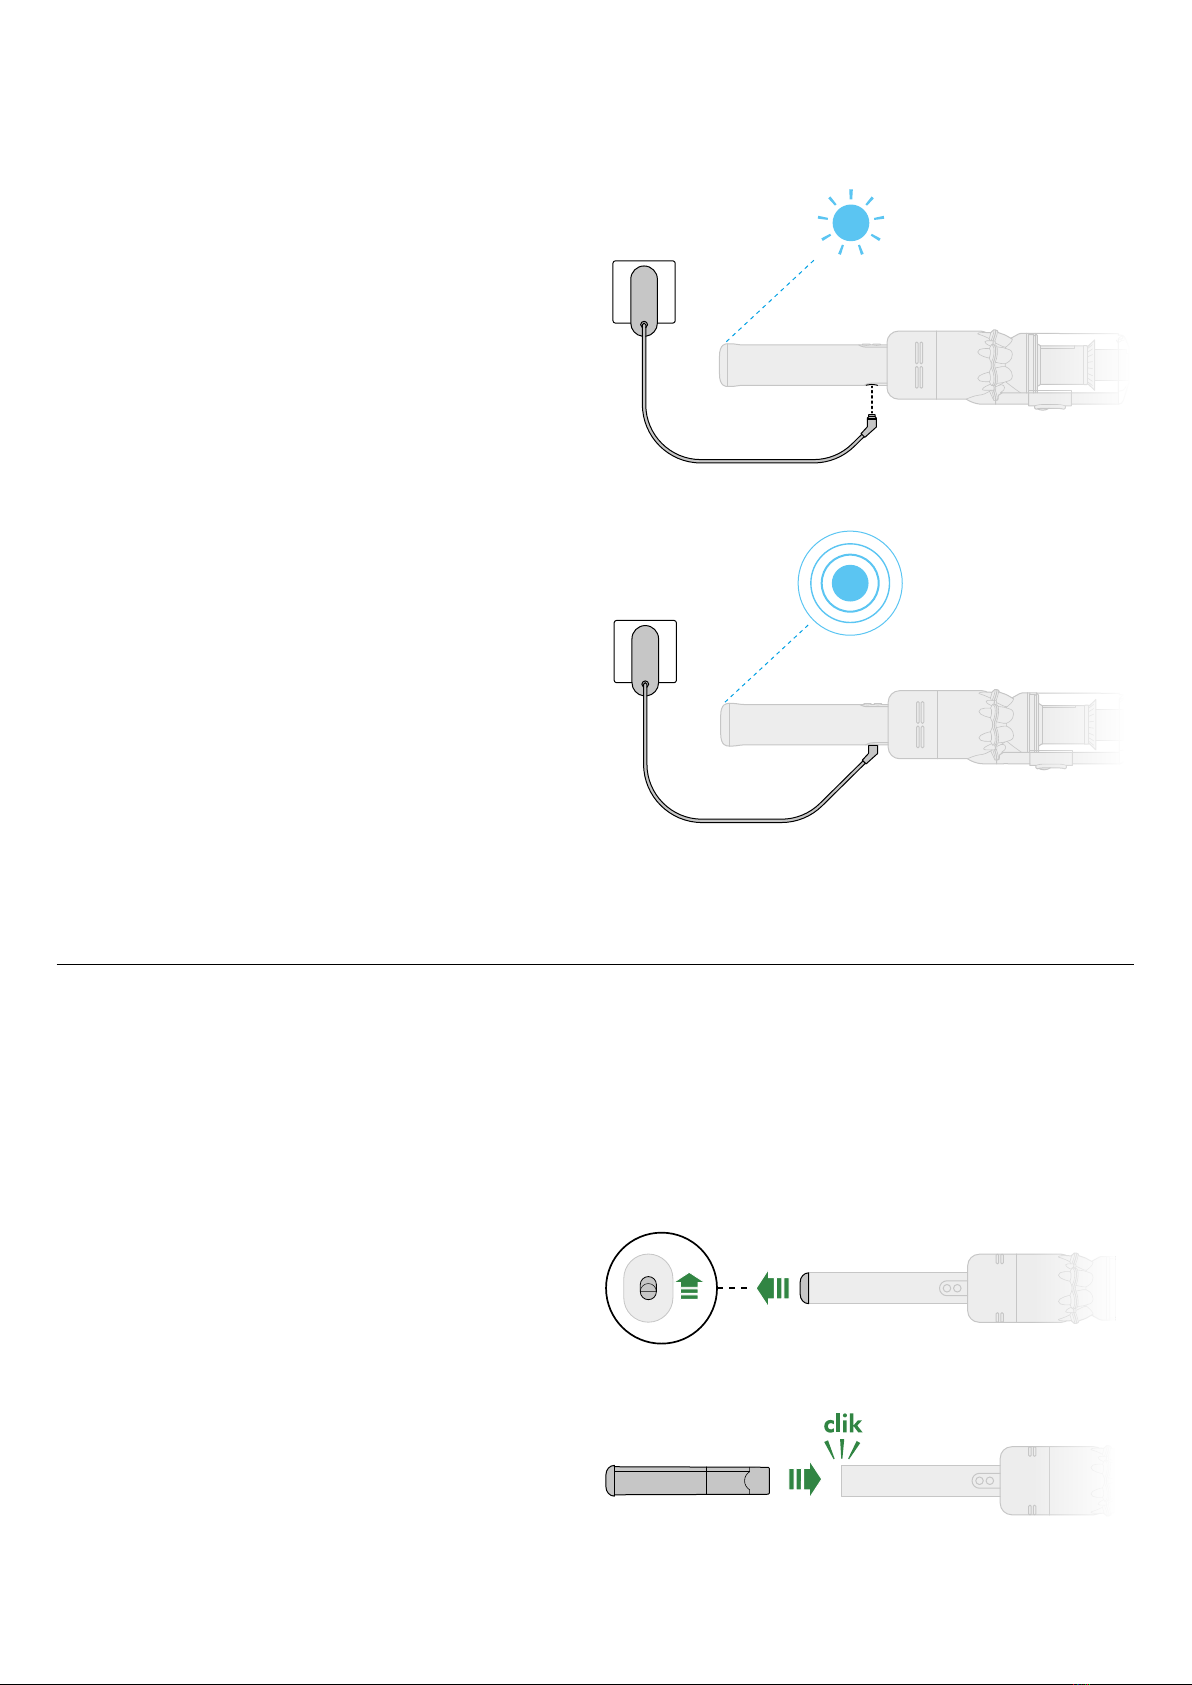
The MAX mark on the bin of the machine,
showing that the dirt should not be filled
over the Max mark when the machine is at
the angle of normal use.
Two images of the bin
with arrows showing
the bin lid closing and
a click symbol and
the bin being pushed
upwards with another
click symbol.
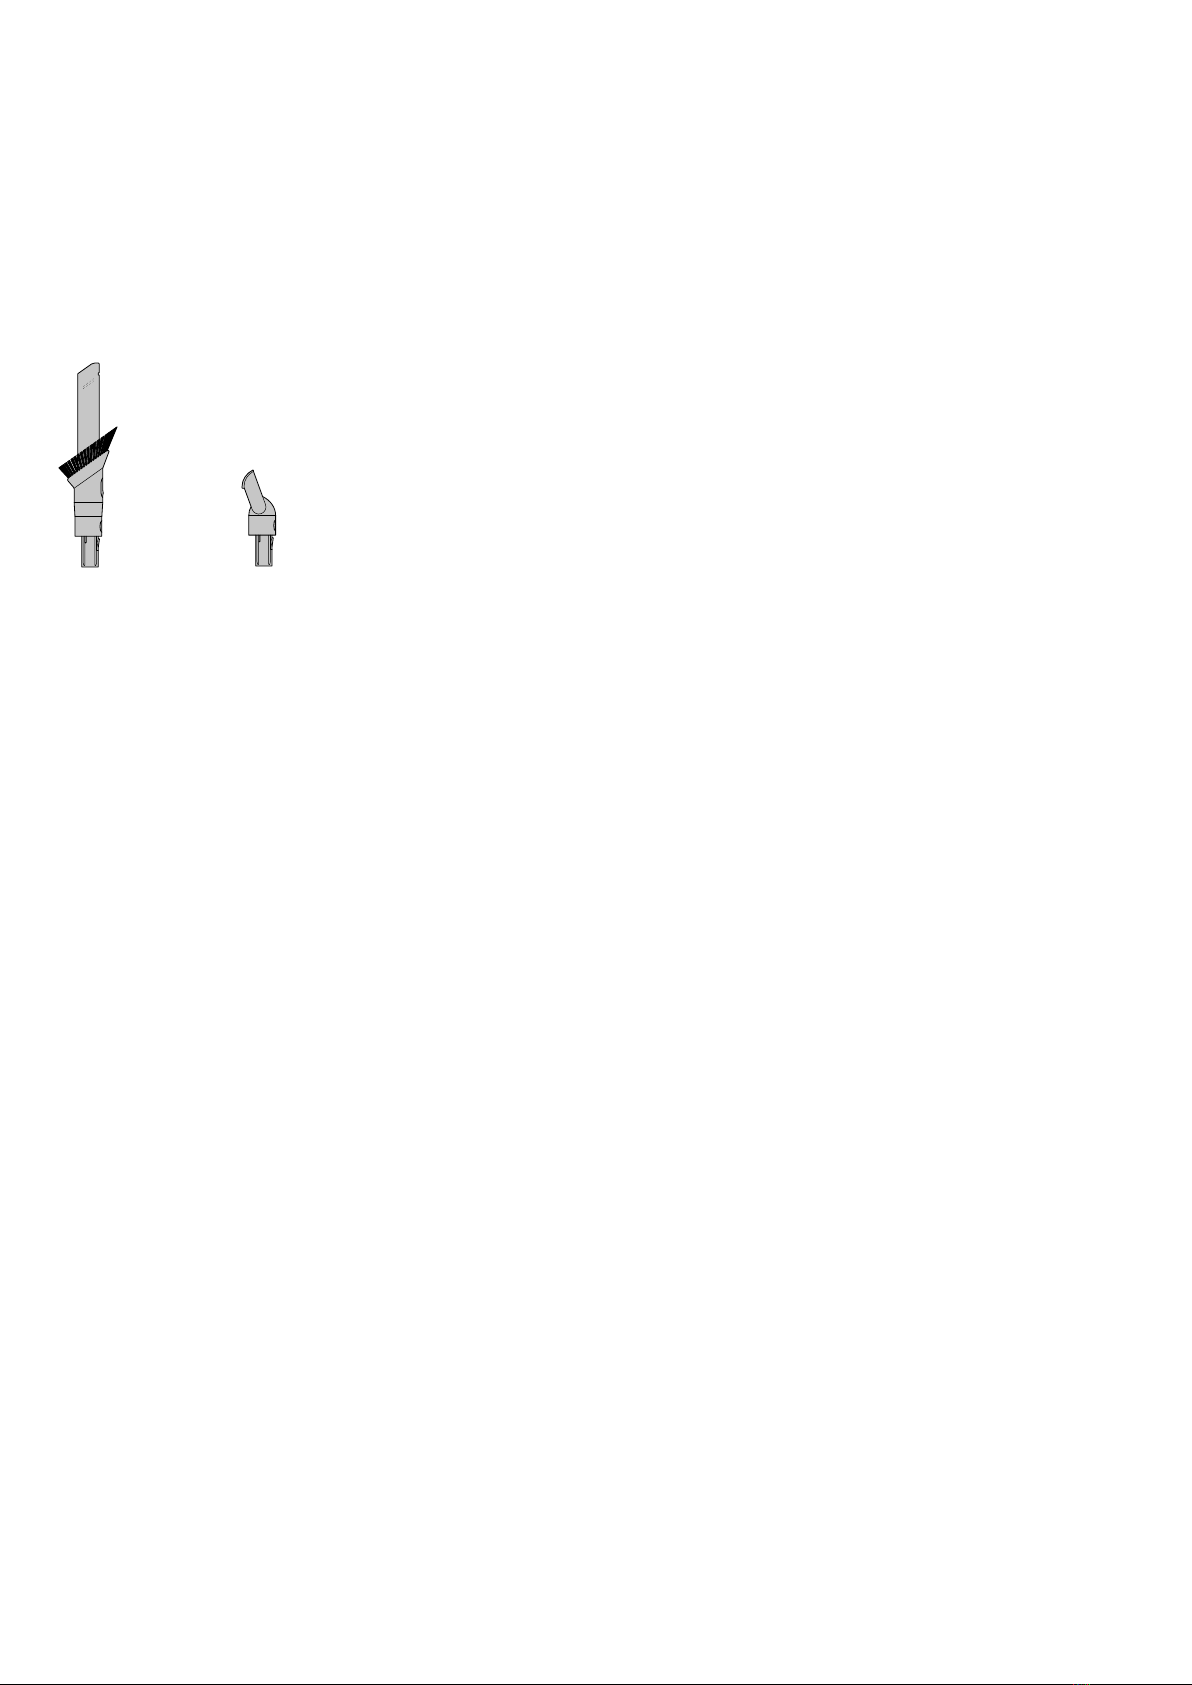
Illustration of the bin
being emptied into
a bag with images
demonstrating to take
care not to press the
trigger when emptying
the bin.
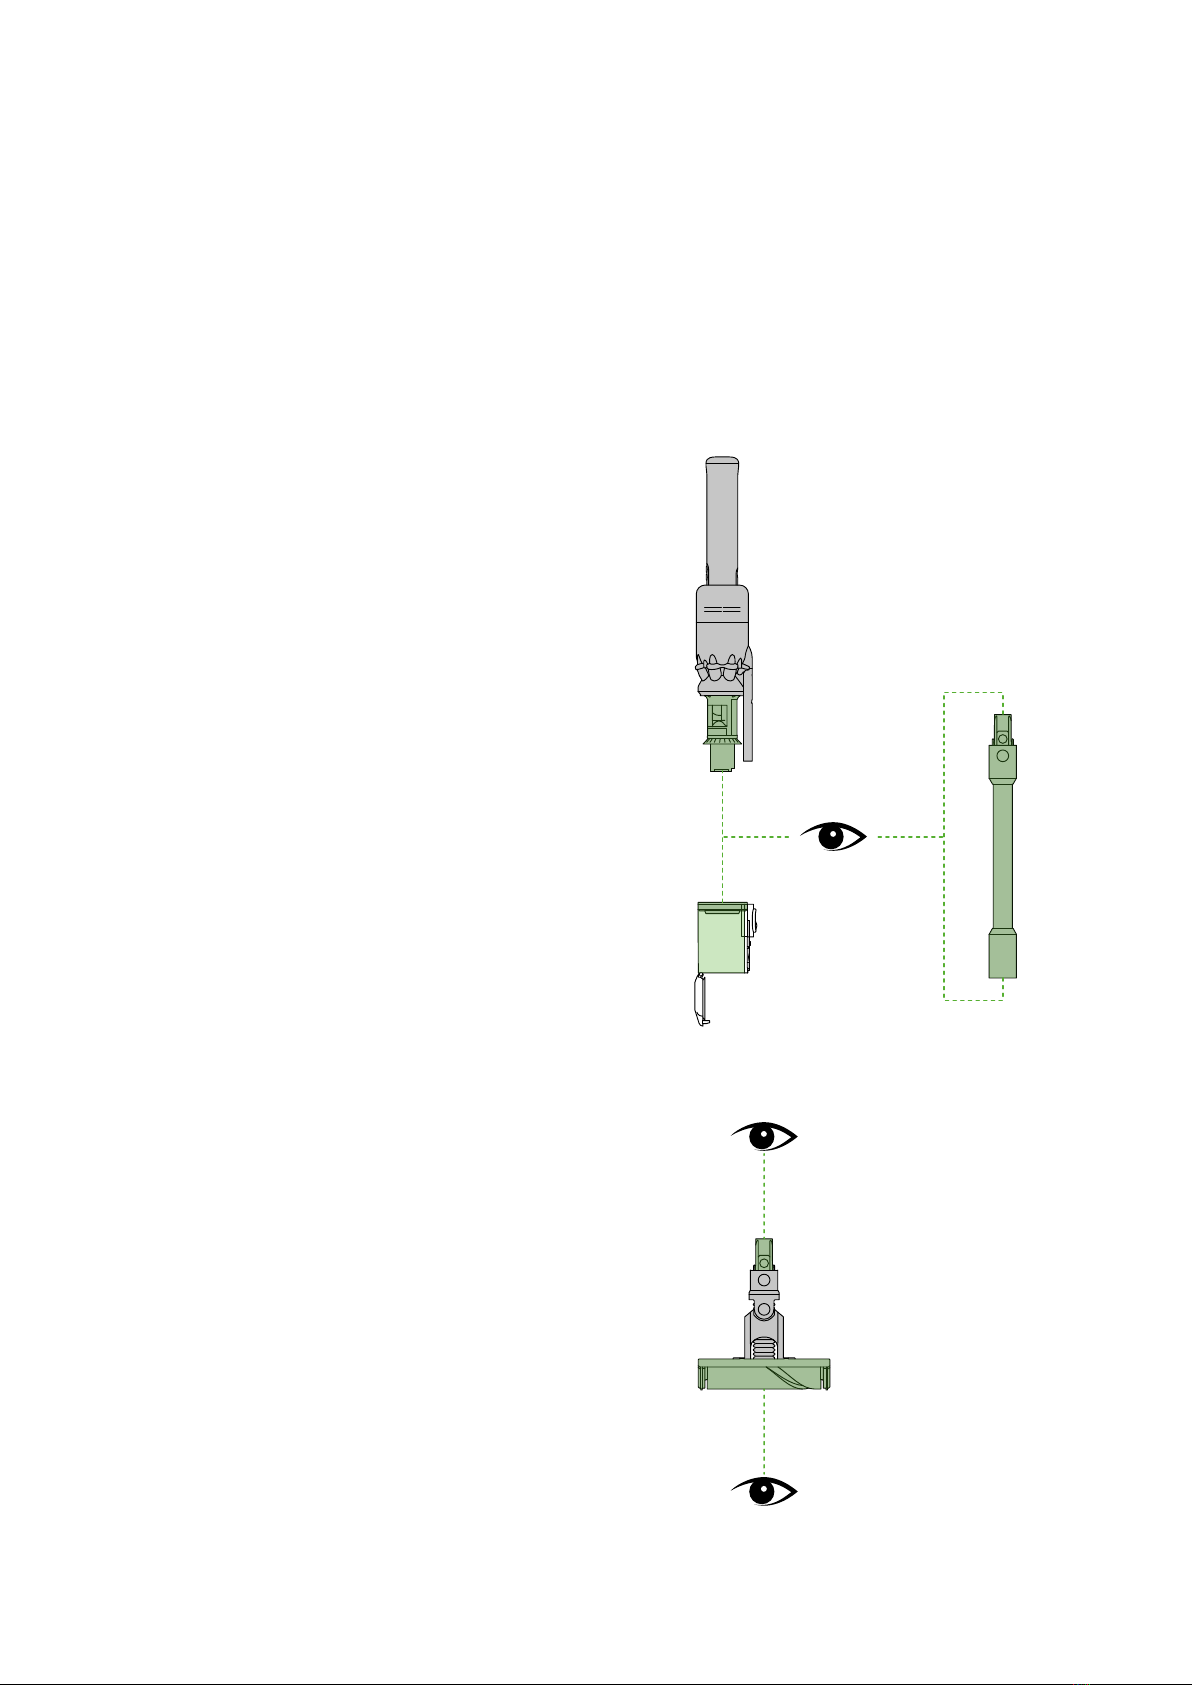
The bin being pushed
back into position on
the bin runner.
The bin being removed and the location of the bin
release lever on the underside of the bin runner.

Washing your filter
Wash your filter at least once a month to maintain the best performance.
Make sure the filter is completely dry before refitting.
Twist off your filter
Wash your filter
Shake and dry
Refit your filter
To refit your filter, slide it onto the handle and turn it clockwise until it clicks into place.
Your filter may need more frequent washing if you vacuum fine dust, use Max mode
frequently or use with the bin full.
Don’t put any part of your machine in a dishwasher or use detergents, polishes or air
fresheners.
Turn your filter anti-clockwise and pull it away from your machine.
Before washing your filter, tap it gently over a bin to remove any loose dust and debris.
Wash the outside of the filter, rubbing with your fingers to remove the dirt.
Carefully rinse the inside filter, without allowing water to fill the filter.
Repeat these steps until the water runs clear.
Empty the filter and shake firmly to remove excess water.
Keep shaking until there’s no water coming from the filter.
Place your filter end up, as shown.
Leave your filter to dry for at least 24 hours in a well-ventilated, warm place.
Don’t dry your filter in a tumble dryer, microwave or near a naked flame.
Important: your filter must be completely dry before you put it back into the machine.
Your machine could be damaged if used with a damp filter.
3
4
clik
2
1
3
4
clik
2
1
1 2 3
Filter held in upright position, with the wider
end in the palm of a hand. Water running
from a tap into the narrower end.
Filter with hand over
the open end with
arrows showing a
shaking motion.
The filter is left to dry with the
pleated filter end facing upwards.

Washing your brush bars
To maintain optimum performance, check and wash the brush bars regularly.
Remove brush bars
Wash and dry brush bars
Replace your brush bars
Don’t put any part of your machine in a dishwasher or use detergents, polishes or
air fresheners.
Press the cleaner head release button to remove it from the wand.
Pull the brush bars off the end cap and put the end cap to one side, don’t wash it.
Hold your brush bars under cold tap water and gently rub to remove any lint
or dirt. Keep washing until the water runs clear.
Stand the brush bars upright and leave for at least 24 hours to dry.
Make sure your brush bars are completely dry before refitting.
Each brush bar is engineered to correspond to a specific position on the end
cap. It is important that both brush bars are fitted in the correct position.
Slide the assembled brush bars back into the cleaner head.
Push the end cap until it clips securely back into the closed position.
The cleaner head housing is not washable and should only be wiped over
with a damp lint-free cloth.
clik
clik
clik
clik
clik
clik
The brush bar release button is located on
the top of the cleaner head and the brush
bars slide out of the same end.
The fittings on the end cap
are either side of a central
point that locks into the
cleaner head. One fitting
is larger than the other
and the ends of the brush
bars will only fit on the
corresponding fitting.

Cleaning your tools
Don’t put any part of your machine in a dishwasher or use detergents,
polishes or air fresheners.
Wipe with a damp, lint-free cloth, without touching the connector end.
Make sure your tools are completely dry before using.
Combination tool Worktop tool

Clearing blockages
Disconnect your machine from the charger before looking for blockages.
Be careful not to touch the power button and be aware of sharp objects.
Leave your machine to cool down before looking for blockages.
Don't use your machine when looking for blockages as this could cause injury.
If your machine detects a blockage, the motor will pulse six times. You won’t
be able to use your machine until the blockage has been cleared.
If you try to use your machine when the motor is pulsing, it will automatically
cut out.
Leave your machine to cool down before looking for blockages and, for your
safety, take care not to touch the power button.
With the wand removed
from the machine, check for
blockages at both ends of the
wand.
Check for blockag-
es in the filter end
and bin ends of the
machine.
With the bin
removed, check
for blockages,
paying particular
attention to the air
inlet, located at on
the right–hand side
of the machine just
below the point
where the bin joins
the main body of
the machine.
Turn the cleaner head over to
check for obstructions on the
brush bar and air inlet.
Remove any obstructions
from the brush bar.

Looking after your machine
To always get the best performance from your machine, it’s important to
clean it regularly and check for blockages.
Look after your battery
Your serial numbers
Look after your machine
To get the best performance and life from your battery, use Eco or Med mode.
Your machine won’t operate or charge if the ambient temperature is below 5°C(41°F).
This is designed to protect both the motor and battery.
You can register your machine using the serial number found on the bottom
of your machine.
You can find your serial numbers on your machine, battery and charger.
Use your serial number to register.
If your machine is dusty, wipe with a damp lint-free cloth.
Check for blockages in the cleaner head, tools and main body of your machine.
Wash your filter regularly and leave to dry completely.
Don’t use detergents or polishes to clean your machine.
Table of contents
Other Dyson Vacuum Cleaner manuals

Dyson
Dyson DC 16 User manual

Dyson
Dyson 360 Heurist User manual

Dyson
Dyson DC15 User manual

Dyson
Dyson DC 31 User manual

Dyson
Dyson Big Ball CY23 User manual

Dyson
Dyson DC28 User manual

Dyson
Dyson DC40 User manual

Dyson
Dyson DC 46 User manual

Dyson
Dyson DC11 Telescope User manual

Dyson
Dyson Cinetic Big Ball User manual

Dyson
Dyson Ball User manual

Dyson
Dyson light ball UP16 User manual

Dyson
Dyson V8 Absolute User manual

Dyson
Dyson V7 Motorhead User manual

Dyson
Dyson DC34 ANIMAL Instruction Manual

Dyson
Dyson SV03 User manual

Dyson
Dyson DC 07 User manual

Dyson
Dyson DC39c User manual

Dyson
Dyson SV10 User manual

Dyson
Dyson V11 User manual