E.P.C RNS-510 User manual
____________________________________________________________________________
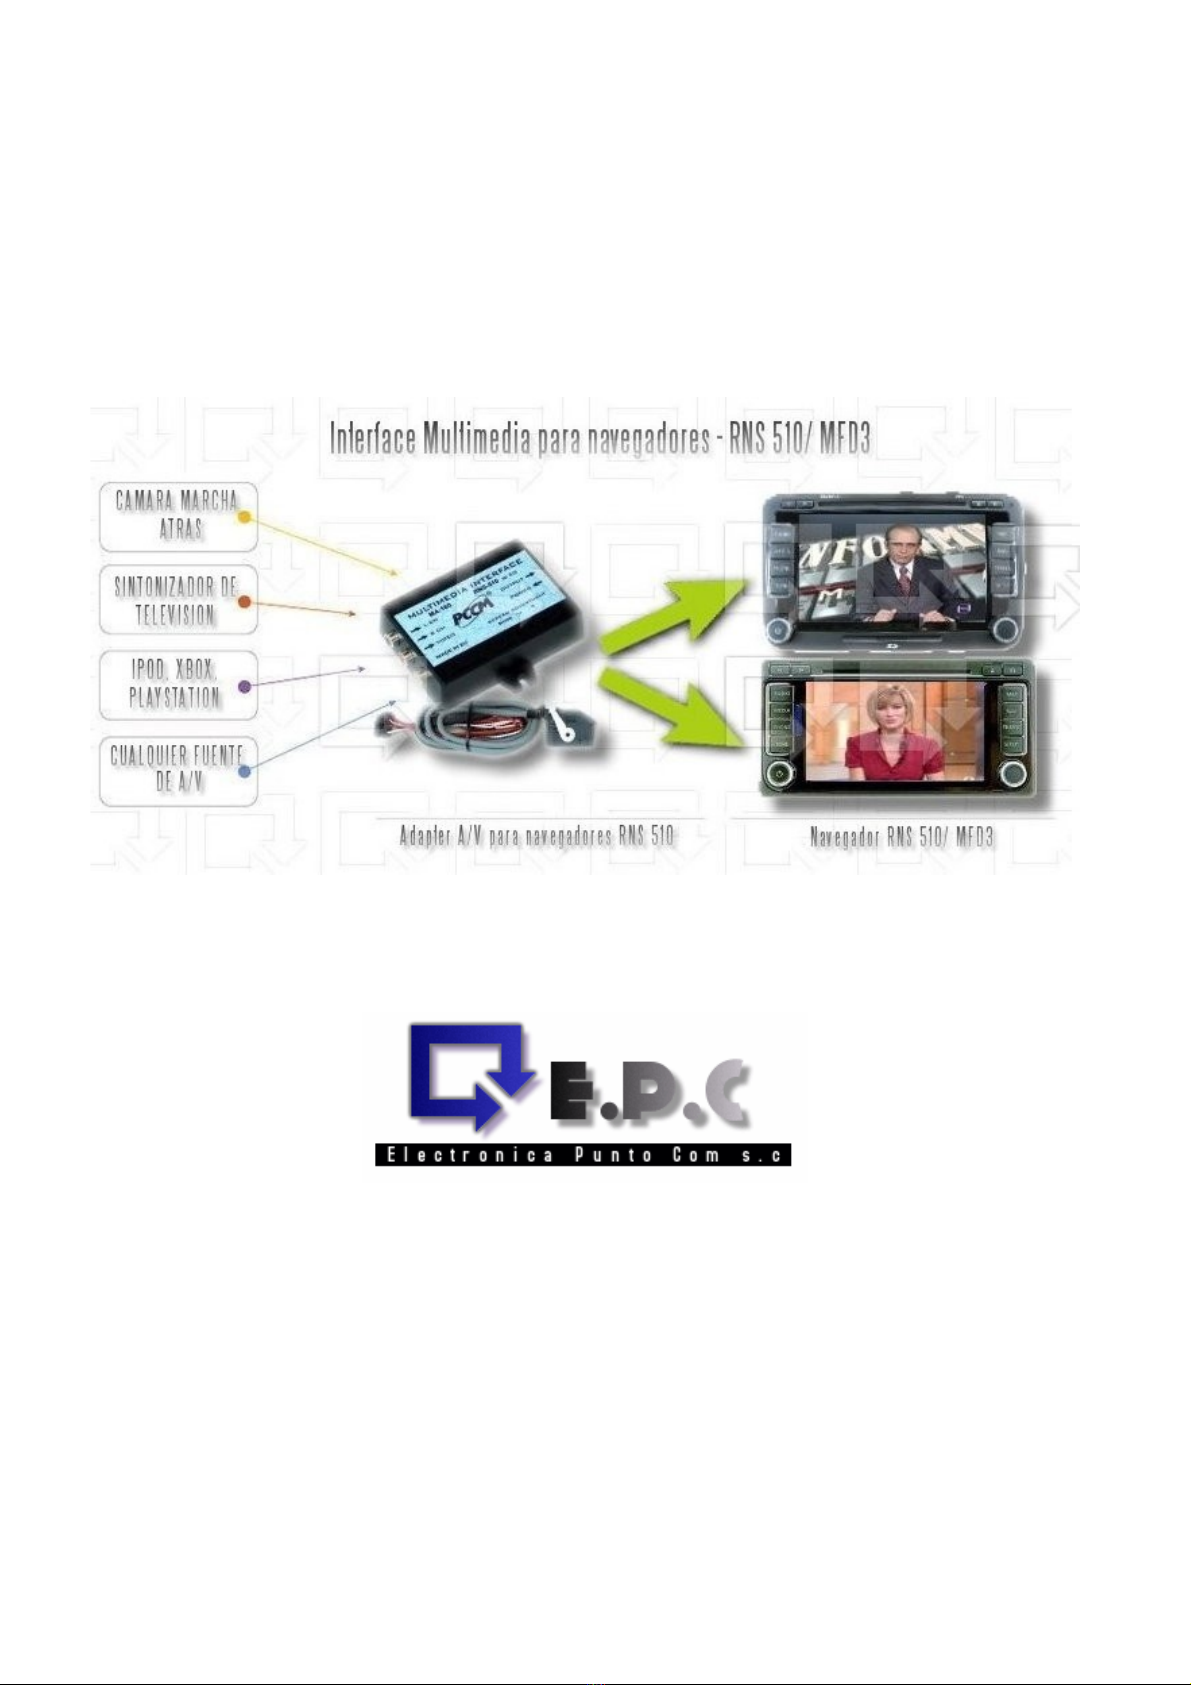
MULTIMEDIA INTERFACE
VW RNS-510
MA-160
HW-VER.: 115 SW-VER.: 6.00 01.04.2008
__________________________________________________________________________________
__________________________________________________________________________________

PL UWAGA !! Koniecznie p zeczytaj !!
Adapte ten odczytuje i konwe tuje dane z magist alii CAN pojazdu. Nie
gwa antujemy iż zbie ane i wysyłane dane na magist alę CAN BUS nie
spowodują zakłóceń innych u ządzeń elekt onicznych w pojeździe. Jeśli
montujesz dodatkowe u ządzenia, zawsze p zest zegaj inst ukcji montażu i
wa unków gwa ancji p oducenta pojazdu – inaczej g ozi Ci ut ata gwa ancji.
GB ATTENTION !! Read this necessa y !!
This inte face eads and conve ts data signals f om the CAN p otocol of a ca .
We cannot gua antee that picking off data f om the CAN BUS system may not
influence othe elect onic units o system in the ca . If you install elect onic
units in ca s, please always pay attention to the installation – guides and the
wa anty – egulations of the ca p oduce because othe wise the wa anty will
be lost.
DE ACHTUNG! Bitte lesen!
De Adapte liest und we tet die Daten vom CAN BUS aus. Wi ga antie en nicht
fü anfallende Stö ungen, wie z. B. defekte Elekt oteile, die du ch
die ve schickten Daten he vo ge ufen we den. Beim installie en von exte nen
Ge äten, folgen Sie bitte imme de Montageanleitung vom He stelle und de en
Ga antiebedingung. Bei Ve stoß e lischt die Ga antie vo zeitig.
PL Inst ukcja montażu
GB Installation/ connection:
DE Montageanleitung:
ES Manual de instalacion:
1.
PL Zdemontuj i odłącz nawigację .
GB Remove and disconnect the navigation system.
DE Bauen Sie die Navigationseinheit aus. Ziehen Sie die Anschlussstecker von der Navi
ab.
ES Saca y desconecta el navegador.
2.
PL Podłącz wtyk adaptera do nawigacji jak na zdjęciu poniżej.
GB Connect the connector into navigation system according to pictures elow.
DE Stecken Sie den Adapterstecker wie auf den unteren Bilden dargestellt an die Navi .
ES Conecta el conector de interface segun muestra la foto.
RNS-510
2

__________________________________________________________________________________
__________________________________________________________________________________
3.
PL Podłącz przewody w kolejności :
Cza ny – masa – pin 12 – rysunek poniżej
Biały – do CAN HIGH – pin 9 – rysunek poniżej
B ązowy – do CAN LOW – pin 10 – rysunek poniżej
Przewody CAN podłącz równolegle do istniejących.
Cze wony – stały +12V – pin 15 – rysunek poniżej
Podłącz wtyk zasilający do nawigacji i włącz ją.
Podłącz ka el zakończony czarnym prostokątnym wtykiem do adaptera.
GB Connect ca les in sequence:
Black – pin 12 – chassis ground negative
White – CAN HIGH – pin 9 – see picture elow
B own – CAN LOW – pin 10 – see picture elow.
Connect CAN ca les in parallel to the existing.
Red – pin 15 – to +12V attery.
Connect navigation power, and turn it on.
It connect ca le ended for lack rectangular connector to interface.
DE Schließen Sie die eitungen in folgender Reihenfolge an:
Schwarz – an Masse – pin 12
Weiß - CAN HIGH – pin 9 – (s. Bild unten)
Braun - CAN OW – pin 10 – (s. Bild unten)
XXXXXXXXX
ES Conecta los ca les en siguiente orden :
Neg o – masa – pin 12 – fijarse en di ujo de a ajo
Blanco – a CAN HIGH – pin 9 – fijarse en di ujo de a ajo
Ma on – a CAN LOW – pin 10 – fijarse en di ujo de a ajo
Los ca les CAN conecta en paralelo con los ca les existentes.
Rojo – +12V – pin 15 – rysunek poniżej
Conecta el conector de alimentacion de navegador y enciendela.
Conecta el ca le terminado con un conector rectangular a interface.
4.
PL Aktywacja i użytkowanie adapte a.
UWAGA
Adapter współpracuje z oprogramowaniem (firmware) o numerach 522 oraz 102x.
Wymagana jest też aktywacja TV w ustawieniach CAN-Gateway:
Tiguan, Golf 5, Touran, EOS, Jetta - Address 19 - Byte 3 - Bit 4
Touareg (08), T5 (08) - Address 19 - Byte 4 - Bit 4
3

Naciśnij przycisk <MEDIA> a następnie <TV> jeśli yła odtwarzana płyta DVD,
lu <MEDIA>,następnie <VIDEO>, potem <TV> jeśli yła odtwarzana muzyka.
ES. Activacion y uso de inte face multimedia.
¡ ATENCION !
El interface tra aja con los software (firmware) de navegador con numeracion 522 y
102x.
Se exige tam ien activacion TV en configuracion de CAN-Gateway.
Tiguan, Golf 5, Touran, EOS, Jetta - Address 19 - Byte 3 - Bit 4
Touareg (08), T5 (08) - Address 19 - Byte 4 - Bit 4
Pulsa oton <MEDIA> y despues <TV> si ha reproducido un disco de DVD,
o <MEDIA>,despues <VIDEO>, despues <TV> si ha reproducido la musica.
GB Activation and usage of adapte .
ATTENTION
Interface cooperates with firmware a out num ers 522 and 102x.
It is required activation TV in setups CAN-Gateway too:
__________________________________________________________________________
__________________________________________________________________________
Tiguan, Golf 5, Touran, EOS, Jetta - Address 19 - Byte 3 - Bit 4
Touareg (08), T5 (08) - Address 19 - Byte 4 - Bit 4
Press < MEDIA > utton, next < TV > if DVD disc was restored, or < MEDIA >,
next < VIDEO >, then < TV > if music was restored.
DE ?
5.
PL Regulacja pa amet ów ob azu
Wyreguluj jasność, kontrast i kolor za pomocą przycisków. Naciskanie <MODE>
powoduje wejście w try y regulacji w kolejności : jasność -> kontrast -> kolor
Regulacja np. jasności następuje poprzez klawisze + i - . Każda regulacja jest
dostępna przez 10 sek. Po tym czasie następuje wyjście z try u regulacji.
ES La regulacion de rillo, contraste y saturacion . Pulsando <MODE> entraremos en el
modo de regulacion en siguiente orden: rillo ->contraste -> saturacion. La regulacion
p.ej.de rillo la haremos mediante + i - . Cada regulacion es disponi le durante 10
secundos. Despues sale de modo de regulacion.
GB
Adjust rightness, contrast and colour with a switch MODE,+ , - . By pressing MODE
can adjust of order : Brightnes -> contrast -> color -> rightnes trought + , -
Each of regulation is posi le for 10sec. After this time adjustment is not availa le.
DE XXXXX
Durch Drücken auf die Taste MODE können Sie Helligkeit, Kontrast und Farbe
nacheinander wählen und mit den Tasten + und - einstellen. Wenn Sie innerhalb
von 10 sec keine Taste drücken, ist die Einstellung beendet und gespeichert. Sie
müssen dann mit MODE neu anfangen.
4

PL UWAGA!!
1. Przy podłaczaniu adaptera wymagana jest minimalna znajomość podstaw
elektroniki
2. Za uszkodzenia spowodowane złą instalacją lu łędami w połaczeniach
elektrycznych lu szkody spowodowane z o u tych powodów producent nie ponosi
odpowiedzialności
GB ATTENTION!!
1. Connect this interface only if you possess concerning knowledge a out electronics.
2. For damages caused y wrong mounting /installation or mistakes of electrical
connection and damages caused y oth reasons we are not alia le.
DE ACHTUNG!!
1. Schließen Sie diesen Adapter (Interface) nur an wenn Sie über entsprechende
Fachkenntnisse Verfügen !!!
2. Für Schäden die durch Einbau oder Anschlussfehler und für Folgeschäden
übernehmen wir keine Haftung.
ES ATENCION !! OJO !! CUIDADO !!
1. La conexion de interface exige conocimientos asicos de electronica.
2. El fa ricante no se responsa iliza de los daños producidos por la incorecta
instalacion de interface.
Si no eres persona mañosa ACUDE A UN TALLER DE CAR AUDIO.
Technical support:
www.electronicapuntocom
www.interfacesmultimedia.com
Your local dealer:
Su local distri uidor:
_________________________________________________________________________________
5
Table of contents


