INTERNATIONAL E-Z UP, INC.
1900 Second St., Norco, California 92860
800-45-SHADE
The #1 Instant Shelter®Brand in the World
ezup.com
INSTRUCTIONS FOR
10’x10’ PREMIUM SHELTER PACK
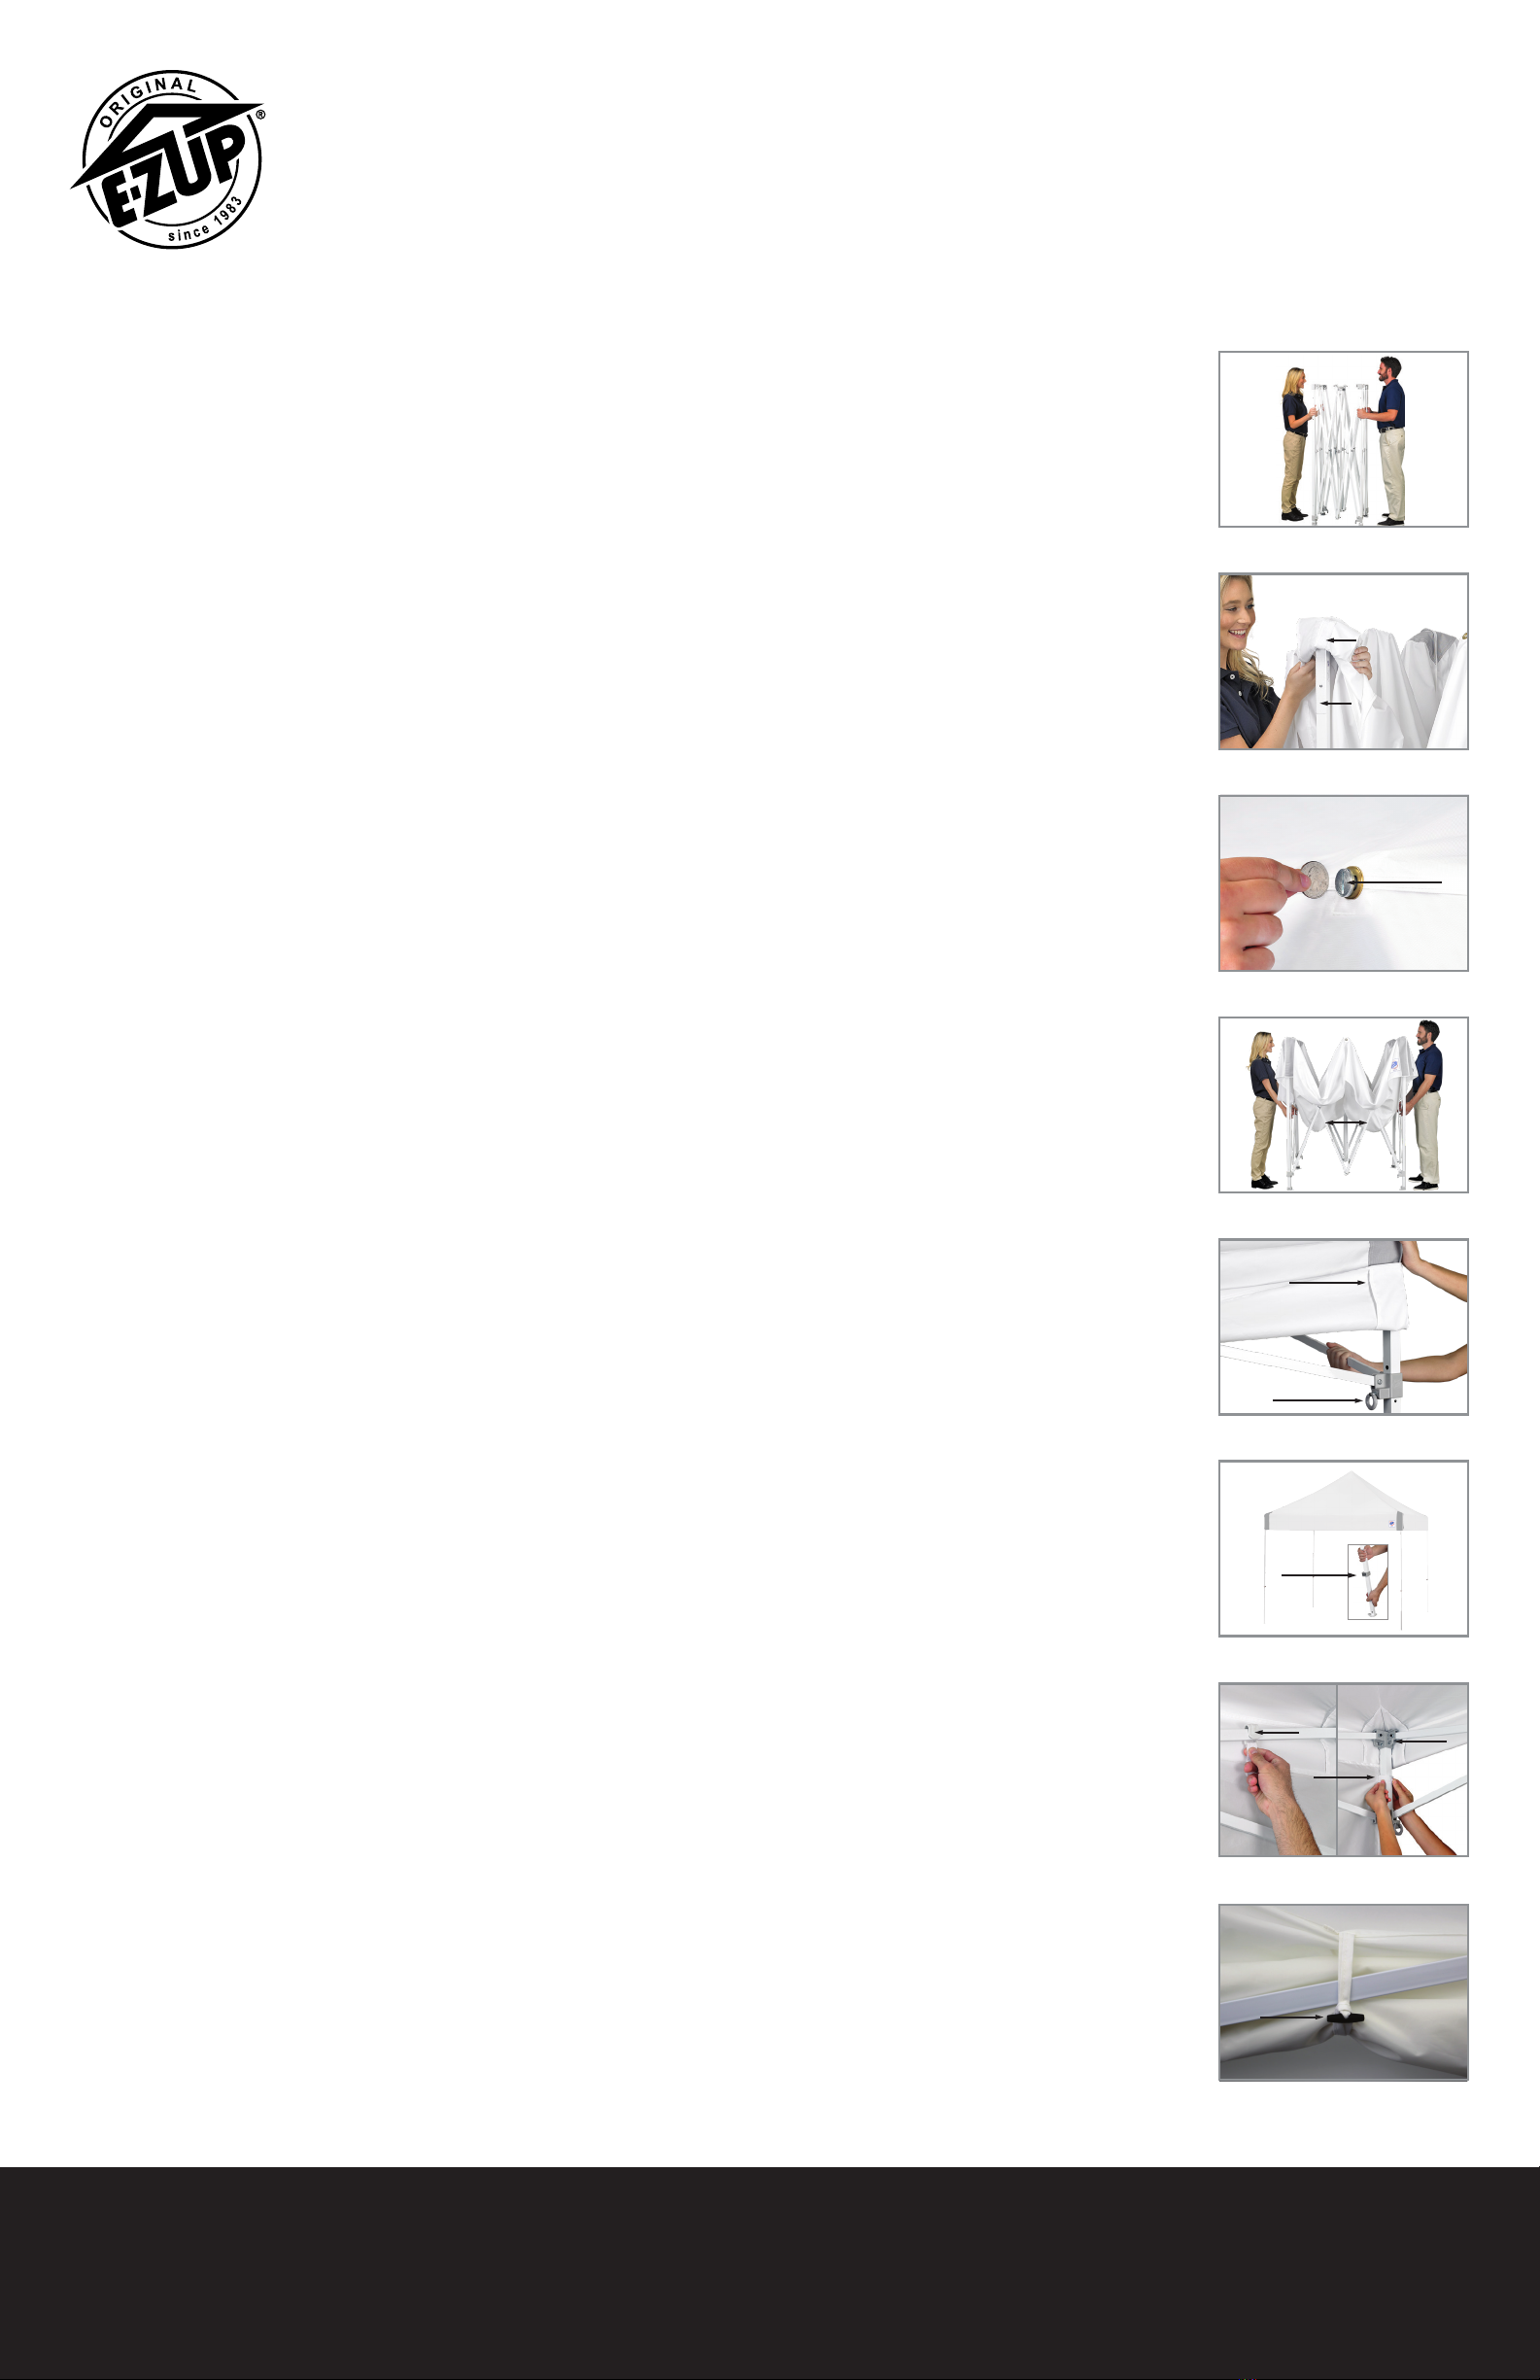
TAKEDOWN
ROLLER BAG
Collapse Shelter Legs
A. With a partner, slightly lift two adjacent corner legs simultaneously.
B. Depress the toggle button and slide Lower/Inner Legs into Upper/Outer Legs, making sure to do two legs at a time on the same side. (Fig. I)
C. Repeat on remaining legs. Note: Keep the toggle button depressed while retracting leg.
Release Auto-Slider®Pull Pin
A. With one hand, slightly push up on the truss near the Auto-Slider®Pull Pin to relieve pressure. (Fig. J)
B. With the other hand, release the Auto-Slider®Pull Pin by pulling the ring.
C. Repeat on remaining legs.
Closing Shelter
A. Grasp the Frame on the top of the diamond-shaped area of Center Trusses on the opposite sides. (Fig. K)
B. Lift the shelter up slightly, and shake it while stepping toward your partner until the shelter is approximately ½ closed.
Be careful not to pinch fingers!
C. Grasp the two Outer Legs, and push the frame together until it is fully closed.
D. Store the shelter in the roller bag provided.
Note: Hug your shelter before placing it in the roller bag.
Fig. I
Fig. J
Fig. K
Fig. L
Fig. M
Center Trusses
Remove Sidewalls
A. Remove sidewall strips from around each frame leg.
B. Remove truss clips from shelter trusses.
One-Time Assembly
Use the Roller Bag to store and transport your Premium Shelter, 4 Sidewalls, Optional Custom Banner, and Spike Kit.
1. Slide Axle through Roller Bag Receiver. (Fig. L)
2. Slide the two Wheel Spacers onto each side of Axle (one on each side).
3. Slide one Wheel onto each side of the Axle.
4. Push Snap Clip over Wheel Axle end (against Wheel). (Fig. M)
Your Roller Bag is ready to use!
Leg Adjustment
Toggle Button
Auto-Slider®Pull Pin
Snap Clip
Axle
Receiver
Wheel Snap Clip
Wheel Spacer
CARE AND MAINTENANCE
For long lasting durability and the best possible protection for your E-Z UP®Instant Shelter®products, follow these E-Z care and maintenance instructions:
• Use a mild soap (not detergent) and plenty of water for the top cleaning.
• Let the E-Z UP®top and frame dry completely before closing or storing to avoid mildew.
• Frame will operate and look better if occasionally treated with silicone spray, especially before and after use in damp conditions.
Remove excess silicone residue before applying top.
• Use a seam sealer (available at most sporting goods and hardware stores) if top leaks or drips water.
• Slightly tighten bolts if frame becomes loose.
REPLACEMENT PARTS WARRANTY INFORMATION
For all shelter sizes: 800-45-SHADE ezup.com/parts www.ezup.com/warranties
CONDITIONS
This warranty shall be void as to any product that has been altered or modified in any manner. This warranty does not apply to damages caused by wind,
rain, or other forces of nature, not to accidental or deliberate damage of the product, nor to the use of the product that does not conform with the product
instructions. This warranty is provided in lieu of all other warranties, expressed or implied.
WARNING: Keep all flame and heat sources away from all Instant Shelter®fabrics and accessories. These fabrics meet the flammability requirements of
CPAI-84. The fabric may burn if left in continuous contact with any flame source. The application of any foreign substance to the fabric may render the
flame-resistant properties ineffective.
IMPORTANT INFORMATION
READ THIS INFORMATION BEFORE PROCEEDING. IT IS THE USER’S RESPONSIBILITY TO TAKE THE FOLLOWING PRECAUTIONS AT ALL TIMES.
• Always stake or weigh down your E-Z UP®Instant Shelter®product with genuine E-Z UP®accessories. Do not use in any potentially windy or rainy weather.
• Wind and rain can damage the E-Z UP®Instant Shelter®product and also may result in injury to you or others. Therefore, do not rely on your shelter for
protection in heavy or prolonged rain storms.
• The E-Z UP®Instant Shelter®product is designed as a temporary shelter. Do not leave up for extended periods.
• Use caution when handling the E-Z UP®folding frame.
• Avoid pinching hands or fingers as frame opens or closes.
• Do not use shelter in a lightning storm.
• Do not leave your E-Z UP®Instant Shelter®product unattended.
• Do not build fires within shelter enclosure.
© Copyright 2022 International E-Z UP, Inc. USA. All rights reserved.