manuals.online logo
Brands
  1. Home
  2. •
  3. Brands
  4. •
  5. Eagle Health Supplies
  6. •
  7. Mobility Aid
  8. •
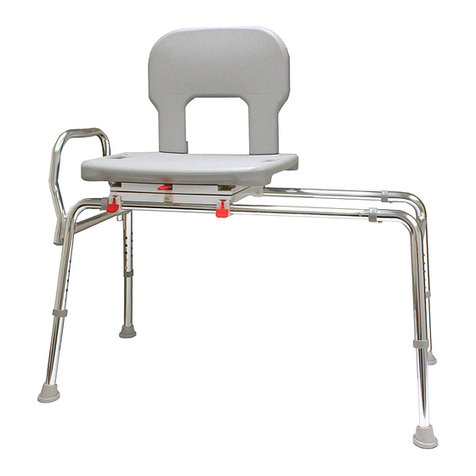
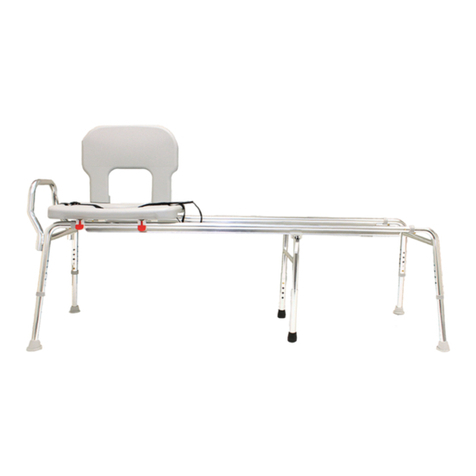
  9. Eagle Health Supplies 77111 User manual

Eagle Health Supplies 77111 User manual

1.
Take the leg frame with the handlebar (Part A), and lay it flat on the ground.
2. Determine which direction you want the seat to face in your bathtub. The leg
frame with the handlebar (Part A) will be the side that goes inside the bathtub.
3. There are two sliding rails (Part C): one rail has 4 brass push
buttons (front rail), and the other rail has 2 brass push
buttons (rear rail).
4. If you prefer to sit facing left (if looking at the tub from
outside), take the rail with 4 push buttons (front rail), and
insert it into tube X (or insert it into tube Y if you want to sit
facing right). Make sure the two smaller push buttons face
forwards (the smaller push buttons are for the sliding rail
locking mechanisms). Make sure the larger button snaps
firmly into the leg frame.
5. Insert the rear sliding rail into the other side of the leg frame
(Part A), making sure the button snaps firmly into place.
6.
Take the seat with the attached
sliding rings (Part D), and align
the sliding rings with the rails,
so that the locking
side of the seat
(the side with the red
tabs) is on the same
rail as the 4 brass
push buttons. Insert
both sliding rails into
the sliding rings
under the seat. Push
in the push buttons
to slide the seat
easily onto the rails.
7.
Take the other leg frame (Part B),
and insert the sliding rails into it.
Make sure the brass
buttons snap firmly
into place.
8.
Take the 4 legs (Part E), and insert
them into the leg frames. Set
the bench height by using the same
button-hole location for each leg.
Make sure the buttons snap firmly
into place. For your safety, adjust
the rubber tips on the legs by
turning
them
outward
for
maximum
floor
contact.
9.
Sit the bench up on the legs. Take
the backrest (Part F), and press
the two brass push buttons on
the frame of the backrest. Insert the
backrest into the tubes underneath
the seat,
and push it
in until
the brass
push
buttons
snap firmly
into place.
Y
X
Thank you for purchasing an Eagle Health Supplies product!
Helpful instructional assembly videos available at www.EagleHealth.com.
If any push button/pin does not completely snap into place
while assembling, or if you feel the bench is not secure,
please do not use the bench, and notify your Authorized Dealer immediately.
To register your product for the Limited One-Year Warranty, please complete and
return the included Warranty Card, or register online at www.EagleHealth.com.
Locking Mechanism
Lock the seat into place by making sure the slide ring snaps firmly onto the
brass push button at the end of the sliding rail (shown below). Release the
locking mechanism by pressing down on the red tab of the locked slide ring.
UNLOCKED LOCKED
Rubber Tips
Be sure the rubber tips are turned outward for maximum floor contact
and stability.
Cleaning
Rinse off the bench with warm water after each use to prevent dirt, soap scum,
and mineral deposits from forming which could affect proper operation. We
recommend regularly cleaning the seat and back with a soft cloth, warm water
and mild soap, or with a soft cloth and any non-bleach cleaner.
Maintenance
Built up soap scum, mineral deposits, or watermarks may cause the brass push
buttons/pins to stick or may cause the seat to not slide smoothly along the rails.
To help, spray lubricant, such as WD-40, on the brass push buttons/pins to
loosen the buttons/pins, or along the sliding rails to maintain a smooth slide.
For Sliding Transfer Bench
77111, 77181, 77191
77211, 77281, 77291
77311, 77381, 77391
For Your Comfort. For Your Safety.
For Your Independence. For YOU.

This manual suits for next models

8

Other Eagle Health Supplies Mobility Aid manuals

Eagle Health Supplies 77111 User manual

Eagle Health Supplies

Eagle Health Supplies 77111 User manual

Eagle Health Supplies 77963 User manual

Eagle Health Supplies

Eagle Health Supplies 77963 User manual

Eagle Health Supplies 74654 User manual

Eagle Health Supplies

Eagle Health Supplies 74654 User manual

Eagle Health Supplies 55111 User manual

Eagle Health Supplies

Eagle Health Supplies 55111 User manual

Popular Mobility Aid manuals by other brands

Drive DeVilbiss GoLite 200 operating instructions

Drive DeVilbiss

Drive DeVilbiss GoLite 200 operating instructions

Invacare 8153-J user manual

Invacare

Invacare 8153-J user manual

Clearwell Mobility Brandon User instructions

Clearwell Mobility

Clearwell Mobility Brandon User instructions

Handicare 1100 user manual

Handicare

Handicare 1100 user manual

NRS Healthcare M11090 User instructions

NRS Healthcare

NRS Healthcare M11090 User instructions

Alber Scalamobil iQ operating instructions

Alber

Alber Scalamobil iQ operating instructions

Ferno CCT-PX user manual

Ferno

Ferno CCT-PX user manual

Medline MDS86835DSHEC User Instructions & Warranty

Medline

Medline MDS86835DSHEC User Instructions & Warranty

Guldmann Twin Turner II user manual

Guldmann

Guldmann Twin Turner II user manual

Ferno 35-ITA user manual

Ferno

Ferno 35-ITA user manual

Drive ROOMBA Operation manual

Drive

Drive ROOMBA Operation manual

Gate Balder operating instructions

Gate

Gate Balder operating instructions

Decon wheel TNS Notos Assembly instructions

Decon wheel

Decon wheel TNS Notos Assembly instructions

ExoAtlet ExoAtlet-II user manual

ExoAtlet

ExoAtlet ExoAtlet-II user manual

Invacare Storm Series parts catalog

Invacare

Invacare Storm Series parts catalog

Rhythm Healthcare B3800F manual

Rhythm Healthcare

Rhythm Healthcare B3800F manual

AMF-BRUNS PROTEKTOR installation manual

AMF-BRUNS

AMF-BRUNS PROTEKTOR installation manual

Drive DeVilbiss Healthcare OTTER Instructions for use

Drive DeVilbiss Healthcare

Drive DeVilbiss Healthcare OTTER Instructions for use

manuals.online logo
manuals.online logoBrands
  • About & Mission
  • Contact us
  • Privacy Policy
  • Terms and Conditions

Copyright 2025 Manuals.Online. All Rights Reserved.