manuals.online logo
Brands
  1. Home
  2. •
  3. Brands
  4. •
  5. EarthQuake
  6. •
  7. Amplifier
  8. •
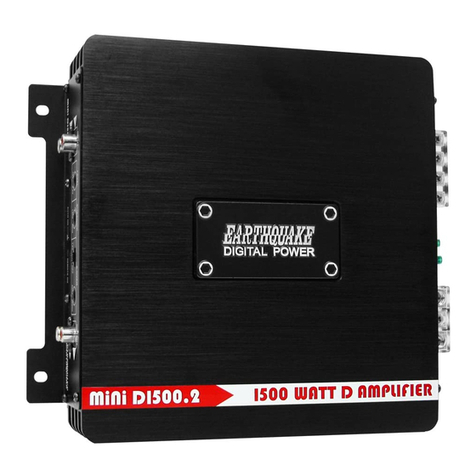
  9. EarthQuake MiNi DI500.2 User manual

EarthQuake MiNi DI500.2 User manual

MiNi-D Stereo Amplifiers
INSTALLATION MANUAL
Earthquake Sound reserves the right to amend the details of the specifications without notice.
© Copyright Earthquake Sound Corporation
Earthquake Europe | Mogensensvej 29 - 5000 Odense C - Denmark
www.earthquakesound.eu | www.earthquakesound.dk
www.earthquakesound.eu | www.earthquakesound.dkSpecifications are subject to change without notice
2
3
Cautions and Advisories .....................................2
Our Thank You.....................................................3
Introduction..........................................................4
Features and Functions.......................................8
Signal Sensing - Auto On/Remote On..................10
Wiring Configurations & Preparations..................12
Specifications.....................................................1Specifications.....................................................14
One (1) Year Warranty Guidelines.....................16
Thank you for choosing Earthquake Sound’s line of
MiNi D
amplifiers, the best way to
enhance your factory mobile audio system. With proper installation and responsible
listening, your amplifier(s) will give you years of near perfect sound reproduction.
WWe strongly recommend you to have your new amplifier(s) installed by an authorized
Earthquake Sound dealer. Installation professionals employed by your dealer have the
correct tools and knowledge to install your amplifier(s) neatly and successfully. Also,
when your new products are installed by an authorized dealer, your products will
include a ONE (1) YEAR LIMITED WARRANTY. If you choose to perform your own
installation, your warranty will be subject to further limitations. Dealer policies on
handling warranty requests may vary from one dealer to the next.
PleasePlease read the warranty information (located at the end of this booklet) in its entirety
and use good judgment when making these vital decisions.
CAUTION:
Earthquake amplifiers are capable of generating high sound pressure levels. You
should exercise caution when operating these amplifier systems. Long term exposures to high levels of
sound pressure will cause permanent damage to your hearing. Sound pressure levels exceeding 85dB
can be dangerous with constant exposure. Set your audio system to a comfortable loudness
level. Earthquake Sound Corporation does not assume liability for damages resulting from the direct use
of Earthquake amplifiers or other Earthquake products and urges users to play their music at moderate
listening levels.
www.earthquakesound.eu | www.earthquakesound.dkSpecifications are subject to change without notice
4
5
is not in the signal path, but works by sensing the electromagnetic field of the
conducting wires. Like OMEGA , the internal communication of MARS is optical rather
than electrical. MARS does not use any relays or other damping-factor reducing
mechanical switches that can wear out or fail over time. Instead, a specially designed
circuit instantly shuts off the output drive. In the event a short-circuit activates the
MARS protection system, it continuously re-scans the output every 10 seconds.
Normal operation automatically resumes as soon as the short-circuit condition is
removed.removed.
MARS (Magnetically Actuated Reanimation
System) is a new type of protection system that
enables the use of all amplifier power
resources without compromising the survival of
the amplifier under catastrophic conditions.
Typical protection systems rely on fuses or
relays that complicate the signal path thus
degrading audio qualitdegrading audio quality. MARS is different as it
OMEGA is tapped into every circuit and transmits instructions in the optical plane with
a speed of 500khz, making it deadly accurate. This enables constant optimization of
power generation and amplification. The best example of efficiency gain due to
OMEGA is the power supply and amplification section, previously operating without
coordination. With OMEGA they operate in continued adaptive synchronization, almost
doubling their output. In addition to adaptive synchronization OMEGA utilizes an
optical multilevel feedback path operating in the digital domain - providing real time
targetingtargeting data, enabling OMEGA to digitally steer voltage and current with absolute
precision.
OMEGA (Optical Multilevel Empirically
Guided Aggregation) is the highly evolved
brain and central nervous system of the MiniD
amplifier. Traditional amplifiers are comprised of
many circuits, operating in blind autonomy.
OMEGA adds intelligence and operational
awareness to these functionsn - transforming
autonomy into unitautonomy into unity.
As the first two channel full-range amplifier of the MiniD series, the MiNi-D1500.2 has
a lot to live up to. While in development its subwoofer-amp brethren has continued
their successful tour of duty setting records and striking fear deep into the heart of the
competition.
TheThe MiNi-D1500.2 continues this legacy of excellence by being the perfect
combination of power and finesse. Delivering enough power to satisfy even the
hungriest full-range speakers all while remaining incredibly composed. The audiophile
attributes are so refined that a panel of audio experts could not pick it out against
esoteric home audio amplifiers.
It was clear that the amplifiers of the future would be smaller, stronger and smarter.
However breaking through the technical barriers on the way would require
considerable innovation. To decrease the size of an amplifier its necessary to increase
efficiency. This requires intelligence and control. In the pursuit of these goals several
new technologies were developed.
Mini-D is a true next-gen amplifier - with features and a level of
design sophistication years beyond the competition. With the
Mini-D, Earthquake once again reasserts absolute dominance
in the field of car amplifier technology.
TTo decisively leapfrog the car amplifier industry, would be no
easy task. Earthquake’s chief engineer, Joseph Sahyoun,
descended into the Earthquake research laboratories
determined to crack the code to the universe and design the
car amplifier of the future!
Smaller - Stronger - Smarter
www.earthquakesound.eu | www.earthquakesound.dkSpecifications are subject to change without notice
6
7
A critical area for efficiency in a Class D amplifier is the speed and precision by which
the transistors can be opened and closed. VE-TAT dramatically increases transistor
velocity, thus eliminating dead-time losses and increasing efficiency. The addition of
VE-TAT makes the Earthquake Gen 3 Enhanced Class D output topology the most
efficient Class D technology on the planet today.
VE-TAT (Velocity Enhancing Transistor
Augmentative Technology ) is an enhanced
transistor dead-time controller. Where OMEGA
is a macro overlay system - VE-TAT works at the
component level.
Real-World Benefits
TheThe real world benefits of these technologies are significant. In comparison to a
traditional Class AB amplifier with an efficiency of 45 percent, the MiniD at 96 percent
will use less than half the power playing at the same volume. Or it will play 3 db louder
with the same amount of power. 3 DB is the same as adding an extra woofer to the
system. With MiniD even a staunch system will be able to operate with just the stock
battery and alternator. As MiniD is very competitively priced against inferior rivals - all
this extra power is basically FREE.
Reclaim your trunk space! The new micro form-factor of the MiniD opens up a new
realm of placement possibilities - Under car seats, inside door or chassis panels. It is
no longer necessary to stuff your trunk with amplifiers to get great sound.
Unprecedented Placement Possibilities
FEATURES
• Clip Suppression Technology. The Mini-D will avoid hard clipping , so in the event
of excessive input the sound will not get harsh.
• Fan free operation. The stellar efficiency of the MiniD negates the need for noisy
fans. Even when driven continuously 2 db into clip the MiniD will not overheat.
•• Variable Subsonic filter option to protect speakers from unwanted low frequency
content.
• Auto ON signal sensing switch. Amplifier can wake up on signal and fall asleep
when not in use.
• RCA line outputs for daisy chaining multiple amplifiers.
• User selectable high & low pass crossovers with variable crossover frequency.
•• MARS status LED. Lights up when MARS has detected an anomaly and when the
unit is initially powered up and going through self analyzing mode.
www.earthquakesound.eu | www.earthquakesound.dkSpecifications are subject to change without notice
8
9
1. POWER LED: When lit up, the amplifier is functioning properly.
2. RCA INPUT: Low level inputs of D1500.2 is 0.2V to 10V RMS.
Be sure to use a HIGH LOW LEVEL adaptor if the head unit has only speaker output.
3. LINE LEVEL CONTROL: Ranged between 0.2V to 10V RMS.
4.4. SUBSONIC FILTER: Used to protect the speakers from harmful low frequencies
and DC Voltage. Note that the subsonic filter only takes effect when the amplifier is in
full range mode.
5. XOVER SWITCH & FREQUENCY ADJUST: Used to adjust the boosted center
frequency.
6. RCA OUTPUT
7.7. SIGNAL SENSING SWITCH: Please refer to page 10-11 for the explanation of this
feature.
8. SPEAKER CONNECTION: Each amplifier has bridgeable speaker outputs. Note
that the minimum impedance in bridged mode is 4-Ohm.
9. GROUND TERMINAL: Connect to vehicle’s chassis/ground using a short 4 gauge
cable (2 feet maximum in length).
10. REMOTE TERMINAL: Connect remote cable to the head unit’s remote terminal. If
multiple amplifiers are installed in the same system, additional relays may be
necessary.
111. +12V BATTERY TERMINAL: Connect to battery positive (+) using a 4 gauge
cable.
12. FUSES: Used as an added protection from damaging excessive current. Be sure
to use the proper fuse rating in your installation. The D1500.2 uses two (2) 30A fuses.
13.13. PROTECTION LED: When lit up upon powering on, the amplifier may be in
self-test mode. If this LED stays on, shut down the amplifier and locate what may have
triggered the amplifier to protection mode. If problem persists, call or e-mail our
technical support team for further assistance.
NOTE: Be sure to follow the wiring preparations/guidelines as listed on the next page
to ensure proper installation.
www.earthquakesound.eu | www.earthquakesound.dkSpecifications are subject to change without notice
10
11
The
MiNi-D1500.2
amplifier features a special AUTO SIGNAL SENSING Feature
which allows installers to turn on the amplifier without using the remote wire.
By simply connecting the RCA or Speaker level inputs to the amplifier, it will turn on au-
tomatically when it senses an audio signal. This feature makes upgrading the
sound system in many of the latest model vehicles easier for installers as it eliminates
the need to connect a remote turn on wire to the amplifier.
Before you proceed, please note the following:
• This feature may not be compatible with all latest model vehicles.
• If your vehicle is going to be parked for over 4 weeks, then you should disconnect the
main fuse of the amplifier.
• Be sure to follow the connection instructions and illustrations shown.
When the switch is on AUTO ON, the amplifier will auto-
matically detect an incoming signal when the stereo is
turned on. If the amplifier does not detect any signal after
20 minutes, the amplifier will automatically turn off.
In case the system goes into protection, simply turn off the
audio source and slide the switch to RESET then back to
AUTO ON position.
When the switch is on REMOTE ON, the amplifier relies
on the remote wire to detect the signal and turn the ampli-
fier on or off.
The proper power and remote wire connection when using the Auto Signal Sensing is
illustrated below.
(!) DO NOT connect the remote wire to the battery wire as this will make the amplifier’s
auto sensing feature not work properly.
(!) DO NOT connect the remote wire to the head unit as this will damage your sound
system.
NOTE: RCA outputs must be inserted in CH1/2 for the amplifier to detect any incoming
signal.
www.earthquakesound.eu | www.earthquakesound.dkSpecifications are subject to change without notice
14
15
.01%
80dB
>110dB
2
1500 Watts
2 x 130 WRMS
2 x 180 WRMS
1 x 360 WRMS
@ 4-Ohm
20 - 500 Hz
N/A
15 - 30 Hz
2 x 30A (included)
MiNi
D1500.2
ALL OUTPUT POWER MEASUREMENTS ARE MADE WITH DUMMY LOAD FOR
THE RMS MEASUREMENTS. DUMMY LOADS ARE HARDER TO DRIVE THAN
SPEAKERS AND DEMAND MORE POWER SUPPLY CURRENT
Power Output
Power Output
Power Output
www.earthquakesound.eu | www.earthquakesound.dkSpecifications are subject to change without notice
16
17

Other EarthQuake Amplifier manuals

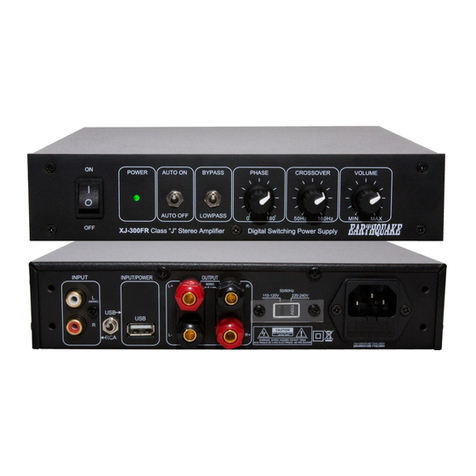
EarthQuake XJ-300ST User manual

EarthQuake

EarthQuake XJ-300ST User manual

EarthQuake XJ-300ST User manual

EarthQuake

EarthQuake XJ-300ST User manual

EarthQuake T1000W/2 User manual

EarthQuake

EarthQuake T1000W/2 User manual

EarthQuake Xtreme 300W.2 User manual

EarthQuake

EarthQuake Xtreme 300W.2 User manual

EarthQuake Cinenova-16 User manual

EarthQuake

EarthQuake Cinenova-16 User manual

EarthQuake XJ-300R User manual

EarthQuake

EarthQuake XJ-300R User manual

EarthQuake XJ-700R User manual

EarthQuake

EarthQuake XJ-700R User manual

EarthQuake Cinenova 7300 User manual

EarthQuake

EarthQuake Cinenova 7300 User manual

EarthQuake Cinenova IR16 User manual

EarthQuake

EarthQuake Cinenova IR16 User manual

EarthQuake PH2000W/D1 User manual

EarthQuake

EarthQuake PH2000W/D1 User manual

EarthQuake mini D Series User manual

EarthQuake

EarthQuake mini D Series User manual

EarthQuake XJ-300 FR User manual

EarthQuake

EarthQuake XJ-300 FR User manual

EarthQuake PH800W/2 User manual

EarthQuake

EarthQuake PH800W/2 User manual

EarthQuake XJ-1000FR User manual

EarthQuake

EarthQuake XJ-1000FR User manual

EarthQuake MiNi D3000.4 User manual

EarthQuake

EarthQuake MiNi D3000.4 User manual

EarthQuake EQ-1000 User manual

EarthQuake

EarthQuake EQ-1000 User manual

EarthQuake Cinenova Grande User manual

EarthQuake

EarthQuake Cinenova Grande User manual

EarthQuake Nova PA-600 Operation manual Quick start guide

EarthQuake

EarthQuake Nova PA-600 Operation manual Quick start guide

EarthQuake XJ-1000FR User manual

EarthQuake

EarthQuake XJ-1000FR User manual

EarthQuake MiNi D3000.4 User manual

EarthQuake

EarthQuake MiNi D3000.4 User manual

EarthQuake XJ-700DSP User manual

EarthQuake

EarthQuake XJ-700DSP User manual

EarthQuake mini D1000 User manual

EarthQuake

EarthQuake mini D1000 User manual

EarthQuake IQ600 User manual

EarthQuake

EarthQuake IQ600 User manual

EarthQuake XJ-300 FR User manual

EarthQuake

EarthQuake XJ-300 FR User manual

Popular Amplifier manuals by other brands

Altec Lansing 9444A POWER AMPLIFIER manual

Altec Lansing

Altec Lansing 9444A POWER AMPLIFIER manual

HyperLink Technologies HyperAmp SE Series quick start guide

HyperLink Technologies

HyperLink Technologies HyperAmp SE Series quick start guide

Sony XM-1002HX operating instructions

Sony

Sony XM-1002HX operating instructions

JBL GX-A604 Service manual

JBL

JBL GX-A604 Service manual

Gold Note IS-10 user manual

Gold Note

Gold Note IS-10 user manual

Marantz 240 Service manual

Marantz

Marantz 240 Service manual

Anfatec eLockIn 203 manual

Anfatec

Anfatec eLockIn 203 manual

Tangent AMP-100 instruction manual

Tangent

Tangent AMP-100 instruction manual

Grandinote Grandinote Supremo user manual

Grandinote

Grandinote Grandinote Supremo user manual

Mark Levinson N380S owner's manual

Mark Levinson

Mark Levinson N380S owner's manual

Avaya HIS user guide

Avaya

Avaya HIS user guide

B&K AV5000 owner's manual

B&K

B&K AV5000 owner's manual

FONESTAR FS-2481E instruction manual

FONESTAR

FONESTAR FS-2481E instruction manual

Texas Instruments TPA6030A4 user guide

Texas Instruments

Texas Instruments TPA6030A4 user guide

Pioneer SA-506 Service manual

Pioneer

Pioneer SA-506 Service manual

Mimitakara BTE B/O quick start guide

Mimitakara

Mimitakara BTE B/O quick start guide

Cambridge Audio 851W user manual

Cambridge Audio

Cambridge Audio 851W user manual

Hifonics ZRX8805 owner's manual

Hifonics

Hifonics ZRX8805 owner's manual

manuals.online logo
manuals.online logoBrands
  • About & Mission
  • Contact us
  • Privacy Policy
  • Terms and Conditions

Copyright 2025 Manuals.Online. All Rights Reserved.