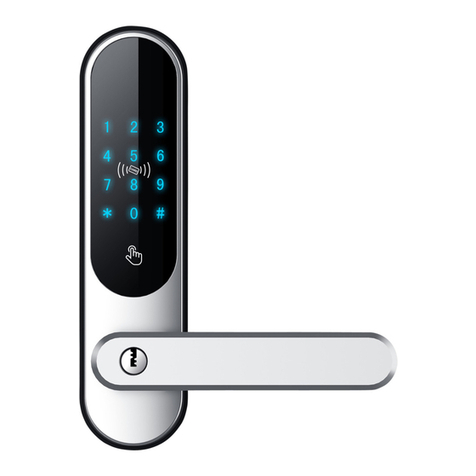
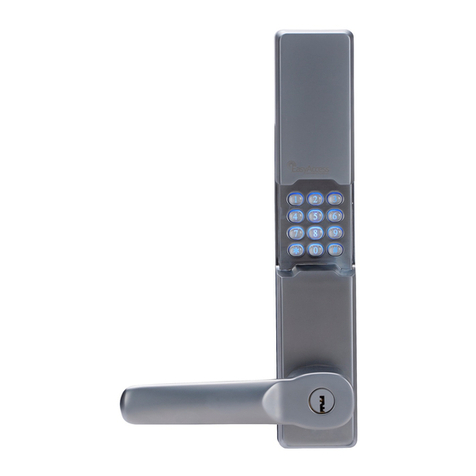
Easy Access Easy-809 User manual

http://www.e2a.net
Easy2Access A/S Easy-809 EU G2 Fingerprint lock
1
Easy-809 EU G2 Manual

http://www.e2a.net
Easy2Access A/S Easy-809 EU G2 Fingerprint lock
2
EU809 User Guide
EU809 PROGRAMMING INSTRUCTIONS
Enrolling Fingerprint Users
Ⅰ
ⅠⅠ
ⅠEnrolling the master Administrator
Press ADD button at the outside unit. When the green LED gives three flashes and one beep is
heard, enrollment process starts. When the red scanner light turns red, rest the finger on the
scanner and hold it. The scanner light will give three flashes. When the scanner light turns off
finally, move the finger away. When one long beep is heard and the green LED turns off, the
master administrator is enrolled successfully. The default User ID for the master administrator is
01.
Ⅱ
ⅡⅡ
ⅡEnrolling Administrator 02
Press ADD button. When one beep is heard, the green LED gives three flashes and the scanner
light turns red, rest the master administrator’s finger on the scanner and move it away when the
scanner light turns off. (If the green LED flashes three times, the mater administrator is verified; if
the red LED flashes, the master administrator is rejected. In this case, please repeat the above
mentioned steps.) Input User ID 02 from the outside keypad. When one beep is heard, the User ID
is entered successfully. Rest the finger on the scanner (scanner light will flash three times) and
move it away when the light turns off finally. When one long beep is heard, the administrator is
enrolled successfully. If three beeps are heard, and the red LED flashes three times, the
administrator enrollment fails.
You can enter User ID 03 directly at the outside unit to continue to enroll Administrator 03 as soon
as Administrator 02 is enrolled.
Ⅲ
ⅢⅢ
ⅢEnrolling general users
Press ADD button. When one beep is heard, the green LED flashes three times and the scanner
light turns red, rest the administrator’s finger on the scanner and move it away when the scanner
light turns off. (If the green LED flashes three times, the administrator is verified; if the red LED
flashes, the administrator is rejected. In this case, please repeat the above mentioned steps.) Input
the User ID, for example, 08 from the outside keypad. When one beep is heard, the User ID is
entered successfully. Rest the finger on the scanner (scanner light will flash three times) and move
it away when the light turns off finally. When one long beep is heard, the user is enrolled
successfully. If three beeps are heard, and the red LED flashes three times, the user enrollment
fails.
Notes:

http://www.e2a.net
Easy2Access A/S Easy-809 EU G2 Fingerprint lock
3
1) During the above operations, whenever the red LED flashes three times, the operation
fails. Please follow the previous steps to try again. If it keeps failing, please change the
fingers and try again.
2) As soon as one user is enrolled, the green LED will keep on for a while (5 seconds). Other
users can be enrolled with no need to have administrators verified again. If you want to quit
from the process, just press any non-numeric button at the outside keypad.
Deleting Fingerprint Users
Press DEL button. When the red LED and the scanner light turn on, rest the administrator’s finger
on the scanner. Move the finger away when the scanner light turns off. (If the green LED flashes
three times, the administration is verified successfully.) Enter the ID number of the User who
should be deleted (for example, if the ID is 08, enter 08). When three beeps are heard and the
green LED flashes three times, User 08 has been deleted successfully. (Other users can be deleted
with no need to restart the process as soon as the first one is deleted.) If the red LED flashes three
times, the deletion fails. Please check the lock and follow the above steps.
Note: As soon as one user is deleted, the red LED will keep on for a while (5 seconds).
Other users can be deleted without the need to have administrators verified
again. If you want to quit from the processes, just press any non-numeric
button at the outside keypad.
Setting PIN codes
Notes:
1) The PIN code can be 10 digits max. and one digit min. It is a code of any
combination of 0 to 9.
2) The lock can have 99 groups of PIN code. All the users can have their own PIN code
under the User ID.
3) The factory-set PIN code is 123.
I. Enrolling the master Administrator PIN code
Enter * (star) + 123 + ADD (red LED flashes one time and green LED flashes three times) + 01
(master Administrator User ID) (green LED flashes one time) + master Administrator PIN
code + * (green LED flashes one time)+ mater Administrator PIN code again + * (star).
For example:
If the master Administrator PIN code which is going to be enrolled is 123456, here is the correct
way to enroll it.
* (star) + 123 + ADD (red LED flashes one time and green LED flashes three times) + 01 (green
LED flashes one time)+ 123456 + * (green LED flashes one time)+ 123456 + *

http://www.e2a.net
Easy2Access A/S Easy-809 EU G2 Fingerprint lock
4
When the red LED flashes one time, the green LED turns on and one long beep is heard, the new
PIN code is enrolled successfully. If the red LED flashes one time following any of the above
operations, the setting fails. Please check it and repeat the previous operation steps.
II. Enrolling Administrator 02 PIN code
Enter * (star) + the master Administrator PIN code + ADD (red LED flashes one time green
LED flashes three times) + 02 (green LED flashes one time) + Administrator 02 PIN code + *
(green LED flashes one time)+ Administrator 02 PIN code again + * (star).
For example:
If the master Administrator PIN code 123456, and Administrator 02 PIN code which is going to be
enrolled is 45678, here is the correct way to enroll it.
* (star) + 123456 + ADD (red LED flashes one time and green LED flashes three times) + 02
(green LED flashes one time)+ 45678 + * (green LED flashes one time)+ 45678 + *
When the red LED flashes one time, the green LED turns on and one long beep is heard, the new
PIN code is enrolled successfully. If the red LED flashes one time following any of the above
operations, the setting fails. Please check it and repeat the previous operation steps.
III. Enrolling User PIN codes
Enter * (star) + Administrator PIN code + ADD (red LED flashes one time green LED flashes
three times) + User ID (green LED flashes one time) + User PIN code + * (green LED flashes
one time)+ User PIN code again + * (star).
For example:
If the Administrator PIN code 123456, the User ID is 08 and the User PIN code which is going to
be enrolled is 32433, here is the correct way to enroll it.
* (star) + 123456 + ADD (red LED flashes one time green LED flashes three times) + 08 (green
LED flashes one time)+ 32433 + * (green LED flashes one time)+ 32433 + *
When the red LED flashes one time, the green LED turns on and one long beep is heard, the new
PIN code is enrolled successfully. If the red LED flashes one time following any of the above
operations, the setting fails. Please check it and repeat the previous operation steps.
Notes:
1) Other PIN codes can be enrolled with no need to restart the process as soon as one PIN
code is enrolled. If you want to quit, just press any non-numeric button at the outside

http://www.e2a.net
Easy2Access A/S Easy-809 EU G2 Fingerprint lock
5
keypad.
2) The PIN codes for User ID 01 and 02 are both administrator PIN codes which are able to
enroll or delete the PIN codes for users.
3) All the PIN codes are individual. No identical PIN codes can be enrolled for different
users.
IV. Changing PIN codes
Enter * (star) + Administrator PIN code + ADD + User ID + New User PIN code + * (star) +
New User PIN code again + *
For example:
If the Administrator PIN code 123456, the User ID is 08 and the new User PIN code which is
going to be enrolled is 85000, here is the correct way to enroll it.
* (star) + 123456 + ADD (red LED flashes one time and green LED flashes three times) + 08
(green LED flashes one time)+ 85000 + * (green LED flashes one time)+ 85000 + *
When the red LED flashes one time, the green LED turns on and one long beep is heard, the User
PIN code is changed successfully. If the red LED flashes one time following any of the above
operations, the setting fails. Please check it and repeat the previous operation steps.
Note:
Other PIN codes can be changed with no need to restart the process as soon as one PIN code
is done. If you want to quit, just press any non-numeric button at the outside keypad.
V. Deleting PIN codes
Enter * (star) + Administrator PIN code + DEL (red LED flashes one time and green LED
flashes three times) + User ID whose PIN code is going to be deleted
For example:
If the Administrator PIN code 123456, the User ID whose PIN code is going to be deleted is 08,
here is the correct way to enroll it.
* (star) + 123456 + DEL (red LED flashes one time and green LED flashes three times) + 08
When the red LED flashes one time, the green LED flashes three times and three beeps are heard,
the User PIN code is deleted successfully. If the red LED flashes one time following any of the
above operations, the deletion fails. Please check it and repeat the previous operation steps.
Note:

http://www.e2a.net
Easy2Access A/S Easy-809 EU G2 Fingerprint lock
6
1) Other PIN codes can be deleted s soon as one PIN code is done. If you want to quit, just
press any non-numeric button at the outside keypad.
2) The PIN codes for Administrator 01 and 02 are Administrator PIN codes. Neither of them
can be deleted individually, but they can be done by resetting the lock. Regarding how to
reset the lock, please contact the local dealer or the manufacturer.
Setting the Matching Mode
There are three choices for how the Polysecu
®
LP808 will verify enrolled users for
access to unlock the door:
•1:N…When this is chosen, all users enrolled at this lock will only need to
match their enrolled Fingerprint or PIN Code to successfully unlock the door.
•1:1…When this is chosen, all users enrolled at this lock must enter their User
ID, then verify their enrolled Fingerprint to successfully unlock the door.
•PIN code & Fingerprint…When this is chosen, all enrolled users at this lock
must enter their PIN codes, then verify their enrolled Fingerprints to
successfully unlock the door.
1. 1:N (one to many)
Enter #3 (green LED flashes one time) + Administrator PIN code + # (red LED flashes one
time and green LED flashes three times) + 0
When the green LED turns on and one long beep is heard, the lock is on 1:N opening mode. If the
red LED flashes three times, the setting fails.
2. 1:1 (one to one)
Enter #3 (green LED flashes one time) + Administrator PIN code + # (red LED flashes one
time and green LED flashes three times) + 1
When the green LED turns on and one long beep is heard, the lock is on 1:1 unlocking mode. If
the red LED flashes three times, the setting fails.
3. PIN code & Fingerprint
Enter #3 (green LED flashes one time) + Administrator PIN code + # (red LED flashes one
time and green LED flashes three times) + 2
When the green LED turns on and one long beep is heard, the lock is on PIN code & Fingerprint

http://www.e2a.net
Easy2Access A/S Easy-809 EU G2 Fingerprint lock
7
unlocking mode. If the red LED flashes three times, the setting fails.
Automatic Locking Mode (ALM) & Temporary Unlocking Mode (TUM) setting
1. Set TUM
Enter #1 (green LED flashes one time) + Administrator PIN code + # (red LED flashes one
time and green LED flashes three times) + 1. When the green LED turns on and one long beep is
heard, the lock is TUM mode.
2. Set ALM
Enter #1 (green LED flashes one time) + Administrator PIN code + # (red LED flashes one
time and green LED flashes three times) + 0. When the green LED turns on and one long beep is
heard, the lock is TUM mode.
Notes:
1). TUM or ALM is effective no matter fingerprint or PIN code is used to unlock the door.
2). The system default mode is ALM.
Anti Malicious Use Function Setting
1. To arm the Anti Malicious Use function
Enter #2 + Administrator PIN code + # (red LED flashes one time and green LED flashes three
times) + 1. When the green LED turns on and one long beep is heard, the Anti Malicious Function
is armed.
2. To disarm the Anti Malicious User function
Enter #2 + Administrator PIN code + # (red LED flashes one time and green LED flashes three
times) + 0. When the green LED turns on and one long beep is heard, the Anti Malicious Function
is disarmed.
Note:
1) When the Anti Malicious User function is armed, the lock will enter the temporary dead
condition if there have 5 continuous opening attempts with fingerprints or PIN codes
happening to the lock.
2) Under this condition, the lock is completely dead no matter any button is entered at the
outside unit.
3) This condition will last 3 minutes once it starts.

http://www.e2a.net
Easy2Access A/S Easy-809 EU G2 Fingerprint lock
8
LP808A OPERATION INSTRUCTIONS
1)
))
)Unlock with fingerprints under 1:N matching mode
Press down on the POWER button at the outside unit. Rest the enrolled user’s finger on the
scanner when it powers on. When one single beep is heard, and the green LED powers on, turn the
knob clockwise to unlock. If three beeps are heard and the red LED flashes, the verification fails
and the access is rejected. In this case, please repeat the above operation steps.
2)
))
)Unlock with PIN codes under 1:N matching mode
Enter the added PIN code at the outside keypad directly, and end up with pressing the # button.
When one single beep is heard and the green LED powers on, turn the knob clockwise to unlock.
If three beeps are heard and the red LED flashes, the verification fails and the access is rejected. In
this case, please repeat the above operation steps.
3)
))
)Unlock with fingerprints under 1:1 matching mode
Enter the User ID at the outside keypad directly, and the POWER button as well. Rest the enrolled
user’s finger corresponding to the User ID on the scanner when it powers on. When one single
beep is heard, and the green LED powers on, turn the knob clockwise to unlock. If three beeps are
heard and the red LED flashes, the verification fails and the access is rejected. In this case, please
repeat the above operation steps.
4)
))
)Unlock with PIN Code + fingerprint
Enter the added PIN code at the outside keypad directly, and the POWER button as well Rest the
enrolled user’s finger corresponding to the User ID on the scanner when it powers on. When one
single beep is heard and the green LED powers on, turn the knob clockwise to unlock. If three
beeps are heard and the red LED flashes, the verification fails and the access is rejected. In this
case, please repeat the above operation steps.
5)
))
)Unlock with the override keys
Insert the key vertically into the keyhole in the outside handle, turn it at 90 degrees clockwise, and
then turn the turning knob to unlock.
EU809 Operations on the Inside Unit
Key IR:
::
:Arming the Infra-Red alarm system
Quick Arming
Press down on Key IR and hold it for 2 seconds until a long beeping is heard and

http://www.e2a.net
Easy2Access A/S Easy-809 EU G2 Fingerprint lock
9
the lock begins to count down for 15 seconds (one beep every two seconds).
Before the down counting finishes, press Key IR again to stop beeping manually,
with the outside turn knob entering into the Unlocking Mode immediately. The
outside turn knob will be locked again in 6 seconds after then and the lock will
send out the arming signal to the Infra-red alarm system.
Normal Arming
Press down on Key IR and hold it for 2 seconds until a long beeping is heard and
the lock begins to count down for 15 seconds (one beep every two seconds).
When the down counting finishes, the outside turn knob will enter into the
Unlocking Mode and be locked again in 3 seconds. After then the lock will send
out the arming signal to the Infra-red alarm system.
Key :
::
:Arming the Non-Infra-red Alarm System
Quick Arming
Press down on Key and hold it for 2 seconds until a long beeping is heard and
the lock begins to count down for 15 seconds (one beep every two seconds).
Before the down counting finishes, press Key again to stop beeping manually,
with the outside turn knob entering into the Unlocking Mode immediately. The
outside turn knob will be locked again in 6 seconds after then and the lock will
send out the arming signal to the Non-Infra-red alarm system.
Normal Arming
Press down on Key and hold it for 2 seconds until a long beeping is heard and
the lock begins to count down for 15 seconds (one beep every two seconds).
When the down counting finishes, the outside turn knob will enter into the
Unlocking Mode and be locked again in 3 seconds. After then the lock will send
out the arming signal to the Non-Infra-red alarm system.

http://www.e2a.net
Easy2Access A/S Easy-809 EU G2 Fingerprint lock
10
Key : Disarming the Alarm system
Press this key and hold it for 2 seconds. When a long beep is heard, the lock has sent
out the disarming signal to the alarm system.
Key R+ Reset Button: Reset the lock
Remove the battery cover and find the small Reset button down in the hole
underneath the battery holder. Press down the Reset button with a long and slim stick
and then press down Key R on the navigation wheel as well. When both the red and
green LED turn on, and two long beeps are heard, the lock has been successfully
reset.
Table of contents
Other Easy Access Door Lock manuals
Popular Door Lock manuals by other brands

Kwikset
Kwikset Camino Pull installation guide

Kaba
Kaba Confidant RFID Kit 2 installation guide

BURG-WACHTER
BURG-WACHTER TSE 5011 Assembly and user's manual

Maco
Maco INSTINCT Important instructions for use

ikonic
ikonic Ashlee Security Set Assembly instruction

Detex
Detex ADVANTEX 82 Series installation instructions