manuals.online logo
Brands
  1. Home
  2. •
  3. Brands
  4. •
  5. EasyGates
  6. •
  7. Safety Equipment
  8. •
  9. EasyGates cb24 User manual

EasyGates cb24 User manual

simple
setup
g
uide
DIPSWITCHES
After all connections have been made, you are now ready to program the gates. First lets start with
setting the correct dipswitches located at the top centre of the control board.
Whilst programming up the ‘Save’ switch should be set to ‘Off’ during this part of the setup.
If your system has a maglock wired in then dipswitch 2 should be set to ‘On’, if not then set this to
‘Off’.
If you have a double gate system, then switch the 3rd dipswitch to ‘Dual mode’. If just using a single
gate motor then switch it to ‘Single’.
If you have any safety edges wired in, then the 4th dipswitch should be set to ‘NC’. If no safety
edges are connected, then switch this to ‘No’.
The nal dipswitch is for the photocells and this should be switched to ‘NC’.
cb
24
Now all the dipswitches have been set, we can set the dials for ‘Force’, ‘Bipart delay’ and
‘Timer to close’. These dials are located in the centre of the bottom half of the board and are
coloured, Red, White and Blue.
The rst dial is labeled ‘Force’
and should be set to around 40%
power (From min to max)
The second is the ‘Bipart delay’
(white), and should be set to the
same setting as ‘Force’.
The 3rd and nal is the ‘Timer
set to close’, and this should be set to off whilst setting up. Note: After setting up, these dials can be
set to suit the application.
CONFIGURE DIALSCHECK WIRING
Now the dipswitches and dials have
been set, we need to check that
there is a link in the control input
‘P10’, between ‘Stop’ and ‘Com’.
We also need to check the ‘Open
photo’ or ‘Close photo’ connections
are not being used and that they are
linked out.
Now check that the radio module is plugged
in correctly at the top of the board.
Next, connect the 2 battery connections at
the bottom right of the board, and the 24VAC
input (2 yellow wires) at the bottom left of
the board.
You should now have a ‘Power’ LED lit and
a ‘Stop’ LED lit, but you should have no con-
stant red LED’s.
(Before any
of the setup is
started, ensure
Power cables
are discon-
nected to begin
with.)
SETTING THE LIMITS
Now if you put your gates in the close position by releasing them, manually moving them closed and
locking them back in, we can set the limits.
For single gates-
Press the learn limit button once. ‘Set open limit’ LED should be ashing. Hold down the right ‘Gate
one’ button until you reach the fully open position you want for your gate. (if you hold this button
down and it doesn’t do anything or tries to close press the button opposite to open the gates). When
the gate is fully opened to your desired range, press the ‘Learn limits’ button once more.
‘Set close limit’ should be ashing. Use the opposite button that you used for opening and hold down
until the gate is closed. Then nally press the ‘Learn limits’ button again. You should now be ready to
operate your gates. You can test this by pressing ‘Single button’.
For Double gates-
Press the learn limit button once. ‘Set open
limit’ LED should be ashing. Hold down
the right ‘Gate one’ button until you reach
the fully open position you want for your
gate. When gate one is open, hold down the
open button for ‘Gate 2’, directly under-
neath it, until it is open. When the gates are
fully opened to your desired range, press the
‘Learn limits’ button once more.
‘Set close limit’ should be ashing. Use the
opposite buttons that you used for opening
and hold down until the gates are closed.
Then nally press the ‘Learn limits’ button
again. You should now be ready to operate
your gates. You can test this by pressing
‘Single button’.
Disclaimer:
Please note this is just a guide and may vary
according to your setup. Please read all
instructions from the manufacturers before
refering to our guides. Easygates Ltd will not
be held responsible for any damage due to
equipment caused due to poor wiring.

Other EasyGates Safety Equipment manuals

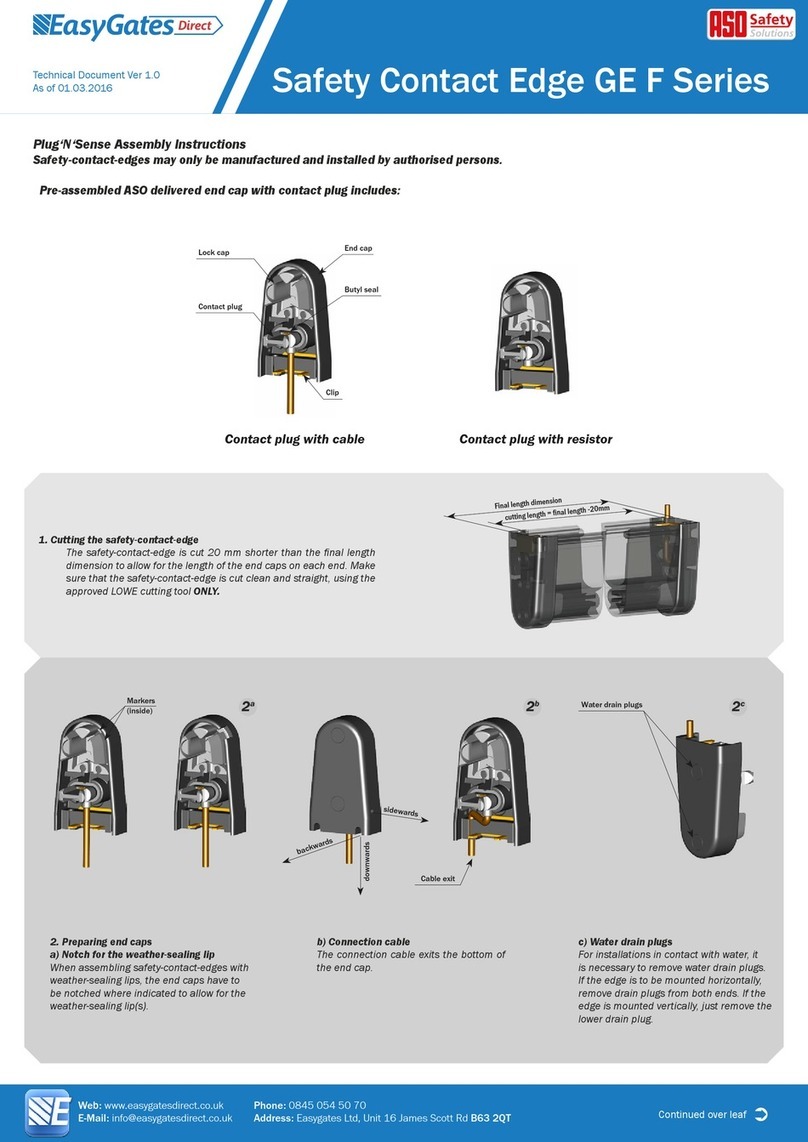
EasyGates ASO Safety Contact Edge GE F Series User manual

EasyGates

EasyGates ASO Safety Contact Edge GE F Series User manual

Popular Safety Equipment manuals by other brands

SKYLOTEC SKYLINE 2.0 Assembly instructions

SKYLOTEC

SKYLOTEC SKYLINE 2.0 Assembly instructions

Singing rock brio quick start guide

Singing rock

Singing rock brio quick start guide

Petzl OMNI TECHNICAL NOTICE

Petzl

Petzl OMNI TECHNICAL NOTICE

Petzl CONGA manual

Petzl

Petzl CONGA manual

Harken Industrial TR31 quick start guide

Harken Industrial

Harken Industrial TR31 quick start guide

FrontLine FD9 quick start guide

FrontLine

FrontLine FD9 quick start guide

Signtex Lighting RAENB-PEN Series Installation instructions and owner's manual

Signtex Lighting

Signtex Lighting RAENB-PEN Series Installation instructions and owner's manual

Guardian Fall Protection 00691 instruction manual

Guardian Fall Protection

Guardian Fall Protection 00691 instruction manual

Dräger PSS 3000 Series Instructions for use

Dräger

Dräger PSS 3000 Series Instructions for use

Otto Bock 17PA1 Series Instructions for use

Otto Bock

Otto Bock 17PA1 Series Instructions for use

Tractel Group FABA-Grip Operating and maintenance instructions

Tractel Group

Tractel Group FABA-Grip Operating and maintenance instructions

KStrong Brute Series User instruction manual

KStrong

KStrong Brute Series User instruction manual

B-Safety BR 71 025 Series operating instructions

B-Safety

B-Safety BR 71 025 Series operating instructions

ClimbTech BWA012N manual

ClimbTech

ClimbTech BWA012N manual

Force P-50 instruction manual

Force

Force P-50 instruction manual

Scott WINTER SPORTS GOGGLES user manual

Scott

Scott WINTER SPORTS GOGGLES user manual

Miller ROPAX User instructions

Miller

Miller ROPAX User instructions

Classic Accessories Over Drive 5th Wheel Hitch Cover instructions

Classic Accessories

Classic Accessories Over Drive 5th Wheel Hitch Cover instructions

manuals.online logo
manuals.online logoBrands
  • About & Mission
  • Contact us
  • Privacy Policy
  • Terms and Conditions

Copyright 2025 Manuals.Online. All Rights Reserved.