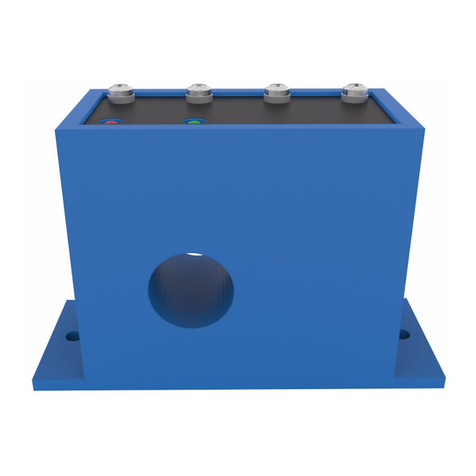
manuals.online logo
Brands
  1. Home
  2. •
  3. Brands
  4. •
  5. Eaton
  6. •
  7. Accessories
  8. •
  9. Eaton CurrentWatch ECSJ Series Manual

Eaton CurrentWatch ECSJ Series Manual

WARNING!
IN ORDER TO AVOID ELECTRIC SHOCK OR OTHER POSSIBLE
INJURY:
• DO NOT USE THIS PRODUCT FOR HUMAN SAFETY
APPLICATIONS. IT WAS NOT DESIGNED, TESTED, OR
RECOMMENDED FOR THIS USE.
• DO NOT USE THIS PRODUCT IN HAZARDOUS LOCATIONS
(E.G. EXPLOSIVE ATMOSPHERES). IT WAS NOT DESIGNED,
TESTED, OR RECOMMENDED FOR THIS USE.
• ENSURE THE PRODUCT IS PROPERLY WIRED FOR THE
APPLICATION. REFER TO THE SPECIFICATIONS AND
WIRING DIAGRAMS IN THIS PUBLICATION.
MODELS COVERED IN THIS PUBLICATION:
Models Covered In This Publication
Catalog Number Description
ECSJ400SC Solid Core, 1-6/6-40/40-175 A Current Ranges, N.O., 1 A @ 240 VAC
ECSJ406SC Solid Core, 1-6/6-40/40-175 A Current Ranges, N.O., 15 A @ 120 VAC
ECSJ401SC Solid Core, 1-6/6-40/40-175 A Current Ranges, N.C., 1 A @ 240 VAC
ECSJ407SC Solid Core, 1-6/6-40/40-175 A Current Ranges, N.C., 15 A @ 120 VAC
ECSJ420SC Solid Core, 1-6/6-40/40-175 A Current Ranges, N.O., 0.15 A @ 30 VDC
ECSJ424SC Solid Core, 1-6/6-40/40-175 A Current Ranges, N.O., 0.15 A @ 30 VDC
ECSJ421SC Solid Core, 1-6/6-40/40-175 A Current Ranges, N.C., 0.15 A @ 30 VAC
ECSJ404SC Solid Core, 1-6/6-40/40-175 A Current Ranges, N.O., 3 A @ 120 VAC
ECSJ405SC Solid Core, 1-6/6-40/40-175 A Current Ranges, N.C., 3 A @ 120 VAC
ECSJ402SP Split Core, 1.75-6/6-40/40-200 A Current Ranges, N.O., 1 A @ 240 VAC
ECSJ403SP Split Core, 1.75-6/6-40/40-200 A Current Ranges, N.C., 1 A @ 240 VAC
ECSJ422SP Split Core, 1.75-6/6-40/40-200 A Current Ranges, N.O., 0.15 A @ 30 VDC
ECSJ423SP Split Core, 1.75-6/6-40/40-200 A Current Ranges, N.O., 0.15 A @ 30 VDC
CurrentWatch™ ECSJ Series Current Sensors
Self-Powered AC Current Sensors with
Jumper Selectable Current Ranges
Instructions Publication P51919 Effective July 2017
Supersedes March 2014
Instruction Leaflet
Montageanweisung
Notice d’installation
Instrucciones de montaje
Istruzioni per il montaggio
安装说明
Инструкция по монтажу
Montagehandleiding
Montagevejledning
Οδηγίες εγκατάστασης
Instruções de montagem
Monteringsanvisning
Asennusohje
Návod k montáži
Paigaldusjuhend
Szerelési utasítás
Montāžas instrukcija
Montavimo instrukcija
Instrukcja montażu
Navodila za montažo
Návod na montáž
Монтажни инструкции
Instrucţiuni de montaj
Upute za montažu
Electric current! Danger to life!
Only skilled or instructed persons may
carry out the following operations.
Lebensgefahr durch elektrischen Strom!
Nur Elektrofachkräfte und elektrotechnisch
unterwiesene Personen dürfen die im Folgenden
beschriebenen Arbeiten ausführen.
Tension électrique dangereuse !
Seules les personnes qualifiées et averties doivent
exécuter les travaux ci-après.
¡Corriente eléctrica! ¡Peligro de muerte!
El trabajo a continuación descrito debe ser realizado
por personas cualificadas y advertidas.
Tensione elettrica: Pericolo di morte!
Solo personeabilitate e qualificate possonoeseguire
le operazioni di seguito riportate.
触电危险!
只允许专业人员和受过专业训练的人员进行下列工作。
Электрический ток! Опасно для жизни!
Только специалисты или проинструктированные
лица могут выполнять следующие операции.
Levensgevaar door elektrische stroom!
Uitsluitend deskundigen in elektriciteit en
elektrotechnisch geïnstrueerde personen is het
toegestaan, de navolgend beschreven
werkzaamheden uit te voeren.
Livsfare på grund af elektrisk strøm!
Kun uddannede el-installatører og personer der
e instruerede i elektrotekniske arbejdsopgaver,
må udføre de nedenfor anførte arbejder.
en
de
fr
es
it
zh
ru
nl
da
Προσοχή, κίνδυνος ηλεκτροπληξίας!
Οι εργασίες που αναφέρονται στη συνέχεια θα
πρέπει να εκτελούνται μόνο από ηλεκτρολόγους
και ηλεκτροτεχνίτες.
Perigo de vida devido a corrente eléctrica!
Apenas electricistas e pessoas com formação
electrotécnica podem executar os trabalhos
que a seguir se descrevem.
Livsfara genom elektrisk ström!
Endast utbildade elektriker och personer som
undervisats i elektroteknik får utföra de arbeten
som beskrivs nedan.
Hengenvaarallinen jännite!
Vain pätevät sähköasentajat ja opastusta saaneet
henkilöt saavat suorittaa seuraavat työt.
Nebezpečí úrazu elektrickým proudem!
Níže uvedené práce smějí provádět pouze
osoby s elektrotechnickým vzděláním.
Eluohtlik! Elektrilöögioht!
Järgnevalt kirjeldatud töid tohib teostada ainult
elektriala spetsialist vői elektrotehnilise
instrueerimise läbinud personal.
Életveszély az elektromos áram révén!
Csak elektromos szakemberek és elektrotechnikában
képzett személyek végezhetik el a következőkben leírt
munkákat.
Elektriskāstrāva apdraud dzīvību!
Tālāk aprakstītos darbus drīkst veikt tikai
elektrospeciālisti un darbam ar elektrotehniskām
iekārtām instruētās personas!
el
pt
sv
fi
cs
et
hu
lv
Pavojus gyvybei dėl elektros srovės!
Tik elektrikai ir elektrotechnikos specialistai gali
atlikti žemiau aprašytus darbus.
Porażenie prądem elektrycznym stanowi
zagrożenie dla życia!
Opisane poniżej prace mogąprzeprowadzaćtylko
wykwalifikowani elektrycy oraz osoby odpowiednio
poinstruowane w zakresie elektrotechniki.
Življenjska nevarnost zaradi
električnega toka!
Spodaj opisana dela smejo izvajati samo
elektrostrokovnjaki in elektrotehnično poučene osebe.
Nebezpečenstvo ohrozenia života
elektrickým prúdom!
Práce, ktoré sú nižšie opísané, smú vykonávat’
iba elektroodborníci a osoby s elektrotechnickým
vzdelaním.
Опасност за живота от електрически ток!
Операциите, описани вследващите раздели,
могат да се извършват само от
специалисти-електротехници иинструктиран
електротехнически персонал.
Atenţie! Pericol electric!
Toate lucrările descrise trebuie efectuate numai
de personal de specialitate calificat şi de persoane
cu cunoştiinţe profunde în electrotehnică.
Opasnost po život uslijed električne struje!
Radove opisane u nastavku smiju obavljati samo
stručni električari i osobe koje su prošle
elektrotehničku obuku.
lt
pl
sl
sk
bg
ro
hr
391000418
Quick Install Guide
The below steps can be followed to quickly install a CurrentWatch
ECSJ Series switch.
1. Run the wire to be monitored through the aperture.
2. Connect output wiring:
a. Use up to 14 AWG copper wires,
b. Ensure load matches the output shown on the switch label.
3. Adjust the setpoint
a. Choose correct range by positioning the range jumper,
Use the potentiometer to adjust the setpoint.
Switching Delay
Trip response time varies from 2.5 seconds to 0.47 seconds depend-
ing on how much over the set point the current rises. The “reset”
time is about the same.
Setpoint Adjustment
The CurrentWatch ECSJ Series features two setpoint adjustment
mechanisms.
• First, select the setpoint range with the range jumper.
• Then, fine tune the setpoint with the four-turn potentiometer (pot).
See the product label for amp ranges and jumper positions.
The four-turn pot is shipped from the factory set fully clock-wise to
the lowest setpoint. Turning the pot counter-clockwise will increase
the setpoint. The pot has a slip-clutch to prevent damage at either
end of its rotation. To determine where the adjustment is, turn the
pot all the way clockwise. This will return it to the minimum setpoint.
Important Setpoint Adjustment Notes
• Output contacts are solid-state. Check output status by applying
the appropriate voltage and load and then reading the voltage
drop across the contacts. An Ohmmeter set on “continuity” will
give misleading results.
• It is recommended the setpoint be adjusted to allow for voltage
variations of 10 to 15 percent.
Typical Adjustment Steps
1. Move the jumper to the desired range. Then, turn the pot to the
minimum setpoint (four turns clockwise).
2. Have normal operating current running through the switch. The
output should be tripped since the pot is at its minimum set-
point. For units with an LED, it should be flashing fast (two to
three times per second).
3. Turn the pot counter-clockwise until the unit un-trips. This is indi-
cated by the slow flashing of the LED (once every two to three
seconds), or by changing of the output switch status.
4. Now turn the pot clockwise slowly until the unit trips again. It is
now set at the current level being monitored.
a. To set underload, turn the pot about 1/8 turn further clock-
wise.
b. To set overload, turn the pot about 1/8 turn further counter-
clockwise.
• For ECSJ421SC models, the LED does not flash. Steady LED-
on indicates contact has been opened.
• ECSJ407SC, ECSJ401SC and ECSJ421SC all provide a solid on
LED to indicate the output has opened. These models are all
normally closed in the front terminal housing.
Introduction
The CurrentWatch™ ECSJ Series current operated switches
provide the same dependable indication of status offered by the
CurrentWatch ECS Series, but with the added benefit of increased
setpoint accuracy.
A choice of three, jumper selectable input ranges allows the ECSJ
Series to be tailored to an application, providing more precise con-
trol through improved setpoint resolution. Self-powering, isolated
solid-state outputs, 1-6 A, 6-40 A and 40-200 A input ranges, and a
choice of split or solid core enclosures are standard.
Eaton’s current sensor family encompasses a broad range of
products for cost-effective monitoring, status, and predictive main-
tenance. Downtime and costly repairs can be avoided by utilizing
Eaton’s products and technologies in your control systems.
Installation
Considerations for all ECSJ
Series models…
• Run wire to be
monitored through the
aperture (opening) in
the switch body.
• These switches can be
located in the same environment as motors,
contactors, heaters, pull-boxes and other electrical enclosures.
• Mounting can be done in any position or hung on a wire.
• The high current (15 A) solid state relay in the ECSJ406SC and
ECSJ407SC models generates heat when the switched circuit
rises over three amps. To dissipate this heat, mount the sensor
on a steel or aluminum surface for at least one square foot (930
cm2). Thermal transfer compound is recommended.
Considerations for ECSJ split-core models…
• To open the switch, press the tab inward (toward the body of the
switch) as shown below.
• After placing the wire in the aperture, press the hinged portion
firmly downward until a click is heard and the tab pops out fully.
• Keep the contact areas of split-core switches clean at all times.
To open:
Press tab inward
towards hinge
Important:
Keep contact areas clean
2EATON www.eaton.com
CurrentWatch™ ECSJ Series Current Sensors
Self-Powered AC Current Sensors with
Jumper Selectable Current Ranges
Instructions Publication P51919
Effective July 2017
Wiring Diagrams
Connect control or monitoring wires to the sensor. Use up to 14
AWG copper wire and tighten terminals to 7 in.-lbs / 0.79 N·m maxi-
mum torque. Be sure the output load does not exceed the switch
rating. The DC output models are polarity sensitive.
CAUTION!
INCANDESCENT LAMPS CAN HAVE “COLD FILAMENT INRUSH” CURRENT
OF UP TO TEN TIMES THEIR RATED AMPERAGE. USE CAUTION WHEN
SWITCHING LAMPS.
Output Diagram
AC, Normally
Open (N.O.)
Models
DC, Normally
Open (N.O.)
Models
Ranges And Maximum Amps
Range
Jumper
Range
Maximum
Amps
Solid
Core Split Core
6 sec. 1 sec.
None 1-6 A 1.75-6 A 400 A 600 A
Mid 6-40 A 6-40 A 500 A 800 A
High 40-175 A 40-200 A 800 A 1,200 A
Troubleshooting
Problem Solution
Switch is
always
tripped.
The jumper may be set in a range that is too low for current being
monitored. Move jumper to the correct range.
The setpoint may be too low. Turn pot counter-clockwise to increase
setpoint.
For DC models only, polarity might be mismatched. Check polarity on
output wiring and correct as needed.
Switch may have been overloaded and contacts are burned out. Check
the output load, remembering to include inrush on inductive loads
(coils, motors, ballasts).
Switch will
not trip.
The jumper may be set in a range that is too high for current being
monitored. Move jumper to the correct range.
The setpoint may be too high. Turn pot counter-clockwise to decrease
setpoint.
The monitored current may be below the minimum required. Loop the
monitored wire several times through the aperture until the “sensed”
current rises above the minimum. The sensed amps equals “actual
amps” multiplied by the “number of loops.” Count loops on the inside
of the aperture.
For split core models, the contact area may be dirty. Open the sensor
and clean the contact area.
AC
Power
AC
Load
Monitored
Wire
Use caution when
switching lamps
(N.O. Model Shown)
DC
Power
DC
Load
Monitored
Wire
Use caution when
switching lamps
(N.O. Model Shown)
Hysteresis
Range
Setting Hysteresis
Low <0.01 A
Mid <0.1 A
High <0.5 A
Specications
AC Models DC Models
Power Supply Self Powered–No Power Supply Needed
Output Isolated Solid State Switch
Output Rating Standard Models: 1.0 A @
240 VAC
Models Ending -04SC/-05SC:
3.0 A @ 120 VAC
Models Ending -06SC/07SC:
15 A @ 120 VAC
10 A @ 240 VAC
Standard Models:
0.15 A @ 30 VDC
ECSJ430SC:
0.15 A @ 30 VDC
Form C SPDT
Off-State Leakage N.O. Models: < 10 µA
N.C. Models: 2.5 mA
N.O. Models: < 10 µA
N.C. Models: 1.4 mA
Response Time 0.47 - 2.5 seconds
Setpoint Range Solid Core Models: 1-6, 6-40, 40-175 A
Split Core Models: 1.75-6, 6-40 and 40-200 A
Hysteresis Low: 6%; Mid: 4%; High: 3%
Overload 1-6 A: 6 sec. @ 400 A; 1 sec. @ 600 A
6-40 A: 6 sec. @ 500 A; 1 sec. @ 800 A
40-175 A: 6 sec. @ 800 A; 1 sec. @ 1,200 A
Isolation Voltage UL Listed to 1,270 VAC, Tested to 5,000 VAC
Frequency Range 6-100 Hz
Sensing Aperture Solid Core, Front Terminal Models: 0.55 in. (14 mm) dia.
Solid Core, Top Terminal Models: 0.74 in. (19 mm) dia.
Split Core Models: 0.85 in. (21.6 mm) sq.
Housing UL94 V0 Flammability Rated
Environmental Operating Temperature: -58 to +122°F (-50 to +50°C)
Approvals UL Listed, E117028
UL Tested to Canadian Safety Standards
CE
RoHs Compliant
(ECSJ404SC and ECSJ405SC Not Listed)
3
EATON www.eaton.com
Instructions Publication P51919
Effective July 2017
CurrentWatch™ ECSJ Series Current Sensors
Self-Powered AC Current Sensors with
Jumper Selectable Current Ranges
Eaton Industries GmbH
Hein-Moeller-Straße 7-11,
53115 Bonn, Germany
Eaton Corporation
W126 N7250 Flint Drive
Menomonee Falls,
WI 53051, USA
Contact your regionalEaton oce for additionaltechnical support
Eatonis a registered trademark of
Eaton Corporation.
All other trademarks are property
of their respective owners.
Americas – Asia Pacic Europe – Middle East – Africa
Eaton Corporation
Electrical Sector – Sensors
+1.800.426.9184
www.eaton.com/sensors
Eaton Industries GmbH
Electrical Sector EMEA
+49(0) 180 5 223822
www.eaton.eu/sensors
© 2017 by Eaton
All Rights Reserved
Printed in USA
Publication No. P51919 / 003
July 2017
CurrentWatch™ ECSJ Series Current Sensors
Self-Powered AC Current Sensors with
Jumper Selectable Current Ranges
Instructions Publication P51919
Effective July 2017
Eaton Industries GmbH
Hein-Moeller-Straße 7-11,
53115 Bonn, Germany
Eaton
W126 N7250 Flint Drive
Menomonee Falls,
WI 53051, USA
Eaton
Electrical Sector – Sensors
+1.800.426.9184
www.eaton.com/sensors
Eaton Industries GmbH
Electrical Sector EMEA
+49 (0) 180 5 223822
www.eaton.eu/sensors
Eaton is a registered trademark.
All other trademarks are property
of their respective owners.
Contact your regional Eaton office for additional technical support
Americas – Asia Pacific Europe – Middle East – Africa

This manual suits for next models

14

Other Eaton Accessories manuals

Eaton EAFR-01 User manual

Eaton

Eaton EAFR-01 User manual

Eaton Crouse-hinds series User manual

Eaton

Eaton Crouse-hinds series User manual

Eaton xComfort CSEZ-01/18 User manual

Eaton

Eaton xComfort CSEZ-01/18 User manual

Eaton E55 Series Manual

Eaton

Eaton E55 Series Manual

Eaton CBMD-02 Series Manual

Eaton

Eaton CBMD-02 Series Manual

Eaton Comet Series Manual

Eaton

Eaton Comet Series Manual

Eaton EX RT PDU User manual

Eaton

Eaton EX RT PDU User manual

Eaton xComfort CBMA-02/01 User manual

Eaton

Eaton xComfort CBMA-02/01 User manual

Eaton Cutler-Hammer iProx Series Instruction manual

Eaton

Eaton Cutler-Hammer iProx Series Instruction manual

Eaton E65 Series Manual

Eaton

Eaton E65 Series Manual

Eaton Cutler Hammer CurrentWatch EGF Series User manual

Eaton

Eaton Cutler Hammer CurrentWatch EGF Series User manual

Eaton CurrentWatch EGFL Series Manual

Eaton

Eaton CurrentWatch EGFL Series Manual

Eaton Magnum PXR ACB Manual

Eaton

Eaton Magnum PXR ACB Manual

Eaton GHG 511 User manual

Eaton

Eaton GHG 511 User manual

Eaton Metalux User manual

Eaton

Eaton Metalux User manual

Eaton CurrentWatch EPRM Series User manual

Eaton

Eaton CurrentWatch EPRM Series User manual

Eaton CurrentWatch EDC Series Manual

Eaton

Eaton CurrentWatch EDC Series Manual

Eaton Series NRX Manual

Eaton

Eaton Series NRX Manual

Eaton E57P Series Manual

Eaton

Eaton E57P Series Manual

Eaton SL Series Manual

Eaton

Eaton SL Series Manual

Eaton xComfort CSEZ-01/14 Quick start guide

Eaton

Eaton xComfort CSEZ-01/14 Quick start guide

Eaton 50 Series User manual

Eaton

Eaton 50 Series User manual

Eaton 450-CSA Manual

Eaton

Eaton 450-CSA Manual

Eaton iProx Series Instruction manual

Eaton

Eaton iProx Series Instruction manual

Popular Accessories manuals by other brands

Dixon Bayco FT390 Series Maintenance & Operating Instructions

Dixon Bayco

Dixon Bayco FT390 Series Maintenance & Operating Instructions

Honeywell LLE Series installation instructions

Honeywell

Honeywell LLE Series installation instructions

Beurer UB 83 Instructions for use

Beurer

Beurer UB 83 Instructions for use

Edimax AI-1001W V2 Quick installation guide

Edimax

Edimax AI-1001W V2 Quick installation guide

Vetus FTLD B installation instructions

Vetus

Vetus FTLD B installation instructions

Knightsbridge TPB14SLED Installation & maintenance manual

Knightsbridge

Knightsbridge TPB14SLED Installation & maintenance manual

Calypso Instruments ULP NMEA 2000 user manual

Calypso Instruments

Calypso Instruments ULP NMEA 2000 user manual

Energizer CONNECT EOX3-1001 quick start guide

Energizer

Energizer CONNECT EOX3-1001 quick start guide

Philips HF3520/70 user manual

Philips

Philips HF3520/70 user manual

jbc STD-A manual

jbc

jbc STD-A manual

Benchmark Scientific Iso-Block BSH6000 Operation manual

Benchmark Scientific

Benchmark Scientific Iso-Block BSH6000 Operation manual

System Sensor 7351A Installation and maintenance instructions

System Sensor

System Sensor 7351A Installation and maintenance instructions

Millefiori LF-MD005 instructions

Millefiori

Millefiori LF-MD005 instructions

Sentera RTK user guide

Sentera

Sentera RTK user guide

Comrex ACCESS 2USB quick start guide

Comrex

Comrex ACCESS 2USB quick start guide

Kyocera Corporate Governance Information sheet

Kyocera

Kyocera Corporate Governance Information sheet

Hudora 76911 INSTRUCTIONS ON ASSEMBLY AND USE

Hudora

Hudora 76911 INSTRUCTIONS ON ASSEMBLY AND USE

LCN LCN 7940-8770 installation instructions

LCN

LCN LCN 7940-8770 installation instructions

manuals.online logo
manuals.online logoBrands
  • About & Mission
  • Contact us
  • Privacy Policy
  • Terms and Conditions

Copyright 2025 Manuals.Online. All Rights Reserved.