manuals.online logo
Brands
  1. Home
  2. •
  3. Brands
  4. •
  5. Eaton
  6. •
  7. Timer
  8. •
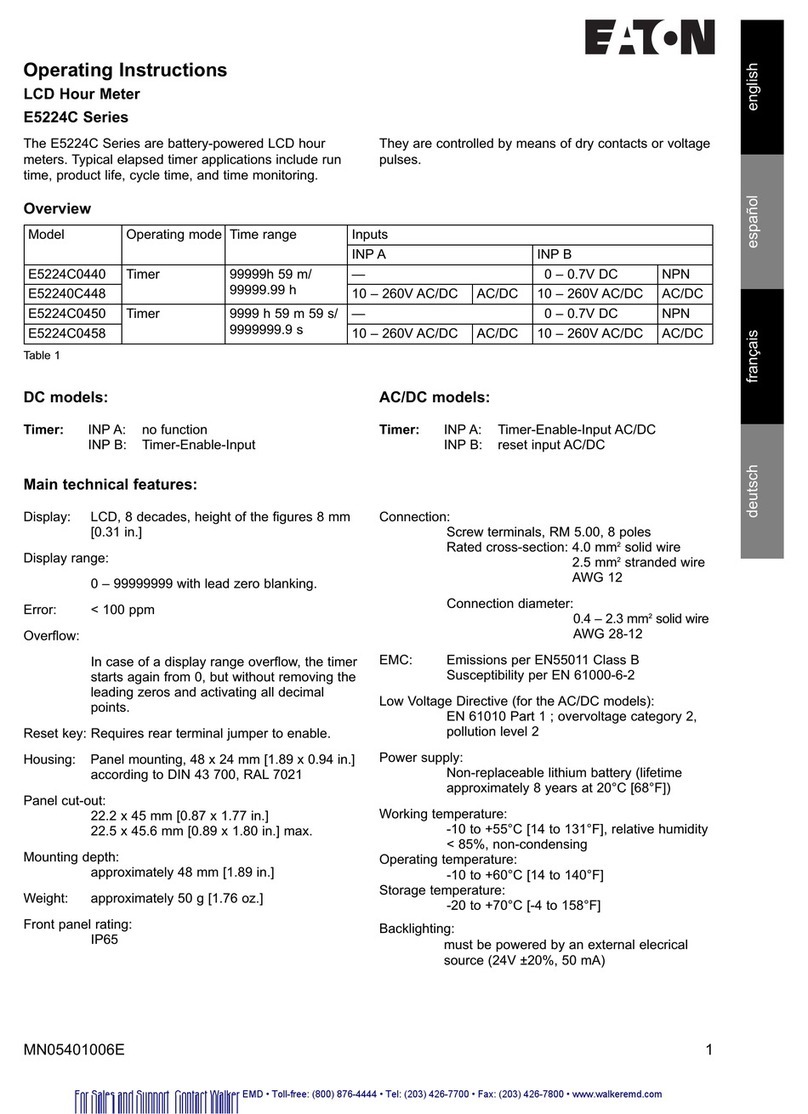
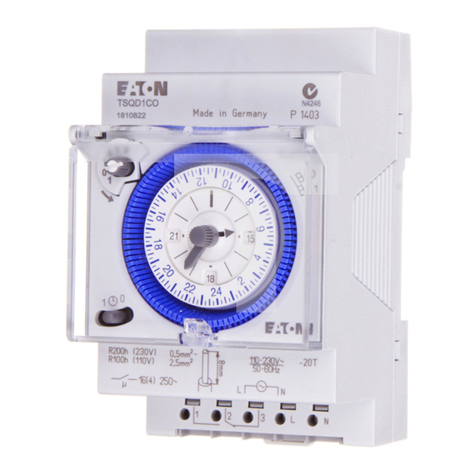
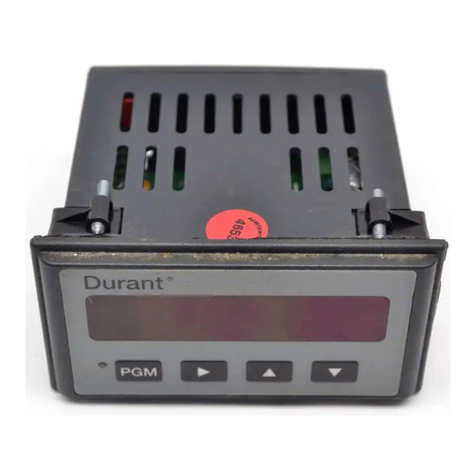
  9. Eaton AT2P Instruction manual

Eaton AT2P Instruction manual

AT2P
Digital Quartz Timer
Specifications
Technical Data
•Direct mounting onto 35mm din rail.
•Optional wall surface-mounting set for 2-3 module
spacing
•BS5584
•Fully programmable 2 channel 2 modules.
•Occupying 2 x 18mm modules
Eaton Electric Limited
Reddings Lane
Birmingham, B11 3EZ
United Kingdom
Tel: 08700 545 333
Fax: 08700 540 333
www.eatonelectrical.com
2007 Eaton Electrical Limited
All rights reserved
May 2007
Ref. Description
AT2P Digital Quartz Timer Fully Programmable , 2 module, 2 channel
Ordering Information
Details
Dimension (H x W x D) mm 45 x 36 x 60
Distributor cut-out mm 46 x 36
Weight g (approx.) 170
Switching capacity at 230 V AC
-ohmic load (VDE, IEC) 16A/250 V AC
-inductive load cos φ0.6 2,5 A/250 V AC
-glow lamp load 1000 W
Switching contacts 1 or 2 changeover
contacts
Running accuracy + 2.5s/day at + 200C
Running reserve type Lithium
Running reserve 150
Shortest switching time 1 minute
Programmable every minute
Memory locations 20/30
Switching pre-selection yes
Hand switch Automatic-pre-selection
Fix ON
Switching state display yes
Block formation of weekdays fixed assignment
Summer/winter time switchover automatic/freely
selectable
Connection type captive +/- screw
terminals
Ambient temperature -250 C … + 550C
Led sealable yes
Putting into operation
The time and date are set at the factory.
The time switch is in Energy-saving
mode. Only the colon flashes.
Press any key: The time switch is activated
Safety instruction:
•When operating the clock safety low voltage, only
safety low voltage may be connected.
•When operating the clock with function low voltage,
mains voltage (230 ~) or function low voltage may
be connected. The connection of safety low voltage
is not admissible in this case.
Connections
Numbered terminals are located at the bottom of the
time switch. These terminals have universal posi/slotted
screws, accept up to 2 x 2.5mm2cable and feature box
clamps with cable protector plates.
Connection details are: For the typical application where
load and timer supply are common, the following
connections are made:
~
M
1 2 3 4 5
4
~
M
1 2
L N
LOAD
3 5
N.B.
(a) On large systems it is necessary to suppress the in-
terface voltage on contactor coils which are switched
directly by the time switch using a suitable varistor or
RC element.
(b) If inductive DC loads are switched, it is necessary to
install a suppressor diode.
(c) Inductive loads, particularly fluorescent lamps, repre-
sent a particularly heavy strain for output contacts.
Here it is necessary to install an isolation relay or a
contactor.
Digital Quartz Timer Product Code: AT2P
3. Control elements
Start program input
Set time,
End program input
Select day(s)
of the week
Delete switching time
Set hours, day, year
Hand switch
Enter pulse/
cycle
Reset
Set minutes, month, year
Summer time/winter time switch over
Res.
Clear
Prog. 1 2
Day h m
+1h
4. Display
Date
Summer time
display
AM/PM
display
DCF 77
reception
Channel 1
Channel 2
Automatic mode
Switching state
1234567 =
Days of the week
1 = Monday
Hours - current time
Calendar day - current
date
-start/end
summer time
Minutes -current time
Month -current date
-start/end
summer time
Fix
Fix
CH1:
CH2:
min sec
date

1 2 3 4 5 6 7
0 0:0 0.
AM
+1h
y
y
Pulse/cycle
Continuous operation
Manual operation
The selections correspond to Central European Time. The time switch offers 3 Operation modes.
The date and time, and also the Operating mode AU are set.
Operating modes:
•AU Automatic summer time controller switchover see 6.2.1
The switchover occurs on the dates defined by the legislator.
•cHA Weekday-related summer time controller switchover, 6.2.2
You enter the start and end dates of summer time which applies to your location/
country.
e.g The first Sunday in April of the current year (start of summer time)
The last Sunday in October of the year (end of summer time)
In the following years, changeover always occurs on the right day of the week in the
correct calendar week.
•no No changeover, see 6.2.3
5. Factory Settings
Digital Quartz Timer Product Code: AT2P
5. Factory Settings cont.
AM/PM switch-over
Switch clock is in current operating mode
1. Press h and keep pressed
2. - Press Res once
- all segments are displayed
- after approx. 1 second the following appears:
AM, 12.00 and 3 (Wednesday)
Operating mode AU is active = works setting
3. Release h
4. Select operating mode as required, see 6.2.1 or 6.2.2 or 6.2.3
5. Set the current time of day and weekday, see 6.1
6. Changing settings
Note:
You can exit/conclude any adjustments, changes you make at any time with
the key
6.1 Time and day of the week
Res.
Clear
Prog. 1 2
Day h m
+1h

1 2 3 4 5 6 7
18:30
+1h
Press the key once
Set the time:
With the h key—hours
With the m key—minutes
Note for weekly time switch:
If the Operating mode
No = no change
- see 6.2.3
Was selected, the day of the
week must now be set.
With the Day 1-Monday
Key select: 2-Tuesday
3-Wednesday
:
7-Sunday
Res.
Clear
Prog. 1 2
Day h m
+1h
Res.
Clear
Prog. 1 2
Day h m
+1h

1 2 3 4 5 6 7
18:30
+1h
Press the key once
The input is ended.
Digital Quartz Timer Product Code: AT2P
14.10.

6.2 Calendar month and day— Select the Operating mode
6.2 AU or 6.2.2 cHA or 6.2.3 no
Res.
Clear
Prog. 1 2
Day h m
+1h

1 2 3 4 5 6 7
18:30
+1h
Press the key once
6.2.1 AU = Automatic changeover
Res.
Clear
Prog. 1 2
Day h m
+1h

1 2 3 4 5 6 7
AU
Press the +1h key 1 once,
AU appears
date
Res.
Clear
Prog. 1 2
Day h m
+1h

1 2 3 4 5 6 7
19 98
Press the Prog key once,
Set the current year:
With the m key or the h key
date
Confirm with the Prog key
Set the current month and day:
With the m key-calendar month
With the h key-calendar day
Note:
With the Prog key (press once or
twice), read the date for the start
e.g. 29.03 and end e.g. 25.10. Of
summer time.
Res.
Clear
Prog. 1 2
Day h m
+1h
1 2 3 4 5 6 7
Res.
Clear
Prog. 1 2
Day h m
+1h
1 2 3 4 5 6 7
29.03.
date

1 2 3 4 5 6 7
25.10.
date

Press the key once.
The input is ended.
Digital Quartz Timer Product Code: AT2P
Res.
Clear
Prog. 1 2
Day h m
+1h

1 2 3 4 5 6 7
18.30
Press the key 1 once
+1h
Res.
Clear
Prog. 1 2
Day h m
+1h

1 2 3 4 5 6 7
c HA
Press the +1h key as often as
necessary until cHA appears
date
Res.
Clear
Prog. 1 2
Day h m
+1h

1 2 3 4 5 6 7
19 97
Press the Prog key once
date
Res.
Clear
Prog. 1 2
Day h m
+1h

1 2 3 4 5 6 7
19 98
Set the current year:
With the m key or the h
date
Res.
Clear
Prog. 1 2
Day h m
+1h
Confirm with the Prog key

Res.
Clear
Prog. 1 2
Day h m
+1h
1 2 3 4 5 6 7
14.10.
Set the current month and day:
With the m key-calendar month
With the h key-calendar day
date
Digital Quartz Timer Product Code: AT2P

Res.
Clear
Prog. 1 2
Day h m
+1h
1 2 3 4 5 6 7
29.03.
Confirm with the Prog key.
The start of summer time is
displayed
date
Set the individual summer time
start:
With the m key-month
With the h key-day

Res.
Clear
Prog. 1 2
Day h m
+1h
1 2 3 4 5 6 7
30.04.
date

Res.
Clear
Prog. 1 2
Day h m
+1h
1 2 3 4 5 6 7
25.10.
Confirm with the Prog key
date

Res.
Clear
Prog. 1 2
Day h m
+1h
1 2 3 4 5 6 7
27.10.
Set individual summer time end:
With the m key-month
With the h key-day
date
Res.
Clear
Prog. 1 2
Day h m
+1h
CH1:

1 2 3 4 5 6 7
18.35
Press the key once.
The input is ended.
+1h
Digital Quartz Timer Product Code: AT2P
6.2.3 no = no changeover-only weekly time switch

Res.
Clear
Prog. 1 2
Day h m
+1h
1 2 3 4 5 6 7
18.30
Press the key once.
+1h

Res.
Clear
Prog. 1 2
Day h m
+1h
1 2 3 4 5 6 7
no
Press the +1h as often as necessary
until no appears.
The time switch operators without a
date!
date

CH1
CH2:
Res.
Clear
Prog. 1 2
Day h m
+1h
1 2 3 4 5 6 7
18.31
Press the key once.
The input is ended.
Note:
Select day of the week see 6.1
+1h
7. Standard switching commands.
You determine the switching times and the switching state of the relevant
switching output (channel.) Symbol: CH1:
CH2:
y
(ON) = Channel 1
(OFF) = Channel 2
These assignments are possible:
•Switching commands only for channel 1
•Switching commands only for channel 2
•The same switching commands for channel 1 and channel 2
(the switching time and switching state are identical)
•The same switching time for channel 1 and channel 2 but
with a different switching state.
Select free memory location:
Press the Prog key as often as
necessary until - -: - - appears.
1 2 3 4 5 6 7
- -:- -
Digital Quartz Timer Product Code: AT2P

CH1
CH2:
Res.
Clear
Prog. 1 2
Day h m
+1h
18.40
Set the switching times:
With the m key-minutes
With the h key-hours
For weekday adjustment, see:
Block formation of weekdays, Point 8.

1 2 3 4 5 6 7

CH1
CH2:
18.40
Res.
Clear
Prog. 1 2
Day h m
+1h

1 2 3 4 5 6 7
y
Set the switching state:
With the key
Note: The switching state for CH1
or CH2 can be deactivated.
No symbol-no switching.
y
(ON) or (OFF)
1 2 3 4 5 6 7
- -:- -
Res.
Clear
Prog. 1 2
Day h m
+1h
Press the Prog key once. The input
has ended. A free memory location is
displayed-for other settings.
CH1
CH2:

Res.
Clear
Prog. 1 2
Day h m
+1h
1 2 3 4 5 6 7
18.40
+1h
y
Press the key once. The input is
ended.
The display shows the current time.
8. Fixed weekday block formation-only weekly time switch.
Defined combinations of weekdays or individual days.
You determine the weekdays for your switching program.
1-Monday, 2-Tuesday, 3-Wednesday…, 7-Sunday
Example: Monday .. Friday (8.00 ON; 22:00 OFF)
1 2 3 4 5 6 7
- -:- -
Res.
Clear
Prog. 1 2
Day h m
+1h
Select free memory location:
Press Prog key as often as necessary
until - -:-- appears
7. Standard switching commands cont.
Digital Quartz Timer Product Code: AT2P
-

CH1
CH2:
Res.
Clear
Prog. 1 2
Day h m
+1h
00.00
Press the Day key once
All 7 days of the week are activated
   
1 2 3 4 5 6 7
Activating/deactivating days of the
week:
Jog the Day key stepwise
Res.
Clear
Prog. 1 2
Day h m
+1h

CH1
CH2:
00.00

1 2 3 4 5 6 7
-
-
-
-
-
-
- --
-
- -
- -
- -
- -
- -
1 2 3 4 5 6 7
Note:
Enter the switching times and the switching state
For the relevant switching state (channel). For
Standard switching commands, see 7.
y
=ON; =OFF
1 2 3 4 5 6 7
- -:- -
Res.
Clear
Prog. 1 2
Day h m
+1h
Press the Prog key once. The input
is ended. A free memory location is
displayed-for further settings.
CH1

Res.
Clear
Prog. 1 2
Day h m
+1h
1 2 3 4 5 6 7
18.00
+1h
y
Press the key 1 once.
The input is ended.
The display shows the current time.
Note:
After the procedures
•Read, modify or delete the time,
date, switching program.
•DCF synchronisation
•Restoration of mains power the
switching state of the time switch
is updated automatically.
8. Fixed weekday block formation-only weekly time switch cont.
Digital Quartz Timer Product Code: AT2P
9. Read-change-delete- reset
•You can read the program contents stepwise
•You can change or overtype the program contents
•You can delete the program contents
•You can delete the date and time
Res.
Clear
Prog. 1 2
Day h m
+1h

CH1
CH2:
11.00
     
1 2 3 4 5 6 7
y
Read:
Press the Prog key Step by step.
Each individual content is displayed
until the end of the program.
Then:
•One free memory location- -:- -
•One digit (free memory locations)
(ex. Fr 10)
Res.
Clear
Prog. 1 2
Day h m
+1h

CH1
CH2:
18.47
     
1 2 3 4 5 6 7
y
Change
Press the Prog key step by step as far as
the switching command/contents which
you want to change/overtype.
Change the switching command/contents:
As described in:
8. Weekday block formation.
Delete-individual switching commands
Press the Prog key step by step as far as
the switching command/contents which
you want to delete.
Press the Clear key once.
This switching command is deleted.
Res.
Clear
Prog. 1 2
Day h m
+1h

CH1
CH2:
00.00
     
1 2 3 4 5 6 7
Fr 28
1 2 3 4 5 6 7 Delete- All switching commands
Press the Prog key as often as
Necessary. Until FRxx appears
Press the Clear key once CL is in
the display.
CL
1 2 3 4 5 6 7
Fr 40
1 2 3 4 5 6 7 Press the Clear key and hold it
down. All memory locations are
deleted!
The display shows the number of the
max. me mory lo cations.
Digital Quartz Timer Product Code: AT2P

Reset: Press the Reset key once
The set date and time are reset.
The factory setting
AU = automatic s/w time changeover is
active (31.12.1997, 00:00)
All segments are visible for approx. 2
seconds, then 00:00 appears.
AU = automatic s/w time changeover
See point 5 and 6 for setting the current
date.
Fix
Fix
CH1:
CH2:
min sec
date

1 2 3 4 5 6 7
0 0:0 0.
AM
+1h
y
y
y
00:00
1 2 3 4 5 6 7
9. Read-change-delete- reset cont.
10. Hand switch
You change-manually-the current
switching state.
However, the individually set switching
program is preserved.
1 for channel 1
2 for channel 2
= automatic = Manual mode FIX = continuous operation
= OFF
= ON
The switching state
corresponds to the
entered program.
y
= ON
= OFF
You change
-m a n u a l l y-
The current switching state.
The next switching command
in the program is
executed automatically again.
y
= FIX = Continuous ON
= FIX = Continuous OFF
You change
-m a n u a l l y-
The current switching state.
Only with the key do you
switch from continuous operation
back to Automatic mode.
Digital Quartz Timer Product Code: AT2P

Other Eaton Timer manuals

Eaton Durant Eclipse Series User manual

Eaton

Eaton Durant Eclipse Series User manual

Eaton TSDW1COA-1 User manual

Eaton

Eaton TSDW1COA-1 User manual

Eaton TRL04 Instruction manual

Eaton

Eaton TRL04 Instruction manual

Eaton TRL04 User manual

Eaton

Eaton TRL04 User manual

Eaton TSSD1CO User manual

Eaton

Eaton TSSD1CO User manual

Eaton TSQW1CO User manual

Eaton

Eaton TSQW1CO User manual

Eaton E5-248-C1420 User manual

Eaton

Eaton E5-248-C1420 User manual

Eaton 3h.508 User manual

Eaton

Eaton 3h.508 User manual

Eaton easy500 Series Owner's manual

Eaton

Eaton easy500 Series Owner's manual

Eaton AT18HM User manual

Eaton

Eaton AT18HM User manual

Popular Timer manuals by other brands

Intermatic DT7 user guide

Intermatic

Intermatic DT7 user guide

Intermatic EJ600 Series Installation and user instructions

Intermatic

Intermatic EJ600 Series Installation and user instructions

Eisco LBTM instruction manual

Eisco

Eisco LBTM instruction manual

Auber Instruments JSL-73C instruction manual

Auber Instruments

Auber Instruments JSL-73C instruction manual

Vemer Memo DW E user manual

Vemer

Vemer Memo DW E user manual

Orbit Controls OC57-T manual

Orbit Controls

Orbit Controls OC57-T manual

Grasslin QEG-2 operating manual

Grasslin

Grasslin QEG-2 operating manual

LIGHTKIWI H5576 quick start guide

LIGHTKIWI

LIGHTKIWI H5576 quick start guide

FDS TBox-Standard Series user manual

FDS

FDS TBox-Standard Series user manual

Aim MyChron Light TG manual

Aim

Aim MyChron Light TG manual

Spirax Sarco BT1050 Installation and maintenance manual

Spirax Sarco

Spirax Sarco BT1050 Installation and maintenance manual

Webasto BlueHeat 1533 operating instructions

Webasto

Webasto BlueHeat 1533 operating instructions

Intermatic DT121C instructions

Intermatic

Intermatic DT121C instructions

Tektronix 7D15 instruction manual

Tektronix

Tektronix 7D15 instruction manual

Learning Resources Time Tracker user guide

Learning Resources

Learning Resources Time Tracker user guide

finder 12.A4 manual

finder

finder 12.A4 manual

Intermatic DT620 Series Installation and user manual

Intermatic

Intermatic DT620 Series Installation and user manual

hager EH010 manual

hager

hager EH010 manual

manuals.online logo
manuals.online logoBrands
  • About & Mission
  • Contact us
  • Privacy Policy
  • Terms and Conditions

Copyright 2025 Manuals.Online. All Rights Reserved.