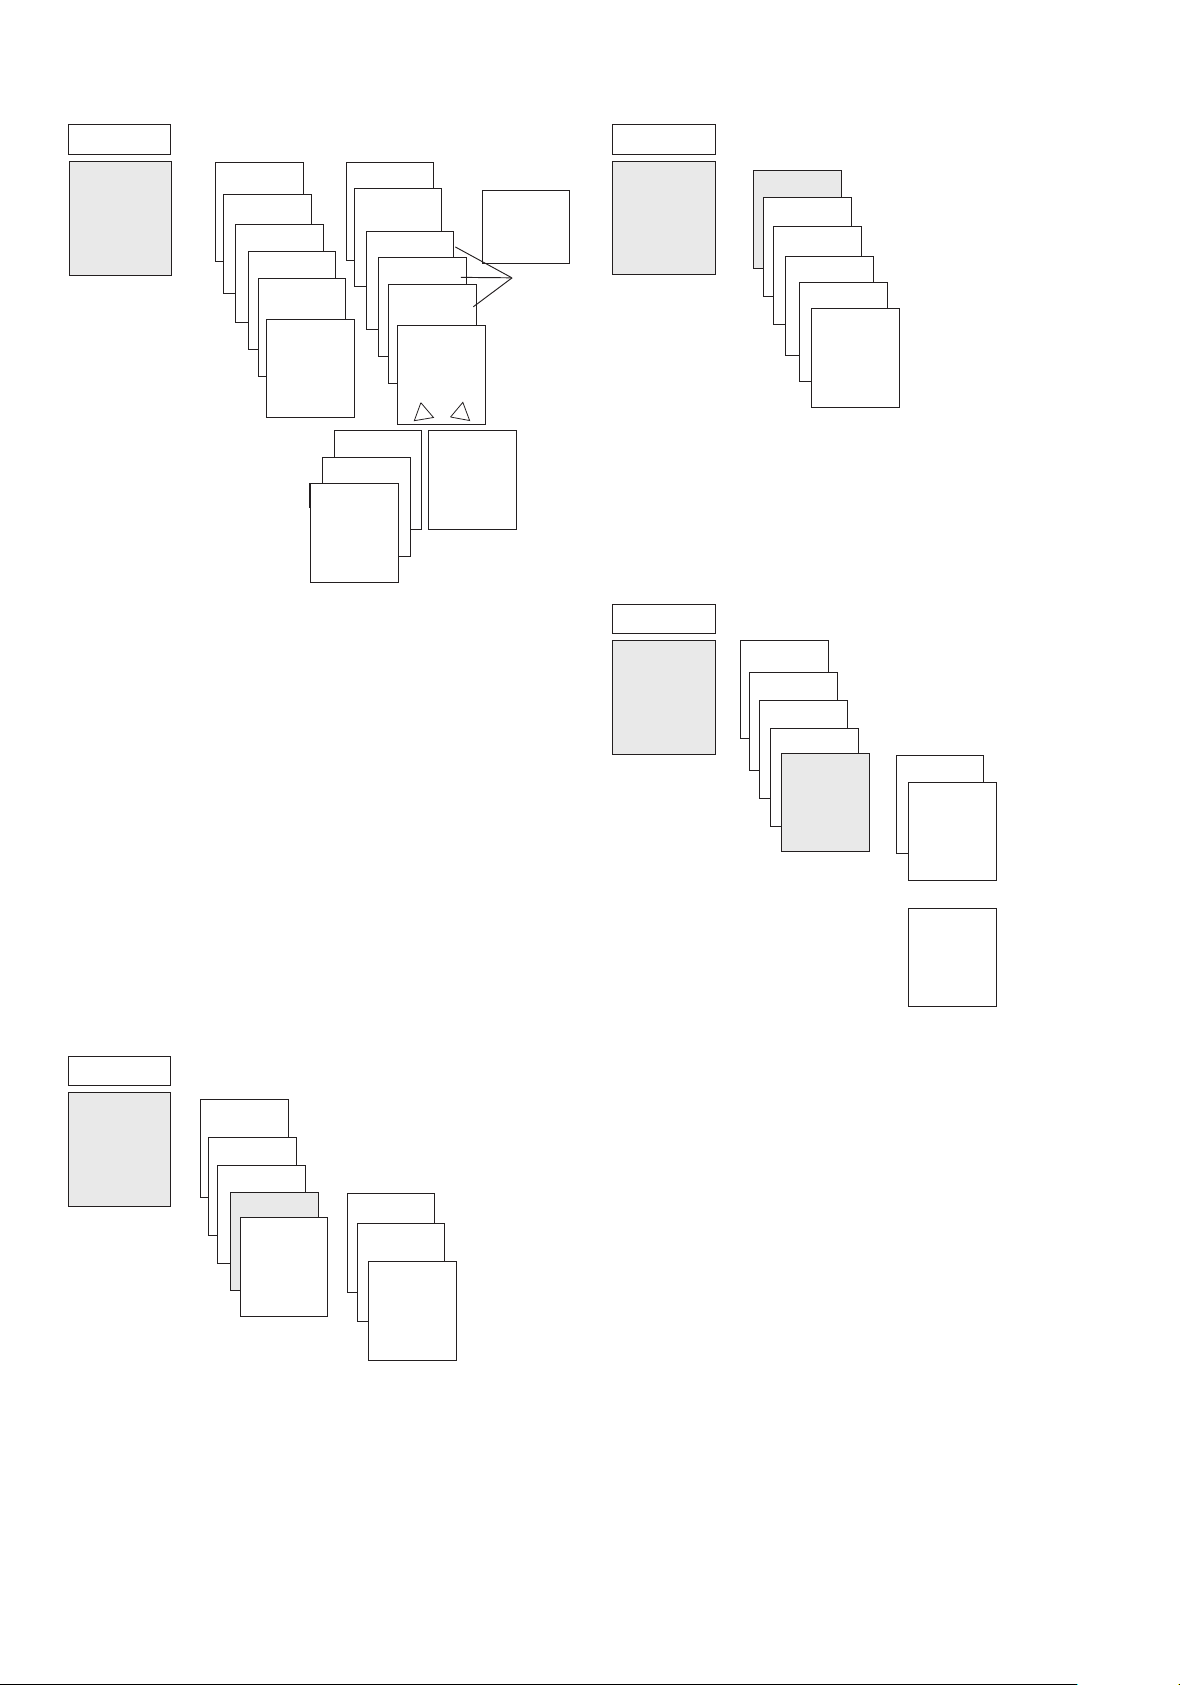
Eaton TSDW1COA-1 User manual

1
TSDW1COA-1
Y7-196850
307541
Astro Time Switch
EN
1. Basic safety information
Danger of death from electric shock or fire!
Installation should only be carried out by a
qualied electrician!
WARNING
•The device is designed for installation on DIN top hat
rails (in accordance with EN 60715)
•Corresponds to type 1 STU nach IEC/EN 60730-2-7
2. Proper use
•The astronomic time switch is used, for instance, for
lighting equipment (roads, external staircases, display
windows, entrances etc.)
•Only for use in closed, dry rooms
!Do not use on safety devices, e.g. escape route doors, re
safety equipment etc.
www.eaton.com/recycling
3. Installation and connection
Time switch installation
click
Test tap
45° cable
Plug-in screwless
terminal NC
contact
DuoFix screwless
terminal
Install on DIN top hat rails (in accordance with EN 60715)
Disconnect power source
Ensure device cannot be switched on
Check absence of voltage
Earth and bypass
Cover or shield any adjacent live components
C1
1 2 3
N
L
L
L N
Correct connection required for smooth zero- cross swit-
ching operation
Connecting the cable
Strip cable to 8 mm (max. 9)
Insert cable in the open DuoFix plug-in terminal at 45°
(2 cables per terminal position possible)
To open the DuoFix plug-in terminal, press screwdriver
downwards
Disconnecting the cable
Use the screwdriver to push the load line connection
opener downwards

2
4. Device description
Display & buttons
06
12 18 24
MENU OK
OKMENU
Date display
Channel status
on = On
off = Off
Programmed
ON times
Days of the week
from 1 to 7
Anzeige der aktiven Tasten
mit den jeweiligen Funktionen
– Activate screen
– Open menu
– Cancel menu
– ESC
(leave menu)
–Store
selection
–Confirm
selection
Selection options
are displayed
Time display
Sunrise/sunset
display
Operating instructions
YES
Confirmation
press
OK
NO
Change/
select
press
u
1. Read text lines
Flashing text/symbol
is a prompt
2. Make a decision
Overview of menu selection
ASTRO
MANUAL
PROGRAM
OPTIONS
TIME/DATE
END
MENU
u u u
ASTRO-
TIMES
TOTAL
SIMULATION
u
uu
OFFSET
ASTRO-
MODE
LOCATION
END
NEW
CHECK
MODIFY
DELETE
TOTAL
SIMULATION
END
TIME
SET DATE
SU-WI
WEEK DAY
FORM DATE
FORM TIME
END
PERM ON
PERM OFF
OVERR ON
TIMER
HOLIDAY
END
OPERATING
HOUR
LCD-ILLUMI-
NATION
LANGUAGE
PIN
FACTORY
SETTINGS
INFO
END

3
Initial start-up
GERMAN
GERMANY STUTTGART
COUNTRY
FORM
DATE
MENU
u u
ENGLISH
SPANISH
u
uu
FRENCH
COORDINATES
SPAIN
ESTONIA
FRANCE
GREAT
BRITAIN
BERLIN YEAR
BREMEN MONTH
DRESDEN
DUESSELDORF
DAY
FORM TIME
HOUR
MINUTE
SUM-WI
EUROPE
28 10 19
ON
9:4046
... ...
...
Set language, country, town/city, date, time as well as
summer/winter time (SO-WI)
Press any button and follow on-screen instructions (see
gure)
5. Settings and functions
ASTRO menu
In the ASTRO menu astro times, complete simulation, offset,
astromode as well as position (location) can be viewed or
changed.
•Astro times
Display of the astro times (including the offsets) for the
current day
•Total simulation
Display of the switching behaviour with a freely selecta-
ble Start date (the holiday program is not displayed)
•Offset
The offset (adjustment value) can be used to shift cal-
culated astro times +/– 120 min. This enables the Astro
switch-on and switch-off times to be adapted to local
circumstances (e.g. mountains, high buildings etc.) or to
personal requirements.
•Astro mode
–Evenings on, mornings off Switches: on at sunset,
switches off at sunset (Example: street lighting)
–Evenings off, mornings on Switches off: at sunset,
switches on at sunrise (Example: terrarium).
–Astro inactive: The astro times are ineffective (timer
function only).
•Position
–Location set by selecting a city or by coordinates
(latitude/longitude, time zone).
Change astro time/position
ASTRO
MENU
u
uu
ASTRO TIMES
TOTAL
SIMULATION
uu
OFFSET
ASTROMODE
LOCATION
END
COUNTRY
COORDINATES
FRANCE
ESPANA
ESTONIA
DEUTSCHLAND
GREAT BRITAIN
AJACCIO
BAYONNE
BORDEAUX
BREST
...
CAEN
...
E.g. enter a different country, a different town/city
Press MENU (see picture).
Setting the offset function
ASTRO
MENU
u
uu
ASTRO TIMES
TOTAL
SIMULAION
OFFSET
ASTROMODE
OFFSET
MORNING
OFFSET
EVENING
OFFSET
MORNING
00:00
OFFSET
EVENING
00:00
...
Press MENU
Select ASTRO and press OK to conrm
Select OFFSET and press OK to conrm
Select OFFSET MORNING or OFFSET EVENING and press OK
to conrm
Set the time and press OK to conrm

4
Set xed switching time
LIGHT ON
MENU
uu
NEW
CHECK
MODIFY
DELETE
TOTAL-
SIMULATION
END
COPY
ADD TUESDAY
SAVE
SAVE
Copy switching to other
days of the week.
The day of the week
always relates to a
start time
PROGRAM
or
Switching
time for
one day
Start
MEM FREE 56
NIGHT BREAK
HOUR
MINUTE
MONDAY
DURATION
UNTIL
LA switching time always consists of a start time and an
end time (LASTS UNTIL). e.g. night switch-off on Monday
23:00 – 05:00 hrs
LThere are 56 memory cells available
Press MENU
Select PROGRAM and press OK to conrm
Select NEW and press OK to conrm
Select NIGHT SWITCH OFF or DAY SWITCH ON and press OK
to conrm
Set selected switching times (hours, minutes, day) and
press OK to conrm
Select COPY or SAVE
To save press u and press OK to conrm
To copy press OK
Setting summer/winter time
TIME/DATE
MENU
u
u
TIME
DATE
OFFSET
SU-WI
WEEK DAY
SU-WI EUROPA
SU-WI EUROPE
WEST
SU-WI EUROPE
EAST
...
Press MENU
Select TIME/DAT and press OK to conrm
Select SO-WI and press OK to conrm
Select region for the SO-WI time and press OK to conrm
Switch Permanent ON / OFF
MANUAL
MENU
uPERM ON
PERM OFF
OVERRI ON
TIMER
HOLIDAY
END
Press MENU
Select MANUAL and press OK to conrm
Select PERMANENT ON or PERMANENT OFF and press OK to
conrm
Setting holiday function
MANUAL
MENU
u
u
PERM ON
PERM OFF
OVERRI ON
TIMER
HOLIDAY ON
BEGIN HOLIDAY
END HOLIDAY
... ...
Press MENU
Select MANUAL and press OK to conrm
Select HOLIDAY and press OK to conrm
Select ON and press OK to conrm
Select START HOLIDAY and press OK to conrm
Enter YEAR, MONTH, DAY, HOUR and press OK to conrm
Select END HOLIDAY and press OK to conrm
Enter YEAR, MONTH, DAY, HOUR and press OK to conrm
Activate PIN-Code
The PIN code is set in OPTIONS via the menu.
LIf you have lost the PIN, please call the Eaton Hotline.
LHave the serial number ready!

5
OPTIONS
MENU
u
u
u
u
OPERATING
HOUR
EXT INPUT
LANGAGE
PIN
FACTORY
SETTINGS
INFO
NO PIN
WITH PIN CURRENT PIN
NEW PIN
00:00
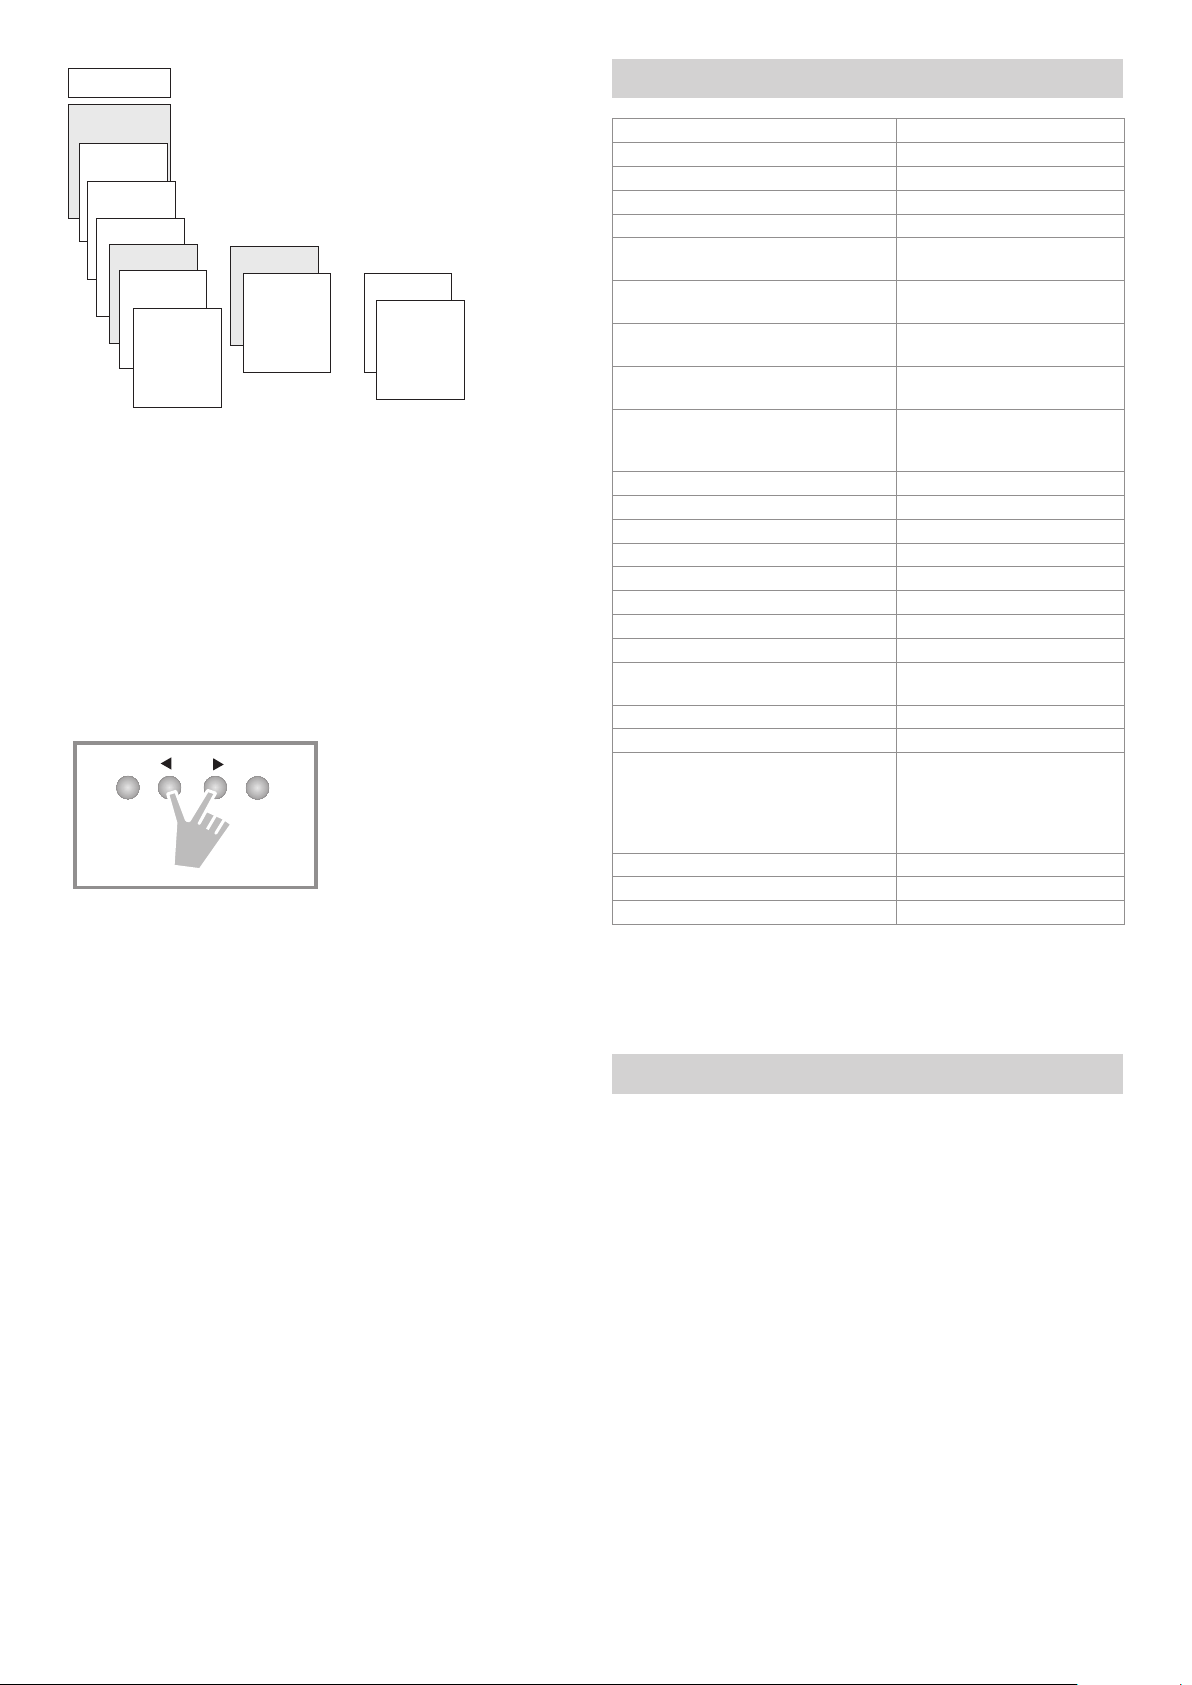
Setting manual or permanent switching
Manual and permanent switching can be set using the menu
in MANUAL or (in the automatic screen) by key combination
(see g).
•Manual control
Reversing the channel status to the next automatic or
programmed switching.
•Permanent switching
As long as a permanent switching (on or off) is activated,
the programmed switching times are ineffective.
ok
Activate manual switching
Briey press both keys simultaneously
Activate permanent switching
Simultaneously press both keys for 2 seconds
Cancelling manual/permanent switching
Press both keys simultaneously
Operating hour counter
The operating hours of the channel (relay) are displayed and
deleted in the OPTIONS menu. If the number of operating
hours exceeds the value set in the Service menu, SERVICE will
appear in the display.
Example: Replace a lamp after 5,000 h.
Delete operating hours or set a higher value in Service (e.g.
to 10,000 h)
Resetting the time switch
Press the 4 buttons simultaneously.
▻You can choose between RETAIN PROGRAM and DELETE
PROGRAM.
6. Technical Data
Operating voltage: 230 V AC +10 % /–15 %
Frequency: 50–60 Hz
Standby: 0,4 W
Max switching capacity.: 16 A (at 250 V AC, cos ϕ= 1)
Switching capacity: 10 A (at 250 V AC, cos ϕ= 0,6)
Min. switching capacity: 10 mA/230 V AC
100 mA/24 V AC/DC
Switch output: switching of any phase is
permitted
TSDW1COA-1: suitable for switching SELV (Safe
Extra-Low Voltage)
Protection rating: IP 20 in accordance with
EN 60529
Protection class: II in accordance with EN
60730-1 subject to designated
installation
Operating temperature: –30 °C … +60 °C
Power reserve: 10 years at +20 °C
Switching accuracy: accurate to the second
Time accuracy (typical) ± 0,25 s/day (25 °C)
Rated impulse voltage 4 kV
Pollution degree 2
Software class: A
Contact two way switch, contact µ
Max. switching cycles with 16 A resistive
load
50 000
Incandescent lamp load 2600 W
Halogen lamp load 2600 W
Fluorescent lamps (LLB low-loss bal-
lasts):
uncorrected
series-corrected
parallel-corrected
2600 VA
2600 VA
1300 VA (130 µF)
Compact uorescent lamps (EB) 1100 W
LED-lamps (< 2 W) 50 W
LED-lamps (> 2 W) 600 W
LThe time switch display is only fully functional at tempera-
tures from +5 °C - +55 °C.
7. Contact
Eaton Industries (Austria) GmbH
Eugenia 1
A-3943 Schrems
Austria
Technical Support Center
Table of contents
Other Eaton Timer manuals

Eaton
Eaton TRL04 User manual

Eaton
Eaton E5-248-C1420 User manual

Eaton
Eaton Durant Eclipse Series User manual

Eaton
Eaton AT2P Instruction manual

Eaton
Eaton AT18HM User manual

Eaton
Eaton TSQW1CO User manual

Eaton
Eaton TSSD1CO User manual

Eaton
Eaton TRL04 Instruction manual

Eaton
Eaton easy500 Series Owner's manual

Eaton
Eaton 3h.508 User manual
Popular Timer manuals by other brands

Utilitech
Utilitech UTTNOCD2 installation instructions

Tork
Tork E502T instructions

KingShield
KingShield T80-C Installation & operating instructions

GIZMO ENGINEERING
GIZMO ENGINEERING T4 instructions

Digi Sport Instruments
Digi Sport Instruments DT710 manual

Dimplex
Dimplex PX01001 Installation and operating instructions