eBike Forme User manual


CONTENTS
Declaration Of Conformity
2
Contact Details
3
Intended Use
4
Personal Safety
5
A note on luggage racks
6
Before Your First Ride
7
Standover height
7
Saddle position
7
Handlebar adjustment
9
Basic operation
9
Brakes
10
Gears
10
Before every ride
11
Maintenance
13
Electrical care and maintenance
13
Batteries And Charging
14
Handling
15
Storage
15
Maintenance and service
16
Disposal
16
Controller Operation
17
Bosch
17
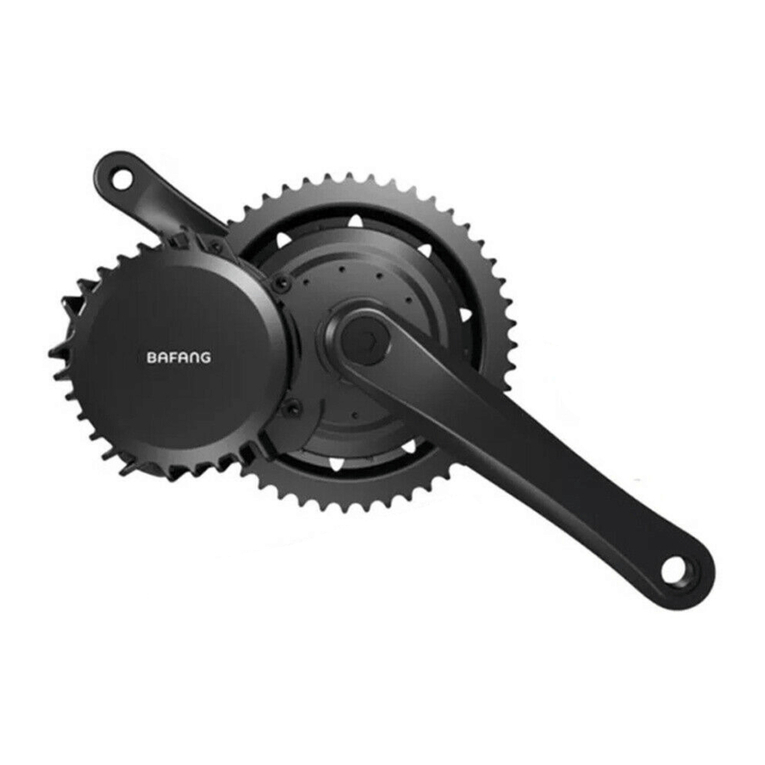
Bafang
24
Folding Bike Instructions
25
Limited Lifetime warranty
26
F O R M E B I K E S . C O . U K
1


DECLARATION OF CONFORMITY
We Moore Large & Co. Ltd Declare that the following bicycles:
FOR1713
FORME BUXTON 2 E-BIKE 18"
5013995435394
FOR1714
FORME BUXTON 1 E-BIKE BOSCH 19"
5013995435400
FOR1715
FORME BUXTON 1 E-BIKE BOSCH 21"
5013995435417
FOR1716
FORME BUXTON 1 FE E-BIKE BOSCH 17"
5013995435424
FOR1717
FORME BUXTON 1 FE E-BIKE BOSCH 19"
5013995435431
FOR1718
FORME BUXTON FOLDER E-BIKE 18"
5013995435448
CONFORM TO THE FOLLOWING GENERAL REGULATIONS AND DIRECTIVES:
General Product Safety Regulations 2005
Regulation 1907/2006 on the Registration, Evaluation, Authorisation and Restriction of Chemicals
(REACH)
Directive 2006/95/EC concerning Electrical Equipment designed for use within certain limits.
(Low Voltage Directive)
Directive 2004/108/EC on Electromagnetic compatibility. (Electro Magnetic Compatibility)
Directive 2011/65/EC on the restriction of the use of certain hazardous substances in electrical and
electronic equipment (RoHS)
Directive 2006/42/EC on machinery
To determine conformity, the following standards are applied:
EN 15194:2009+A1:2011
Cycles. Electrically power assisted cycles. EPAC Bicycles
ISO 4210-2:2014
Cycles -- Safety requirements for bicycles
0B
EN 60335-
1:2012+A11:2014
6B
Household and similar electrical appliances. Safety. General requirements
1B
EN 14764:2005
7B
City and trekking bicycles. Safety requirements and test methods
EN 61000-3-2:2014
8B
Electromagnetic compatibility (EMC). Limits. Limits for harmonic current
emissions
EN 61000-3-3:2008
9B
Electromagnetic compatibility (EMC). Limits. Limitation of voltage
changes, voltage fluctuations and flicker
2B
EN 55014-1:2006+A2:2011
10B
Electromagnetic compatibility. Requirements for household appliances,
electric tools and similar apparatus. Emission
3B
EN 55014-2:2015
11B
Electromagnetic compatibility. Requirements for household appliances,
electric tools and similar apparatus. Immunity.
4B
EN 60335-2-
29:2004+A2:2010
12B
Household and similar electrical appliances. Safety. Particular
requirements for battery chargers
5B
EN 62321:2009
Electrotechnical products. Determination of levels of six regulated
substances
ALL TECHNICAL FILES ARE HELD AT: Grampian Buildings
Sinfin Lane Industrial Estate,
Sinfin Lane
Derby DE24 9GL
Kristian Rigby
Technical Manager 3RD April 2017
F O R M E B I K E S . C O . U K
2

CONTACT
Postal address
Moore Large & Co Ltd
Sinfin Lane Industrial Estate
Sinfin Lane
Derby DE24 9GL
United Kingdom
Consumer website
http://www.formebikes.co.uk/
Customer Service
Monday to Friday from 9:00 AM to 5:30 PM
techsupport@formebikes.co.uk
telephone: 01332 274 242
Thank you for choosing a Forme e-bike.
Our electrically assisted pedal cycle will give you a great deal of pleasure and enjoyment when
riding due to its dynamic driving properties.
This instruction manual contains a great deal of important and detailed information on the
proper use of the drive system, its care and maintenance and also its technology.
Please take the time to read it through thoroughly.
Your Forme e-bike will be given to you already fully assembled and ready for use by your bicycle
dealer. If that should not be the case, then please contact the place of purchase. A retailer’s
failure to properly check and set-up your bike will invalidate any manufacturer’s warranty so it is
important that you ensure this is rectified to your satisfaction immediately.
If you have any questions that are not covered in this manual, then please contact your bicycle
dealer.
Please keep this manual in a safe place to answer any questions that might crop up later. Please
also make this instruction manual available if you lend or pass on your e-bike to someone else.
IMPORTANT NOTICE
Read this manual before taking your first ride on your bicycle and keep it handy for future
reference. It has been written to help maximise your safety, comfort and enjoyment whilst
cycling. It is important that you understand your bicycle’s operations, limits and features to
ensure you enjoy a lifetime of safe cycling from the very first ride.
This Manual contains several “Warnings” and “Cautions” concerning the consequences of failure
to maintain or inspect your bicycle and of failure to follow safe cycling practices. Many of these
say you may lose control and fall. As any fall can result in serious injury or even death, we do not
always repeat the Warning of possible injury or death.
Because it is impossible to anticipate every situation or condition which can occur while riding,
this Manual makes no representation about the safe use of the bicycle under all conditions.
There are risks associated with the use of any bicycle which cannot be predicted or avoided, and
which are the sole responsibility of the ride r. If you are unsure of any aspect of these Warnings,
you should consult a qualified bicycle technician before using this cycle.
Warning: As with all mechanical components, the bicycle is subjected to wear and high stresses.
Different materials and components can react to wear or stress fatigue in different ways. If the
design life of a component has been exceeded, it can suddenly fail, possibly causing injuries to
F O R M E B I K E S . C O . U K
3

the rider. Any form of crack, scratch or colour change in highly stressed areas indicate that the
life of the component has been reached and it should be replaced.
We may refer you to separate suppliers’ owner manuals and any other supplements for operation
and maintenance of certain components. These manuals should be included with your bicycle. If
by chance they are not, you can look these manuals up on the internet or, alternatively consult
any authorised retailer. If you should encounter any issues with your bicycle that aren’t covered
in this manual, again, please contact your nearest authorised retailer. As your number one
resource, your local independent bicycle shop can answer questions, perform required
maintenance and recommend the best equipment & gear to complement your ride. A list of
authorised dealers is available online at www.todayscyclist.co.uk/
We cannot teach you everything you need to know to properly inspect and service your bicycle;
and that is why we repeatedly urge you to take your bicycle to your dealer for professional care
and attention.
Warning: Frequent inspection of your bike is important to your safety. Follow the Mechanical
Safety Check of this Manual before every ride. Periodic, more detailed inspection of your bicycle
is important. How often this more detailed inspection is needed depends upon you.
INTENDED USE OF YOUR CYCLE
Warning: Understand your bike and its intended use. Choosing the wrong bicycle for
your purpose can be hazardous. Using your bike the wrong way is dangerous.
No one type of bicycle is suited for all purposes. There are many types of bicycles and many
variations within each type and nothing lasts forever, including your bike.
When the useful life of your bike or its components is over, continued use is hazardous.
Every bicycle and its component parts have a finite, limited useful life. The length of that life will
vary with the construction and materials used in the frame and components; the maintenance
and care the frame and components receive over their life; and the type and amount of use to
which the frame and components are subjected. Use in competitive events, trick riding, ramp
riding, jumping, aggressive riding, riding on severe terrain, riding in severe climates, riding with
heavy loads, commercial activities and other types of non-standard use can dramatically shorten
the life of the frame and components. Any one or a combination of these conditions may result in
an unpredictable failure.
Like all cycles, this bicycle must conform to legislative requirements.
The legal requirements set out below are applicable to the bike:
•The motor may only be used to assist pedalling, i.e. it must only “help” when the
cyclist applies effort to the pedals him or herself.
•The average motor power must not exceed 250 W.
•As speed increases motor power must drop progressively.
•The motor must cease to assist pedalling (stop) at 25 km/h (15.5mph)
•Only riders aged 14 or over may use a electric bicycle on a public road.
F O R M E B I K E S . C O . U K
4

Youshould have your bicycle and its components checked periodically by your dealer for
indicators of stress and/or potential failure, including cracks, deformation, corrosion, paint
peeling, dents, and any other indicators of potential problems, inappropriate use or abuse. These
are important safety checks and very important to help prevent accidents, bodily injury to the
rider and shortened product life.
YOUR FORME E-BIKE IS INTENDED:
Forme e-bikes are designed for exclusive use on smooth paved roads, gravel or dirt roads that
are in good condition, and bike paths only.
YOUR FORME E-BIKE IS NOT INTENDED:
For any kind of off-road, mountain bike, cyclocross, touring or any kind of jumping.
We cannot teach you everything you need to know to properly inspect and service your bicycle;
and that is why we repeatedly urge you to take your bicycle to your dealer for professional care
and attention.
Warning: Frequent inspection of your bike is important to your safety. Follow the Mechanical
Safety Check of this Manual before every ride.
Periodic, more detailed inspection of your bicycle is important. How often this more detailed
inspection is needed depends upon you. You, the rider/owner, have control and knowledge of
how often you use your bike, how hard you use it and where you use it. Because your dealer
cannot track your use, you must take responsibility for periodically bringing your bike to your
dealer for inspection and service. Your dealer will help you decide what frequency of inspection
and service is appropriate for how and where you use your bike.
Any impact can weaken your e-bike
If you have a major impact, inspect your bicycle thoroughly and repair any damage before you
ride it again. A major impact is anything that causes you to fall from your bike. If you are not sure
how to do a thorough inspection, take your bicycle to your dealer for service. A minor impact,
where you hit an obstacle without falling from your bike, can still place high stresses on your
bicycle. If, after a minor impact, your bicycle behaves in an unusual manner or you hear an
unusual noise, immediately stop the bicycle and identify the problem. Always inspect the bicycle
thoroughly and repair any problem before riding the bicycle again
Warning: Do not ride a bicycle or component with any crack, bulge or dent, even a small one.
Riding a cracked frame, fork or component could lead to complete failure, with risk of serious
injury or death.
Personal Safety
For your own safety -and that of others- when riding on public highways it is your responsibility
to familiarize yourself with and obey the rules and regulations relating to pedal cycles and cycling
contained in the Highway Code. In addition, you should also ensure you familiarize yourself with
any bye-laws that are applicable where you cycle. Watch for –and avoid- potholes, drain grates,
kerb stones and other deviations that could impact on your wheels or cause them to lose
F O R M E B I K E S . C O . U K
5

traction. When crossing railway lines or cattle grids, do so carefully and at a 45° angle. If you are
not sure of riding surface conditions, walk your bike. Ensure you use your bell to alert others of
your approach. If somebody should walk in front of you or unexpectedly opens the door of a
parked car, you could be involved in a serious accident and should use your bell to alert others of
your approach.
We strongly recommend that all riders wear a bicycle helmet whilst riding. Any bicycle helmet
should be CE approved and tested to EN 1078. Look for these labels in the helmet. Most serious
cycling injuries involve head injuries that may have been less severe had the rider worn a helmet.
Wear light, bright and reflective clothing to make yourself more visible, especially at night. It is
imperative that you follow the instructions contained in this manual to perform regular checks on
your brakes, tyre pressure, steering and rims. No brakes, whatever their make or design will
perform as effectively in wet weather as they do in the dry. Ensure you anticipate the extra
distance it will take to stop in the wet. Wet weather also reduces traction so remember to take
wider, slower turns in the wet and on painted surfaces. Try to avoid riding in wet weather when
visibility is reduced.
Strong winds can make a bicycle turn or steer unexpectedly. Slow down or use another form of
transportation in windy conditions. Whilst our adult bicycles are designed to be compatible with
pannier racks and leading child seat brands, you should be mindful to cover any springs under
your saddle before carrying a child in a rear carrier. Do this to prevent the child fingers getting
caught and / or damaged by your saddle.
Like any activity, cycling involves risk of injury and damage. By choosing to ride a bicycle, you
assume the responsibility for that risk, so you need to know -and to practice- responsible riding
and of proper use and maintenance. Proper use and maintenance of your bicycle reduces risk of
injury.
Special Warning on luggage racks
•Never exceed the maximum stated loading capacity of any rack.
•Do not attempt to use the rack as a passenger seat or a child carrier.
•Never attach a trailer to any rack.
•Before each ride, ensure the rack is properly attached to your frame and there are no loose
straps on your load that may interfere with the rear wheel.
•A loaded rack can affect the stability and alter the riding characteristics of your bicycle,
particularly the steering and braking.
•Always ensure any load does not obscure the rear reflector.
•Do not make any modifications to your rack. Structural alterations could jeopardize you or other
highway users and participants.
•We particularly recommend you make the following checks before each ride:
•Ensure neither the total load capacity of your bicycle nor the capacity of your rack has
been exceeded.
•Ensure all fasteners on your bike (screws, nuts, quick-release-skewers) are tightened to
the correct torque value and locked.
•Ensure any luggage is attached and securely fitted in accordance with the manufacturer’s
instructions.
F O R M E B I K E S . C O . U K
6

•Make sure that the weight of any load is evenly distributed.
BEFORE YOUR FIRST RIDE
This information should be read by anyone before their first ride of this bicycle.
A number of steps need to be taken first before you can put your e-bike into use.
1. fully charge the battery
2. make sure that you are familiar with the controls and assistance functions of your e-bike.
3. familiarise yourself fully with the properties and special form of travel ahead of time and off
public roads. Always bear in mind that the acceleration in particular and also the greater average
speed will be unaccustomed for both you and other road users.
Also bear in mind that the weight of your e-bike may be greater than you have been used to with
conventional bicycles; that the centre of gravity can be higher and that manoeuvring may be
more difficult under certain circumstances.
We recommend that you recharge the battery after each longer ride so that you can always get
to your destination with full drive assistance and to extend the life of the battery as long as
possible.
Correct fit is an essential element of bicycling safety, performance and comfort. Making
adjustments to your bicycle that ensure correct fit for your body and riding conditions requires
experience, skill and special tools. Always have your dealer make the adjustments on your
bicycle; or, if you have the experience, skill and tools, have your dealer check your work before
riding.
Warning: If your bicycle does not fit properly, you may lose control and fall. If your new bike
doesn’t fit, ask your dealer to exchange it before you ride it.
If making any adjustment to your bicycle, avoid sharp points, moving parts, hot spots and pinch
points. Some parts of your bicycle can injure you if mishandled. Sharp points include the teeth of
the chainrings and some pedals. Brakes and their parts get hot. Moving parts can cut skin and
even break bones. Clamps and pivoting parts such as brake levers can pinch, as can the chain
where it runs on to sprocket teeth.
A. Standover height
To check if the frame size is safe, the rider should straddle the bicycle while wearing the kind of
shoes which will be used for riding and stand straight with feet at on the ground.
The minimum distance between the rider’s crotch and top tube should be 50-70mm (2-3”) for city
bicycles. The seat and handlebar can be adjusted to offer the best performance and most
comfortable riding position.
However, this method of measuring the correct frame size does not apply to bicycles with step-
through frames, or so called “ladies” frames. In case of these frames, correct frame size should
be determined first on a traditional diamond frame (so called “men’s” frame).
B. Saddle position
Correct saddle adjustment is an important factor in getting the most performance and comfort
from your bicycle. If the saddle position is not comfortable for you, see your dealer.
F O R M E B I K E S . C O . U K
7

The saddle can be adjusted in three directions:
1. Up and down adjustment.
To check for correct saddle height:
• sit on the saddle;
•place one heel on a pedal;
• rotate the crank until the pedal with your heel on it is in the down position and the crank arm is
parallel to the seat tube.
If your leg is not completely straight, your saddle height needs to be adjusted.
If your hips must rock for the heel to reach the pedal, the saddle is too high. If your leg is bent at
the knee with your heel on the pedal, the saddle is too low.
Ask your dealer to set the saddle for your optimal riding position and to show you how to make
this adjustment.
If you choose to make your own saddle height adjustment:
• loosen the seat post clamp
• raise or lower the seat post in the seat tube
• make sure the saddle is straight fore and aft
• re-tighten the seat post clamp to the recommended torque
Once the saddle is at the correct height, make sure that the seat post does not project from the
frame beyond its “Minimum Insertion” mark.
Warning: If your seat post is not inserted in the seat tube as described above, the seat post may
break, which could cause you to lose control and fall.
2. Front and back adjustment.
The saddle can be adjusted forward or back to help you get the optimal position on the bike. Ask
your dealer to set the saddle for your optimal riding position and to show you how to make this
adjustment. If you choose to make your own front and back adjustment, make sure that the
clamp mechanism is clamping on the straight part of the saddle rails and is not touching the
curved part of the rails, and that you are using the recommended torque on the clamping
fastener(s).
3. Saddle angle adjustment.
Most people prefer a horizontal saddle; but some riders like the saddle nose angled up or down
just a little. Your dealer can adjust saddle angle or teach you how to do it. If you choose to make
your own saddle angle adjustment and you have a single bolt saddle clamp on your seat post, it
is critical that you loosen the clamp bolt sufficiently to allow any serrations on the mechanism to
disengage before changing the saddle’s angle, and then that the serrations fully re-engage before
you tighten the clamp bolt to the recommended torque.
Warning: When making saddle angle adjustments with a single bolt saddle clamp, always check
to make sure that the serrations on the mating surfaces of the clamp are not worn. Worn
serrations on the clamp can allow the saddle to move, causing you to lose control and fall.
Always tighten fasteners to the correct torque. Bolts that are too tight can stretch and deform.
Bolts that are too loose can move and fatigue. Either mistake can lead to a sudden failure of the
bolt, causing you to lose control and fall.
F O R M E B I K E S . C O . U K
8

Small changes in saddle position can have a substantial effect on performance and comfort. To
find your best saddle position, make only one adjustment at a time.
C. Handlebar adjustment
You hold the handlebar to steer the bicycle and the stem connects the handlebar to the fork. The
position of the handlebar is important for control and comfort. Each month check all the bolts of
the stem.
Warning: Over-tightening of stem bolts can cause damage to the steerer of the fork, possibly
causing it to break. If the steerer breaks, you could fall. To adjust the angle of the handlebar
1. Loosen the handlebar-clamp bolt(s) on the stem
2. Move the handlebar. Make sure it is in the centre of the stem.
3. Make sure the gaps between any face plate and stem are even on both sides.
4. Tighten the handlebar-clamp bolt(s) on your type of stem:
Warning: An incorrect headset and stem assembly can cause damage to the steerer of the fork,
possibly causing it to break. If the steerer breaks, you could fall.
To adjust the height of an adjustable-rise stem, first change the stem angle (see the next
section), which gives access to the expander bolt. The expander bolt holds the stem wedge,
which secures the stem in the fork.
1. Loosen the expander bolt two to three turns.
2. Tap the top of the expander bolt with a mallet that has a wood or plastic face to loosen the
wedge.
3. Adjust the handlebar to the necessary height, but the minimum-insertion mark must be in the
frame.
4. Tighten the expander bolt.
Warning: A quill stem that is too high can cause damage to your bicycle, decrease your control,
and cause you to fall. Make sure the minimum-insertion mark is in the frame.
To change the angle of an adjustable-rise stem
1. Loosen the angle adjustment bolt until the stem angle can be changed.
2. Move the stem to the necessary angle.
3. Tighten the angle-adjustment bolt
D. Know How Your Bicycle Operates
The properties of your bicycle, if not used correctly, can decrease your control of the bicycle.
Before you ride, learn the operation and performance of all the mechanisms of your bicycle,
especially brakes and steering components.
The braking action of a bicycle is a function of the friction between the braking surfaces.
To make sure that you have maximum friction available, keep your wheel rims and brake pads
clean and free of dirt, lubricants, waxes or polishes.
Brakes are designed to control your speed, not just to stop the bike. Maximum braking force for
each wheel occurs at the point just before the wheel “locks up” (stops rotating) and starts to skid.
Once the tyre skids, you actually lose most of your stopping force and all directional control. You
need to practice slowing and stopping smoothly without locking up a wheel.
F O R M E B I K E S . C O . U K
9

When you apply one or both brakes, the bike begins to slow, but your body wants to continue at
the speed at which it was going. This causes a transfer of weight to the front wheel (or, under
heavy braking, around the front wheel hub, which could send you flying over the handlebars).
A wheel with more weight on it will accept greater brake pressure before lockup; a wheel with
less weight will lock up with less brake pressure. So, as you apply brakes the bike, to transfer
weight back on to the rear wheel; and at the same time, you need to both decrease rear braking
and increase front braking force.
Two keys to effective speed control and safe stopping are controlling wheel lockup and weight
transfer. Practice braking and weight transfer techniques where there is no traffic or any other
hazard or distractions.
Everything changes when you ride on loose surfaces or in wet weather. It will take longer to stop
on loose surfaces or in wet weather. Tyre adhesion is reduced, so the wheels have less cornering
and braking traction and can lock up with less brake force.
Moisture or dirt on the brake pads reduces their ability to grip. The way to maintain control on
loose or wet surfaces is to go more slowly.
Practice the use of your bicycle at slower speeds in a flat, empty area. Practice again after any
change to your bicycle.
If your bicycle does not operate as necessary, or if different parts are necessary for the safe
operation of your bicycle, consult your dealer.
Learn the Power of Your Brakes
The power of bicycle brakes changes with the Use Condition of the bicycle. If it is necessary for
your bicycle to have more—or less—power to stop, consult your dealer about brake adjustments
or other brake options for your bicycle.
Modern brakes are very powerful; they are made to stop a bicycle in wet or muddy conditions. If
your brakes are too powerful, take your bicycle to your dealer for adjustment or replacement of
the brake system.
Use your brakes carefully. Always ride with a safe distance between you and other vehicles or
objects; use your brakes. Adjust distances and brake forces for the conditions in which you ride.
Bicycles are made so that the left brake-lever controls the rear-wheel brake and the right brake
lever controls the front-wheel brake.
If your bicycle has two hand brakes, apply both brakes at the same time.
Warning: Brake force applied to the front-wheel suddenly or too fully could lift the rear wheel off
the ground or cause the front wheel to slide out from below you. This could decrease your
control and cause you to fall.
Apply both brakes at the same time and move rearward on your bicycle.
Change Gears Correctly
The left shift-lever controls the front derailleur and the right shift-lever controls the rear derailleur.
Use only one shift-lever at a time. Change gears only when the pedals and chain move forward.
Do not change gears when you ride over bumps; the chain could jam, miss a gear, or fall off. If
the chain jams or falls off, it could cause you to lose control and fall.
F O R M E B I K E S . C O . U K
10

When you change gears, decrease the force on the pedals. Lower tension helps the chain change
gears quickly and smoothly. This can decrease chain and gear wear, and prevent bent chains,
derailleurs, or chainrings.
Do not ride with the chain in the “crossover” position. If you shift the chain so that it crosses from
the biggest sprocket to the biggest sprocket (or the smallest sprocket to the smallest sprocket),
the chain is placed at an extreme angle. This angle causes the chain and gears to run roughly,
and will also cause the components to wear at a faster rate.
With modern gear-change systems, a movement of the shift-lever from one position to the other
position (or movement of the shift-lever to the “shift” position) will promptly move the chain to a
different gear.
Bicycles that have Shimano STI road shiftlevers and three chainrings can change front gears
better if you “hold” the lever for a moment before you release the left shift-lever.
This is most important when you change gears from the smallest chainring to the middle
chainring.
BEFORE EACH RIDE:
Every time you ride your bicycle, its condition changes. The more you ride, the more frequently
maintenance will be required. We recommend you spend a little time on regular maintenance
tasks. The following schedules are a useful guide. If you require assistance, we recommend you
see a bicycle specialist.
Warning: A bicycle that does not operate correctly can decrease your control and cause you to
fall. Fully check your bicycle before each ride, and do not ride your bicycle until you correct any
problem.
1 Nuts, bolts screws & other fasteners: Because manufacturers use a wide variety of fastener
sizes and shapes made in a variety of materials, often differing by model and component, the
correct tightening force or torque cannot be generalized. To make sure that the many fasteners
on your bicycle are correctly tightened, refer to the Fastener
Torque Specifications of this manual or to the torque specifications in the instructions provided
by the manufacturer of the component in question. Correctly tightening a fastener requires a
calibrated torque wrench. A professional bicycle mechanic with a torque wrench should torque
the fasteners on you bicycle.
WARNING: Correct tightening force on fasteners –nuts, bolts, screws– on your bicycle is
important. Too little force and the fastener may not hold securely. Too much force and the
fastener can strip threads, stretch, deform or break. Either way, incorrect tightening force can
result in component failure, which can cause you to lose control and fall.
2 Check the Handlebar and Stem Make sure the stem is in alignment with the front wheel and
correctly attached to the fork and handlebar. To check the attachment, try to turn the handlebar
from side to side while you hold the front wheel between your knees. To check the connection of
the handlebar, try to twist it in the stem. The handlebar should not move or be loose. Make sure
that no cables are pulled or caught when you turn the handlebar.
Make sure grips are secure and that the handlebar ends are covered or that plugs are correctly
put into the ends of the handlebar.
F O R M E B I K E S . C O . U K
11

Warning: A handlebar end that is not plugged or covered can cut in a crash.
3 Check the Wheels
Check the tyre inflation. Inflate the tyres to the air pressure recommended on the sidewall of the
tyre, but no higher than any recommendation that may be on the rim. Make sure tyres are
correctly inflated. Check by putting one hand on the saddle, one on the intersection of the
handlebars and stem, then bouncing your weight on the bike while looking at tyre deflection.
Compare what you see with how it looks when you know the tyres are correctly inflated; and
adjust if necessary.
Spin each wheel slowly and look for cuts in the tread and sidewall. Replace damaged tyres before
riding the bike.
Make sure the front and rear wheels are correctly secured.
Spin each wheel and check for brake clearance and side-to-side wobble.
If a wheel wobbles side to side even slightly, or rubs against or hits the brake pads, take the bike
to a qualified bike shop to have the wheel trued.
CAUTION: Wheels must be true for rim brakes to work effectively. Wheel trueing is a skill which
requires special tools and experience. Do not attempt to true a wheel unless you have the
knowledge, experience and tools needed to do the job correctly. Make sure the rims are clean
and undamaged at the tyre bead and, if you have rim brakes, along the braking surface. Check to
make sure that any rim wear indicator marking is not visible at any point on the wheel rim.
Warning: Bicycle wheel rims are subject to wear. Ask your dealer about wheel rim wear. Some
wheel rims have a rim wear indicator which becomes visible as the rim’s braking surface wears.
A visible rim wear indicator on the side of the wheel rim is an indication that the wheel rim has
reached its maximum usable life. Riding a wheel that is at the end of its usable life can result in
wheel failure, which can cause you to lose control and fall.
4 Check the Brakes
Warning: A brake system that has damage or is not adjusted correctly could decrease your
control and cause you to fall. Make a full inspection of the brakes before each ride. If your brakes
do not operate correctly, do not ride your bicycle. Adjust the brakes or take your bicycle to your
dealer for service.
Pull the lever to make sure the brake moves freely and stops your bicycle. If the lever can be
pulled to the handlebar, the brake is too loose.
The brake-pads should be in alignment with the rim surface.
When the brake is not applied, both brake-pads should be 1 to 2 mm from the rim. If the brake-
pads are too near the rim, the brake is too tight.
5 Check the Saddle (seat) and Seatpost Make sure the saddle is correctly attached. Try to turn
the saddle and seatpost in the frame, and try to move the front of the saddle up and down. The
saddle should not move or be loose.
6 Check the Lights and Reflectors Make sure all reflectors are clean and in their correct position.
Also make sure the reflectors are not covered or obstructed by anything on your bike.
Make sure the lights operate correctly and that batteries are charged. If the lights use a dynamo,
make sure the dynamo is mounted correctly and cannot move.
F O R M E B I K E S . C O . U K
12

7 Check the Frame and Fork Closely examine your frame and fork, especially near junctions of
the tubing and clamping or attachment areas, for signs of fatigue stress:
• Dents
•Cracks
•Scratches
•Deformation
•Discoloration
•Unusual noises
8 Chain
The chain connects the chainring (and crankarms) to the rear wheel. On a bicycle that does not
have a rear derailleur, correct chain tension is required to prevent the chain from falling off. To
adjust the chain tension
1. Slightly loosen the rear wheel axle nut on one side of the wheel, then on the other side of the
wheel. If you fully loosen the axle nut on one side before you loosen the other axle nut, you can
cause the bearings to come out of adjustment.
2. Slide the wheel rearward to tighten the chain.
3. Complete the wheel installation before riding the bike.
MAINTENANCE
This maintenance schedule is based on normal use. If you ride your bicycle more than average;
or in rain, snow; do maintenance on your bicycle more frequently than the schedule
recommends. If a part malfunctions, check and service it immediately, or consult your dealer. If a
part has wear or damage, replace it before you ride your bicycle again.
After initial use, new bicycles should be checked. As an example, cables stretch through use, and
this can affect the operation of the shifting or brakes. Approximately two months after you
purchase your new bicycle, have your dealer fully check your bicycle.
Even if you did not ride your bicycle much, have your dealer fully service your bicycle each year.
Suggested Tools List
Not all these tools are necessary for all bicycles.
• Torque wrench with Nm gradations
• 2, 4, 5, 6, 8 mm hexagonal wrenches
• 9, 10, 15 mm open-end wrenches
• 14, 15, and 19 mm socket
• T25 Torx wrench
• No. 1 cross-head screwdriver
• Bicycle inner tube patch-kit, tyre-pump with gauge, and tyre levers
Whilst undertaking any maintenance on your bicycle, it is important to avoid sharp points,
moving parts, hot spots and pinch points. Some parts of your bicycle can injure you if
mishandled. Sharp points include the teeth of the chainrings and some pedals. Brakes and their
parts get hot. Moving parts can cut skin and even break bones. Clamps and pivoting parts such
as brake levers can pinch, as can the chain where it runs on to sprocket teeth.
F O R M E B I K E S . C O . U K
13

The checklist that follows shows critical areas for you to check. If a part of your bicycle does not
function correctly, use the instructions in this manual to repair your bicycle, or take your bicycle
to your dealer for service. Do not ride a bicycle with a part that is damaged; replace the part.
CARE AND MAINTENANCE OF THE ELECTRONIC SYSTEM
The motor, which is the heart of your e-bike system, is maintenance-free.
That means that you do not have to do any maintenance work.
In general, the other components of your system are also maintenance-free, apart from the fact
that the battery must be charged up regularly.
However, you must keep your system clean and free of dirt and detritus.
If your Forme e-bike should ever require any maintenance, then have it done only by a
professional e-bike dealer.
Always remove the battery before carrying out any care work on the system.
Never clean the battery with anything that is wet.
Take special care that the contacts do not get wet.
It is best to clean the battery and the remaining system parts with a slightly damp cloth.
Do not get any water on the contacts and plugs.
Never clean an e-bike using a high-pressure cleaner or a jet of water from a hose. Use a slightly
damp cloth or sponge to clean the system, but never use anything that is actually wet.
Never press the buttons while cleaning the control element or doing care work on it.
Opening the motor or any parts of the motor makes the warranty null and void at once and
means that you cannot make any claims under warranty.
Never remove the type label from the motor or battery. These are used to identify the motor and
to display the statement of legal conformity in compliance
Deliberately removing either label leads to the warranty becoming null and void
BATTERY AND CHARGING
•Do not leave your battery on charge for long periods of time or leave it unattended whilst
charging
•Remove the battery pack from the eBike before beginning ANY work (e.g. inspection,
repair, assembly, maintenance, work on the chain, etc.) on the eBike, transporting it by car or
plane, or storing it.
•Unintentional activation of the eBike system poses a risk of injury.
•Do not open the battery pack. Danger of short-circuiting. Opening the battery pack voids
any and all warranty claims.
•Protect the battery against heat (e.g. prolonged sun exposure) and fire and from being
submerged in water. Do not store or operate the battery near hot or flammable objects. There is
a risk of explosion.
•Keep the battery pack away from paper clips, coins, keys, nails, screws or other small
metal objects, that can make a connection from one terminal to another. Shorting the battery-
pack terminals together may cause burns or a fire. For short-circuiting damage caused in this
manner, any and all warranty claims shall be invalid.
F O R M E B I K E S . C O . U K
14

•Do not place the charger or battery pack near to flammable materials. Charge battery
packs only when dry and in a fireproof area. There is a risk of fire due to the heat generated
during charging.
•Under abusive conditions, liquid may be ejected from the battery pack. Avoid contact. If
contact accidentally occurs, flush with water. If liquid contacts eyes, additionally seek medical
help. Liquid ejected from the battery pack may cause skin irritations or burns.
•Battery packs must not be subjected to mechanical impacts. There is a risk that the
battery pack will be damaged causing vapours to escape. The vapours can irritate the respiratory
system. Provide for fresh air and seek medical attention in case of complaints.
•The battery may give off fumes if it becomes damaged or is used incorrectly. Provide a
fresh air supply and seek medical advice in the event of pain or discomfort. These fumes may
irritate the respiratory tract.
•Charge the battery pack only with original charger. When using non-original chargers, the
danger of fire cannot be excluded.
•Use only original battery packs approved for your eBike. Using other battery packs can
lead to injuries and pose a fire hazard. When using other battery packs, Moore Large shall not
assume any liability and warranty.
•Do not use the rack-type battery pack as a handle. Lifting the eBike up by the battery pack
can cause damage to the battery pack.
•Keep the battery pack out of reach of children.
Notes for Optimum Handling of the Battery Pack
The battery-pack life can be prolonged when being properly maintained and especially when
being operated and stored at the right temperatures.
With increasing age, however, the battery-pack capacity will diminish, even when properly
maintained.
A significantly reduced operating period after charging indicates that the battery pack is worn out
and must be replaced.
You can replace the battery pack yourself.
Recharging the Battery Pack prior to and during Storage
When not using the battery pack for a longer period, charge it to approx. 60 %
Check the charge condition each 6 months and recharge the battery pack again approx. 60 %.
Note: When the battery pack is stored discharged (empty) for longer periods, it can become
damaged despite the low self-discharging feature and the battery-pack capacity may be strongly
reduced.
It is not recommended to have the battery pack connected permanently to the charger.
Storage Conditions
Store the battery pack in a dry, well-ventilated location. Protect the battery pack against moisture
and water. Under unfavourable weather conditions, it is recommended e.g. to remove the battery
pack from the eBike and store it in an enclosed location until being used again.
The battery pack can be stored at temperatures between –10 °C and +60 °C. For a long battery-
pack life, however, storing the battery pack at a room temperature of approx. 20 °C is of
advantage.
F O R M E B I K E S . C O . U K
15

Take care that the maximal storage temperature is not exceeded. As an example, do not leave
the battery pack in a vehicle in summer and store it out of direct sunlight.
It is recommended to not store the battery pack on the bike.
Maintenance and Service
Keep the battery clean. Clean it carefully with a soft, damp cloth. The battery must not be
submerged in water or cleaned using a jet of water.
When the battery pack is no longer operative, please refer to an authorised Forme e-bike dealer.
After-sales Service and Application Service
In case of questions concerning the battery packs, please refer to an authorised bicycle dealer.
Charge indicator
Bosch:When the battery pack is switched on, the five green LEDs of the charge-control indicator
indicate the charge condition of the battery pack.
In this, each LED indicates approx. 20 % capacity. When the battery pack is completely charged,
all five LEDs light up.
The charge level of the switched on battery pack is also shown on the display of the on-board
computer. If the capacity of the battery pack is below 5 %, all LEDs of the charge-control indicator
on the battery pack go out. However there is another display function of the on-board computer.
Phylion: Connect the charger output lead to the battery and then connect the charger input lead
to your mains supply. The indicator light will shine red whilst the battery is charging and become
green once the battery is fully charged.
Transport
If you carry your eBike outside of your car, e.g. on a luggage rack, remove the eBike battery
pack in order to avoid damaging it.
The battery packs are subject to the Dangerous Goods Legislation requirements. Private users
can transport undamaged battery packs by road without further requirements.
When being transported by commercial users or third parties (e.g. air transport or forwarding
agency), special requirements on packaging and labelling must be observed (e.g. ADR
regulations). If necessary, an expert for hazardous materials can be consulted when preparing
the item for shipping. Dispatch battery packs only when the housing is undamaged.
Tape or mask off open contacts and pack up the battery pack in such a manner that it cannot
move around in the packaging. Inform your parcel service that the package contains dangerous
goods. Please also observe the possibility of more detailed national regulations.
In case of questions concerning transport of the battery packs, please refer to an authorised
Forme e-bike dealer. The dealer should also be able to provide suitable transport packaging.
Disposal
Battery packs, accessories and packaging should be sorted for environmental-friendly recycling.
Do not dispose of the battery packs into household waste!
Tape or mask off the contact surfaces of the battery pack’s terminals with adhesive tape before
disposing of battery packs.
Electrical devices/tools that are no longer usable, and according to the European Guideline
2006/66/EC, defective or used battery packs/batteries, must be collected separately and
disposed of in an environmentally correct manner.
F O R M E B I K E S . C O . U K
16

Please return battery packs that are no longer usable to an authorised bicycle dealer.
Controller operation
Bosch
F O R M E B I K E S . C O . U K
17

Safety Notes
Read all safety warnings and all instructions.
Failure to follow the warnings and instructions
may result in electric shock, fire and/or serious
injury.
Save all safety warnings and instructions for
future reference.
The term “battery pack” used in these
operating instructions, irrespective of model,
refers both to standard battery packs (battery
packs with holder on the bike fra
me) and to
rack-
type battery packs (battery packs with
holder in the rear rack/ carrier).
Do not use the on-board computer as a
handle.
Lifting the eBike up by the on-board
computer can cause irreparable damage to the
on-board computer.
Make sure to not be distracted by the display
of the on-board computer.
If you do not focus
exclusively on the traffic, you risk being
involved in an accident. If you want to make
entries in your on-board computer other than
switching the assistance level, stop and enter
the appropriate data.
Read and observe the safety warnings and
instructions in all operating instructions of the
eBike system and in the operating instructions
of your eBike.
Product Description and Specifications
Intended Use
The Intuvia on-board computer is designed to
control Bosch eBike systems and display riding
data.
Product Features
The numbering of the components shown
refers to the illustrations on the graphic pages
at the beginning of the manual.
Individual illustrations in these operating
instructions may differ slightly from the actual
circumstances depending on the equipment of
your eBike.
1
Display-function button
“i”
2 Bike lights button
3
On-board computer
4
Holder for on-board computer
5
On/Off button for on-board computer
6 “RESET”
button
7
USB port
8
Protective cap of USB port
9
Operating unit
10
Display-function button
“i”
on the operating
unit
11 Decrease assistance level/scroll down
button
“–”
12 Increase assistance level/scroll up button
“+”
13
Push-assistance button
“WALK”
14
Lock latch for on-board computer
15
Locking screw for on-board computer
USB charging cable (Micro A – Micro B)*
* not illustrated; available as accessory
Display elements of on-board computer
a
Drive unit assistance indicator
b
Assistance-level indicator
c
Light indicator
d
Text indication
e
Value indication
f
Speed indication
g
Shift recommendation: higher gear
h
Shift recommendation: lower gear
i
Battery charge-control indicator
Assembly
Inserting and removing the battery pack
For inserting and removing the eBike battery
pack in/fr
om the eBike, please read and
observe the battery pack operating
instructions.
Inserting and removing the on-board computer
To
insert
the on-board computer
3
, slide it from
the front into the holder
4
.
To
remove
the on-board computer
3
, press the
lock latch
14
and slide the on-board computer
F O R M E B I K E S . C O . U K
18
This manual suits for next models
6
Table of contents
Other eBike Bicycle manuals


