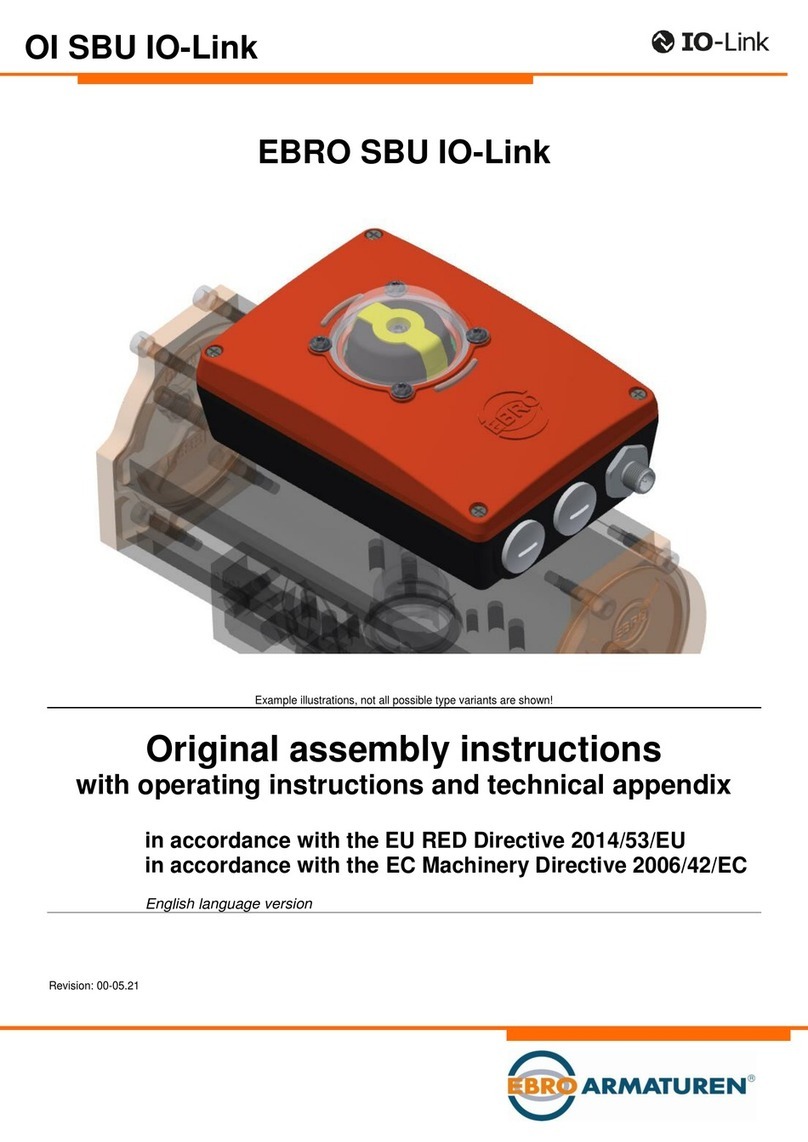
EBRO ARMATUREN EP 501 B User manual

Quickstart
English Deutsch Français
Type EP 501 B
Positioner
Electropneumatic positioner
Elektropneumatischer Positioner
Régulateur de position électropneumatique

We reserve the right to make technical changes without notice.
Technische Änderungen vorbehalten.
Sous réserve de modification techniques.
Operating Instructions 1403/00_EU-ML_00809729 / Original DE

3
1 QUICKSTART GUIDE.....................................................................................4
1.1 Definition of the term "Device" ......................................................4
1.2 Symbols ..............................................................................................4
2 AUTHORIZED USE .........................................................................................5
2.1 Restrictions ........................................................................................5
3 BASIC SAFETY INSTRUCTIONS .............................................................5
4 GENERAL INFORMATION ...........................................................................6
4.1 Contact addresses ..........................................................................6
5 SYSTEM DESCRIPTION ...............................................................................7
5.1 Structure ............................................................................................7
5.2 General description .........................................................................7
5.3 AS interface .......................................................................................8
6 TECHNICAL DATA ........................................................................................10
6.1 Conformity .......................................................................................10
6.2 Standards .........................................................................................10
6.3 Operating conditions .....................................................................10
6.4 Mechanical data .............................................................................10
6.5 Electrical data..................................................................................10
6.6 Electrical data with AS interface bus control (optional) ........11
6.7 Pneumatic data ...............................................................................11
7 OPERATION .....................................................................................................12
7.1 Operating state ...............................................................................12
7.2 Operating and display elements of the positioner ..................12
7.3 Error messages ...............................................................................15
8 ATTACHMENT AND INSTALLATION ...................................................16
8.1 Installation of devices for the explosion-risk area ...................16
8.2 Attachment to a control valve with swivel actuator ................16
9 PNEUMATIC CONNECTION ....................................................................19
9.1 Connection of devices for the explosion-risk area .................19
9.2 Safety instructions .........................................................................19
9.3 Safety positions ..............................................................................20
10 ELECTRICAL CONNECTION ................................................................... 22
10.1 Connection of devices for the explosion-risk area ...............22
10.2 Safety instructions .......................................................................22
10.3 Electrical installation with cable gland ....................................22
10.4 Electrical installation AS interface ............................................24
10.5 LED status display for AS interface .........................................25
11 STARTING UP .................................................................................................25
11.1 Safety instructions .......................................................................25
11.2 Specifying the basic settings ....................................................26
12 TRANSPORT, STORAGE, PACKAGING ............................................. 27
Positioner Type EP 501 B
english
Type EP 501 B

4
Quickstart Guide
1 QUICKSTART GUIDE
The quickstart guide contains the most important information and notes
regarding the use of the device. A detailed description can be found
in the operating instructions for Type EP 501.
Keep these instructions in a location which is easily accessible to
every user and make these instructions available to every new owner
of the device.
Important safety information!
Read Quickstart carefully and thoroughly. Study in particular
the chapters entitled “Basic safety instructions” and “Authorized
use”.
▶Quickstart must be read and understood.
1.1 Definition of the term "Device"
In these instructions, the term "device" always refers to the posi-
tioner Type EP 501 B.
1.2 Symbols
The following symbols are used in these instructions.
DANGER!
Warns of an immediate danger!
▶Failure to observe the warning will result in a fatal or serious
injury.
WARNING!
Warns of a potentially dangerous situation!
▶Failure to observe the warning may result in a serious or fatal
injury.
CAUTION!
Warns of a possible danger!
▶Failure to observe this warning may result in a moderate or minor
injury.
NOTE!
Warns of damage to property!
Important tips and recommendations.
Refers to information in these instructions or in other
documentation.
▶Designates an instruction to prevent risks.
→Designates a procedure which you must carry out.
english
Type EP 501 B
5
Authorized use
2 AUTHORIZED USE
Non-authorized use of the positioner Type EP 501 B may be a
hazard to people, nearby equipment and the environment.
The device is designed for the open-loop control and closed-loop
control of media.
▶Do not expose the device to direct sunlight.
▶A pulsating direct voltage (rectified alternating current without
smoothing) must not be used as supply voltage.
▶During use observe the permitted data, the operating conditions
and conditions of use specified in the contract documents and
operating instructions, as described in chapter “6 Technical
data” in this manual and in the valve manual for the respective
pneumatically actuated valve.
▶In view of the wide range of possible application cases, check
whether the positioner is suitable for the specific application
case.
▶Correct transportation, storage and installation, as well as care-
ful use and maintenance are essential for reliable and faultless
operation.
▶The positioner Type EP 501 B must be used only for its
intended purpose.
2.1 Restrictions
If exporting the system/device, observe any existing restrictions.
3 BASIC SAFETY INSTRUCTIONS
These safety instructions do not make allowance for any
• contingencies and events which may arise during the assembly,
operation, and maintenance of the devices.
• local safety regulations – the operator is responsible for observing
these regulations, also in relation to the installation personnel.
Danger – high pressure!
▶Before loosening lines and valves, turn off the pressure and vent
the lines.
Risk of electric shock!
▶Before reaching into the device or the equipment, switch off the
power supply and secure to prevent reactivation!
▶Observe applicable accident prevention and safety regulations
for electrical equipment!
General hazardous situations
To prevent injuries:
• In a potentially explosive area, the positioner Type EP 501 B may
be used only in accordance with the specification on the separate
Ex rating plate. For the use, observe the additional information
enclosed with the device with safety instructions for the EX area.
• Devices without a separate Ex rating plate may not be used in a
potentially explosive area.
english
Type EP 501 B
6
Basic safety instructions
▶Ensure that the system cannot be activated unintentionally.
▶Installation and maintenance work may be carried out only by
authorized technicians with the appropriate tools.
▶After an interruption in the electrical or pneumatic supply,
ensure that the process is restarted in a defined or controlled
manner.
▶The device must only be operated when in a perfect condition
and in consideration of the operating instructions.
▶The general rules of technology must be observed for applica-
tion planning and operation of the device.
To prevent damage to the device:
• Do not supply the pressure supply connection of the system with
aggressive or flammable media.
• Do not supply the pressure supply connection with liquids.
• Do not physically stress the housing (e.g. by placing objects on
it or standing on it).
• Do not make any external alterations to the housing of the device.
Do not paint housing parts or screws.
NOTE!
Electrostatic sensitive components/modules!
The device contains electronic components which react sensitively
to electrostatic discharge (ESD). Contact with electrostatically
charged persons or objects are hazardous to these components.
In the worst case scenario, they will be destroyed immediately or
will fail after start-up.
• Observe the requirements in accordance with EN 61340-5-1
and 5-2 to minimize/avoid the possibility of damage caused by
a sudden electrostatic discharge!
• Also, ensure that you do not touch electronic components when
the supply voltage is present!
The positioner Type EP 501 B was developed with due con-
sideration given to the accepted safety rules and is state-of-
the-art. Nevertheless, dangerous situations may occur.
Failure to observe these operating instructions and the information
contained therein as well as unauthorized tampering with the device
release us from any liability and also invalidate the warranty covering
the devices and accessories!
4 GENERAL INFORMATION
4.1 Contact addresses
Germany
Automation technology
EBRO ARMATUREN Gebr. Bröer GmbH
Karlstraße 8
D-58135 Hagen
Tel. + 49 (0) 2331 - 904 0
Fax + 49 (0) 2331 - 904 111
E-mail: [email protected]
english
Type EP 501 B

7
System description
5 SYSTEM DESCRIPTION
5.1 Structure
Mechanical position indicator
Display module with 3 LEDs
Working connection 2
(connection: A2)
Pressure supply con-
nection 1.4 ... 7 bar
(connection: P)
Working connection 1
(connection: A1)
Air exhaust connection/
air exhaust filter
Pressure-relief valve
Fig. 1: Structure, positioner Type EP 501 B
Internal position sensor
Axle for position sensor
Cable bushing
Electronics module
Control system
Fig. 2: Structure, positioner Type EP 501 B
5.2 General description
The positioner Type EP 501 B is a digital, electro-pneumatic position
controller for pneumatically actuated control valves. The device incor-
porates the main function groups
- Position sensor
- Electro-pneumatic control system
- Microprocessor electronics
The position sensor measures the current positions of the control valve.
The microprocessor electronics continuously compare the current
position (actual value) with a position set-point value specified via the
standard signal input and supplies the result to the position controller.
If there is a control difference, the electro-pneumatic control system
corrects the actual position accordingly.
english
Type EP 501 B
8
System description
5.3 AS interface
5.3.1 AS interface connection
AS interface (Actuator Sensor Interface) is a field bus system which
is used primarily for networking binary sensors and actuators (slaves)
with a higher-level control (master).
Bus line
Unshielded two-wire line (AS interface line as AS interface cable
harness) along which both information (data) and energy (power supply
for the actuators and sensors) are transmitted.
Network topology
Freely selectable within wide limits, i.e. star, tree and line networks are
possible. Further details are described in the AS interface specification
(A/B slave model conforms to the version 3.0 specification).
5.3.2 Technical data for AS interface PCBs
Profile version S-7.3.4 Profile version S-7.A.5
Supply via AS interface via AS interface
Outputs 16 bit set-point value 16 bit set-point value
Inputs - 16 bit status feedback
Certification Certificate no. 87301
after version 3.0
Certificate no. 95401
after version 3.0
Tab. 1: Technical data
5.3.3 Programming data for AS Interface PCBs
Profile version S-7.3.4 Profile version
S-7.A.5
I/O configuration 7 hex 7 hex
ID code 3 hex (analog profile) A hex
Extended
ID code 1
F hex (default value, can
be changed by the user) 7 hex
Extended
ID code 2 4 hex 5 hex
Profile S-7.3.4 S-7.A.5
Tab. 2: Programming data
Bit configuration
1. Output set-point value
(value range 0 ... 10,000 corresponds to 0 ... 100 %)
2. Input status feedback14)
(value range 0 ... 10,000 corresponds to 0 ... 100 %)
Byte 2
0 0 D13 D12 D11 D10 D9 D8
Byte 1
D7 D6 D5 D4 D3 D2 D1 D0
Parameter bit P3 P2 P1 P0
Output Not used Not used Not used Not used
Tab. 3: Bit configuration
english
Type EP 501 B
9
System description
5.3.4 Sequence of communication for the profile
version S-7.A.5
1. After the start-up, the AS interface master (from master class 4)
automatically replaces the ID object with the S-7.A.5 slave.
Master sends 3 bytes:
1. Byte 2. Byte 3. Byte
Code = 16 dez Index = 0 dez Length = 5 dez
S-7.A.5 slave answers with 6 bytes
1. Byte 2. Byte 3. Byte 4. Byte 5. Byte 6. Byte
Code Vendor
ID (high)
Vendor
ID (low)
Device
ID (high)
Device
ID (low)
1 word
output +
1 word
input
= 80 dez = 120 dez = 1 dez = 34 dez
or with 2 bytes (Read Response not OK)
1. Byte 2. Byte
Code Error code
=
144 dez
=
0 dez
(no error)
1 dez
(illegal
index)
2 dez
(illegal
length)
3 dez
(request
not imple-
mented)
4 dez
(busy)
2. After that, the following cyclical commands can be used:
Code = 0 (get cyclic data from slave)
→ for status feedback 0 ... 100 %
Code = 1 (put cyclic data to slave)
→ for set-point value 0 ... 100 %
english
Type EP 501 B

10
Technical data
6 TECHNICAL DATA
6.1 Conformity
The positioner Type EP 501 B conforms to the EC directives
according to the EC Declaration of Conformity.
6.2 Standards
The applied standards which are used to demonstrate compliance
with the EC Directives are listed in the EC-Type Examination
Certificate and/or the EC Declaration of Conformity.
6.3 Operating conditions
NOTE!
If used outside, the device may be exposed to direct sunlight
and temperature fluctuations which may cause malfunctions
or leaks!
• If the device is used outdoors, do not expose it unprotected to
the weather conditions.
• Ensure that the permitted ambient temperature does not exceed
the maximum value or drop below the minimum value.
Ambient temperature 0 ... +60 °C
Degree of protection IP65 / IP671) according to EN 60529
(only if cables, plugs and sockets have
been connected correctly)
1) When using the positioner under IP67 conditions, the air
exhaust filter (see “Fig. 1”) must be removed and the exhaust air
conveyed to the dry area.
6.4 Mechanical data
Dimension see data sheet
Material
Housing material plastic-coated aluminum
Other external parts stainless steel (V4A), PC, PE, POM, PTFE
Sealing material EPDM, NBR, FKM
Weight approx. 1.0 kg
6.5 Electrical data
Connections 2 cable glands (M20 x 1.5) with screw ter-
minals 0.14 ... 1.5 mm2 or circular plug-in
connector
(M12, 8-pole)
Interfaces communication interface USB:
Direct connection to PC via USB adapter.
Communication with communications
software based on FTD/DTM technology.
An external adapter with integrated
interface driver is required.
Supply voltage 24 V DC ± 10 %
max. residual ripple 10 %
Power consumption < 3.5 W
Input resistance for
set-point value signal 180 Ω at 0/4 - 20 mA / 12 bit resolution
english
Type EP 501 B

11
Technical data
Protection class 3 in accordance with VDE 0580
Analog position feedback
max. load. Load for
current output 0/4 ... 20 mA 560 Ω
Inductive proximity switches 100 mA current limitation
Binary input not galvanically isolated
0 ... 5 V = log "0", 10 ... 30 V = log "1"
inverted input in reverse order
(input current < 6 mA)
6.6 Electrical data with AS interface bus
control (optional)
Connections circular plug-in connectors (M12, 4-pole)
Supply voltage 29.5 V ... 31.6 V DC (according to specification)
Devices without external supply voltage:
Max. power consumption 150 mA
Devices with external supply voltage:
External supply-
voltage 24 V ± 10 %, the power supply unit must
include a secure disconnection in accordance
with IEC 364-4-41 (PELV or SELV)
Max. power consumption 100 mA
Max. power consumption from AS interface 50 mA
6.7 Pneumatic data
Control medium quality classes in accordance with
DIN ISO 8573-1
Dust content class 5, max. particle size 40 µm, max. particle
density 10 mg/m³
Water content class 3, max. pressure dew point - 20 °C
or min. 10 °C below the lowest operating
temperature
Oil content class 5, max. 25 mg/m³
Temperature range
of compressed air 0 ... +60 °C
Pressure range 1.4 ... 7 bar
Air capacity 95 lN / min (at 1.4 bar2))
for aeration and deaeration
150 lN / min (at 6 bar2))
for aeration and deaeration
(QNn = 100 lN / min (according to definition for
pressure drop from 7 to 6 bar absolute))
Connections internal threads G1/4"
2) Pressure specifications: Overpressure with respect to
atmospheric pressure
english
Type EP 501 B

12
Operation
7 OPERATION
7.1 Operating state
AUTOMATIC (AUTO)
Normal controller mode is implemented and monitored in
AUTOMATIC operating state.
→ LED 1 (MODE) flashes green.
MANUAL
In MANUAL operating state the valve can be opened and closed
manually via the buttons.
→ LED 1 (MODE) flashes green.
→ LED 3 (FAULT) flashes red.
The DIP switch 4 can be used to switch between the two operating
statuses AUTOMATIC and MANUAL. (see chapter “7.2.2 Function of
the DIP switches”).
7.2 Operating and display elements of the
positioner
LED 1 (MODE)
LED 2 (POSITION)
LED 3 (FAULT)
DIP switches
Button 2
Button 1
Communications interface
Fig. 3: Description of operating elements
The positioner features 2 buttons, 4 DIP switches and 3 LEDs as a
display element.
english
Type EP 501 B

13
Operation
7.2.1 Configuration of the buttons
The configuration of the 2 buttons inside the housing varies depending
on the operating state (AUTOMATIC / MANUAL).
The description of the operating statuses (AUTOMATIC / MANUAL)
can be found in the chapter entitled “7.1 Operating state”.
Button 1
Button 2
Fig. 4: Description of the buttons
MANUAL operating state (DIP switch 4 set to ON):
Button Function
1Aerate3) (manually open / close the actuator)4)
2Deaerate3) (manually open / close the actuator)4)
3) No function if the binary input was activated with the “H/A
change-over” via the communications software.
4) Depending on the control function of the actuator.
Tab. 4: Configuration of the buttons for MANUAL operating state
AUTOMATIC operating state (DIP switch 4 set to OFF):
Button Function
1 Press for 5 seconds to start the X.TUNE function
2 -
Tab. 5: Configuration of the buttons for AUTOMATIC operating state
7.2.2 Function of the DIP switches
ON
12 3 4
DIP
switches
Posi-
tion Function
1 ON Reversal of the effective direction of the set-point
value (DIR.CMD)
(set-point value 20 ... 4 mA = position 0 ... 100 %)
OFF Normal effective direction of the set-point value
(set-point value 4 ... 20 mA = position 0 ... 100 %)
2 ON Sealing function active. The valve completely
closes below 2 %5) and opens above 98 % of the
set-point value (CUTOFF)
OFF No sealing function
english
Type EP 501 B

14
Operation
DIP
switches
Posi-
tion Function
3 ON Correction characteristic for adjustment of the
operating characteristic
(linearization of the process characteristic
CHARACT) 6)
OFF Linear characteristic
4 ON MANUAL operating state manual
OFF AUTO AUTOMATIC operating state
5) Factory setting can be changed via communications software.
6) The characteristic type can be changed via communications
software
Tab. 6: Function of the DIP switches
Information about the communications software:
The switching position of the DIP switch has priority over
the communications software!
If the values of the sealing function (CUTOFF) or the cor-
rection characteristic (CHARACT) are changed via the
software tool, the corresponding function must be active
(DIP switch set to ON).
The effective direction of the set-point value (DIR.CMD) can
be changed via the Dip switches only.
7.2.3 Display of the LEDs
LED 1, green (MODE)
display of the operating states
AUTO, MANUAL, X.TUNE
LED 2, green / yellow (POSITION)
display of the actuator state
(open, closed, opens or closes)
LED 3, red (FAULT)
fault states
Fig. 5: LED display
LED 1 (green, MODE) and LED 3 (red, FAULT)
LED states Display
green red
on off Acceleration phase when Power ON
flashes slowly off AUTO operating state
flashing flashing MANUAL operating state
alternating
flashes quickly off X.TUNE function
off on ERROR (see chapter entitled
“7.3 Error messages”)
flashing flashing AUTO operating state for sensor
break detection
slow
Tab. 7: LED states, LED 1 and LED 3
english
Type EP 501 B

15
Operation
LED 2 (green / yellow, POSITION)
LED states Display
green yellow
on off Actuator closed
off on Actuator open
flashes slowly off Constant control deviation
(actual value > nominal value)
off flashes slowly Constant control deviation
(actual value < nominal value)
flashes quickly off Closing in MANUAL operating
state
off flashes quickly Opening in MANUAL operating
state
Tab. 8: LED states, LED 2
7.3 Error messages
7.3.1 Error messages in MANUAL and AUTOMATIC
operating states
Display Cause of fault Remedial action
LED 3
FAULT
(red) on
Checksum error in data
memory
→ Data memory defective
→ The device automatically
switches to an older
(possibly not current) data
record.
No remedy possible.
Device defective.
Contact your EBRO
sales office.
Tab. 9: Error messages in MANUAL and AUTOMATIC operating states
english
Type EP 501 B

16
Attachment and installation
7.3.2 Error messages while the X.TUNE function is
running
Display Cause of fault Remedial action
LED 3
FAULT
(red) on
No compressed air
connected
Connect compressed air
Compressed air failure
while the X.TUNE
function was running
Check compressed air
supply
Actuator or control
system deaeration side
leaking
No remedy possible. Device
defective
Control system aeration
side leaking
No remedy possible. Device
defective
The rotation range of
the position sensor has
exceeded 180°
Correct the attachment of
the shaft for the position
sensor on the actuator
Tab. 10: Error messages while the X.TUNE function is running
8 ATTACHMENT AND INSTALLATION
8.1 Installation of devices for the
explosion-risk area
When installing devices in the explosion-protected area, observe the
“Additional information for use in the explosion-risk area” enclosed
with the Ex-devices.
8.2 Attachment to a control valve with
swivel actuator
The axle of the position sensor integrated in the positioner is con-
nected directly to the axle of the swivel actuator.
The attachment kit for swivel actuators can be ordered from
EBRO as an accessory. The associated parts are listed in
the “Tab. 11: Attachment kit for swivel actuators”.
No. Quantity Designation
1 1 Adapter
2 2 Setscrew DIN 913 M4 x 10
3 4 Cylinder head screw DIN 933 M6 x 12
4 4 Circlip B6
5 2 Hexagon nut DIN 985, M4
Tab. 11: Attachment kit for swivel actuators
english
Type EP 501 B

17
Attachment and installation
8.2.1 Installation
WARNING!
Risk of injury from improper assembly!
▶Assembly may be carried out by authorized technicians only
and with the appropriate tools!
Risk of injury from unintentional activation of the system and
uncontrolled restart!
▶Secure system against unintentional activation.
▶Following assembly, ensure a controlled restart.
Procedure:
→Determine the attachment position of the positioner:
- parallel to the actuator or
- rotated by 90° to the actuator.
→Determine the basic settings and the direction of rotation of the
actuator.
Anti-twist safeguard:
Note the flat side of the axle!
One of the setscrews must be situated on the flat side of
the axle as an anti-twist safeguard (see “Fig. 6”).
→Connect the adapter ① to the axle of the positioner and secure
with 2 setscrews.
→Secure setscrews with self-locking nuts.
Rotation range of the position sensor:
The maximum rotation range of the position sensor is 180°.
The axle of the positioner may be moved within this range
only.
90°
ideal position
for the swivel range
of the positioner = 90°
(min. 30° / max. 180°)
The rotation movement of the
rotary actuator must be within
the position sensor rotation range
of 180°.
Flattened axle
180°
maximum
swivel range
Fig. 6: Rotation range / anti-twist safeguard
english
Type EP 501 B

18
Attachment and installation
→Set up the multi-part assembly bridge* to suit the actuator.
→Attach the assembly bridge with 4 cylinder head screws ③ and
circlips ④ to the positioner (see “Fig. 7”).
③
④
* The assembly bridge consists of four parts,
which can be adjusted to the actuator by
different arrangements.
①
Fig. 7: Attaching the assembly bridge (schematic representation)
→Place positioner with assembly bridge on the swivel actuator and
attach (see “Fig. 8”)
Fig. 8: Swivel actuator attachment
english
Type EP 501 B

19
Pneumatic connection
9 PNEUMATIC CONNECTION
9.1 Connection of devices for the
explosion-risk area
When connecting devices in the explosion-protected area, observe
the “Additional information for use in the explosion-risk area”
enclosed with the Ex-devices.
9.2 Safety instructions
DANGER!
Risk of injury from high pressure in the system!
▶Before loosening lines and valves, turn off the pressure and vent
the lines.
WARNING!
Risk of injury from improper installation!
▶Installation may be carried out by authorized technicians only
and with the appropriate tools!
Risk of injury from unintentional activation of the system and
uncontrolled restart!
▶Secure system against unintentional activation.
▶Following installation, ensure a controlled restart.
Working connection 2
(connection: A2)
Pressure supply connection
1.4 ... 7 bar (connection: P)
Working connection 1
(connection: A1)
Air discharge connection
Fig. 9: Pneumatic installation / location of the connections
Procedure:
→Apply supply pressure ( 1.4 ... 7 bar) to the pressure supply
connection P.
For single-acting actuators (control function A and B):
→Connect one working connection (A1 or A2, depending on
required safety position) to the chamber of the single-acting
actuator.
Safety positions see chapter “9.3 Safety positions”.
→Seal a working connection which is not required with a plug.
english
Type EP 501 B

20
Pneumatic connection
For double-acting actuators (control function I):
→Connect working connections A1 and A2 to the respective
chambers of the double-acting actuator.
Safety positions see chapter “9.3 Safety positions”.
Important information for perfect control behavior!
In order to ensure that the control behavior is not extremely
negatively affected in the upper stroke range on account of
too little pressure difference,
• keep the applied supply pressure at least 0.5 ... 1 bar
above the pressure which is required to move the pneu-
matic actuator to its end position.
If fluctuations are greater, the control parameters measured
with the X.TUNE function are not optimal.
• During operation keep the fluctuations of the supply
pressure as low as possible (max. ±10 %).
9.3 Safety positions
The safety position following failure of the auxiliary electrical power
depends on the pneumatic connection of the actuator to the working
connections A1 or A2.
9.3.1 Single-acting actuators
Actuator system
Safety positions after failure of the
auxiliary power pneumatic
auxiliary power
up
down
down
→Connection to
“Fig. 10” down
up
→Connection to
“Fig. 11”
Control function A
up
down
up
→Connection to
“Fig. 10”
up
down
→Connection to
“Fig. 11”
Control function B
Tab. 12: Safety positions - single-acting actuators
english
Type EP 501 B
Table of contents
Languages:
Other EBRO ARMATUREN Valve Positioner manuals