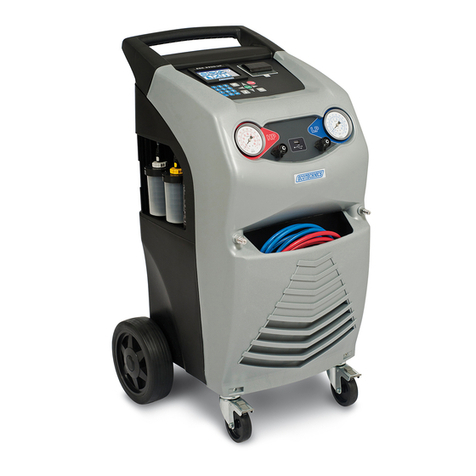
Ecotechnics XK360 User manual

The data, information and descriptions, and the technology described herein are the exclusive intellectual property of Ecotechnics S.p.A. and constitute industrial
secrets. Said information is communicated in strict confidentiality; said information may be used only for the purpose for which it is communicated; said information
may not be divulged, communicated, or revealed to third parties and/or reproduced by any means for any reason whatsoever; said information is protected under
applicable Italian competition and industrial property law.
Service manual VA500-VA750 ed.1 ver.5.05 [MANU360.SA0].doc pag.1 - 18/10/2005

The data, information and descriptions, and the technology described herein are the exclusive intellectual property of Ecotechnics S.p.A. and constitute industrial
secrets. Said information is communicated in strict confidentiality; said information may be used only for the purpose for which it is communicated; said information
may not be divulged, communicated, or revealed to third parties and/or reproduced by any means for any reason whatsoever; said information is protected under
applicable Italian competition and industrial property law.
pag.2 - 18/10/2005 Service manual VA500-VA750 ed.1 ver.5.05 [MANU360.SA0].doc

The data, information and descriptions, and the technology described herein are the exclusive intellectual property of Ecotechnics S.p.A. and constitute industrial
secrets. Said information is communicated in strict confidentiality; said information may be used only for the purpose for which it is communicated; said information
may not be divulged, communicated, or revealed to third parties and/or reproduced by any means for any reason whatsoever; said information is protected under
applicable Italian competition and industrial property law.
Service manual VA500-VA750 ed.1 ver.5.05 [MANU360.SA0].doc pag.3 - 18/10/2005
INDEX
INDEX...............................................................................................................................3
INTRODUCTION..............................................................................................................5
PREPARATION FOR REMOVAL AND DISASSEMBLY............................................................................5
REPLACEMENT PARTS ............................................................................................................................5
CHECKING THE CONNECTIONS .............................................................................................................6
OPERATING CYCLE .......................................................................................................7
RECOVERY-RECYCLING PHASE.............................................................................................................7
VACUUM PHASE........................................................................................................................................8
FILLING PHASE..........................................................................................................................................8
THE MACHINE.................................................................................................................8
BASIC COMPONENTS...............................................................................................................................8
CONTROLS AND CONTROL SYSTEM.....................................................................................................9
CONTROLS AND CONTROL SYSTEM...................................................................................................10
FUNCTION SELECTOR KEYBOARD......................................................................................................11
STATUS AND ALARM PANEL.................................................................................................................12
ROUTINE MAINTENANCE ............................................................................................13
FILLING THE MACHINE BOTTLE............................................................................................................13
VACUUM PUMP .......................................................................................................................................13
M.1) OIL TOP-UP..................................................................................................................................................13
M.2) OIL CHANGE ................................................................................................................................................13
M.3) DECONTAMINATION (ONLY MODEL “A”)...................................................................................................14
REPLACING THE DRYER FILTERS........................................................................................................15
FILLING THE NEW OIL TANK..................................................................................................................15
EMPTYING THE USED OIL TANK...........................................................................................................16
SPECIAL MAINTENANCE .............................................................................................17
BOTTLE SCALE CALIBRATION ..............................................................................................................17
ELECTRONIC VALVE CLEANING OR SUBSTITUTION.........................................................................18
CHANGING THE UNITS OF MEASURE (KGÆLBS OR LBSÆKG)........................................................18
TEST OF THE MACHINE...............................................................................................18
TROUBLESHOOTING ...................................................................................................19
FULL BOTTLE ALARM.............................................................................................................................19
EMPTY BOTTLE ALARM..........................................................................................................................19
SERVICE ALARM.....................................................................................................................................19
HIGH PRESSURE ALARM.......................................................................................................................19
NO DISPLAY WHEN MAIN POWER SWITCH IS ON..............................................................................19
FLUCTUATION OF THE READING OF THE REFRIGERANT................................................................19
VACUUM PUMP DOESN’T START..........................................................................................................19
VACUUM PUMP RUNS, BUT LOW SIDE GAUGE DOES NOT REGISTER AN APPROPRIATE
VACUUM...................................................................................................................................................20
THE MACHINE DOESN’T FINISH THE REFILLING................................................................................20
THE MACHINE DOESN’T REFILL THE OIL ............................................................................................20
THE MANOMETERS DON’T READ THE PRESSURE OF THE A/C SYSTEM.......................................20
PROBLEMS DURING THE DOWNLOAD OF THE SOFTWARE.............................................................20
SCALE DOESN’T READ THE WEIGHT...................................................................................................20
GAIN-OF-WEIGHT IMPLIES READING DECREASE OF THE SCALE...................................................21
THE MACHINE DOESN’T FINISH THE RECOVERY..............................................................................22
ALARM MESSAGES......................................................................................................23
ER02..........................................................................................................................................................23
ER01..........................................................................................................................................................23
HIGH PRESSURE LED.............................................................................................................................23
BOTTLE EMPTY LED..............................................................................................................................23
FULL BOTTLE LED...................................................................................................................................23

The data, information and descriptions, and the technology described herein are the exclusive intellectual property of Ecotechnics S.p.A. and constitute industrial
secrets. Said information is communicated in strict confidentiality; said information may be used only for the purpose for which it is communicated; said information
may not be divulged, communicated, or revealed to third parties and/or reproduced by any means for any reason whatsoever; said information is protected under
applicable Italian competition and industrial property law.
pag.4 - 18/10/2005 Service manual VA500-VA750 ed.1 ver.5.05 [MANU360.SA0].doc
SERV........................................................................................................................................................ 23
HEATER (ONLY MODEL XK360)............................................................................................................ 23
SUGGESTED SPARE PARTS ...................................................................................... 24
TECHNICAL DETAILED LISTS ..................................................................................... 25
WIRING..........................................................................................................................26
30 KG LOAD CELL WIRING................................................................................................................................. 26
BOTTLE GROUND WIRING................................................................................................................................. 26
POWER SUPPLY WIRING................................................................................................................................... 27
MAIN GROUND WIRING...................................................................................................................................... 27
MAIN SWITCH WIRING + CHOKE....................................................................................................................... 28
2 ELECTRONIC VALVE WIRING (MATE_N_LOCK) ........................................................................................... 28
3 ELECTRONIC VALVE WIRING (MATE_N_LOCK) ........................................................................................... 29
HEATER PRESSURE SWITCH WIRING (PRS4075) (ONLY MODEL XK360).................................................... 29
LOW PRESSURE SWITCH WIRING (PRS4175)................................................................................................. 30
SAFETY PRESSURE SWITCH WIRING (PRS4305)........................................................................................... 30
COMPRESSOR WIRING...................................................................................................................................... 31
CONDENSER FAN WIRING ................................................................................................................................ 31
VACUUM PUMP WIRING..................................................................................................................................... 32
BOTTLE HEATER WIRING (ONLY MODEL XK360)............................................................................................ 32
BOTTLE TEMPERATURE PROBE WIRING (ONLY MODEL XK360).................................................................. 33
HYDRAULICAL DIAGRAM............................................................................................ 34
WIRING DIAGRAM........................................................................................................ 35
ELECTRONIC BOARD.................................................................................................. 36
SCH4000/SCH4001 VALUE_7/9 MOTHERBOARD................................................................................ 36
EXPLODED VIEW KEY................................................................................................ 37
MODEL XK360........................................................................................................................................ 37
MODEL XK360........................................................................................................................................ 38
MODEL XK385........................................................................................................................................ 39
MANIFOLD.............................................................................................................................................. 40
PIPING..................................................................................................................................................... 42
CHECK VALVE [GRVLV05].................................................................................................................... 44
SOLENOID VALVE [VLV1550]................................................................................................................ 45
NOTE............................................................................................................................. 46

The data, information and descriptions, and the technology described herein are the exclusive intellectual property of Ecotechnics S.p.A. and constitute industrial
secrets. Said information is communicated in strict confidentiality; said information may be used only for the purpose for which it is communicated; said information
may not be divulged, communicated, or revealed to third parties and/or reproduced by any means for any reason whatsoever; said information is protected under
applicable Italian competition and industrial property law.
Service manual VA500-VA750 ed.1 ver.5.05 [MANU360.SA0].doc pag.5 - 18/10/2005
INTRODUCTION
This manual was produced by the manufacturer primarily for use by dealers and their qualified
A/C system technicians. It is not possible to include all the knowledge of a mechanic in one
manual. Therefore, anyone who uses this book to perform maintenance and repairs on service
stations should have a basic understanding of mechanics and the techniques to repair these
types of machines. Repair and maintenance work attempted by anyone without this knowledge
is likely to render the service station unsafe and unfit for use. This model has been designed
and manufactured to perform within certain specifications in regard to performance. Proper
service with the correct tools is necessary to ensure that the service station will operate as
designed. If there is any question about a service procedure, it is imperative that you contact
the dealer for any service information changes that apply to this model. This policy is intended
to provide the customer with the most satisfaction from his service station. The manufacturer is
continually striving to improve all of its models. Modifications and significant changes in
specifications or procedures will be forwarded to all authorized dealers and will appear in future
editions of this manual where applicable. Please read this material carefully. Designs and
specifications are subject to change without notice.
PREPARATION FOR REMOVAL AND DISASSEMBLY
1. Before removal and disassembly, eliminate all dirt, mud, dust and foreign material.
2. Use only the proper tools and cleaning equipment.
3. During disassembly, clean all of the parts and place them in trays in the order of
disassembly. This will speed up assembly and allow for the correct installation of all parts.
4. Keep all parts away from any source of fire.
REPLACEMENT PARTS
Use only genuine manufacturer parts for all replacements, contact the dealer for the complete
list. Other brands may be similar in function and appearance, but inferior in quality, and not
designed for that specific use.

The data, information and descriptions, and the technology described herein are the exclusive intellectual property of Ecotechnics S.p.A. and constitute industrial
secrets. Said information is communicated in strict confidentiality; said information may be used only for the purpose for which it is communicated; said information
may not be divulged, communicated, or revealed to third parties and/or reproduced by any means for any reason whatsoever; said information is protected under
applicable Italian competition and industrial property law.
pag.6 - 18/10/2005 Service manual VA500-VA750 ed.1 ver.5.05 [MANU360.SA0].doc
CHECKING THE CONNECTIONS
Check the leads, couplers, and connectors for stains,
rust, moisture, etc.
1.Disconnect: Lead, Coupler, Connector
2.Check: Lead, Coupler, Connector
Moisture ÆDry with an air blower.
Rust/stains ÆConnect and disconnect several
times.
3.Check: all connections
Loose connection ÆConnect properly.
If the pin 1 on the terminal is flattened, bend it up.
4.Connect: Lead, Coupler, Connector
NOTE: Make sure all connections are tight.
5.Check: continuity (with the pocket tester)
NOTE: If there is no continuity, clean the
terminals. When checking the wire harness,
perform steps (1) to (3). As a quick remedy, use a
contact revitalizer available at most part stores.

The data, information and descriptions, and the technology described herein are the exclusive intellectual property of Ecotechnics S.p.A. and constitute industrial
secrets. Said information is communicated in strict confidentiality; said information may be used only for the purpose for which it is communicated; said information
may not be divulged, communicated, or revealed to third parties and/or reproduced by any means for any reason whatsoever; said information is protected under
applicable Italian competition and industrial property law.
Service manual VA500-VA750 ed.1 ver.5.05 [MANU360.SA0].doc pag.7 - 18/10/2005
OPERATING CYCLE
The operating cycle is divided into three distinct phases: the recovery-recycling phase with the
automatic draining of used oil, the vacuum phase, the oil and refrigerant recharging phase.
RECOVERY-RECYCLING PHASE
After carrying out the necessary connections to the vehicle’s air conditioning system and
selecting the phase, if gas is present the machine will begin recovery. There follows a detailed
description of the system. We will follow the path taken by the gas on the enclosed hydraulic
diagram: during this phase the EV1 solenoid valve is open, and the compressor (14) and
electric fan (26) are also in operation. For this to occur, it is necessary that the gas pressure,
visible on the manometer, is sufficient (+0.5 bar) to close the electrical contact at the pressure
switch (7) connected to the distributor. Under these conditions, the flow arriving from the air
conditioning system through the mechanical filters (8), which retains any solid residue, reaches
the evaporator (9) after passing through the EV1 solenoid valve.
From the evaporator, the gas moves past the check valve n°1 (11) and the low pressure filter
(12) until it reaches the compressor (14). The filter mentioned is a high capacity dehydrating
filter (between 10 and 12 ppm per kg of refrigerant in relation to the type of refrigerant and the
temperature of the fluid).
When it leaves the compressor the refrigerant, in a superheated vapour state, arrives at the
separator. In its new configuration this cylindrically-shaped component has three connectors on
the upper part, with a safety pressure switch (16) connected to one of them. This is normally
closed and will open the electrical contact, disconnecting the power supply to the compressor,
if the delivery pressure of the compressor should exceed around 17.5 bar. The compressor is
a 12 cc displacement reciprocating compressor and has three connections: on one side are the
suction and delivery connections, on the opposite side is a connection used for returning the oil
from the separator (15).
There follows a detailed description of the separator: during compressor operation obviously
part of the oil enters into circulation with the refrigerant, therefore it is necessary to make sure
that this oil returns to the compressor so that its functionality is not compromised. In
correspondence with the central connector, the separator has a pure borosilicate coalescent
filter with over 99% efficiency, which causes the oil molecules to coacervate as an effect of the
excitation produced by passing over the filter. In this way, gravity causes the drops of oil to
deposit on the bottom of the bottle and then return to the compressor, at the end of the
recovery phase, when the EV3 solenoid valve is opened.
After coming out of the separator, the superheated gas goes through the check valve n°2 (17)
and returns to the evaporator. When it comes out of the evaporator, the refrigerant goes to the
condenser (27) where it completely passes to a liquid state, transferring heat to the air flow
produced by the electric fan (26). In its now liquid state, the refrigerant then goes through filter
(30), which has the same characteristics as filter (12), and passes through the humidity
indicator (31), the check valve n°3 (32) which stop the gas from the bottle (33) returning, even if
the pressure rises to a relatively high level as an effect of the automatic heating element
resistance (ONLY MODEL XK360), not illustrated.
There is also a bottle manometer (22) and a pressure switch (21) (ONLY MODEL XK360) for
the bottle heater. When the pressure descends below 6 bar, the electrical heating element is
triggered until a pressure of 8 bar is reached.
Finally we arrive to the bottle (33) through the vapour side valve.

The data, information and descriptions, and the technology described herein are the exclusive intellectual property of Ecotechnics S.p.A. and constitute industrial
secrets. Said information is communicated in strict confidentiality; said information may be used only for the purpose for which it is communicated; said information
may not be divulged, communicated, or revealed to third parties and/or reproduced by any means for any reason whatsoever; said information is protected under
applicable Italian competition and industrial property law.
pag.8 - 18/10/2005 Service manual VA500-VA750 ed.1 ver.5.05 [MANU360.SA0].doc
The recovery phase shuts down with the de-energising of EV1 when the pressure switch (7)
reaches a pressure of –0.3 bar, the EV2 valve is automatically opened to drain the used oil,
and the electronic valve EV3 for the return of the oil of the compressor
VACUUM PHASE
At the end of the recovery phase there is an interval of around 2 minutes during which any gas
returning from the system will result in the recovery phase being immediately restarted.
Otherwise the vacuum phase will automatically begin. During this phase only the EV4 solenoid
valve is energised so that air and non-condensable gases can be evacuated through the
vacuum pump (10). The vacuum pump is a single stage model with an involute capacity of
112l/min and a vacuum degree of 0.1 mbar.
The vacuum phase can also be selected from the keyboard as long as the air conditioning
system has been completely discharged. The vacuum phase will only start under these
conditions, otherwise the machine will sound an acoustic alarm and it will be necessary to
begin from the recovery phase.
FILLING PHASE
Once the vacuum phase has concluded, the technician will carry out the recharging of new oil,
and refrigerant. The new oil in the container (35), passes through the new oil valve (34), the
check valve n°4 (19) and reaches the distributor where there is a vacuum.
Once injection of oil is complete, the EV5 solenoid valve is energised and the refrigerant flows
from the bottle to the distributor and then into the air conditioning system, where there is a
vacuum, by simply making use of the pressure difference between the bottle and the system.
Once the required weight has been reached, the EV5 solenoid valve closes, blocking the flow
of refrigerant from the bottle.
NOTE: Numbers under bracket of this chapter are referred to the hydraulic diagram.
THE MACHINE
BASIC COMPONENTS
a) Control console b)Taps
c) Handle d) High/Low Pressure threaded connectors
e) Top-up oil container f) Bottle
g) Drying filters h)Electronic scale
j) Main switch i) Heating resistance (ONLY MODEL XK360)
k) Socket for electrical supply plug l) Fuse
m) Used oil container n) Serial port
o) Humidity gauge p) Vacuum pump
q) Wheels

The data, information and descriptions, and the technology described herein are the exclusive intellectual property of Ecotechnics S.p.A. and constitute industrial
secrets. Said information is communicated in strict confidentiality; said information may be used only for the purpose for which it is communicated; said information
may not be divulged, communicated, or revealed to third parties and/or reproduced by any means for any reason whatsoever; said information is protected under
applicable Italian competition and industrial property law.
Service manual VA500-VA750 ed.1 ver.5.05 [MANU360.SA0].doc pag.9 - 18/10/2005

The data, information and descriptions, and the technology described herein are the exclusive intellectual property of Ecotechnics S.p.A. and constitute industrial
secrets. Said information is communicated in strict confidentiality; said information may be used only for the purpose for which it is communicated; said information
may not be divulged, communicated, or revealed to third parties and/or reproduced by any means for any reason whatsoever; said information is protected under
applicable Italian competition and industrial property law.
pag.10 - 18/10/2005 Service manual VA500-VA750 ed.1 ver.5.05 [MANU360.SA0].doc
CONTROLS AND CONTROL SYSTEM
(A1) High pressure gauge for A/C system
(A2) Low pressure gauge for A/C system
(A4) Pressure gauge for bottle refrigerant pressure
(A6) Emergency/alarms panel
(A7) Display
(A8) Pushbuttons for modifying and starting/stopping operations
(A9) Operations selector panel
A1 A2
A9
A4
A6
A7 A8

The data, information and descriptions, and the technology described herein are the exclusive intellectual property of Ecotechnics S.p.A. and constitute industrial
secrets. Said information is communicated in strict confidentiality; said information may be used only for the purpose for which it is communicated; said information
may not be divulged, communicated, or revealed to third parties and/or reproduced by any means for any reason whatsoever; said information is protected under
applicable Italian competition and industrial property law.
Service manual VA500-VA750 ed.1 ver.5.05 [MANU360.SA0].doc pag.11 - 18/10/2005
T1 T3 T8
T6
T9
T5
T4 T7 T12 T10 T11
T2T13
FUNCTION SELECTOR KEYBOARD
(T1) Availability LED indicator: when lit, the display reports the quantity of refrigerant fluid
contained in the bottle.
(T2) Charging LED indicator (flashes during the CHARGING phase).
(T3) Recovery LED indicator (flashes during the RECOVERY phase).
(T4) Vacuum LED indicator (flashes during the VACUUM phase).
(T5) Oil Discharge indicator (flashes during the OIL DISCHARGE phase).
(T6) SEL key: Selects the operation to be performed. Every time this key is pressed one of the
LEDs from T1 through T4 will light in sequence; the LED alongside each operation indicates
that the operation may be started or that it is being performed (flashing LED).
(T7) + key: Each time this key is pressed during the operations relative to setting the time and
the quantity, the value of the flashing digit on the display will be increased by one unit.

The data, information and descriptions, and the technology described herein are the exclusive intellectual property of Ecotechnics S.p.A. and constitute industrial
secrets. Said information is communicated in strict confidentiality; said information may be used only for the purpose for which it is communicated; said information
may not be divulged, communicated, or revealed to third parties and/or reproduced by any means for any reason whatsoever; said information is protected under
applicable Italian competition and industrial property law.
pag.12 - 18/10/2005 Service manual VA500-VA750 ed.1 ver.5.05 [MANU360.SA0].doc
(T8) ARROW key: Each time this key is pressed while a display value is flashing during the
operations relative to setting the time and the quantity, a different digit will be selected for
modification (selected digit will flash).
(T9) ENTER key: Pressing this key when a LED corresponding to an operation is lit but not
flashing will permit modifying the times and the fluid quantities. Upon completion of
modification, press the key again to confirm the datum
(T10) START key: Pressing this key will start the operation indicated by the lighted LED
(T11) STOP key: Pressing this key will stop the operation indicated by the flashing LED.
(T12) TEMPERATURE key: Pressing this key the display will show the bottle temperature in
Celsius degree and Fahrenheit degree. (ONLY MODEL XK360)
(T13) Display: According to the operation selected, displays the time or refrigerant quantity
values.
STATUS AND ALARM PANEL
(C1) HEATER ON: Lights to indicate that the electrical resistance of the machine is heating the
bottle to maintain fluid pressure between 5.5 and 8,5 bar. The resistance does not operate
during the RECOVERY phase of operation (ONLY MODEL XK360)
(C2) HIGH PRESSURE: Lights and emits an acoustic signal when the pressure of the fluid in
the circuit catch up 17.5 bar. The RECOVERY operation is automatically interrupted.
(C3) FULL BOTTLE: Lights and emits an acoustic signal when the bottle is full to more than
80% capacity (that is, 10 kg). The Recovery operation is automatically interrupted.
(C4) EMPTY BOTTLE: Lights and emits an acoustic signal when the quantity of refrigerant fluid
contained in the bottle is low (2 kg). in order to avoid the emission of non-condensable gases.
Fill the bottle according to the procedure described in the ROUTINE MAINTENANCE section.
C3
C4
C2
C1

The data, information and descriptions, and the technology described herein are the exclusive intellectual property of Ecotechnics S.p.A. and constitute industrial
secrets. Said information is communicated in strict confidentiality; said information may be used only for the purpose for which it is communicated; said information
may not be divulged, communicated, or revealed to third parties and/or reproduced by any means for any reason whatsoever; said information is protected under
applicable Italian competition and industrial property law.
Service manual VA500-VA750 ed.1 ver.5.05 [MANU360.SA0].doc pag.13 - 18/10/2005
ROUTINE MAINTENANCE
FILLING THE MACHINE BOTTLE
This operation must be performed whenever the available refrigerant in the bottle is less than 3
kg and must in any case be performed when the “empty bottle” indicator lights on the control
console.
IMPORTANT: Never tamper with the taps on the machine bottle. Procure a bottle of R134a
gas; connect it to the high-pressure hose of the MACHINE. Open the tap of the external bottle
and the high-pressure tap of the MACHINE. If the external bottle is not supplied with a suction
device, turn it upside down to obtain a higher delivery rate. Switch the machine on, then hold
down the SEL key until the LED corresponding to “Recovery” lights. Press the START key to
start the MACHINE. The display will indicate the quantity of refrigerant transferred to the bottle
on board the machine. Close the tap of the external bottle when the quantity transferred is 0.50
kg less than the final quantity desired. Allow the machine to recover the fluid remaining in the
hose. The “oil discharge” LED will light when the machine will have recovered all the fluid from
the hose. The machine will stop automatically. Close the high-pressure tap on the MACHINE,
press the STOP key, and disconnect the external bottle.
VACUUM PUMP
Perform the operations listed below on a routine basis in order to ensure good operation of the
vacuum pump.
M.1) Oil top-up
M.2) Oil change
M.3) Decontamination (only Model “A”)
When topping-up or replacing the pump oil, use only the oil recommended by the
manufacturer. Contact the distributor for information concerning the correct type of oil.
NOTE: in order to correctly check the oil level it is suggested to run a 1 minutes of vacuum, and
the verify the oil level.
M.1) Oil top-up
This operation must be performed when the level of the oil falls to less than half on the indicator
(4). To refill the oil, perform the steps listed below in the order given. Disconnect the machine
from the mains supply. Locate the oil cap (3) and screw it off. The oil will be added through the
hole in which the oil cap was lodged (3). Add oil a little at a time, waiting for the level to rise
before each successive addition, until the oil level is about ½ cm above the red mark on the
indicator (4). Replace the oil cap (3) and tighten down.
M.2) Oil change
The vacuum pump oil must be replaced every 150 working hours and in any case every time
the refrigerant filters are replaced. The oil must also be changed whenever it changes color
due to absorption of humidity. Before beginning the oil change procedure, procure a container
of at least 500 cc capacity in which to collect the used oil. The pump contains about 500 cc of
oil. Use only suitable ISO68 oils (Contact your vacuum pump distributor for specific
information).
1) Disconnect the machine from the mains supply.
2) Unscrew the filling cap (3).

The data, information and descriptions, and the technology described herein are the exclusive intellectual property of Ecotechnics S.p.A. and constitute industrial
secrets. Said information is communicated in strict confidentiality; said information may be used only for the purpose for which it is communicated; said information
may not be divulged, communicated, or revealed to third parties and/or reproduced by any means for any reason whatsoever; said information is protected under
applicable Italian competition and industrial property law.
pag.14 - 18/10/2005 Service manual VA500-VA750 ed.1 ver.5.05 [MANU360.SA0].doc
3) Unscrew the drain cap (5).
4) Allow all the oil to run out into a disposal
container (with height < 10 cm)
5) Close the drain cap (5).
6) Pour in new oil through the filling hole (3
- opened previously) until the level rises
to the midpoint on the indicator (4).
7) Replace and tighten the filling cap (3).
M.3) Decontamination (only Model “A”)
Dark or turbid oil or an increase in the oil level
are signs that the oil has been contaminated
by foreign substances. In these cases proceed
as outlined below.
1) Disconnect the machine from the mains
supply.
2) Unscrew the ballast valve (2) by 2 (two)
turns.
3) Reconnect the machine to mains
supply.
4) Run the vacuum phase for one hour on
the hoses, with the taps open, and with
the quick coupler connected.
5) Disconnect the machine from mains supply.
Should decontamination not return the oil to its original state (light color and no traces of
emulsion), change the oil.
NOTE: vacuum pump maintenance procedure described into the users manual ed.0 is non
correct, decontamination is available only for vacuum pumps model “A”.
2 1
3
4
MA
X
min
5
5
4
MA
X
min
3
1
Model “
A
”
Model “B”

The data, information and descriptions, and the technology described herein are the exclusive intellectual property of Ecotechnics S.p.A. and constitute industrial
secrets. Said information is communicated in strict confidentiality; said information may be used only for the purpose for which it is communicated; said information
may not be divulged, communicated, or revealed to third parties and/or reproduced by any means for any reason whatsoever; said information is protected under
applicable Italian competition and industrial property law.
Service manual VA500-VA750 ed.1 ver.5.05 [MANU360.SA0].doc pag.15 - 18/10/2005
REPLACING THE DRYER FILTERS
Replace the filters whenever the machine gives
the service alarm during the first ten seconds of
operation or whenever the humidity gage signals
the presence of humidity in the circuit (inner circle
yellow). Before performing any operation, check
that the replacement filters are the same types as
those installed on the machine. Then proceed as
described below:
1) Disconnect the machine from the electrical
supply
2) Wear protective gloves and glasses
3) Remove the rear plastic cover from the
machine.
4) Close the taps on the bottle.
5) Close the tap (1) on the filter (4)
6) Connect the low pressure quick-connect
coupling to the male connector (2) of the
filter (4)
7) Connect the machine to the electrical
supply
8) Carry out a recovery operation (note: the
low pressure tap should be open)
9) When zero bar is reached, immediately
close the tap (3) on the filter (5) and press
Stop or Reset
10)Disconnect the machine from the electrical supply
11)Disconnect the low pressure quick-connect coupling from the connector (2) on the filter
(4)
12)Dismantle the old filters and mount new ones, carefully noting the direction of the
arrows.
IMPORTANT: replace the old filter with a new one as quickly as possible to avoid
possible contamination by moisture in the ambient air.
13)Open the tap (1) under the filter (4) and the tap (3) on the filter (5)
14)Open the taps on the bottle
15)Replace the rear plastic cover on the machine
16)Reconnect to the electrical supply and switch the machine on.
17)Select NEXT MENU, and enter into SERVICE ALARM.
18)Key in the filter code to cancel the alarm; if the filter code is not available, telephone the
Service Center.
19)Recover around 500g of gas to charge the machine circuit.
20)Switch off the machine
21)Disconnect the machine from the electrical supply
FILLING THE NEW OIL TANK
It is good practice to fill the oil tank whenever the oil level falls below 100 cc in order to
guarantee that there will be sufficient oil for topping up during successive operations. Types of
1
2
3
4
5

The data, information and descriptions, and the technology described herein are the exclusive intellectual property of Ecotechnics S.p.A. and constitute industrial
secrets. Said information is communicated in strict confidentiality; said information may be used only for the purpose for which it is communicated; said information
may not be divulged, communicated, or revealed to third parties and/or reproduced by any means for any reason whatsoever; said information is protected under
applicable Italian competition and industrial property law.
pag.16 - 18/10/2005 Service manual VA500-VA750 ed.1 ver.5.05 [MANU360.SA0].doc
oil: use only synthetic (polyester) oils or the oils recommended by the A/C system manufacturer
(ISO 68 density). Always refer to the information provided by the system manufacturer.
Procedure: Lift the oil tank out of its lodging. Hold the cap and unscrew the tank. Fill with the
correct quantity of suitable type and grade oil for compressors. Screw the tank back into the
cap while holding the latter in place.
EMPTYING THE USED OIL TANK
This operation must be performed whenever the oil level exceeds 200 cc. Procedure. Remove
the tank from its lodging very carefully. Hold the cap and unscrew the tank. Empty the contents
into a container for used oils. Screw the tank back into the cap while holding the latter in place.
Replace the tank.

The data, information and descriptions, and the technology described herein are the exclusive intellectual property of Ecotechnics S.p.A. and constitute industrial
secrets. Said information is communicated in strict confidentiality; said information may be used only for the purpose for which it is communicated; said information
may not be divulged, communicated, or revealed to third parties and/or reproduced by any means for any reason whatsoever; said information is protected under
applicable Italian competition and industrial property law.
Service manual VA500-VA750 ed.1 ver.5.05 [MANU360.SA0].doc pag.17 - 18/10/2005
SPECIAL MAINTENANCE
BOTTLE SCALE CALIBRATION
This operation should be performed when the scale values displayed are out of line with known
values. The operations listed below must be performed with the maximum attention and care.
Always observe the precautions outlined in this section. Always place the weights carefully on
the scale plate, one at a time. Always place the weights the center of the scale plate. Proceed
as explained below to calibrate the scale (see fig.3). Disconnect the machine from mains
supply. Procure a known reference weight (16 or 18 kg). Remove the plastic cover on the rear
of the machine (ONLY MODEL XK360) to access the machine bottle. Close the blue and red
taps on the bottle. Unscrew the bottle lock nut (3). Separate the heating coil (4) from the bottle
(do not touch or disconnect the wires of the resistance coil).
Remove the bottle (5) from its seat, leaving the resistance around the scale plate(ONLY
MODEL XK360). Rest the bottle on a stand at least 40 cm in height. Switch on the MACHINE.
Be careful not to touch any electrical wires. Wait at least 10 seconds. Press the + and ARROW
keys simultaneously and hold down for about 5 seconds. The value displayed at this point will
correspond to the scale zero value. Press down lightly on the scale plate; the value should
increase. If it does not, replace the charge cell. Press the ENTER key to memorize the value.
In this phase, take care that nothing touches the scale plate). Place the reference weight (16 or
18 kg) carefully at the center of the scale plate and check that the displayed value increases
accordingly. Press the SEL key and use the + e ARROW keys to type in the 4 figures of the
reference weight. Press ENTER. The display reading should be the reference weight minus the
weight of the empty bottle (ca. 6.1 kg).
Remove the reference weight. Switch off the machine and disconnect from mains supply.
Replace the bottle in its seat on the scale plate. Switch on the MACHINE, taking care not to
touch any electrical wires. Check calibration: place a known 0.5 kg or 1 kg reference weight on
the bottle and check that the displayed availability value increases by the value of the known
reference weight ±2%. Remove the reference weight. Switch off the machine and disconnect
from mains supply. Screw down the bottle lock nut (3). Open the red and blue bottle taps.
Replace the rear plastic cover(ONLY MODEL XK360).

The data, information and descriptions, and the technology described herein are the exclusive intellectual property of Ecotechnics S.p.A. and constitute industrial
secrets. Said information is communicated in strict confidentiality; said information may be used only for the purpose for which it is communicated; said information
may not be divulged, communicated, or revealed to third parties and/or reproduced by any means for any reason whatsoever; said information is protected under
applicable Italian competition and industrial property law.
pag.18 - 18/10/2005 Service manual VA500-VA750 ed.1 ver.5.05 [MANU360.SA0].doc
ELECTRONIC VALVE CLEANING OR
SUBSTITUTION
Disconnect the machine from mains supply.
Remove the rear plastic cover. Identify the
solenoid valve referring to the PIPING
paragraph of the EXPLODED VIEW KEY. Close
the blue and red taps of the machine bottle.
Unscrew the nut (2), extract the lock washer (3)
and the coil (1). ATTENTION: The coil must
remain inside the machine, with the wires
attached.
NOTE: if the valve to be cleaned is EV2 or EV3,
it will be necessary to also remove the front
plastic cover and the front panel.
Unscrew the body of the solenoid valve (4). Use
a jet of compressed air to clean the plunger
gasket (5) and the orifice (6). Reassemble.
Open the blue and red taps of the machine
bottle. Replace the rear plastic cover. Test the
machine. If the problem persists, disconnect the
machine from main supply and replace the
solenoid valve
CHANGING THE UNITS OF
MEASURE (KGÆLBS OR LBSÆKG)
Press the SEL, START, and ENTER keys
simultaneously. Switch on the machine. The
machine will change from one system of units of
measurement to the other.
TEST OF THE MACHINE
Not available
1
23
4
5
6

The data, information and descriptions, and the technology described herein are the exclusive intellectual property of Ecotechnics S.p.A. and constitute industrial
secrets. Said information is communicated in strict confidentiality; said information may be used only for the purpose for which it is communicated; said information
may not be divulged, communicated, or revealed to third parties and/or reproduced by any means for any reason whatsoever; said information is protected under
applicable Italian competition and industrial property law.
Service manual VA500-VA750 ed.1 ver.5.05 [MANU360.SA0].doc pag.19 - 18/10/2005
TROUBLESHOOTING
FULL BOTTLE ALARM
- Transfer refrigerant from unit tank to approved refrigerant storage tank.
- Check the scale calibration
- Check if the max=10.000g
EMPTY BOTTLE ALARM
- Transfer refrigerant from approved refrigerant storage tank to unit tank.
- Check the scale calibration
- Check if the min=2.000g
SERVICE ALARM
- Remove and replace the filter-drier. See REPLACING THE FILTER-DRIER and change
the oil of the vacuum pump
HIGH PRESSURE ALARM
- remove the air from the bottle as describe into “purge non condensable gas” paragraph
of the user manual. Repeat another recovery phase, if air accumulate again into the
bottle it means that the machine is sucking air, please verify leaks on the piping.
- Open the machine, verify that the valve under the high pressure dryer filter and the two
valves over the refrigerant bottle are all open
- Gaskets of the hose (s) connected to the internal bottle are distorted. Substitutes with
new ones, cod. GUA0002
NO DISPLAY WHEN MAIN POWER SWITCH IS ON
- Blown main fuse, Replace fuse 8A
- verify connection LINE IN into the motherboard
- verify the voltage into the LINE IN wiring,
a. it is 230 +/-10%: substitute the motherboard
b. it is NOT 230 +/-10%: substitute the LINE IN wiring
FLUCTUATION OF THE READING OF THE REFRIGERANT
- verify the power supply voltage must be 220 +/-10%:
- verify bottle load cell connection J15 to the motherboard
- verify wiring connection to bottle load cell
- replace refrigerant bottle load cell
- replace motherboard
VACUUM PUMP DOESN’T START
- ERROR: “02”; make another recovery phase, if the recovery phase doesn’t finish,
please refer “the machine doesn’t finish the recovery” paragraph

The data, information and descriptions, and the technology described herein are the exclusive intellectual property of Ecotechnics S.p.A. and constitute industrial
secrets. Said information is communicated in strict confidentiality; said information may be used only for the purpose for which it is communicated; said information
may not be divulged, communicated, or revealed to third parties and/or reproduced by any means for any reason whatsoever; said information is protected under
applicable Italian competition and industrial property law.
pag.20 - 18/10/2005 Service manual VA500-VA750 ed.1 ver.5.05 [MANU360.SA0].doc
VACUUM PUMP RUNS, BUT LOW SIDE GAUGE DOES NOT REGISTER AN
APPROPRIATE VACUUM
- Possible leak into the A/C system, close both quick coupler, if the now the vacuum is
reached it means there is a leak into the A/C system of the car.
- Pump oil insufficient or contaminated: refill or decontaminate the vacuum pump oil
- If the pump start and the immediately stops visualizing ERROR “02", verify and if
necessary substitute the check valve n°1
THE MACHINE DOESN’T FINISH THE REFILLING
- Close HP valve, left open the LP valve in front of the machine, start the engine of the
car, turn on the A/C system, let the compressor of the A/C system suck the remaining
refrigerant.
- If the problem reiterate continuously, proceed with the following verification:
1. bottle pressure > LP and HP
a. verify if the needle of the HP and LP quick coupler reach the valve
inside the male fitting
b. verify if hose or the capillary for the refilling (the one under the refilling
electronic valve EV5) is obstructed
2. bottle pressure < LP and HP
a. verify the calibration of the refrigerant load cell, it could possible a shift
of the “zero” (that is the availability displayed > of the real one)
THE MACHINE DOESN’T REFILL THE OIL
- Verify the functioning of the new oil manual valve
- New oil hose (Ton) obstructed or restricted
THE MANOMETERS DON’T READ THE PRESSURE OF THE A/C SYSTEM
- the quick coupler is closed, verify the corresponding stinger inside of the quick coupler
- service hoses gasket obstructed
- manometer capillary line obstructed (rare)
PROBLEMS DURING THE DOWNLOAD OF THE SOFTWARE
- The software “ECKPC” doesn’t find the machine:
1.The serial cable RS232 isn’t direct (pit to pin), turn off the machine and check the
serial wiring
2.wrong connection port
3.wrong bit rate, set up to 19200 baud rate
SCALE DOESN’T READ THE WEIGHT
- the bottle fix bolt touches the bottle plate, remove it (only for refrigerant scale)
- the scale pin-connector isn’t correctly plugged to the motherboard
- during calibration electrical level is always 4096:
1. verify the right sequence (refer to WIRING paragraph) of the colour of the wire into
the pin-connector of the scale
2.verify that the pin-connector “AMP MOD II” of the motherboard aren’t short-
circuited: check the voltage between PIN 2 and PIN 3, if the voltage is > 100 mV
clear the pin-connector or replace the motherboard
This manual suits for next models
3
Table of contents
Other Ecotechnics Service Equipment manuals
Popular Service Equipment manuals by other brands
Orion
Orion 29405-07-08 Parts and technical service guide
Master cool
Master cool 53376 operating instructions
Master cool
Master cool COMMANDER4000-E Operation instructions
parktool
parktool 100-3D quick start guide
Brain Bee
Brain Bee 9000 Bus Plus User and maintenance manual
Heal-Tech
Heal-Tech FI Cleaner user manual
