EDA ED-GWL2110 User manual

User Manual of ED-GWL2110
EDATechnology Co.,LTD–Electronics Development Accelerator
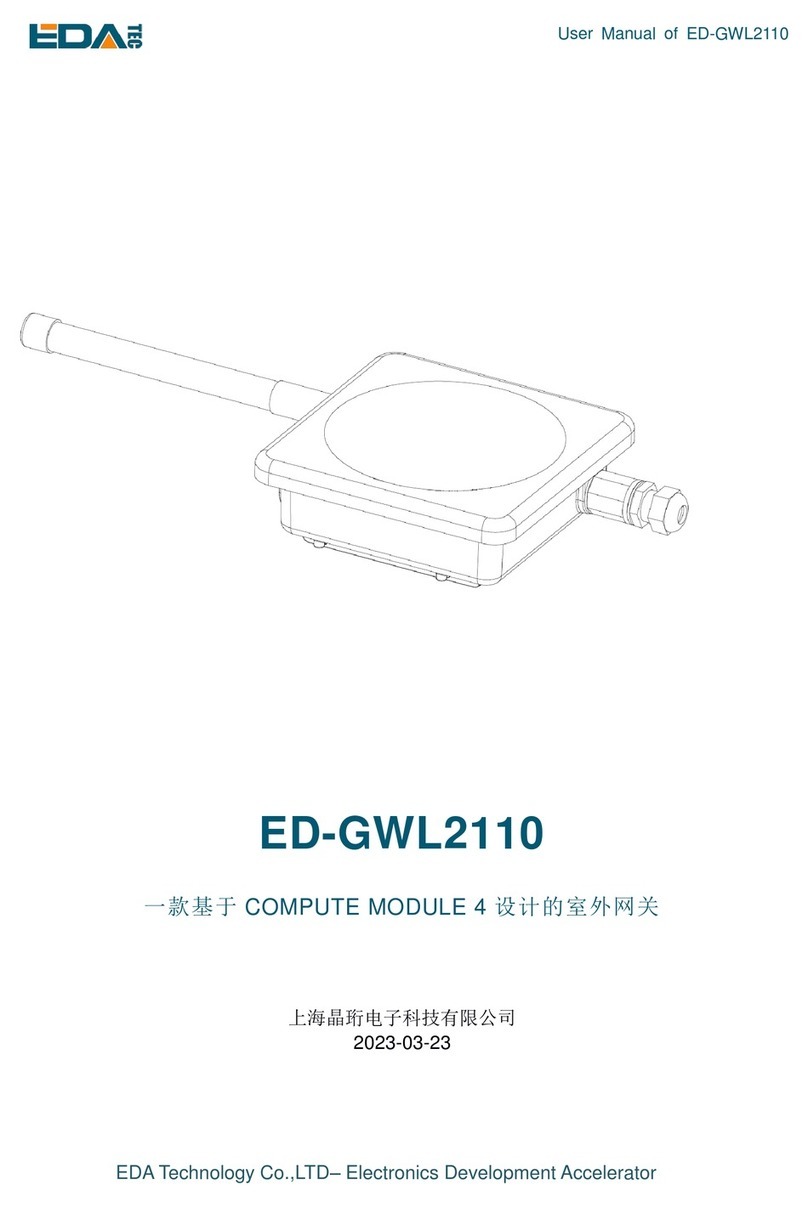
ED-GWL2110
AN OUTDOOR GATEWAY BASED ON RASPBERRY PI CM4
Shanghai EDA Technology Co.,Ltd
2023-03-23

User Manual of ED-GWL2110
EDATechnology Co.,LTD–Electronics Development Accelerator
Copyright Statement
ED-GWL2110 and its related intellectual property rights are owned by Shanghai EDATechnology Co., Ltd.
Shanghai EDA Technology Co., Ltd owns the copyright of this document and reserves all rights. Without
the written permission of Shanghai EDA Technology Co., Ltd, no part of this document may be modified,
distributed or copied in any way or form.
Disclaimers
Shanghai EDA Technology Co., Ltd does not guarantee that the information in this manual is up to date,
correct, complete or of high quality. Shanghai EDATechnology Co., Ltd also does not guarantee the further
use of this information. If the material or non-material related losses are caused by using or not using the
information in this manual, or by using incorrect or incomplete information, as long as it is not proved that
it is the intention or negligence of Shanghai EDA Technology Co., Ltd, the liability claim for Shanghai EDA
Technology Co., Ltd can be exempted. Shanghai EDATechnology Co., Ltd expressly reserves the right to
modify or supplement the contents or part of this manual without special notice.

User Manual of ED-GWL2110
EDATechnology Co.,LTD–Electronics Development Accelerator
Contents
1Product Overview..................................................................................................................................5
1.1 TargetApplication....................................................................................................................... 5
1.2 Specifications and Parameters..................................................................................................5
1.3 System Diagram.........................................................................................................................6
1.4 Functional Layout.......................................................................................................................7
1.5 Packing List................................................................................................................................ 7
1.6 Order Code ................................................................................................................................8
2Quick Start ............................................................................................................................................ 8
2.1 Equipment List ...........................................................................................................................8
2.2 Hardware Connection................................................................................................................ 8
2.3 First Start.................................................................................................................................... 9
2.3.1 Raspberry Pi OS (Lite)....................................................................................................9
2.3.2 Enable SSH................................................................................................................... 10
2.3.3 Get The Device IP.........................................................................................................10
3Software Operation Guide ...................................................................................................................11
3.1 Button........................................................................................................................................11
3.2 LED Indication...........................................................................................................................11
3.3 Ethernet Configuration.............................................................................................................12
3.4 LTE 4G..................................................................................................................................... 12
3.5 WiFi..........................................................................................................................................13
3.6 Bluetooth.................................................................................................................................. 13
3.6.1 Basic Usage.................................................................................................................. 14
3.6.2 Example ........................................................................................................................ 14
3.7 SD Card Extended Storage .....................................................................................................15
3.7.1 Mount ............................................................................................................................15
3.7.2 Unmount........................................................................................................................16
3.7.3 SetAutomatic Mount in The Command Line................................................................ 16
3.8 RTC.......................................................................................................................................... 16
3.9 Watch Dog................................................................................................................................ 17
3.10 GPS.......................................................................................................................................... 18
3.10.1 Pin Configuration...........................................................................................................18
3.10.2 Modify config.txt to Enable Serial Port..........................................................................18
3.10.3 Check GNSS information.............................................................................................. 18
3.10.4 Use the u-center tool to view positioning information................................................... 19
3.11 LoRaWAN ................................................................................................................................21
3.11.1 Install LoRa Service and ChirpStack Client..................................................................21
3.11.2 Configuring LoRa Service.............................................................................................22
3.11.3 Install ChirpStack Server ..............................................................................................24
3.11.4 Adding LoRa Gateway and Terminal ............................................................................27
3.12 Encryption chip.........................................................................................................................30
4OS Installation..................................................................................................................................... 30
4.1 Image Download...................................................................................................................... 30

User Manual of ED-GWL2110
EDATechnology Co.,LTD–Electronics Development Accelerator
4.2 System Flash ........................................................................................................................... 30
5FAQ.....................................................................................................................................................31
5.1.1 Default Username and Password.................................................................................31
6About Us ............................................................................................................................................. 31
6.1 About EDATEC ........................................................................................................................ 31
6.2 Contact Us ............................................................................................................................... 31

User Manual of ED-GWL2110
EDATechnology Co.,LTD–Electronics Development Accelerator
1 Product Overview
ED-GWL2110 is an outdoor gateway. The whole machine is sealed with all-aluminum alloy outer box,
which has good waterproof, moisture-proof, insect-proof and lightning-proof performance. It is designed
based on CM4. It has SATA interface specially used for LoRa module, and supports LoRa modules with
different frequency bands (external antennas with different frequency bands are required); It has a 4G
module to ensure that outdoor equipment can upload and download data normally; The equipment has
onboard GPS module, which can easily meet the positioning requirements; The watchdog module is
provided, which can effectively prevent the equipment from being stuck and greatly increase the stability
of the equipment operation; Moreover, this device is equipped with a special encryption chip, which is
mounted on the I2C bus to ensure the information security of the device. The equipment is also equipped
with RTC module to ensure the reliability.
1.1 Target Application
LoRa intelligent gateway
Smart manufacturing
Smart city
Smart transportation
1.2 Specifications and Parameters
Function
Parameters
CPU
Broadcom BCM2711 4core, ARM Cortex-A72(ARM v8), 1.5GHz, 64Bit
CPU
Memory
1GB / 2GB / 4GB / 8GB option
Dual micro SD Card
SD card system card
option 8GB / 16GB / 32GB / 64GB
Extend SD card storage card(option)
option 8GB / 16GB / 32GB / 64GB
HDMI
1x standard HDMI
Ethernet
1x Gigabit Ethernet
WiFi
2.4G / 5.8G dual WiFi, compatible IEEE 802.11 b/g/n/ac
Bluetooth
Standard 5.0,support BLE
4G
1x 4G/LTE module(option), Full netcom, supporting mobile, Unicom and
telecom network standards.
LoRa
Support LoRa WAN protocol
Support frequency band
- 868MHz(EU868,RU864)

User Manual of ED-GWL2110
EDATechnology Co.,LTD–Electronics Development Accelerator
Function
Parameters
- 915MHz(US915,AS923-1/2/3,AU915)
- 470MHz(CN470)
GPS
Support multi-satellite system
- GPS L1 C/A:1575.42 ±1.023 MHz
- BeiDou B1I:1561.098 ±2.046 MHz
- GLONASS L1:1597.78~1605.66 MHz
Serial(TTL)
1x Serial(TTL),available for the system default console.
Real clock
1x RTC,Use CR1220 button cell
Independent key
1x User-defined key
LED
1x RGB three-colour LED
Watchdog
Support watchdog function to prevent the system from being stuck.
Encryption chip
On-board encryption chip
Power input
POE power supply 40V~57V
Dimensions
195(L) x 195(W) x 65(H) mm
Case
Cast aluminum waterproof shell, IP24 waterproof grade.
Working
environment temperature
-25 ~ 60°C environment temperature
1.3 System Diagram

User Manual of ED-GWL2110
EDATechnology Co.,LTD–Electronics Development Accelerator
1.4 Functional Layout
Item
Function Description
Item
Function Description
A1
GPS antenna IPX port
A5
RGB LED
A2
LoRa mini-PCIe port
A6
12V power connector
A3
CM4 slot
A7
Button
A4
4G mini-PCIe port
A8
Nano SIM slot
Item
Function Description
Item
Function Description
B1
UART port
B5
Storage expansion SD slot
B2
HDMI type A port
B6
RTC Battery slot
B3
Ethernet RJ45 port
B4
System micro SD slot
1.5 Packing List
1x ED-GWL2110 host
[option]1x LoRa antenna
[option WiFi/BT version]1x 2.4GHz/5GHz WiFi/BT antenna
[option 4G version]1x 4G/LTE antenna

User Manual of ED-GWL2110
EDATechnology Co.,LTD–Electronics Development Accelerator
1.6 Order Code
2 Quick Start
2.1 Equipment List
1x ED-GWL2110 host
1x WiFi / BT external antenna
1x LoRa external antenna
1x GPS antenna
1x net cable
1x 12V@2A power supply
2.2 Hardware Connection
1. Install the WiFi external antenna.
2. Install LoRa external antenna.
3. Install the GPS external antenna and place it outdoors.
4.Insert the network cable into the Ethernet port, and the network cable is connected with network

User Manual of ED-GWL2110
EDATechnology Co.,LTD–Electronics Development Accelerator
devices such as routers and switches that can access the Internet.
5.Plug in the DC power input port (+12V DC) of ED-GWL2110 and supply power to the power adapter.
2.3 First Start
ED-GWL2110 has no power switch. Plug in the power cord and the system will start.
2.3.1 Raspberry Pi OS (Lite)
If you use the system image provided by us, after the system starts, you will automatically log in with the
user name pi, and the default password is raspberry.
If you use the official system image, and the image is not configured before burning, the configuration
window will appear when you start it for the first time. You need to configure the keyboard layout, set the
user name and the corresponding password in turn.
Set the configuration keyboard layout

User Manual of ED-GWL2110
EDATechnology Co.,LTD–Electronics Development Accelerator
Create a new user name
Then set the password corresponding to the user according to the prompt, and enter the password again
for confirmation. At this point, you can log in with the user name and password you just set.
2.3.2 Enable SSH
All the images we provide have turned on the SSH function. If you use the official image, you need to
use a method to turn on the SSH function.
2.3.2.1 raspi-config
sudo raspi-config
1. Choose 3 Interface Options
2. Choose I2 SSH
3. Would you like the SSH server to be enabled? Select Yes
4. Choose Finish
2.3.2.2 Add Empty File to Enable SSH
Put an empty file named ssh in the boot partition, and the SSH function will be automatically enabled
after the device is powered on.
2.3.3 Get The Device IP
If the display screen is connected, you can use the ifconfig command to find the current device IP.
If there is no display screen, you can view the assigned IP through the router.
If there is no display screen, you can download the nmap tool to scan the IP under the current
network.
Nmap supports Linux, macOS, Windows and other platforms. If you want to use nmap to scan the
network segments from 192.168.3.0 to 255, you can use the following command:

User Manual of ED-GWL2110
EDATechnology Co.,LTD–Electronics Development Accelerator
nmap -sn 192.168.3.0/24
After waiting for a period of time, the result will be output:
Starting Nmap 7.92 ( https://nmap.org ) at 2022-12-30 21:19 中国标准时间
Nmap scan report for 192.168.3.1 (192.168.3.1)
Host is up (0.0010s latency).
MAC Address: XX:XX:XX:XX:XX:XX (Phicomm (Shanghai))
Nmap scan report for DESKTOP-FGEOUUK.lan (192.168.3.33)
Host is up (0.0029s latency).
MAC Address: XX:XX:XX:XX:XX:XX (Dell)
Nmap scan report for 192.168.3.66 (192.168.3.66)
Host is up.
Nmap done: 256 IP addresses (3 hosts up) scanned in 11.36 seconds
3 Software Operation Guide
3.1 Button
ED-GWL2110 has a user-defined button. On the back of GWL2110 PCBA, it is connected to the GPIO23
pin of CPU, which is high by default and low when the button is pressed.
We use the raspi-gpio command to test, and query the GPIO23 pin when the key is not pressed.
raspi-gpio get 23
GPIO 23: level=1 fsel=0 func=INPUT
Level of 1 indicates that the GPIO23 pin is high.
When the key is pressed, query the GPIO23 pin.
raspi-gpio get 23
GPIO 23: level=0 fsel=0 func=INPUT
Level of 0 indicates that the GPIO23 pin is low.
3.2 LED Indication
ED-GWL2110 has an RGB tricolor LED indicator. Corresponding to the GPIO pin of CPU is as follows:
RGB LED PIN
GPIO
Blue
GPIO16
Green
GPIO20
Red
GPIO21
When the GPIO output is low, the corresponding LED is valid.
We use the raspi-gpio command to operate, and the configuration parameter is op, which means output

User Manual of ED-GWL2110
EDATechnology Co.,LTD–Electronics Development Accelerator
setting, dl setting pin is low level, and dh setting pin is high level.
The LED is displayed in blue
sudo raspi-gpio set 16 op dl
sudo raspi-gpio set 20 op dh
sudo raspi-gpio set 21 op dh
The LED is displayed in green
sudo raspi-gpio set 16 op dh
sudo raspi-gpio set 20 op dl
sudo raspi-gpio set 21 op dh
The LED is displayed in red
sudo raspi-gpio set 16 op dh
sudo raspi-gpio set 20 op dh
sudo raspi-gpio set 21 op dl
The LED is displayed in yellow
sudo raspi-gpio set 16 op dh
sudo raspi-gpio set 20 op dl
sudo raspi-gpio set 21 op dl
3.3 Ethernet Configuration
ED-GWL2110 has an adaptive 10/100/1000 Mbsp Ethernet interface.
The official system of Raspberry Pi uses dhcpcd as the network management tool by default.
Static IP can be set by modifying/etc/dhcpcd.conf. For example, eth0 can be set, and users can set
wlan0 and other network interfaces according to their different needs.
interface eth0
static ip_address=192.168.0.10/24
static routers=192.168.0.1
static domain_name_servers=192.168.0.1 8.8.8.8 fd51:42f8:caae:d92e::1
3.4 LTE 4G
Before using 4G, we need to add ourAPT library first. All the images given by our company have been
added with this library, so users don't need to add it manually.
sudo apt update
sudo apt install ed-ec20-qmi

User Manual of ED-GWL2110
EDATechnology Co.,LTD–Electronics Development Accelerator
Automatic dialing is not started by default. If users want to start automatic dialing, they need to enable
LTE lte-reconnect.service service.
sudo systemctl enable lte-reconnect.service
sudo systemctl start lte-reconnect.service
After successful dialing, you can use the ifconfig command to see the wwan0 network port.
If you need to setAPN additionally, you need to modify the dialing command in/usr/share/ed-ec20-
qmi/LTE-reconnect.sh.
$BSP_HOME_PATH/quectel-CM -4 -f $LOGFILE &
The quectel-CM dialing configuration information is as follows:
$BSP_HOME_PATH/quectel-CM -4 -f $LOGFILE -s <APN> &
Restart lte-reconnect.service after setting.
sudo systemctl restart lte-reconnect.service
Reset 4G module
raspi-gpio set 10 pd
raspi-gpio set 10 op dl
sleep 0.5
raspi-gpio set 10 dh
sleep 0.5
raspi-gpio set 10 dl
3.5 WiFi
ED-GWL2110 support 2.4 /5.8 GHz IEEE 802.11 b/g/n WiFi。
The official system of Raspberry Pi uses dhcpcd as the network management tool by default.
sudo raspi-config
1. Choose 1 System Options。
2. Choose S1 Wireless LAN。
3. Select your country in the Select the country in which the pi is to be used window, and then select
OK. This prompt only appears when setting up WIFI for the first time.
4. Please enter SSID,input WIFI SSID name。
5. Please enter passphrase. Leave it empty if none,input password and then restart the device。
3.6 Bluetooth

User Manual of ED-GWL2110
EDATechnology Co.,LTD–Electronics Development Accelerator
ED-GWL2110 supports Bluetooth 4.2 and Bluetooth Low Power Consumption (BLE), and the Bluetooth
function is turned on by default.
Bluetoothctl can be used to scan, pair and connect Bluetooth devices. Please refer to the ArchLinux-
Wiki-Bluetooth guide to configure and use Bluetooth.
3.6.1 Basic Usage
Scan:
bluetoothctl scan on/off
Find device:
bluetoothctl discoverable on/off
Truct device:
bluetoothctl trust [MAC]
Connect:
bluetoothctl connect [MAC]
Disconnect:
bluetoothctl disconnect [MAC]
3.6.2 Example
Into bluetootch shell
sudo bluetoothctl
Enable Bluetooth
power on
Scan Device
scan on
Discovery started
[CHG] Controller B8:27:EB:85:04:8B Discovering: yes
[NEW] Device 4A:39:CF:30:B3:11 4A-39-CF-30-B3-11
Find the name of the turned-on Bluetooth device, where the name of the turned-on Bluetooth device is
test.
devices
Device 6A:7F:60:69:8B:79 6A-7F-60-69-8B-79
Device 67:64:5A:A3:2C:A2 67-64-5A-A3-2C-A2

User Manual of ED-GWL2110
EDATechnology Co.,LTD–Electronics Development Accelerator
Device 56:6A:59:B0:1C:D1 Lefun
Device 34:12:F9:91:FF:68 test
Pair device
pair 34:12:F9:91:FF:68
Attempting to pair with 34:12:F9:91:FF:68
[CHG] Device 34:12:F9:91:FF:68 ServicesResolved: yes
[CHG] Device 34:12:F9:91:FF:68 Paired: yes
Pairing successful
Add as trusted device
trust 34:12:F9:91:FF:68
[CHG] Device 34:12:F9:91:FF:68 Trusted: yes
Changing 34:12:F9:91:FF:68 trust succeeded
3.7 SD Card Extended Storage
3.7.1 Mount
You can install the storage device in a specific folder location. It is usually done in the /mnt folder, such
as /mnt/mydisk. Please note that the folder must be empty.
1. Insert the storage device into the USB port on the device.
2. Use the following command to list all disk partitions on Raspberry Pi:
sudo lsblk -o UUID,NAME,FSTYPE,SIZE,MOUNTPOINT,LABEL,MODEL
Raspberry Pi uses mount points/and /boot. Your storage device will appear in this list, along with any
other connected storage devices.
3. Use the Size, Label and Model columns to identify the name of the disk partition that points to your
storage device. For example, sda1'.
4. Run the following command to get the location of the disk partition:
sudo blkid
For example, display, /dev/sda1
5. Create a target folder as the mount point of the storage device. The mount point name used in this
example is mydisk. You can specify a name of your choice:
sudo mkdir /mnt/mydisk
6. Mount the storage device at the mount point you created:
sudo mount /dev/sda1 /mnt/mydisk
7. Verify that the storage device has been successfully mounted by listing the following:
ls /mnt/mydisk
tip:No-Desktop system will not automatically mount external storage devices.

User Manual of ED-GWL2110
EDATechnology Co.,LTD–Electronics Development Accelerator
3.7.2 Unmount
When the device is turned off, the system will unmount the storage device so that it can be pulled out
safely. If you want to uninstall the device manually, you can use the following command:
sudo umount /mnt/mydisk
If you receive a "destination busy" error, it means that the storage device has not been unmounted. If no
error is displayed, you can safely unplug the device now.
3.7.3 Set Automatic Mount in The Command Line.
You can modify the fstab setting to mount automatically.
1. First, you need to get the disk UUID.
sudo blkid
2. Find the UUID of the mounted device, such as 5C24-1453.
3. Open the fstab file
sudo nano /etc/fstab
4. Add the following to the fstab file
UUID=5C24-1453 /mnt/mydisk fstype defaults,auto,users,rw,nofail 0 0
Replace fstype with the type of your file system, which you can find in step 2 of "Mounting storage
devices" above, for example, ntfs.
5. If the file system type is FAT or NTFS, add umask = 000 immediately after nofail, which will allow all
users to have full read/write access to every file on the storage device.
Information about more fstab commands can be viewed using man fstab.
3.8 RTC
The default shipping system image will integrate the RTC automatic synchronization service we wrote,
so guests can automatically synchronize the clock without setting it, and can use RTC without feeling.
The general principle is:
When the system is turned on, the service automatically reads the saved time from RTC and
synchronizes it to the system time.
If there is an Internet connection, the system will automatically synchronize the time from the NTP
server and update the local system time with Internet time.
When the system is shut down, the service automatically writes the system time into RTC and
updates the RTC time.
Because button cell is installed, although the equipment is powered off, RTC is still working to time.
In this way, we can ensure that our time is accurate and reliable.
WARN:If it is the first time to boot, because there is no effective time in RTC, synchronization

User Manual of ED-GWL2110
EDATechnology Co.,LTD–Electronics Development Accelerator
may fail, so just restart it directly. When rebooting, the system time will be written into RTC for
normal use.
If you don't want to use this service, you can turn it off manually:
sudo systemctl disable rtc
sudo reboot
Re-enable this service:
sudo systemctl enable rtc
sudo reboot
Time to read RTC manually:
sudo hwclock -r
2022-11-09 07:07:30.478488+00:00
Manually synchronize RTC time to the system:
sudo hwclock -s
Write the system time into RTC:
sudo hwclock -w
Trouble Shooting
Please first check whether there is an rtc device (/dev/rtc0) mounted:
ls /dev/rtc0
If not, maybe you used the official standard system, but didn't install our BSP package. Please install ed-
rtc package to enable RTC automatic synchronization.
Other possible checkpoints:
Is CR1220 installed in button cell?
NTP network time protocol, you need to connect to the Internet to synchronize the time
automatically, and you need to open the port (UDP, 123), otherwise the synchronization will fail.
3.9 Watch Dog
ED-GWL2110 is equipped with watchdog module to prevent the system from being stuck.
Watchdog logic table
GPIOx
pin
H/L
H/L
H/L
GPIO17
OE
H
H
L
GPIO16
A
H
L
X
output
Y
H
L
Z

User Manual of ED-GWL2110
EDATechnology Co.,LTD–Electronics Development Accelerator
You need to install ed-gwl2100-wdt.dtbo to use watchdog module. File link: todo.
Users need to put it on the device after downloading it. You can use scp command to copy the file to the
device directory:
scp /path/ed-gwl2100-wdt.dtbo pi@ip-address:/home/pi
sudo cp /home/pi/ed-gwl2100-wdt.dtbo /boot/overlays
sudo chmod +x /boot/overlays/ed-gwl2100-wdt.dtbo
And add the following at the end of /boot/config.txt:
sudo nano /boot/config.txt
dtoverlay=ed-gwl2100-wdt
3.10 GPS
ED-GWL2110 gateway integrates L76K GPS module, which is connected with UART0 serial port of
CPU. The module reports GNSS information through NMEA 0183 general protocol output statement.
3.10.1 Pin Configuration
The WakeUp signal of L76K GPS module is connected to GPIO4. If the pin module is pulled down, it will
enter standby mode, and if it is pulled up or suspended, it will return to continuous mode. The Reset
signal is connected to GPIO5. Pulling this pin low for 100ms will reset the module. SET signal is
connected with GPIO6, which is used to configure the satellite combination. When the pin is suspended
or high level, the satellite combination is GPS and Beidou, and when the pin is low level, the satellite
combination is GPS and GLONASS.
#
Signal
CM4 Pinout
1
GPS_WakeUp
GPIO4
2
GPS_Reset
GPIO5
3
GPS_Set
GPIO6
3.10.2 Modify config.txt to Enable Serial Port.
sudo nano /boot/config.txt
Add at the end
[all]
enable_uart=1
3.10.3 Check GNSS information
sudo cat /dev/ttyS0
Display GPS data as follows:

User Manual of ED-GWL2110
EDATechnology Co.,LTD–Electronics Development Accelerator
$BDGSV,3,1,11,04,29,117,20,10,,,19,16,75,160,,24,51,328,,0*4C
$BDGSV,3,2,11,25,,,27,26,,,21,34,12,198,,35,45,063,,0*76
$BDGSV,3,3,11,39,62,159,17,41,,,25,59,44,137,,0*7A
$GNRMC,053557.000,A,3027.47401,N,11424.34027,E,1.17,186.64,070223,,,A,V*05
$GNVTG,186.64,T,,M,1.17,N,2.17,K,A*2D
$GNZDA,053557.000,07,02,2023,00,00*4F
$GPTXT,01,01,01,ANTENNA OPEN*25
$GNGGA,053558.000,3027.47438,N,11424.34119,E,1,07,1.5,75.0,M,-14.1,M,,*52
$GNGLL,3027.47438,N,11424.34119,E,053558.000,A,A*4F
$GNGSA,A,3,07,08,16,31,195,,,,,,,,2.1,1.5,1.5,1*05
$GNGSA,A,3,04,39,,,,,,,,,,,2.1,1.5,1.5,4*39
$GPGSV,3,1,12,04,54,241,16,07,19,314,15,08,63,208,15,09,38,291,,0*67
$GPGSV,3,2,12,16,51,029,17,18,07,046,,21,08,175,,26,24,063,,0*6A
$GPGSV,3,3,12,27,77,065,,31,09,122,22,194,61,058,,195,46,125,21,0*66
NMEA 0183 general statement is described as follows:
$BDGSV Visible Beidou satellite information
$GNRMC Recommended GNSS data
$GNVTG Relative ground heading and speed information
$GNZDA Time and date, UTC format
$GPTXT Text transmission
$GNGGA Multi-satellite joint positioning data
$GNGLL Geographical location, latitude and longitude
$GNGSA Represents GNSS accuracy factor and effective satellite.
$GPGSV Visible GNSS satellite
3.10.4 Use the u-center tool to view positioning information.
3.10.4.1 Installs serial port to network tool ser2net.
sudo apt-get update
sudo apt-get install ser2net
Enable ser2net service
Ser2net configuration file is/etc/ser2net.yaml. By default, /dev/ttyS0 is configured, baud rate is 9600, and
there is no check, and the corresponding TCP port is 2000.
connection: &con0096
accepter: tcp,2000
enable: on
options:
banner: *banner
kickolduser: true
telnet-brk-on-sync: true
connector: serialdev,
/dev/ttyS0,

User Manual of ED-GWL2110
EDATechnology Co.,LTD–Electronics Development Accelerator
9600n81,local
3.10.4.2 Checks ser2net Port Forwarding Service.
Use the following instructions to query whether ser2net has started 2000 port forwarding.
sudo netstat -ltnp | grep 2000
If port forwarding has been started, the following message will be displayed
tcp6 0 0 :::2000 :::* LISTEN 720/ser2net
If not, restart the ser2net service.
sudo systemctl restart ser2net
Download and install the u-center tool. If you are prompted that the MSVCR120.dll file is missing, please
install vcredist_x86.exe.
Open u-center,Choose Receiver->Port->Network connection->New…
Enter your device IP and port number 2000.
You will see the GPS positioning information immediately after the configuration is completed.
Other manuals for ED-GWL2110
1
Table of contents
Other EDA Gateway manuals
