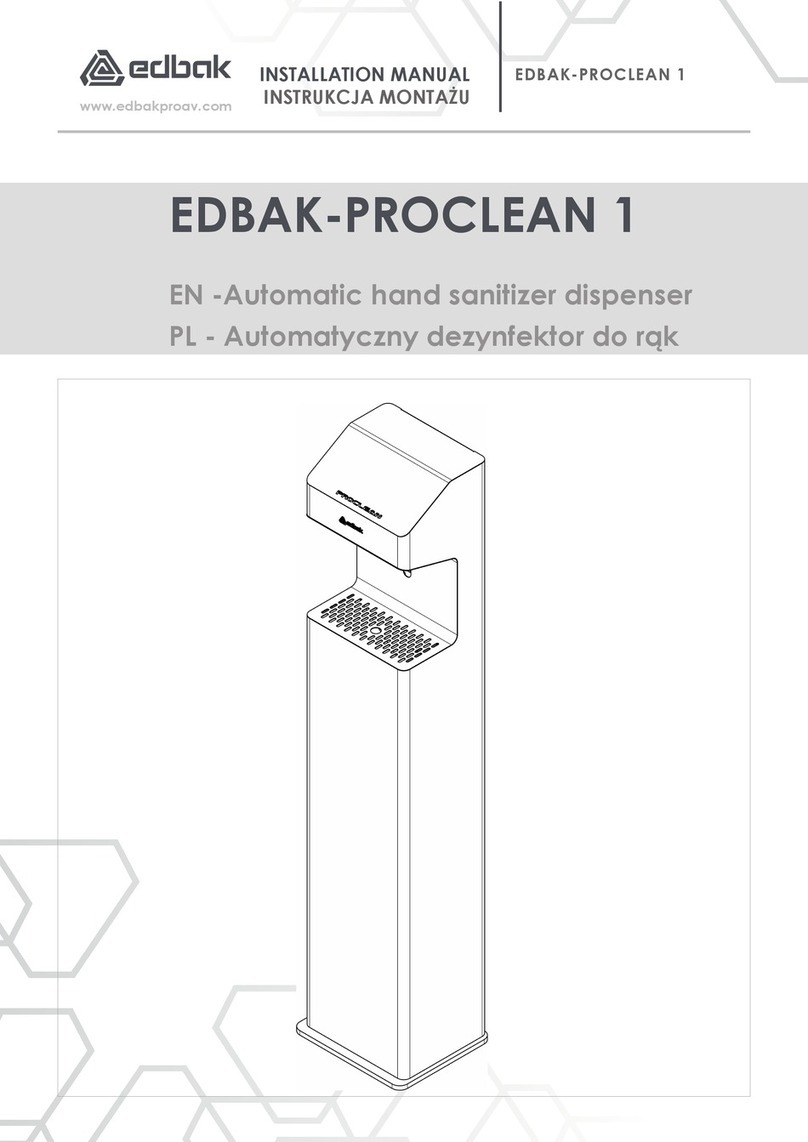
Edbak PROCLEAN1 User manual

EDBAK-PROCLEAN1
29.05.2020 EDBAK-PROCLEAN1
1
INSTRUCTION MANUAL
INSTRUKCJA MONTAŻU
EDBAK-PROCLEAN1
Automatyczny dezynfektor do rąk
Automatic hand sanitizer dispenser

EDBAK-PROCLEAN1
29.05.2020 EDBAK-PROCLEAN1
2
INSTRUCTION MANUAL
INSTRUKCJA MONTAŻU
Ostrzeżenie
Przed rozpoczęciem montażu należy uważnie zapoznać się z instrukcją obsługi w celu
zapewnienia prawidłowego montażu. Prace montażowe powinny wykonywać co
najmniej dwie osoby posiadające kwalifikacje w zakresie montażu zgodnie z niniejszą
instrukcją. Firma EDBAK nie bierze odpowiedzialności za straty materialne oraz
uszkodzenia mienia lub ciała, wynikające z nieprawidłowego montażu. Dlatego należy
zawsze przestrzegać:
-w trakcie montażu dokładnie przestrzegać załączonej do produktu instrukcji
montażowej, w przeciwnym razie może to prowadzić do zniszczenia sprzętu, a
nawet uszkodzeń ciała,
-koniecznie przed montażem upewnić się, że pod powierzchnią, na której będzie
mocowane urządzenie nie ma kabli elektrycznych, rur wodnokanalizacyjnych lub
instalacji gazowych,
-w miejscach wskazanych w instrukcji, w których są ruchome elementy uchwytu
zachować szczególną ostrożność w celu uniknięcia przyciśnięcia, dłoni i palców.
Niniejszy sprzęt może być użytkowany przez dzieci w wieku co najmniej 8 lat i przez
osoby o obniżonych możliwościach fizycznych, umysłowych i osoby o braku
doświadczenia i znajomości sprzętu, jeżeli zapewniony zostaje nadzór lub instruktaż
odnośnie do użytkowania sprzętu w bezpieczny sposób, tak aby związane z tym
zagrożenia były zrozumiałe. Dzieci nie powinny bawić się sprzętem. Dzieci bez nadzoru
nie powinny wykonywać czyszczenia i konserwacji sprzętu.
Warning Please read this manual before starting the installation to ensure
correct assembly. The assembly should be carried out in accordance with this manual
by at least two fully qualified people. The EDBAK Company shall not be liable for any
injuries or damage to material or property caused by incorrect assembly. Hence please
ensure that:
-during the assembly all the instructions are followed carefully. Failure to do so may
result in damage to the product or property, or even personal injury;
-before assembly you must ensure that there are no power cables, or water, sewage
or gas pipes in the area of the ceiling where the mount is to be fixed;
-extra caution should be taken with movable parts in order to avoid crushing or
pinching your hands or fingers. The movable parts are identified in this manual.
This equipment may be used by children aged 8 years and over and by persons with
reduced physical and mental capabilities and lack of experience and knowledge of
the equipment if supervision or instruction is provided on how to use the equipment
in a safe way so that the associated risks are understood. Children should not play
with the equipment. Children without supervision should not perform cleaning and
maintenance of the equipment.

EDBAK-PROCLEAN1
29.05.2020 EDBAK-PROCLEAN1
3
INSTRUCTION MANUAL
INSTRUKCJA MONTAŻU
TRASNPORT URZĄDZENIA/TRANSPORATION OF DEVICE
Edbak-ProClean1 dostarczany jest do klienta w 5 warstwowym opakowaniu tekturowym. W celu
bezpiecznego transportowania urządzenia, opakowanie należy ustawiać w pionie przy zwróceniu uwagi
na oznaczenie góry opakowania.
Pudełko powinno być zabezpieczone do transportu w sposób uniemożliwiający przemieszczeniu się go w
sposób niekontrolowany. Z opakowaniem należy obchodzić się w sposób delikatny – nie można nim
rzucać ani układać go w stosach.
Edbak-ProClean1 is delivered to the customer in a 5-layer cardboard packaging. To transport the device
safely, place the packaging vertically, paying attention to the marking on the top of the packaging.
The box should be secured for transport in a way that prevents uncontrolled movement. The packaging
must be handled gently - boxes must not be thrown about or stacked.

EDBAK-PROCLEAN1
29.05.2020 EDBAK-PROCLEAN1
4
INSTRUCTION MANUAL
INSTRUKCJA MONTAŻU
BUDOWA URZĄDZENIA/ EQUIPMENT STRUCTURE

EDBAK-PROCLEAN1
29.05.2020 EDBAK-PROCLEAN1
5
INSTRUCTION MANUAL
INSTRUKCJA MONTAŻU
WNĘTRZE OBUDOWY/ INSIDE

EDBAK-PROCLEAN1
29.05.2020 EDBAK-PROCLEAN1
6
INSTRUCTION MANUAL
INSTRUKCJA MONTAŻU
WYMIARY URZĄDZENIA/ EQUIPMENT DIMENSIONS

EDBAK-PROCLEAN1
29.05.2020 EDBAK-PROCLEAN1
7
INSTRUCTION MANUAL
INSTRUKCJA MONTAŻU
INSTRUKCJA OBSŁUGI/ INSTRUCTION MANUAL
1. ROZPAKOWANIE/ UNPACKING
Po dostawie, należy sprawdzić zawartość opakowania:
oczy dostarczone urządzenie Edbak ProClean1 dotarło w stanie nieuszkodzonym, czy nie zawiera
widocznych wgnieceń ani zadrapań.
oczy dostarczone są klucze umożliwiające otwarcie drzwi
oczy wewnątrz urządzenia znajdują się zbiorniki: 5litrowy na płyn dezynfekujący oraz 1litrowy na
niezaaplikowane resztki płynu
After delivery, check the contents of the package:
omake sure that the delivered Edbak ProClean1 is undamaged and that there are no visible dents
or scratches.
omake sure that the doors keys are provided.
omake sure that there are the following tanks inside the device: 5-liter tank for disinfectant and 1-
liter tank for unused residue

EDBAK-PROCLEAN1
29.05.2020 EDBAK-PROCLEAN1
8
INSTRUCTION MANUAL
INSTRUKCJA MONTAŻU
2. POSADOWIENIE/ LOCALIZATION
Podstawę urządzenia postawić na twardym i pewnym gruncie. Przy ustawieniu należy wziąć pod uwagę,
że długość kabla zasilającego urządzenie ma 1,4metra.
Place the base of the device on solid and firm ground. When setting the device, take into account that
the length of its power cable is 1.4 meters.

EDBAK-PROCLEAN1
29.05.2020 EDBAK-PROCLEAN1
9
INSTRUCTION MANUAL
INSTRUKCJA MONTAŻU
3. OTWARCIE DRZWI/OPENING THE DOOR
Korzystając z załączonego kluczyka otworzyć drzwi.
Open the door using the key provided.

EDBAK-PROCLEAN1
29.05.2020 EDBAK-PROCLEAN1
10
INSTRUCTION MANUAL
INSTRUKCJA MONTAŻU
4. PRZYKTOWIENIE *opcja
ANCHORING *option
Edbak ProClean1 jest urządzeniem wolnostojącym. W celach bezpieczeństwa producent zaleca
jednak wykonanie pewnego mocowania do podłoża.
The Edbak ProClean1 is a freestanding device. For safety reasons, however, the manufacturer
recommends a secure fixing to the ground.

EDBAK-PROCLEAN1
29.05.2020 EDBAK-PROCLEAN1
11
INSTRUCTION MANUAL
INSTRUKCJA MONTAŻU
5. USUNIĘCIE ZABEZPIECZEŃ/ REMOVING PROTECTION
Usunąć elementy zabezpieczające zbiorniki.
Remove the tank protection.

EDBAK-PROCLEAN1
29.05.2020 EDBAK-PROCLEAN1
12
INSTRUCTION MANUAL
INSTRUKCJA MONTAŻU
6. PRZYGOTOWANIE ZBIORNIKA DO NAPEŁNIANIA/ PREPARING THE TANK FOR FILLING
Odkręcić nakrętkę zbiornika 5 litrowego, a następnie wyjąć z niego wężyk
Loosen the 5-liter tank cap, and take out the hose

EDBAK-PROCLEAN1
29.05.2020 EDBAK-PROCLEAN1
13
INSTRUCTION MANUAL
INSTRUKCJA MONTAŻU
7. UZUPEŁNIANIE PŁYNU/ FILLING THE LIQUID
Korzystając z lejka napełnić 5 litrowy zbiornik. Urządzenie Edbak ProClean jest przystosowane do pracy
WYŁĄCZNIE z płynem dezynfekującym na bazie alkoholi, o stężeniu nie przekraczającym 70% etanolu.
Nie należy stosować żeli i pianek!
UWAGA: Podczas napełniania zbiornika ZABRONIONE jest korzystanie o otwartego ognia, lub
żarzących się elementów.
Use the funnel to fill the 5-liter tank. The Edbak ProClean is designed to work ONLY with alcohol-based
disinfectant with a concentration not exceeding 70% of ethanol. Do not use gels or foams!
NOTE: When filling the tank, it is FORBIDDEN to use open fire or glowing elements.

EDBAK-PROCLEAN1
29.05.2020 EDBAK-PROCLEAN1
14
INSTRUCTION MANUAL
INSTRUKCJA MONTAŻU
8. ZAMKNIĘCIE ZBIORNIKA/ CLOSING THE TANK
Po zakończeniu napełniania zbiornika, włożyć wężyk do zbiornika i zakręcić nakrętkę. Zwrócić
uwagę, czy wężyk nie uległ skręceniu lub załamaniu. Ważne jest aby po zamknięciu zbiornika,
wężyk sięgał jego dna. Płyn, który podczas napełniania uległ rozlaniu, należy bezzwłocznie
wytrzeć do sucha.
Having filled the tank, put the hose into the tank and tighten the cap. Make sure that the hose is
not twisted or bent. It is important that when the tank is closed, the hose reaches the bottom.
The liquid that has been spilled during filling should be wiped dry immediately.

EDBAK-PROCLEAN1
29.05.2020 EDBAK-PROCLEAN1
15
INSTRUCTION MANUAL
INSTRUKCJA MONTAŻU
9. WYMIANA/UZUPEŁNIENIE BATERII/ REPLACING THE BATTERIES
DISASSEMBLING THE BATTERY BASKET
To replace the battery, disconnect the power plug from
the DC IN +12V socket (1). Make sure that the power
mode switch is not set to "BATTERY" or "12V" but is set
to "0". Then firmly pull the battery basket up and
forward (the basket is attached to the housing with
Velcro) (2).
DEMONTAŻ KOSZYKA NA BATERIE
W celu wymiany baterii należy odłączyć wtyk
zasilający z gniazda DC IN +12V (1). Należy zwrócić
uwagę, aby przełącznik trybu zasilania nie był
ustawiony w pozycji „BATTERY” lub „12V”, lecz był
ustawiony w pozycji „0”. Następnie pewnym ruchem
pociągnąć koszyk z bateriami do góry i do przodu
(koszyk jest zamocowany do obudowy za pomocą
rzepa) (2).

EDBAK-PROCLEAN1
29.05.2020 EDBAK-PROCLEAN1
16
INSTRUCTION MANUAL
INSTRUKCJA MONTAŻU
REPLACING THE BATTERIES
Unplug the power cable from the battery basket removed
from the housing - this makes it easier to handle the
basket. Replace the used batteries with new AA 1.5V.
Please remember to:
1. Observe the battery polarity +/- when replacing
2. Replace all 8 batteries. Do not mix new batteries
with the empty ones
3. Do not charge batteries that are not designed for
this purpose
4. Used batteries must not be disposed of with the
regular waste. Return them to the selective
collection point.
Mount the basket with new batteries in reverse order to
the one presented in the manual.
WYMIANA BATERII
Wyjęty z obudowy koszyk z bateriami należy odpiąć od kabla
zasilającego – ułatwia to operowanie koszykiem. Następnie
zużyte baterie należy zastąpić nowymi AA 1,5V. Należy
pamiętać, aby:
1. Przy wymianie zachować biegunowość baterii +/-
2. Wymieniać wszystkie 8 baterii. Nie należy mieszać
nowych baterii z wyczerpanymi
3. Nie wolno ładować baterii, które nie są przeznaczone
do tego celu
4. Zużytych baterii nie wolno wyrzucać do kosza na
śmieci. Należy je oddać do punktu zbiórki
selektywnej.
Montaż koszyka z nowymi bateriami odbywa się w kolejności
odwrotnej, do przedstawionej w instrukcji.

EDBAK-PROCLEAN1
29.05.2020 EDBAK-PROCLEAN1
17
INSTRUCTION MANUAL
INSTRUKCJA MONTAŻU
10. WYBÓR TRYBU ZASILANIA/ SELECTING THE POWER MODE
W zależności od tego, czy mamy dostęp do sieci elektrycznej 230V czy nie, należy dokonać wyboru
sposobu zasilania urządzenia:
You choose how to power your device depending on whether or not you have access to the 230V mains
power supply:
BATERIE:
Koszyk na baterię uzupełnić 8 bateriami AA 1,5V (patrz punkt 9. „Wymiana/uzupełnienie baterii”).
Przełącznik należy przestawić z pozycji „0” na „BATTERY”.
Nie zaleca się aby koszyk był uzupełniony bateriami, a urządzenie pracowało w trybie zasilacza. W
przypadku pacy urządzenia podpiętego do sieci 230V baterie należy wyjąć z koszyka.
Urządzenie można wyłączyć poprzez przestawienie przełącznika do pozycji „0”.
BATTERIES:
Put 8 1.5V AA batteries into the basket (see section 9. “Replacing the batteries”). Switch from "0" to
"BATTERY".
The device should not work in a power supply mode when there are batteries in the basket. When the
device is connected to the 230 V mains, the batteries must be removed from the basket.
The Device can be turned off by switching to "0".
ZASILACZ (Zasilanie z sieci 230V):
Do gniazdka znajdującego się w dolnej
części obudowy podłączyć wtyczkę
zasilacza. Kabel zasilający powinien
być zabezpieczony przed
niezamierzonym szarpnięciem lub
nadeptywaniem. W górnej części
panelu operatora, wtyczkę wetknąć do
gniazda DC IN +12V.
Przełącznik należy przestawić z pozycji
„0” na „12V”.
POWER (Power supply from 230V
mains):
Plug the power supply into the socket
at the bottom of the case. The power
cable should be protected against
unintentional jerking or tripping. Put
the plug into the DC IN +12V socket at
the top of the operator panel.
Switch from "0" to "12V".

EDBAK-PROCLEAN1
29.05.2020 EDBAK-PROCLEAN1
18
INSTRUCTION MANUAL
INSTRUKCJA MONTAŻU
11. ZASILENIE URZĄDZENIA/POWER SUPPLY
Zasilanie urządzenia odbywa się poprzez włącznie wtyczki zasilacza do gniazda zasilającego 230V lub z
zestawu baterii. Poprzez zastosowanie zasilacza, wewnątrz obudowy panuje bezpieczne dla użytkownika
napięcie 12V. Po włączeniu zasilania, urządzenie zareaguje zaświeceniem się czerwonej diody na
fotokomórce (kolor czerwony diody zmienia się na zielony w momencie wykrycia dłoni w komorze
dezynfekującej).
The device is powered by putting the plug of the power supply unit in the 230V power socket or from the
battery pack. When using a power supply unit, a user safe voltage of 12V is present inside the case.
After turning the power on, the device will respond with a red diode on the photocell (the red diode changes
to green when a hand is detected in the disinfection chamber).

EDBAK-PROCLEAN1
29.05.2020 EDBAK-PROCLEAN1
19
INSTRUCTION MANUAL
INSTRUKCJA MONTAŻU
12. ODPOWIETRZANIE UKŁADU/VENTING THE SYSTEM
Każdorazowo, po napełnieniu zbiornika płynem dezynfekującym, należy odpowietrzyć układ dozowania
płynu! W tym celu należy:
Every time the tank is filled with disinfectant, you must vent the liquid dosing system! For this purpose,
you need to:
Place your hand in the disinfection chamber and move it under the photocell several times. You can observe the
liquid hoses inside the housing - check that the air bubbles are moving upwards and that the liquid is being fed
towards the spray nozzle. When the liquid stream comes out of the nozzle continuously and uninterruptedly, the
system is considered to be vented and normal use can begin.
Umieścić dłoń w komorze dezynfekującej i kilkukrotnie przemieścić ją pod fotokomórką. W tym czasie można
obserwować wężyki cieczowe wewnątrz obudowy - sprawdzać czy pęcherzyki powietrza przemieszczają się w górę
i czy płyn jest podawany w stronę dyszy natryskowej. W momencie, gdy strumień cieczy wydostaje się z dyszy w
sposób nieprzerywany i ciągły, układ uznaje się za odpowietrzony i można rozpocząć normalne użytkowanie.

EDBAK-PROCLEAN1
29.05.2020 EDBAK-PROCLEAN1
20
INSTRUCTION MANUAL
INSTRUKCJA MONTAŻU
13. REGULACJE/ADJUSTMENTS
Urządzenie ProClean 1 posiada opcje regulacji dawki dozowanego płynu. Aby zmienić porcję dozy,
należy:
The ProClean 1 device has options for adjusting the liquid it doses. To change the dosage, you must:
Turn the control knob on the control panel to the left or right, and then by bringing your hand close to the
photocell, start dosing the liquid. Determine whether the quantity dosed is sufficient. When you turn the
knob to the minimum and select "0", a characteristic "click" will be felt - the pump will be turned off and
when a hand is detected in the disinfection chamber, no liquid will escape from the nozzle.
Pokrętłem regulatora umieszczonego na panelu sterującym, pokręcać w lewo lub w prawo, a następnie
poprzez zbliżenie dłoni do fotokomórki uruchomić dozowanie płynu. Stwierdzić czy dozowana ilość jest
wystarczająca. Przy przekręceniu pokrętła na minimum i wybraniu „0”, będzie wyczuwalny
charakterystyczny „klik” – pompka zostanie wyłączona a w momencie wykrycia dłoni w komorze
dezynfekującej, płyn nie będzie wydostawał się z dyszy.
Table of contents
Other Edbak Dispenser manuals
Popular Dispenser manuals by other brands
Electrolux Professional
Electrolux Professional GH2 NEW Use and maintenance manual
Signature Hardware
Signature Hardware 948519 manual
STODDART
STODDART SPPL.HSD.HS.001 installation manual
Piusi
Piusi Cube 56/33 Installation, use and maintenance guide

Vermes
Vermes MDS 3000 Series user manual

Hilti
Hilti Nuron CD 4-22 manual
