manuals.online logo
Brands
  1. Home
  2. •
  3. Brands
  4. •
  5. Eden
  6. •
  7. Irrigation System
  8. •
  9. Eden 25417-EDAMZ User manual

Eden 25417-EDAMZ User manual

Place the point of the sensor into the soil within the area you want to monitor. Bury
the sensor up to the indicator ribs located on the side of the sensor. The sensor
should be placed within 300 ft. (100 m) of the timer.
It will take a few minutes for the timer to show the soil moisture reading.
NOTE: Do not hammer the sensor into the ground. You may need to loosen the soil
with a small shovel.
Place the Sensor in the Ground
UP TO
300ft
100m
2
25417-EDAMZ
Wireless
Soil Moisture Sensor
Pairing the Moisture Sensor should be done before placing the sensor in the ground.
You must program the zone you want to monitor before pairing the sensor. Only one zone can be
paired at a time.
a) Insert 2 fresh AA alkaline batteries into the battery tray of the sensor.
b) Press the button on the timer to move the cursor to the SENSOR setting.
c) For multi-zoned timers, select the zone you want paired with your Moisture Sensor.
For a 1-zone timer, move directly to the next step.
d) Simultaneously press the button on your sensor and the button on your timer for about
10 seconds to start the pairing process. You will see the sensor box and symbol appear
on your timer screen once the Moisture Sensor has been paired.
Repeat this process for any additional sensors you want to add to the remaining zones of
multi-zoned timers.
WATER DAY
START WATER
HOW LONG
OFF
SENSOR
SET TIME
AUTO
RAIN DELAY, HOLD
CYCLE
MIN
MANUAL
PM
TODAY
DELAY
TIME
WATER EVERY
SU FR SATH
WE
TUMO
ABC D
DAY
NEXT START
ZONE
AM
HRS
DAY
1 2
3
4
SENSOR
RESET
Pair Your Wireless Moisture Sensor with Your Timer
RAIN DELAY, HOLD
WATER DAY START WATER
HOW LONG
OFF
SENSOR
SET TIME
AUTO
CYCLE
MIN
MANUAL
PM
TODAY
DELAY
TIME
WATER EVERY
SU FR SATH
WE
TUMO
ABC D
DAY
NEXT START
ZONE
AM
HRS
DAY
1 2
3
4
SENSOR
RESET
RAIN DELAY, HOLD
WATER DAY START WATER
HOW LONG
OFF
SENSOR
SET TIMEAUTO
CYCLE
MIN
MANUAL
PM
TODAY
DELAY
TIME
WATER EVERY
SU FR SATH
WE
TUMO
ABC D
DAY
NEXT START
ZONE
AM
HRS
DAY
1 2
3
4
SENSOR
RESET
Toggle Button
1
Cover
Battery tray
Sensor
2 x AA Alkaline batteries
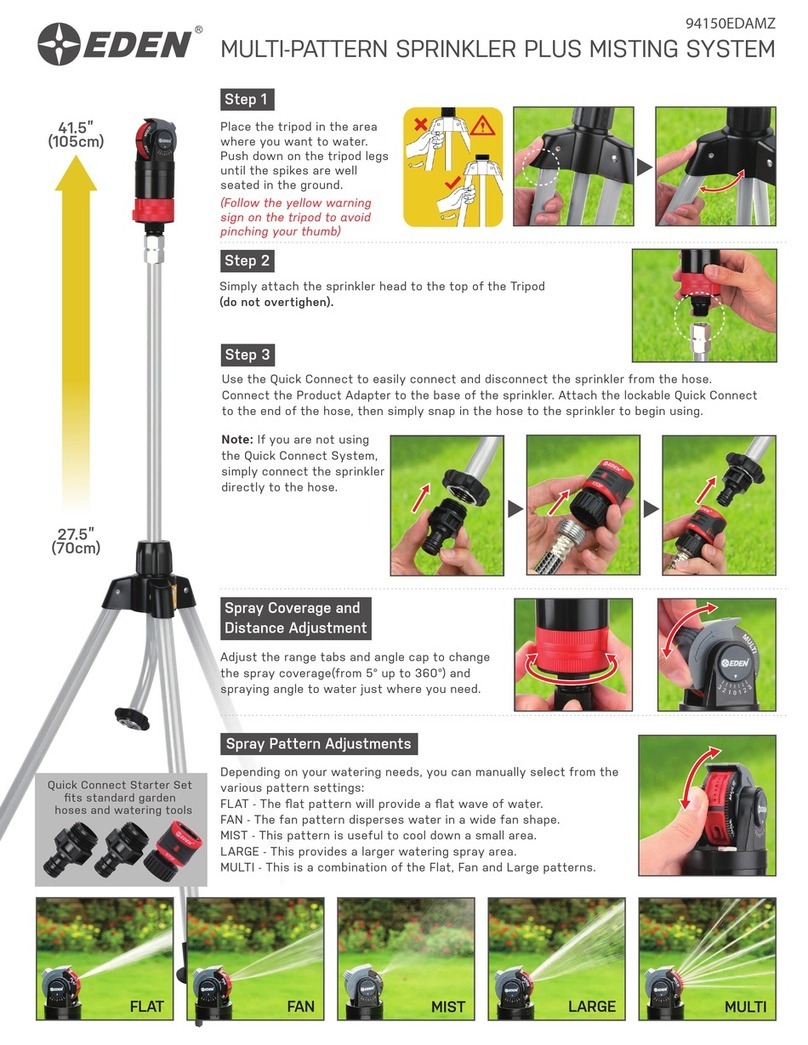
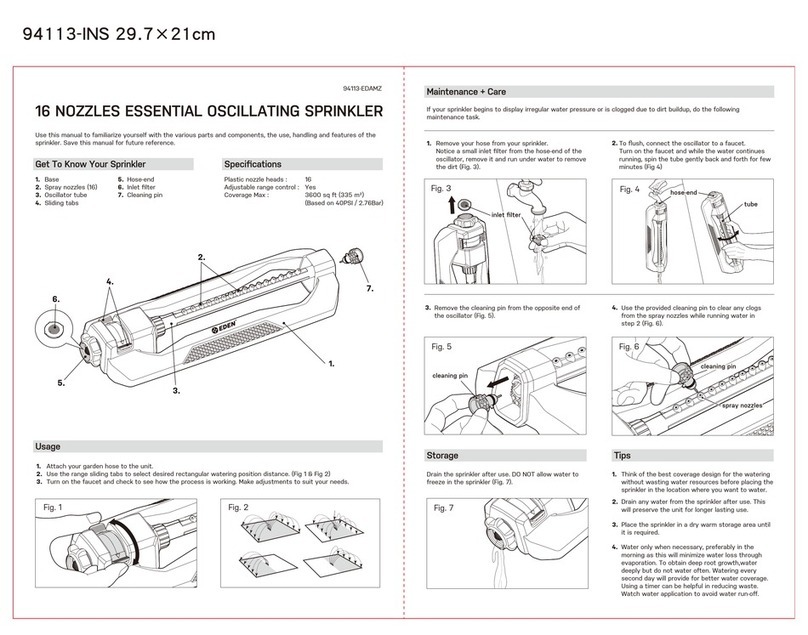
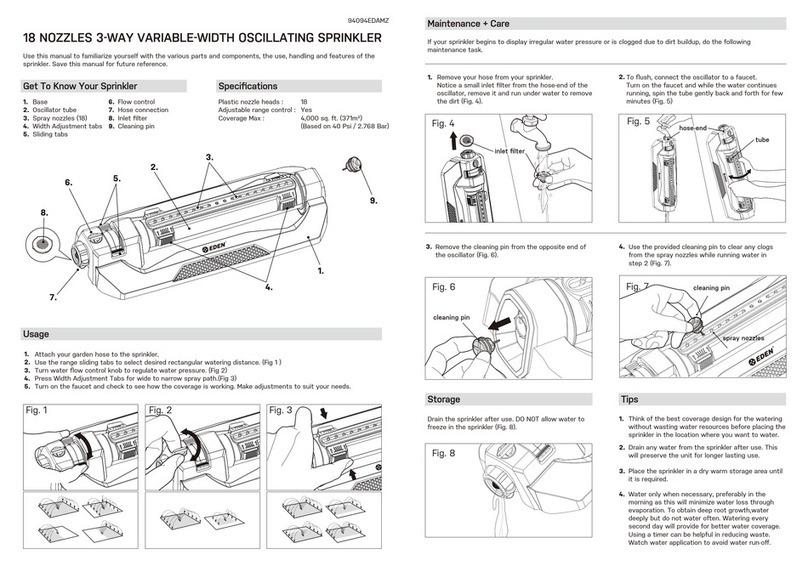
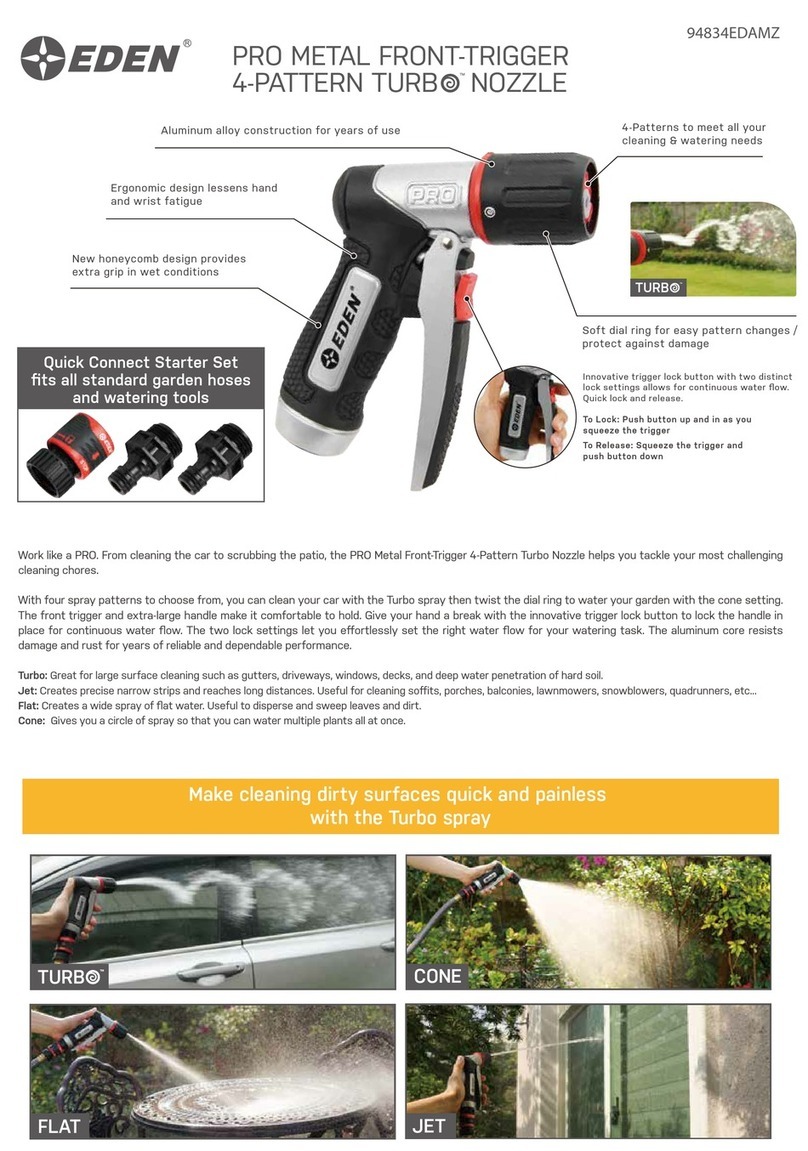
Instructions for using the Eden Wireless Moisture Sensor with Eden Programmable Digital Water Timers. If you have an
Eden Bluetooth® Water Timer, please see separate instructions: https://edengarden.com/support/
Indicator Ribs
WATER DAY
START WATER
HOW LONG
OFF
SENSOR
SET TIME
AUTO
RAIN DELAY, HOLD
CYCLE
MIN
MANUAL
PM
TODAY
DELAY
TIME
WATER EVERY
SU FR SATH
WE
TUMO
ABC D
DAY
NEXT START
ZONE
AM
HRS
DAY
1 2
3
4
SENSOR
RESET
WATER DAY
START WATER
HOW LONG
OFF
SENSOR
SET TIME
AUTO
RAIN DELAY, HOLD
CYCLE
MIN
MANUAL
PM
TODAY
DELAY
TIME
WATER EVERY
SU FR SATH
WE
TUMO
ABC D
DAY
NEXT START
ZONE
AM
HRS
DAY
12
3
4
SENSOR
RESET
3
Model: 25417-EDAMZ
Range: 300 ft (100 m) without interference
Temperature Operating: 32 - 110° F (0 -45°C) T45
Operating Frequency: 915 MHz (N. Amer.)
Moisture Sensor Spec:
Works with
CYCLE
MIN
RESET
MANUAL
PM
TODAY
DELAY
TIME
WATER EVERY
SU FR SATH
WE
TUMO
ABC D
DAY
NEXT START
ZONE
AM
HRS
DAY
SENSOR
1 2
RAIN DELAY, HOLD
WATER DAY START WATER
HOW LONG
OFF
SENSOR
SET TIME
AUTO
CYCLE
MIN
RESET
PM
TODAY
DELAY
TIME
WATER EVERY
SU FR SATH
WE
TUMO
ABC D
DAY
NEXT START
AM
HRS
DAY
MANUAL
SENSOR
RAIN DELAY, HOLD
WATER DAY START WATER
HOW LONG
OFF
SENSOR
SET TIME
AUTO
25411 25412
25413
*Not Included
RAIN DELAY, HOLD
WATER DAY START WATER
HOW LONG
OFF
SENSOR
SET TIME
AUTO
CYCLE
MIN
MANUAL
PM
TO DAY
DELAY
TIME
WATER EVERY
SU FR SATH
WE
TUMO
A B C D
DAY
NEXT START
ZONE
AM
HRS
DAY
1 2
3
4
SENSOR
RESET
Different plants or soils have different moisture requirements. Once the Moisture Sensor
is connected to the timer and placed in the ground, the timer will show the current soil
moisture reading with one to five water droplets appearing in the sensor box. The cursor
below the droplets sets the default moisture level at 60%. We suggest beginning with the
default setting.
Set Desired Moisture Level
Otherwise, use the buttons to adjust the moisture level as desired. To set the moisture
level, press the button to move the cursor to the AUTO setting. The timer screen will
alternate between showing the current time and the next watering cycle of each zone with the
sensor box.
Assess the soil and the plants during the first few watering cycles. If the soil is too wet or is
too dry, follow the steps below to adjust the moisture level. You can select increments from
20% up to 100%.
Adjust the Soil Moisture Level:
a) Press the button on the timer to move the cursor to the SENSOR setting.
b) For multi-zoned timers, select the zone you paired with your Moisture Sensor. For a 1-zone
timer, move directly to the next step.
c) Use the buttons to adjust the moisture level.
d) The cursor will keep flashing while you make adjustments.
e) Once your moisture level is set, press the button to move back to the AUTO setting.
The diagram below shows the desired soil moisture setting at 80% and the actual soil
moisture reading at 40% (2 water droplets).
SENSOR
Watering will be suspended if the actual reading matches the desired moisture setting. If the
reading does not reach the desired moisture setting, the timer will water for the length of the
watering cycle (HOW LONG setting on timer).
NOTE:
• If the desired moisture setting is set to 100% and the soil is still too dry, increase the length
of the watering cycle (HOW LONG) or the frequency of watering (WATER DAY).
• The Eden Wireless Soil Moisture Sensor is specifically designed and programmed to work
with Eden brand water timers only.
• Adding additional moisture sensors will cause the timer battery to be consumed more
rapidly. When the sensor battery level indicator is flashing, please change the batteries.
• Only use alkaline batteries with the sensor and water timer. Non-alkaline batteries will not
provide sufficient energy.
4
To pair the Moisture Sensor with a different zone or disconnect from the timer, follow the steps
below.
a) Press the button on the timer to move the cursor to the SENSOR setting.
b) For multi-zoned timers, select the zone you paired with your Moisture Sensor. For a 1-zone
timer, move directly to the next step.
c) Press the button on the timer for 10 seconds to disconnect the Moisture Sensor.
Disconnect Your Wireless Moisture Sensor
from Your Timer
SENSOR
Actual
Soil Moisture
Reading Sensor
Battery
Level
Desired
Soil Moisture
Setting
20%
40%
60%
80%
100%
This device complies with part 15 of the FCC Rules.
Operation is subject to the following two conditions:
( 1 ) This device may not cause harmful interference, and ( 2 ) this device must accept any
interference received, including interference that may cause undesired operation.
Caution: Any changes or modification not expressly approved by our Yuan Mei Corp. could
void the user's authority to operate the equipment.
Note: This equipment has been tested and found to comply with the limits for a Class B digital
device, pursuant to part 15 of the FCC Rules. These limits are designed to provide reasonable
protection against harmful interference in a residential installation. This equipment generates,
uses and can radiate radio frequency energy
and, if not installed and used in accordance with the instructions, may cause harmful
interference to radio communications. However, there is no guarantee that interference will
not occur in a particular installation. If this equipment does cause harmful interference to radio
or television reception, which can be determined by turning the equipment o and on, the user
is encouraged to try to correct the interference by one or more of the following measures:
- Reorient or relocate the receiving antenna
- Increase the separation between the equipment and receiver
- Connect the equipment into an outlet on a circuit different from that to which the receiver is
connected.
- Consult the dealer or an experienced radio/TV technician for help
To comply with FCC RF exposure requirements, the device and the antenna for this device
must be installed to ensure a minimum separation of 20cm or more from a person’s body.
Other operating connfigurations should be avoided.
This device complies with Industry Canada’s licence-exempt RSSs. Operation is subject to the
following two conditions:
( 1 ) This device may not cause interference; and ( 2 ) This device must accept any interfer-
ence, including interference that may cause undesired operation of the device.
Le présent appareil est conforme aux CNR d'Industrie Canada applicables aux appareils radio
exempts de licence. L'exploitation est autorisée aux deux conditions suivantes : ( 1 ) l'appareil
ne doit pas produire de brouillage, et ( 2 ) l'utilisateur de l'appareil doit accepter tout brouillage
radioélectrique subi, même si le brouillage est susceptible d'en compromettre le fonctionne-
ment
The device meets the exemption from the routine evaluation limits in section 2.5 of RSS 102
and compliance with RSS-102 RF exposure, users can obtain Canadian information on RF
exposure and compliance.
Le dispositif rencontre l'exemption des limites courantes d'évaluation dans la section 2.5 de
RSS 102 et la conformité à l'exposition de RSS-102 rf, utilisateurs peut obtenir l'information
canadienne sur l'exposition et la conformité de rf
FCC Statement :
CAN ICES-3 (B)/NMB-3(B) Canada Statement :
Should your unit need replacement after extended use, do not dispose of it with the
household waste, but in an environmentally safe way.
Waste produced by electrical machine items should not be handled like
normal household garbage. Please recycle where recycle facilities exist.
Check with your local authority or retailer for recycling advice.
Disposal:
- For outdoor use with cold water only !
- Do not spray near electrical connections.
- When not in use, rinse the tool with water to remove dirt, dry your tool, and store indoors.
- Not for use with household appliances.
- Do not mix Alkaline, carbon-zinc, or rechargeable batteries.
- Used or dead batteries must be removed from the timer and disposed of properly.
- Use only with one timer.
CAUTION
This product can expose you to chemicals including lead, which is known to
the State of California to cause cancer and birth defects or other reproductive
harm, and styrene, which is known to the State of California to cause cancer.
For more information go to www.P65Warnings.ca.gov.
WARNING:
!!
Other Eden Irrigation System manuals

Eden 94110EDAMZ User manual

Eden

Eden 94110EDAMZ User manual

Eden 94112-EDAMZ User manual

Eden

Eden 94112-EDAMZ User manual

Eden 99989EDAMZ User manual

Eden

Eden 99989EDAMZ User manual

Eden 94127EDAMZ User manual

Eden

Eden 94127EDAMZ User manual

Eden 97063-EDAMZ User manual

Eden

Eden 97063-EDAMZ User manual

Eden 96213EDAMZ User manual

Eden

Eden 96213EDAMZ User manual

Eden 94150EDAMZ User manual

Eden

Eden 94150EDAMZ User manual

Eden 94094EDAMZ User manual

Eden

Eden 94094EDAMZ User manual

Eden 95144EDAMZ User manual

Eden

Eden 95144EDAMZ User manual

Eden 94804-EDAMZ User manual

Eden

Eden 94804-EDAMZ User manual

Eden 96214EDAMZ User manual

Eden

Eden 96214EDAMZ User manual

Eden 96998EDAMZ User manual

Eden

Eden 96998EDAMZ User manual

Eden 94806-EDAMZ User manual

Eden

Eden 94806-EDAMZ User manual

Eden 98063EDAMZ User manual

Eden

Eden 98063EDAMZ User manual

Eden 94122-EDAMZ User manual

Eden

Eden 94122-EDAMZ User manual

Eden 94801-EDAMZ User manual

Eden

Eden 94801-EDAMZ User manual

Eden 96122EDAMZ User manual

Eden

Eden 96122EDAMZ User manual

Eden 94115-EDAMZ User manual

Eden

Eden 94115-EDAMZ User manual

Eden 96216EDAMZ User manual

Eden

Eden 96216EDAMZ User manual

Eden PRO TURBO User manual

Eden

Eden PRO TURBO User manual

Eden 96215EDAMZ User manual

Eden

Eden 96215EDAMZ User manual

Eden 94120-EDAMZ User manual

Eden

Eden 94120-EDAMZ User manual

Eden 94114-EDAMZ User manual

Eden

Eden 94114-EDAMZ User manual

Eden 94106EDAMZ User manual

Eden

Eden 94106EDAMZ User manual

Popular Irrigation System manuals by other brands

Viking VK514 Technical data

Viking

Viking VK514 Technical data

Viking VK697 Technical data

Viking

Viking VK697 Technical data

Task Force Tips Mid-Force INSTRUCTIONS FOR SAFE OPERATION AND MAINTENANCE

Task Force Tips

Task Force Tips Mid-Force INSTRUCTIONS FOR SAFE OPERATION AND MAINTENANCE

Tyco Fire Product Gem DS-1 Series instruction manual

Tyco Fire Product

Tyco Fire Product Gem DS-1 Series instruction manual

RM Speedy-Rain 401 Instructions for use

RM

RM Speedy-Rain 401 Instructions for use

Hunter Professional Series installation instructions

Hunter

Hunter Professional Series installation instructions

Tyco TY-FRL Series quick start guide

Tyco

Tyco TY-FRL Series quick start guide

AQUAJOE SJI-TLS18 quick start guide

AQUAJOE

AQUAJOE SJI-TLS18 quick start guide

Rain Click quick start guide

Rain

Rain Click quick start guide

Tyco Fire Product Star I-LD-2 instruction manual

Tyco Fire Product

Tyco Fire Product Star I-LD-2 instruction manual

Hunter i-core IC-600PL manual

Hunter

Hunter i-core IC-600PL manual

Autopot 100Pot XL Set-up guidelines

Autopot

Autopot 100Pot XL Set-up guidelines

Viking VK3501 Technical data

Viking

Viking VK3501 Technical data

Rain S-Dial installation manual

Rain

Rain S-Dial installation manual

SNOWJOE AQUAJOE SJI-OMS16 manual

SNOWJOE

SNOWJOE AQUAJOE SJI-OMS16 manual

Toro TS120 operating manual

Toro

Toro TS120 operating manual

claber POP-UP user manual

claber

claber POP-UP user manual

Autopot SmartPot 80 XL Set-up guidelines

Autopot

Autopot SmartPot 80 XL Set-up guidelines

manuals.online logo
manuals.online logoBrands
  • About & Mission
  • Contact us
  • Privacy Policy
  • Terms and Conditions

Copyright 2025 Manuals.Online. All Rights Reserved.