manuals.online logo
Brands
  1. Home
  2. •
  3. Brands
  4. •
  5. Tyco
  6. •
  7. Irrigation System
  8. •
  9. Tyco TY-L Series User manual

Tyco TY-L Series User manual

General
Description
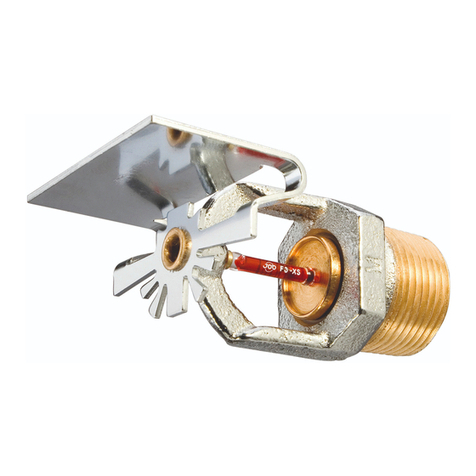
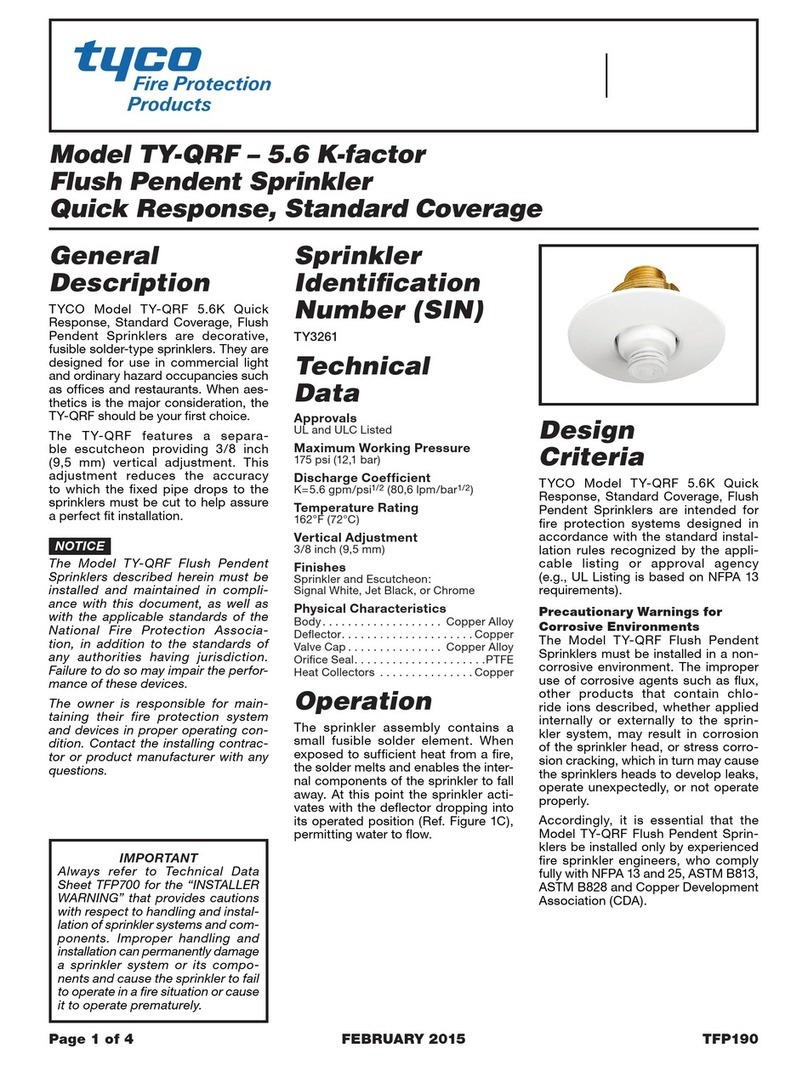
The Series TY-L , 5.6 K-factor, Hori-
zontal Sidewall Sprinklers are stand-
ard response - standard coverage, sol-
der type spray sprinklers designed for
use in light and ordinary hazard, com-
mercial occupancies such as banks,
hotels, shopping malls, offices, etc.
They are designed for installation
along a wall or the side of a beam and
just beneath a smooth ceiling. Horizon-
tal sidewall sprinklers are commonly
used instead of pendent or upright
sprinklers due to aesthetics or building
construction considerations where
piping across the ceiling is not desir-
able.
Corrosion resistant coatings, where
applicable, are utilized to extend the
life of copper alloy sprinklers beyond
that which would otherwise be ob-
tained when exposed to corrosive at-
mospheres. Although corrosion resis-
tant coated sprinklers have passed the
standard corrosion tests of the appli-
cable approval agencies, the testing is
not representative of all possible cor-
rosive atmospheres. Consequently, it
is recommended that the end user be
consulted with respect to the suitability
of these coatings for any given corro-
sive environment. The effects of ambi-
ent temperature, concentration of
chemicals, and gas/chemical velocity,
should be considered, as a minimum,
along with the corrosive nature of the
chemical to which the sprinklers will be
exposed.
WARNINGS
The Series TY-L Sprinklers described
herein must be installed and main-
tained in compliance with this docu-
ment, as well as with the applicable
standards of the National Fire Protec-
tion Association, in addition to the
standards of any other authorities hav-
ing jurisdiction. Failuretodosomay
impair the performance of these de-
vices.
The owner is responsible for maintain-
ing their fire protection system and de-
vices in proper operating condition.
The installing contractor or sprinkler
manufacturer should be contacted
with any questions.
Model/Sprinkler
Identification
Numbers
TY3311 - HSW 5.6K, 1/2"NPT
TY3311 is a redesignation for S1803
and G3113.
Technical
Data
Approvals
UL and C-UL Listed.
FM Approved.
(Refer to Table A for complete approval
information.)
Maximum Working Pressure
175 psi (12,1 bar)
Discharge Coefficient
K=5.6GPM/psi
1/2 (80,6 LPM/bar1/2)
Temperature Ratings
RefertoTableA
Finishes
Sprinkler: Refer to Table A
Physical Characteristics
Frame ............. Brass
Sealing Button . . . Bronze w/Teflon†
Ejection Spring . . . Stainless Steel
Fusible Element . . . Solder, Copper
............StainlessSteel
Strut ..............Monel
Hook ......... Bronze/Monel
Deflector........... Bronze
† DuPont Registered Trademark
Operation
A copper tube sealed by two stainless
steel balls holds a fusible alloy. When
the rated temperature is reached, the
alloy melts, the balls are forced toward
each other releasing the tension
mechanism, allowing the sprinkler to
operate.
Page 1 of 4 TFP120
JULY, 2004
Series TY-L — 5.6 K-factor
Horizontal Sidewall Sprinklers
Standard Response, Standard Coverage
Technical Services: Tel: (800) 381-9312 / Fax: (800) 791-5500
IMPORTANT
Always refer to Technical Data
Sheet TFP700 for the “INSTALLER
WARNING” that provides cautions
with respect to handling and instal-
lation of sprinkler systems and com-
ponents. Improper handling and in-
stallation can permanently damage
a sprinkler system or its compo-
nents and cause the sprinkler to fail
to operate in a fire situation or cause
it to operate prematurely.
Design
Criteria
The 5.6 K-factor, Series TY-L Horizon-
tal Sidewall Sprinklers are intended for
fire protection systems designed in ac-
cordance with the standard installation
rules recognized by the applicable
Listing or Approval agency (e.g., UL
Listing is based on NFPA 13 require-
ments). The Series TY-L Horizontal
Sidewall Sprinkler must be installed
with a deflector to ceiling distance of 4
to 6 inches (100 to 150 mm). To meet
this requirement the centerline of the
sprinkler waterway must be located 4-
5/16 to 6-5/16 inches (110 to 160 mm)
below the ceiling. Installation of the
Series TY-L Horizontal Sidewall Sprin-
klers in recessed escutcheons will void
all manufacturer’s warranties, as well
as possibly void the sprinkler’s Approv-
als and/or Listings.
Installation
TheSeriesTY-LSprinklersmustbe
installed in accordance with the follow-
ing instructions:
NOTES
A leak tight 1/2 inch NPT sprinkler joint
should be obtained with a torque of 7
to 14 ft.lbs. (9,5 to 19,0 Nm). A maxi-
mum of 21 ft. lbs. (28,5 Nm) of torque
may be used to install sprinklers with
1/2 NPT connections. Higher levels of
torque may distort the sprinkler inlet
and cause leakage or impairment of
the sprinkler.
Do not attempt to make-up for insuffi-
cient adjustment in the escutcheon
plate by under- or over-tightening the
sprinkler. Readjust the position of the
sprinkler fitting to suit.
The Series TY-L Horizontal Sidewall
Sprinklers must be installed in ac-
cordance with the following instruc-
tions.
Step 1. The Series TY-L Horizontal
Sidewall Sprinklers must be installed
with their centerline of waterway paral-
lel to the ceiling and perpendicular to
the back wall surface. The word “TOP”
on the deflector must face upwards
toward the ceiling.
Step 2. After installing an escutcheon
(as applicable) over the sprinkler pipe
threads and with pipe thread sealant
applied to the pipe threads, hand
tighten the sprinkler into the sprinkler
fitting.
Step 3. Tighten the sprinkler into the
sprinkler fitting using only the W-Type
9 Sprinkler Wrench (Ref. Figure 2),
except that an 8 or 10 inch adjustable
Crescent wrench is to be used for wax
coated sprinklers. With reference to
Figure 1, the W-Type 9 Sprinkler
Wrench is to be applied to the wrench
area, or as applicable, the adjustable
Crescent wrench is to be applied to the
wrenching flanges.
When installing wax coated sprinklers
with the adjustable Crescent wrench,
additional care needs to be exercised
to prevent damage to the wax coating
on the sprinkler wrench flats or frame
arms and, consequently, exposure of
bare metal to the corrosive environ-
ment. The jaws of the wrench should
be opened sufficiently wide to pass
over the wrench flats without damag-
ing the wax coating. Before wrench
tightening the sprinkler, the jaws of the
wrench are to be adjusted to just con-
tact the sprinkler wrench flats. After
wrench tightening the sprinkler, loosen
the wrench jaws before removing the
wrench.
After installation, the sprinkler wrench
flatsandframearmsmustbein-
spected and the wax coating re-
touched (repaired) whenever the coat-
ing has been damaged and bare metal
is exposed. The wax coating on the
wrench flats can be retouched by gen-
tly applying a heated 1/8 inch diameter
steel rod to the areas of wax that have
Page2of4 TFP120
FIGURE 1
STANDARD RESPONSE
SERIES TY-L (TY3311) HORIZONTAL SIDEWALL SPRINKLERS
5.6 K-FACTOR, 1/2 INCH NPT
1-Frame
2-Sealing
Button
3-Ejection
Spring
4-Fusible
Element
5-Strut
6-Hook
7 - Deflector
*Temperature rating is indicated on deflector.
**Pipe thread connections per ISO 7/1 can be provided on
special request.
FIGURE 2
W-TYPE 9 SPRINKLER
WRENCH
RECESS
WRENCH
WRENCHING
CENTERLINE
7
TOP
3/8"
(9,5 mm)
7/16"
(11,1 mm)
1-1/2"
(38,1 mm)
(63,5 mm)
2-1/2"
1-7/8"
NOMINAL MAKE-IN
(47,6 mm)
7/16" (11,1 mm)
OF
WATERWAY
SPRINKLER
FLANGES
WRENCHING
6543
SURFACE
PLATE SEATING
ESCUTCHEON
21
NPT
AREA
1/2"
been damaged, to smooth it back over
areas where bare metal is exposed.
NOTES
Only retouching of the wax coating ap-
plied to the wrench flats and frame
arms is permitted, and the retouching
is to be performed only at the time of
the initial sprinkler installation.
The steel rod should be heated only to
the point at which it can begin to melt
the wax, and appropriate precautions
need to be taken, when handling the
heated rod, in order to prevent the
installer from being burned.
If attempts to retouch the wax coating
with complete coverage are unsuc-
cessful, additional wax can be ordered
in the form of a wax stick (the end of
which is color coded). Only the correct
color coded wax is to be used, and
retouching of wrench flats and frame
arms is only permitted at the time of
initial sprinkler installation. With the
steel rod heated as previously de-
scribed, touch the rod to the area re-
quiring additional wax with the rod an-
gled downward, and then touch the
wax stick to the rod approximately
one-half inch away from the area re-
quiring retouching. The wax will melt
and run down onto the sprinkler.
Care and
Maintenance
TheSeriesTY-LSprinklersmustbe
maintained and serviced in accord-
ance with the following instructions:
NOTES
Before closing a fire protection system
main control valve for maintenance
work on the fire protection system that
it controls, permission to shut down the
affected fire protection system must be
obtained from the proper authorities
and all personnel who may be affected
by this action must be notified.
Absence of an escutcheon, which is
used to cover a clearance hole, may
delay the time to sprinkler operation in
a fire situation.
Sprinklers that are found to be leaking
or exhibiting visible signs of corrosion
must be replaced.
Automatic sprinklers must never be
painted, plated, coated or otherwise
altered after leaving the factory. Modi-
fied or over-heated sprinklers must be
replaced.
Care must be exercised to avoid dam-
age to the sprinklers - before, during,
and after installation. Sprinklers dam-
aged by dropping, striking, wrench
twist/slippage, or the like, must be re-
placed.
Frequent visual inspections are rec-
ommended to be initially performed for
corrosion resistant coated sprinklers,
after the installation has been com-
pleted, to verify the integrity of the cor-
rosion resistant coating. Thereafter,
annual inspections per NFPA 25
should suffice; however, instead of in-
specting from the floor level, a random
sampling of close-up visual inspec-
tions should be made, so as to better
determine the exact sprinkler condi-
tion and the long term integrity of the
corrosion resistant coating, as it may
be affected by the corrosive conditions
present.
The owner is responsible for the in-
spection, testing, and maintenance of
their fire protection system and de-
vices in compliance with this docu-
ment, as well as with the applicable
standards of the National Fire Protec-
tion Association (e.g., NFPA 25), in
addition to the standards of any other
authorities having jurisdiction. The in-
stalling contractor or sprinkler manu-
facturer should be contacted relative to
any questions.
It is recommended that automatic
sprinkler systems be inspected,
tested, and maintained by a qualified
Inspection Service in accordance with
local requirements and/or national
codes.
Limited
Warranty
Products manufactured by Tyco Fire
Products are warranted solely to the
original Buyer for ten (10) years
against defects in material and work-
manship when paid for and properly
installed and maintained under normal
use and service. This warranty will ex-
pire ten (10) years from date of ship-
ment by Tyco Fire Products. No war-
ranty is given for products or
components manufactured by compa-
nies not affiliated by ownership with
Tyco Fire Products or for products and
components which have been subject
to misuse, improper installation, corro-
sion, or which have not been installed,
maintained, modified or repaired in ac-
cordance with applicable Standards of
the National Fire Protection Associa-
tion, and/or the standards of any other
Authorities Having Jurisdiction. Mate-
rials found by Tyco Fire Products to be
defective shall be either repaired or
replaced, at Tyco Fire Products’ sole
option. Tyco Fire Products neither as-
sumes, nor authorizes any person to
assume for it, any other obligation in
connection with the sale of products or
parts of products. Tyco Fire Products
shall not be responsible for sprinkler
system design errors or inaccurate or
TFP120 Page 3 of 4
TYPE TEMP.
RATING
FRAME
COLOR
CODE
NATURAL
BRASS
CHROME
PLATED
SPRINKLER FINISH
NOTES:
1. Listed by Underwriters Laboratories, Inc. (UL) for Light or Ordinary Hazard Occupancies.
2. Listed by Underwriters Laboratories, Inc. for use in Canada (C-UL) for Light or Ordinary Hazard Occupancies.
3. Approved by Factory Mutual Research Corporation (FM) for Light Hazard Occupancies.
N/A: Not Available.
TABLE A
LABORATORY LISTINGS AND APPROVALS
5.6
1/2"
NPT
HORIZONTAL
SIDEWALL
(TY3311)
165°F/74°C Unpainted
212°F/100°C White
280°F/138°C Blue
1, 2, 3
KLEAD
COATED
WAX
COATED
WAX OVER
LEAD COATED
1, 2
N/A
incomplete information supplied by
Buyer or Buyer’s representatives.
IN NO EVENT SHALL TYCO FIRE
PRODUCTS BE LIABLE, IN CON-
TRACT, TORT, STRICT LIABILITY OR
UNDER ANY OTHER LEGAL THE-
ORY, FOR INCIDENTAL, INDIRECT,
SPECIAL OR CONSEQUENTIAL
DAMAGES, INCLUDING BUT NOT
LIMITED TO LABOR CHARGES, RE-
GARDLESS OF WHETHER TYCO
FIRE PRODUCTS WAS INFORMED
ABOUT THE POSSIBILITY OF SUCH
DAMAGES,ANDINNOEVENT
SHALL TYCO FIRE PRODUCTS’ LI-
ABILITY EXCEED AN AMOUNT
EQUAL TO THE SALES PRICE.
THE FOREGOING WARRANTY IS
MADE IN LIEU OF ANY AND ALL
OTHER WARRANTIES EXPRESS OR
IMPLIED, INCLUDING WARRANTIES
OF MERCHANTABILITY AND FIT-
NESS FOR A PARTICULAR PUR-
POSE.
Ordering
Procedure
When placing an order, indicate the full
product name. Refer to the Price List
for complete listing of Part Numbers.
Contact your local distributor for avail-
ability.
Sprinkler Assemblies with NPT
Thread Connections:
Specify: (Specify Model/SIN), Stand-
ard Response, (specify K-factor),
(specify temperature rating), Series
TY-L Horizontal Sidewall Sprinkler with
(specify type of finish), P/N (specify
from Table B).
Sprinkler Wrench:
Specify: W-Type 9 Sprinkler Wrench,
P/N 56-000-1-849.
Wax Sticks:
(for retouching wrench damaged
wax coating)
Specify: (Specify color) color coded
Wax Stick for retouching (specify tem-
perature rating) temperature rated Se-
ries TY-L Sprinklers, P/N (specify).
Redfor165°F............. P/N56-065-1-155
Blue for 212°F and
280°F . . . . . . . . . . . . . . . . . P/N 56-065-1-286
NOTES
Each wax stick is suitable for retouch-
ing up to twenty-five sprinklers.
The wax used for 280°F sprinklers is
the same as for 212°F sprinklers, and,
therefore, the 280°F sprinkler is limited
to the same maximum ceiling tempera-
ture as the 212°F sprinkler (i.e.,
150°F).
Page4of4 TFP120
P/N 53 — XXX — X — XXX
165°F/74°C165
TEMPERATURE
RATING
1
SPRINKLER
TABLE B
PART NUMBER SELECTION
SERIES TY-L HORIZONTAL SIDEWALL SPRINKLERS
212°F/100°C
280°F/138°C280
212NATURAL BRASS
9
MODEL/SIN
CHROME PLATED
113 5.6K HSW (1/2"NPT) TY3311
LEAD COATED7
6WAX COATED
165°F and 212°F
ONLY
7WAX OVER LEAD
165°F and 212°F
ONLY
TYCO FIRE PRODUCTS, 451 North Cannon Avenue, Lansdale, Pennsylvania 19446

This manual suits for next models

1

Other Tyco Irrigation System manuals

Tyco TY-B Series User manual

Tyco

Tyco TY-B Series User manual

Tyco TFP PH2 Instruction Manual

Tyco

Tyco TFP PH2 Instruction Manual

Tyco CHEC User manual

Tyco

Tyco CHEC User manual

Tyco ELO-231B Series User manual

Tyco

Tyco ELO-231B Series User manual

Tyco EC-25 User manual

Tyco

Tyco EC-25 User manual

Tyco DS-1 Series User manual

Tyco

Tyco DS-1 Series User manual

Tyco TY-FRB Series User manual

Tyco

Tyco TY-FRB Series User manual

Tyco TY7158 User manual

Tyco

Tyco TY7158 User manual

Tyco 3002B User manual

Tyco

Tyco 3002B User manual

Tyco Rapidresponse LFII Series User manual

Tyco

Tyco Rapidresponse LFII Series User manual

Tyco Rapidresponse LFII Series Operating and maintenance instructions

Tyco

Tyco Rapidresponse LFII Series Operating and maintenance instructions

Tyco DS-2 Series User manual

Tyco

Tyco DS-2 Series User manual

Tyco ELO-231 Series User manual

Tyco

Tyco ELO-231 Series User manual

Tyco TY-FRL Series User manual

Tyco

Tyco TY-FRL Series User manual

Tyco ELOC User manual

Tyco

Tyco ELOC User manual

Tyco Rapidresponse LFII Series User manual

Tyco

Tyco Rapidresponse LFII Series User manual

Tyco ESFR-17 User manual

Tyco

Tyco ESFR-17 User manual

Tyco EC-5 Series User manual

Tyco

Tyco EC-5 Series User manual

Tyco ESFR-25 User manual

Tyco

Tyco ESFR-25 User manual

Tyco ELO-231B Series User manual

Tyco

Tyco ELO-231B Series User manual

Tyco Mulsifyre F822 User manual

Tyco

Tyco Mulsifyre F822 User manual

Tyco DS-3 Series User manual

Tyco

Tyco DS-3 Series User manual

Tyco EC-11 Series User manual

Tyco

Tyco EC-11 Series User manual

Tyco Central ESFR-25/WilFlow User manual

Tyco

Tyco Central ESFR-25/WilFlow User manual

Popular Irrigation System manuals by other brands

Toro R Series Installation and Adjustment guide

Toro

Toro R Series Installation and Adjustment guide

Tyco Fire Product Star LD-2 instruction manual

Tyco Fire Product

Tyco Fire Product Star LD-2 instruction manual

Hunter G835 owner's manual

Hunter

Hunter G835 owner's manual

Gardena 4040 user manual

Gardena

Gardena 4040 user manual

Johnson Controls tyco CC2 manual

Johnson Controls

Johnson Controls tyco CC2 manual

Tyco Fire Product CENTRAL Royal Flush A instruction manual

Tyco Fire Product

Tyco Fire Product CENTRAL Royal Flush A instruction manual

Toro 570Z Series installation instructions

Toro

Toro 570Z Series installation instructions

SNOWJOE AQUAJOE AJ-OMS20-BRS manual

SNOWJOE

SNOWJOE AQUAJOE AJ-OMS20-BRS manual

Tyco Fire Product Gem ISSUE D QUARTZOID instruction manual

Tyco Fire Product

Tyco Fire Product Gem ISSUE D QUARTZOID instruction manual

Reliable F1XLH Series quick start guide

Reliable

Reliable F1XLH Series quick start guide

Task Force Tips G-Force INSTRUCTIONS FOR SAFE OPERATION AND MAINTENANCE

Task Force Tips

Task Force Tips G-Force INSTRUCTIONS FOR SAFE OPERATION AND MAINTENANCE

SNOWJOE AQUAJOE SJI-OMS20 manual

SNOWJOE

SNOWJOE AQUAJOE SJI-OMS20 manual

Reliable G4 quick start guide

Reliable

Reliable G4 quick start guide

Johnson Controls tyco TY-FRB Series manual

Johnson Controls

Johnson Controls tyco TY-FRB Series manual

Viking MicrofastHP VK317 Technical data

Viking

Viking MicrofastHP VK317 Technical data

Eden 94805-EDAMZ instructions

Eden

Eden 94805-EDAMZ instructions

Tyco Fire Product CENTRAL A instruction manual

Tyco Fire Product

Tyco Fire Product CENTRAL A instruction manual

Toro FLX35 Series Installation and service instructions

Toro

Toro FLX35 Series Installation and service instructions

manuals.online logo
manuals.online logoBrands
  • About & Mission
  • Contact us
  • Privacy Policy
  • Terms and Conditions

Copyright 2025 Manuals.Online. All Rights Reserved.