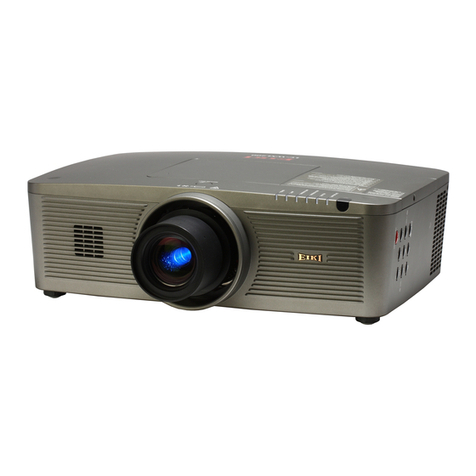
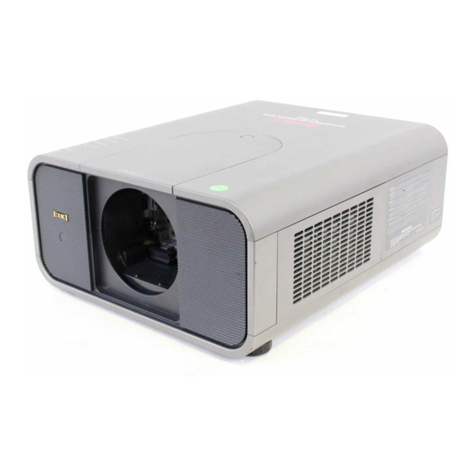
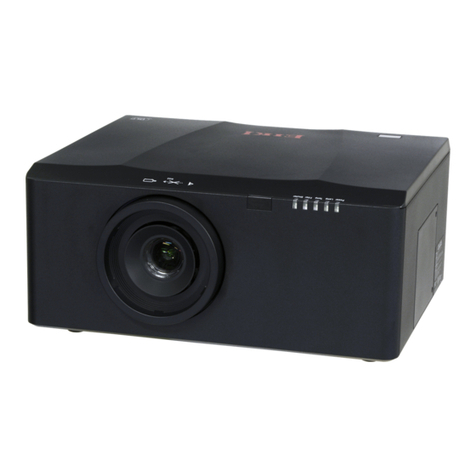
Eiki LC-X800 User manual

* Projection lens is optional.
PRODUCT CODE
1 122 506 01 (KE8B)
1 122 507 01 (LE8B)
1 122 507 06 (LE8G)
Multimedia Projector
SERVICE MANUAL
REFERENCE NO. SM5111208-00
Model No. LC-X800
U.S.A., Canada,
Europe, H.K
Give complete “Chassis No.” for parts
order or servicing, it is shown on the
rating sheet on the cabinet on the pro-
jector.
FOREWORD
For your convenience, all service parts, identified in this manual are available through Eiki’s normal distribution channels.
In addition to service part number, the generic descriptions have been given, where possible, to allow your service
technicians to substitute equivalent components which might be available from other sources.
All orders for service parts will be honored. However, in instances where generic components are considered to be
available from several common sources, as would be the case with an industry standard fuse, resistor, or semicon-
ductor, it may be more economical and expeditious to purchase the part locally.
ORIGINAL VERSION
Chassis No. KE8-X80000

-2-
Contents
SERVICE MANUAL ................................................... 1
Contents ........................................................................ 2
Safety Instructions......................................................... 3
Safety Precautions ..........................................................3
Product Safety Notice .....................................................3
Service Personnel Warning.............................................3
Specifications ................................................................ 4
Circuit Protections ......................................................... 5
Fuse.................................................................................5
Thermostats (SW903, SW904) .......................................5
Mechanical sensor switches (SW902, SW6581) ............6
Temperature sensors, wind sensors and thermistor .......7
Power failure and fan lock detection ...............................8
Maintenance.................................................................. 9
Filter Instructions.............................................................9
Replacing the Filter Cartridge ....................................... 10
Resetting the Filter Counter .......................................... 11
Resetting the Scroll Counter ......................................... 11
Lamp Management ....................................................... 12
Lamp Replacement ....................................................... 13
Resetting the Lamp Counter ......................................... 14
Checking the projector used time and lamp used time. 14
Quick Maintenance ....................................................... 15
Cleaning the optical parts.............................................. 16
Cleaning the Projection Lens ........................................ 16
Cleaning the Projector Cabinet ..................................... 16
Security Function Notice ............................................. 17
Lens Mounting............................................................. 18
Mechanical Disassembly............................................. 22
Mechanical disassembly flow chart...............................22
Mechanical disassembly ...............................................23
Optical Parts Disassembly .......................................... 39
Adjustments................................................................. 50
Adjustments after Parts Replacement...........................50
Note on Main Board Replacement ................................50
Optical Adjustments .................................................... 51
Optical adjustment location........................................... 51
Before Adjustment.........................................................52
1. Optical Center adjustment.........................................54
2. PBS adjustment.........................................................58
3. Contrast adjustment ..................................................59
4. Back focus adjustment ..............................................60
5. Convergence adjustment .......................................... 61
Adjustment ....................................................................64
Electrical Adjustments................................................. 65
Service Adjustment Menu Operation ............................65
Circuit Adjustments .......................................................66
Test Points and Locations .............................................70
Service Adjustment Data Table.....................................71
Chassis Description ...................................................111
Chassis over view.........................................................111
Boards Connection...................................................... 112
Troubleshooting..........................................................113
No Picture.................................................................... 113
No Power..................................................................... 118
Power Supply and Power Fail Detection ..................... 119
Power failure detection tree (1/2) ................................ 120
Power failure detection tree (2/2)................................ 121
Power (DC) power supply system ...............................122
Fan Control System..................................................... 123
Temperature Abnormality ............................................ 124
Power Lens and Shutter System and Abnormality...... 125
Lamp Abnormality ....................................................... 126
Power failure detection system ...................................127
Error information table................................................. 127
Error History Log ......................................................... 128
Diagnosis of Power Failure with RS-232C port ........... 129
Diagnosis procedure ................................................... 129
Indicators and Projector Condition.............................. 130
Serial Control............................................................. 133
Serial Control Interface ...............................................133
Control Port Functions............................................... 135
Waveform ...................................................................141
IC Block Diagrams..................................................... 142
Parts Location Diagrams........................................... 147
Mechanical Parts List ................................................ 161
Electrical Parts List.................................................... 163
Diagrams & Drawings.................................................. A1
Parts description and reading in schematic diagram ..A2
Schematic Diagrams ...................................................A3
Printed Wiring Board Diagrams................................. A13
Pin description of diode, transistor and IC ................A23
Note on Soldering......................................................A24
-3-
Safety Instructions
WARNING:
The chassis of this projector is isolated (COLD) from AC line by using the converter transformer. Primary side
of the converter and lamp power supply unit circuit is connected to the AC line and it is hot, which hot circuit is
identified with the line ( ) in the schematic diagram. For continued product safety and protection of per-
sonnel injury, servicing should be made with qualified personnel.
The following precautions must be observed.
Safety Precautions
1: An isolation transformer should be connected in
the power line between the projector and the AC
line before any service is performed on the projec-
tor.
2: Comply with all caution and safety-related notes
provided on the cabinet back, cabinet bottom, inside
the cabinet or on the chassis.
3: When replacing a chassis in the cabinet, always
be certain that all the protective devices are
installed properly, such as, control knobs, adjust-
ment covers or shields, barriers, etc.
DO NOT OPERATE THIS PROJECTOR WITHOUT
THE PROTECTIVE SHIELD IN POSITION AND PR
OPERLY SECURED.
4: Before replacing the cabinet cover, thoroughly
inspect the inside of the cabinet to see that no stray
parts or tools have been left inside.
Before returning any projector to the customer, the
service personnel must be sure it is completely safe
to operate without danger of electric shock.
Service Personnel Warning
Eye damage may result from directly viewing the light produced by the Lamp used in this equipment. Always
turn off Lamp before opening cover. The Ultraviolet radiation eye protection required during this servicing.
Never turn the power on without the lamp to avoid electric-shock or damage of the devices since the stabilizer
generates high voltages (15kV - 25kV) at its starts.
Since the lamp is very high temperature during units operation replacement of the lamp should be done at least
45 minutes after the power has been turned off, to allow the lamp cool-off.
Product Safety Notice
Product safety should be considered when a component replacement is made in any area of the projector.
Components indicated by mark !in the parts list and the schematic diagram designate components in which
safety can be of special significance. It is, therefore, particularly recommended that the replacement of there
parts must be made by exactly the same parts.

-4-
Specifications
This symbol on the nameplate means the product is Listed by Underwriters
Laboratories Inc. It is designed and manufactured to meet rigid U.L. safety stan-
dards against risk of fire, casualty and electrical hazards.
Mechanical Information
Projector Type Multi-media Projector
Dimensions (W x H x D) 20.87” x 10.55” x 29.8” (530 mm x 268.1 mm x 757 mm) (Not including projections)
Net Weight 60.85 lbs (27.6 kg)
Feet Adjustment 0˚ to 2.8˚
Panel Resolution
LCD Panel System 1.8” TFT Active Matrix type, 3 panels
Panel Resolution 1,024 x 768 dots
Number of Pixels 2,359,296 (1,024 x 768 x 3 panels)
Signal Compatibility
Color System
PAL, SECAM, NTSC, NTSC4.43, PAL-M, and PAL-N
High Definition TV Signal 480i, 480p, 575i, 575p, 720p, 1035i, and 1080i
Scanning Frequency H-sync. 15 kHz–120 kHz, V-sync. 48 Hz–120 Hz
Optical Information
Projection Lamp 330 W NSHA lamp x 2
Interface
Input 1 DVI-D Terminal (Digital), Mini D-Sub 15-pin Terminal (Analog)
Input 2 BNC Type x 5 (VIDEO/Y/G, B/Pb/Cb, R/Pr/Cr, H/HV and V), S-Video
Other Jacks Serial port in (D-sub 9), Serial port out (D-sub 9), USB port, and Wired Remote Jack
Power
Voltage and Power Consumption AC 100–120 V (11.2A Max. Ampere), 50/60 Hz (The U.S.A and Canada)
AC 200-240 V (5.1A Max. Ampere), 50/60 Hz (Continental Europe and The H.K.)
Operating Environment
Operating Temperature 41˚F–104˚F (5˚C–40˚C)
Storage Temperature 14˚F–140˚F (-10˚C–60˚C)
Remote Control
Battery AA or LR6 Type x 2
Operating Range 16.4’ (5 m/±30˚)
Dimensions 1.97” (W) x 1.06” (H) x 6.61” (D) (50 mm x 27 mm x 168 mm)
Net Weight 4.6 oz (129 g) (including batteries)
●The specifications are subject to change without notice.
●LCD panels are manufactured to the highest possible standards. Even though 99.99% of the pixels are effective, a tiny
fraction of the pixels (0.01% or less) may be ineffective by the characteristics of the LCD panels.

-5-
This projector provides the following circuit protections to operate in safety. If the abnormality occurs inside the pro-
jector, it will automatically turn off by operating one of the following protection circuits.
Circuit Protections
A fuse is located inside of the projector. When the LAMP/
READY indicators are not lightning, the fuse may be opened.
Check the fuse as following steps.
The fuse should be used with the following type;
Fuse Part No. : 323 028 4202
TYPE 15.0A 400V FUSE
SOC CORP. SHV14 15A N4
How to replace the fuse
1. Remove the cabinet top following to "Mechanical disas-
sembly".
2. Remove the cover and fuse from fuse holder.
To install the fuse, take reversed step in the above. Fuse
There are the thermostat switches (SW903 and SW904) inside of the projec-
tor to detect the internal temperature rising abnormally. When the internal
temperature reaches near 100˚C, the thermostat opens to stop the operation
of the power supply circuit.
The thermostat will automatically return to normal condition when the inter-
nal temperature becomes normal.
Thermostat
(SW903)
Cover
Holder
Thermostat
(SW904)
Fuse
Thermostats (SW903, SW904)

-6-
Circuit Protections
Mechanical sensor switches (SW902, SW6581)
Filter cartridge sensor
switch (SW6581)
Lamp cover sensor
switch (SW902)
Filter cartridge
This projector provides 2 mechanical sensor switches, the one is for filter cartridge sensor switch (SW6581) and the
other one is for lamp cover sensor switch (SW902). The filter cartridge sensor switch detects whether the filter car-
tridge is installed correctly. If the filter cartridge is not installed correctly, the projector cannot turn on.
The lamp cover sensor switch detects whether the lamp cover is closed securely. If lamp cover is opened or not
closed completely, the drive signal to the lamp circuit is cut off. After opening the lamp cover for replacing the lamp
ass’y, place the lamp cover correctly otherwise the projector cannot turn on.
CAUTION
DO NOT LEAVE THE PROJECTOR WITH THE AC POWER CORD
CONNECTED UNDER AN ABNORMAL CONDITION. IT MAY RE-
SULT IN FIRE OR ELECTRIC SHOCK.
Indicators
The projector is shut down; and the LAMP indicator is lighting
and other indicators are blinking.
When the projector detects an abnormal condition (SW902, SW903, SW904
- opens, or SW6581 - opens), it will be automatically shut down to protect the
inside of the projector and the LAMP indicator lights on and other indicators
blink. In this case, unplug the AC power cord and check that the filter car-
tridge and lamp cover are installed securely, and the plug it, and turn on the
projector once again to verify operation. If the projector cannot be turned on
and these indicators are still lighting and blinking, unplug the AC power cord.
See the troubleshooting chapter.
LAMP indicator lights on
and other indicators blink.

-7-
The projector provides 2 temperature sensor ICs, 1 sensor on the Main board and 1 sensor on the Sensor board,
and 1 wind sensor on the intake duct 1 thermistor on the blue polarized glass unit. The sensor ICs monitor surround-
ing temperature of the panels/prism, and surrounding temperature of the intake duct, and the wind sensor monitors
airflow passed through the air filter in the intake duct.
- Thermistor (TH901) on the blue polarized glass.
- Temperature sensor (IC2541) on the main board for monitoring the surrounding temperature of panels/prism.
- Temperature sensor (IC8811) on the sensor board for monitoring the surrounding temperature of the intake duct.
- Wind sensor (S901) on the filter box.
Circuit Protections
IC2541
(Behind)
Temperature sensors, wind sensors and thermistor
TH901
Thermistor
S901
Wind sensor
IC8811
The projector is shut down and the WARNING TEMP. indicator is
blinking red.
When the temperature inside the projector reaches a certain level, the projec-
tor will be automatically shut down to protect the inside of the projector. The
LAMP indicator turns red brighter and the WARNING TEMP indicator blinks
while the projector is being cooled down. When the projector has cooled
down enough (to its normal operating temperature), it can be turned on again
by pressing the ON/STAND-BY button.
✔Note:
• The WARNING TEMP. indicator continues to blink even after the temperature
inside the projector returns to normal. When the projector is turned on again, the
WARNING TEMP. indicator stops blinking.
Indicators
WARNING TEMP.
blinking red

-8-
The projector provides the detection circuits of the power failure and the fan lock. When the detection circuit detects
an error at the power supply line or at the fan operation circuit, the projector will turn into the standby mode to protect
the other circuits defective.
Circuit Protections
Power failure and fan lock detection
CAUTION
DO NOT LEAVE THE PROJECTOR WITH THE AC POWER CORD
CONNECTED UNDER AN ABNORMAL CONDITION. IT MAY RE-
SULT IN FIRE OR ELECTRIC SHOCK.
Indicators
The projector is shut down; and the LAMP indicator is lighting
and other indicators are blinking.
When the projector detects an abnormal condition (Power supply lines failure
or fans failure), it will be automatically shut down to protect the inside of the
projector and the LAMP indicator lights on and other indicators blink. In this
case, unplug the AC power cord and plug it, and then turn on the projector
once again to verify operation. If the projector cannot be turned on and these
indicators are still lighting and blinking, unplug the AC power cord. See the
troubleshooting chapter.
LAMP indicator lights on
and other indicators blink.

-9-
Maintenance
Filter Instructions
Filter prevents dust from accumulating on the optical elements inside the projector. Should the filter becomes
clogged with dust particles, it will reduce cooling fans’ effectiveness and may result in internal heat buildup and
adversely affect the life of the projector. This projector has an electrically operated filter which helps you to replace
the filter easily. The projector monitors the condition of the filter at all time and replaces a filter with a new one
automatically when it detects the clogging.
If the projector reaches a time set in the timer setting (p. 56), a Filter
replacement icon (Fig.1) appears on the screen and the WARNING
FILTER indicator on the top panel lights up. When you see this icon,
replace the filter as soon as possible. If the filter is out of scroll and
the projector reaches a time set in the timer setting, Fig. 2 appears
on the screen, indicating that the filter cartridge replacement is nec-
essary.
When the filter scroll is counted down to 1, the Last scroll icon
(Fig.3) appears on the screen, indicating that there is one scroll left
in the filter cartridge.
If the projector detects that the filter is clogged and no scroll is left
in the filter cartridge, a Filter cartridge replacement icon (Fig. 4) ap-
pears on the screen and the WARNING FILTER indicator on the top
panel lights up. When you see this icon, replace the filter cartridge
and reset the Filter counter and the Scroll counter.
When the filter is being scrolled by the remote control or the Fil-
ter control function in the setting menu, a Filter replacement icon
and “Please wait...” message (Fig.5) appear on the screen and the
WARNING FILTER indicator blinks slow (approx. 2 seconds ON, 2
seconds OFF).
The WARNING FILTER indicator blinks fast when the projector de-
tects an abnormal condition, the filter cartridge is not installed prop-
erly, or the filter scroll is not working properly.
Fig.1 Filter replacement icon
Fig.4 Filter cartridge replacement icon
Fig.3 Last scroll icon
✔Note:
• Fig.1, Fig.2, Fig.3 or Fig. 4 will not appear when the
Display function is set to “Off”, or during “Freeze”.
• The filter cannot be rewound.
• The filter can be scrolled 9 times since the filter cartridge
has 10 scrolls.
• The filter cartridge is disposable. Do not clean and reuse
the filter cartridge.
• Do not expose the filter cartridge to water or liquid, or it
may cause a breakdown.
• Replace the filter cartridge after all the scroll is used up. If
you replace the filter cartridge when there are some scrolls
left in the filter cartridge, the filter counter and the scroll
counter do not recognize the correct number of remaining
scrolls and the reset function cannot work properly. It may
cause a breakdown.
• The used part of the filter can be seen on the edge of the
Filter cartridge after scrolling the filter, but there is no prob-
lem for the use of the projector.
• Do not use the filter cartridge with other projector. The filter
counter and the scroll counter do not recognize the correct
number of remaining scrolls of the used filter cartridge and
the reset function cannot work properly. It may cause a
breakdown.
• Make sure that the projection lamps are turned off when
you are replacing the filter cartridge. If you replace the filter
cartridge when the projection lamps are turned on, the
projector will be shut down automatically for safety pur-
poses.
• Do not forget to reset the filter counter and the scroll coun-
ter in the setting menu after replacing the filter cartridge.
If you forget to reset the filter counter and the scroll coun-
ter, the projector cannot recognize the correct number of
remaining scrolls and it may cause a breakdown.
• When the projector is kept used for 3 minutes without get-
ting the filter cartridge replaced after the Fig.4 appears on
the screen, the projector is turned off automatically to pre-
vent the damage of optical components.
Fig.5 Filter replacement icon and
“Please wait...” message.
Fig.2

-10-
Turn off the projector, press the Main On/Off Switch to
Off and unplug the AC power cord from the AC outlet.
First, clean up the dust on the projector and around the
air vents.
1
2
Slide and open the Filter cover. (See the right figure.)
3
Put the new one back into the position and close the filter
cover. Make sure that the filter cartridge is properly and
fully inserted.
5
CAUTION
Make sure the filter cartridge is inserted in the pro-
jector. If the filter cartridge is not inserted, the pro-
jector cannot be turned on.
Do not put anything into the air vents. Doing so may
result in malfunction of the projector.
4
Reset the filter counter and the scroll counter.
6
Filter cover
Replacing the Filter Cartridge
Pull out the filter cartridge by holding the finger grip.
RECOMMENDATION
We recommend avoiding dusty/smoky environments when
operating the projector. Usage in these environments may
cause a poor image quality.
When using the projector under dusty or smoky conditions, dust
may accumulate on a lens, liquid crystal panels, or optical elements
inside the projector. Such condition may degrade the quality of the
projected image.
When the symptoms above are noticed, contact your authorized
dealer or service station for proper cleaning.
ORDER REPLACEMENT FILTER CARTRIDGE
Type No.: POA-FIL-180
Service Parts No. : 610 335 9830
Connect the AC power cord to the projector and turn on
the projector.
7
Filter cartridge
Maintenance

-11-
Be sure to reset the Scroll counter after replacing the filter
cartridge.
Press the MENU button to display the On-Screen Menu.
Use the Point 7 8 buttons to move the red frame pointer
to the Setting Menu icon.
Use the Point ed buttons to move the red frame pointer
to Filter counter and then press the SELECT button. A
dialog box appears showing the Used time option and
the Scrolls remaining option. Use the Point ed buttons
to select Scroll(s) remaining.
1
2
Resetting the Scroll Counter
Scroll counter
Another confirmation dialog box appears, select [Yes] to
reset the Scroll counter.
3Scroll(s) remaining shows the number of the remaining
scrolls and the Reset option. Select Reset and the “Scroll
counter Reset?” appears. Select [Yes] to continue.
4
Be sure to reset the Filter counter after replacing the filter
cartridge.
Press the MENU button to display the On-Screen Menu.
Use the Point 7 8 buttons to move the red frame pointer
to the Setting Menu icon.
Use the Point ed buttons to move the red frame pointer
to Filter counter and then press the SELECT button. A
dialog box appears showing the Used time option and
the Scrolls remaining option. Use the Point ed buttons
to select Used time.
1
2
Resetting the Filter Counter
Filter counter
Select Reset and the “Filter
counter Reset?” appears.
Select [Yes],
then another
confirmation
box appears.
Select [Yes] again to reset
the Filter counter.
Another confirmation dialog box appears, select [Yes] to
reset the Filter counter.
3Used time shows the total accumulated time of the filter
use, a timer setting option, and the Reset option. Select
Reset and the “Filter counter Reset?” appears. Select
[Yes] to continue.
4
Select “Used time” and the dia-
logue box below appears.
Select “Scrolls remaining” and
the dialogue box below appears.
Select Reset and the “Scroll
counter Reset?” appears.
Select [Yes],
then another
confirmation
box appears.
Select [Yes] again to reset
the Scroll counter.
Meintenance
Note:
•While the scroll counter reset is in progress, ‘‘Please wait...’’
message appears on the screen, the cooling fans operate and
the filter cartridge is adjusted.

-12-
Maintenance
Lamp Management
This Projector is equipped with 2 Projection Lamps to ensure brighter image and those lamps are controlled by the
Lamp Management Function. The Lamp Management Function detects the status of lamps and shows the status
on screen or on the LAMP 1/2 REPLACE indicators. This function also automatically controls the Lamp Mode when
any of lamps is out for the end of life or malfunctions.
Projection Lamp lights normally.
Lamp 1/2 Replace Indicators
The LAMP 1/2 REPLACE indicators light orange when any of Projection Lamps is nearing its end, and flash when
any of them becomes out. Check the number of lamp on the Lamp Status Display or the LAMP 1/2 REPLACE
indicators and replace the lamp.
Yellow Lamp
Dim Lamp
X Mark on Lamp
Red Lamp
LAMP 1/2 REPLACE
INDICATORS
Projection Lamp is turned off.
Projection Lamp is nearing its end. When the image be-
comes darker or the color becomes unnatural, replace
lamp. (LAMP 1/2 REPLACE indicator lights orange.)
(LAMP 1/2 REPLACE indicator flashes orange.)
Projection lamp is defective or fails to be turned on. Re-
start the projector on, and make sure lamp is on. If this
mark still appears, replace lamp corresponding with num-
ber marked X.
LAMP STATUS
DISPLAY
Lamp Mode Changeover
The Lamp Management Function automatically changes the lighting lamp (Lamp Mode) by detecting the status of lamp. When
either of the 2 lamps is out, the projector operates with 1 lamp. The Lamp Mode can be switched to 2 lamps or 1 lamp manually.
Refer to the SETTING section on page 51.
2 LAMP MODE 1 LAMP MODE
When Lamp 2 is burnt out.
Lamp Status Display
The Lamp Status Display appears on screen when the projector is turned on or the input position (input 1, input 2,
Input 3 or input 4) is switched. This shows the status of each lamp as; ON, OFF, NEAR END, or OUT. Refer to the
following for each status.
Lamp mode
When Lamp 1 is burnt out.

-13-
Check the number of lamp to be replaced on the Lamp Sta-
tus Display.
Loosen a screw on the Lamp Cover. Slide and open the
Lamp Cover until it makes a clicking sound. (See the right
figure.)
1
3
Loosen two screws and pull out the Lamp to be replaced
by grasping handle.
4
Turn off the projector, press the Main On/Off Switch to Off
and unplug the AC power cord from the AC outlet. Let the
projector cool for at least 45 minutes.
2
Replace the Lamp with a new one and tighten two screws.
Make sure the Lamp is set properly.
6
Follow these steps to replace the lamp.
Put the Lamp Cover back and tighten a screw.
5
7
8
Connect the AC Power Cord to the projector and turn on
the projector.
Reset the Lamp Replacement Counter. (Refer to section
"Resetting the Lamp Counter" on page 62.)
NOTE : Do not reset LAMP REPLACEMENT COUNTER when
lamp is not replaced.
SCREW
LAMP
COVER
SCREWS
Make sure which number of lamp needs to be
replaced on Lamp Status Display.
Figure shows case of replacing LAMP 1.
LAMP 2
LAMP 1
CAUTION : DO NOT OPERATE THE PROJECTOR WHILE ANY OF LAMPS IS REMOVED. IT MAY RESULT IN
MALFUNCTIONS, FIRE HAZARD, OR OTHER ACCIDENTS.
NOTES ON LAMP REPLACEMENT
To maintain quality of picture (better balance of color and brightness in entire screen), we recommend replacing both
2 lamps at a time.
Lamp Replacement
For continued safety, replace with a lamp assembly of
the same type.
Do not drop the lamp assembly or touch a glass bulb!
The glass can shatter and may cause injury.
Allow the projector to cool, for at least 45 minutes be-
fore you open Lamp Cover. The inside of the projec-
tor can become very hot.
CAUTION
TURN OFF THE UV LAMP BEFORE OPEN-
ING THE LAMP COVER.
WARNING:
When the projection lamp of the projector reaches its end of life, the Lamp replacement icon appears on the screen
and LAMP 1/2 REPLACE indicator lights orange. Replace the lamp with a new one promptly. The timing when the
LAMP 1/2 REPLACE indicators should light is depending on the lamp mode.
Indicators
LAMP 1 / 2 REPLACE indicators
Lamp replacement icon
✔Note:
•The Lamp replacement icon will not appear when the
Display function is set to “Off”, or during “Freeze”.
Maintenance

-14-
The LAMP REPLACE indicator will light yellow when the total lamp used time (Corresponding value) reaches 3,000
hours. This is to indicate that lamp replacement is required.
The total lamp used time is calculated by using the below expression,
Total lamp used time (Corresponding value) = Teco + (Tnormal x 1.5)
Teco: used time in the Eco mode
Tnormal : used time in the Normal mode and Auto mode
You can check the lamp used time following to the below procedure.
1Press and hold the ON/STAND-BY button on the projector or the remote control for more than 20 seconds.
2The projector used time and lamp used time will be displayed on the screen briefly as follows.
Counter
Projector 500H
Lamp Lamp1 Lamp2
Normal 200H 200 H
Eco 300H 300 H
Corresponding value 600H 600 H
Total lamp used time
Projector used time
Maintenance
Lamp mode
ORDER REPLACEMENT LAMP
Replacement Lamp Type No. : POA-LMP128
Service Parts No. : 610 341 9497
Checking the projector used time and lamp used time
Be sure to reset the Lamp counter after the lamp is replaced. When the Lamp counter is reset, the LAMP 1/2 RE-
PLACE indicator stops lighting and the Lamp replacement icon disappears.
✔Note:
•Do not reset the Lamp counter without replacing the lamp. Be
sure to reset the Lamp counter only after replacing the lamp.
Press the MENU button to display the On-Screen Menu.
Use the Point 7 8 buttons to move the red frame point-
er to the Setting Menu icon
Use the Point ed buttons to move the red frame point-
er to Lamp counter and then press the SELECT button.
A dialog box appears. Select a lamp and the “Lamp
replacement counter Reset?” appears. Select [Yes] to
continue.
1
2
Lamp counter
Select a lamp and the “Lamp replace-
ment counter Reset?” appears.
Select [Yes] again to reset
the lamp counter.
Select [Yes], then another
confirmation box appears.
Another confirmation dialog box appears and select
[Yes] to reset the Lamp counter.
3
Resetting the Lamp Counter
Auto
Normal
Eco

-15-
Maintenance
This projector provides a cabinet front cover and lamp cover on the cabinet top to enhance the service maintenance.
This enables service personnel to align the optical adjustment or replace the optical parts without disassembly the
cabinet top.
Quick access to the Projection lens unit, LCD/Prism ass'y, Polarized glass ass'y.
Quick Maintenance
Quick access to the PBS/Integrator lens ass'y
1
2
Turn the Cabinet Front Ring anti-clockwise and
pull it forward to remove.
Remove 2 screws-A and loosen 2 screws-B, and
pull the cabinet front cover-A forward.
You can access the projection lens unit, LCD/
Prism ass'y and Polarized glass ass'y quickly.
1
2
Loosen 1 screw-A on the Lamp Cover. Slide and
open the Lamp Cover until it makes a clicking
sound.
Remove 1 screws-B and take the PBS Cover.
You can access the PBS/Integrator lens ass'y
quickly.
Cabinet front cover-A
Cabinet front ring
A
A
B
B
B
A
PBS Cover

-16-
Cleaning the optical parts
Cleaning with air spray
Remove the cabinet top following to “Mechanical Disassembly”. Clean up the LCD panel and polarizing plate by us-
ing the air spray from the cabinet top opening.
Caution:
Use a commercial (inert gas) air spray designed for cleaning camera and computer equipment. Use a resin-based
nozzle only. Be very careful not to damage optical parts with the nozzle tip. Never use any kind of cleanser on the
unit. Also, never use abrasive materials on the unit as this may cause irreparable damage.
Disassembly Cleaning
Disassembly cleaning method should only be performed when the unit is considerable dirty and cannot be suffi-
ciently cleaned by air spraying alone.
Be sure to readjust the optical system after performing disassembly cleaning.
1. Remove the cabinet top and main units following to “Mechanical Disassembly”.
2. Remove the optical base top following to “Optical Unit Disassembly”. If the LCD panel needs cleaning, remove the
LCD panel unit following to “LCD panel replacement”.
3. Clean the optical parts with a soft cloth. Clean extremely dirty areas using a cloth moistened with alcohol.
Caution:
The surface of the optical components consists of multiple dielectric layers with varying degrees of refraction. Never
use organic solvents (thinner, etc.) or any kind of cleanser on these components.
Since the LCD panel is equipped with an electronic circuit, never use any liquids (water, etc.) to clean the unit. Use
of liquid may cause the unit to malfunction.
After long periods of use, dust and other particles will accumulate on the LCD panel, prism, mirror, polarized glass,
lens, etc., causing the picture to darken or color to blur. If this occurs, clean the inside of optical unit.
Remove dust and other particles using air spray. If dirt cannot be removed by air spray, disassemble and clean the
optical unit.
Maintenance
Turn off the projector, press the Main On/Off Switch to Off and unplug
the AC power cord from the AC outlet before cleaning.
Gently wipe the projection lens with a cleaning cloth that contains a
small amount of non-abrasive camera lens cleaner, or use a lens clean-
ing paper or commercially available air blower to clean the lens.
Avoid using an excessive amount of cleaner. Abrasive cleaners, sol-
vents, or other harsh chemicals might scratch the surface of the lens.
Cleaning the Projector Cabinet
Turn off the projector, press the Main On/Off Switch to Off and unplug
the AC power cord from the AC outlet before cleaning.
Gently wipe the projector body with a soft dry cleaning cloth. When the
cabinet is heavily soiled, use a small amount of mild detergent and finish
with a soft dry cleaning cloth. Avoid using an excessive amount of clean-
er. Abrasive cleaners, solvents, or other harsh chemicals might scratch
the surface of the cabinet.
When the projector is not in use, put the projector in an appropriate car-
rying case to protect it from dust and scratches.
Cleaning the Projection Lens

-17-
This projector provides security functions such as "Key lock", "PIN code lock" and "Logo PIN code lock". When the
projector has set these security function on, you are required to enter correct PIN code to use the projector. If you
do not know the correct PIN code to the projector, the projector can no longer be operated or started. In this case,
you must reset those function first according to the resetting procedure described below and then check up on the
projector.
Security Function Notice
Resetting procedure
1Turn off the projector with the Mains switch.
2As pressing the SELECT button on the projector, turn on the projector with the Mains switch. Keep pressing
the SELECT button until the READY indicator lights continuously.
This is complete the resetting of the security function. The PIN code lock and Logo PIN code lock are reset
as the initial PIN code at the factory and the Key lock function is disabled.
Please refer to the owner's manual for further information of the security functions.
Function Description
Key lock
Locks operation of the side control or the remote con-
trol.
If the Key lock is enabled with side control lock, the
projector can no longer be started.
Initial setting: Key lock function is disabled
PIN code lock
Prevents the projector from being operated by an un-
authorized person.
Initial code: “1234”
Logo PIN code lock
Prevents an unauthorized person for changing the
start-up logo on the screen.
Initial code: “4321”

-18-
Lens Mounting
- 1 -
LCD PROJECTOR Model No. LC-X7/X8/X800 and LC-W5
LENS REPLACEMENT AND INSTALLATION PROCEDURE
Be sure to consult with a qualified service personnel.
When installing or replacing the Projection
Lens, refer to this manual. For installation
of the lens, use the parts specified in this
manual.
Do not use the installation manual and
Light-Block Sheets in the optional lens
package.
Check the following parts supplied to this
projector.
LENS INSTALLATION PRECAUTIONS
L
Lens installation and replacement should be made by a qualified service personnel.
LBe sure to install the lens by following this procedure precisely.
LDo not touch or remove any parts except the lens and related parts. It may result in
malfunctions, electrical shock, fire hazard or other accidents.
LBefore installing or replacing the lens, check that the Part No. of the Projection Lens
matches to the projector.
LWhen moving or setting up the projector, be sure to replace the Lens Cover to protect
the surface. And be careful not to hold or subject the lens to strong forces. Otherwise
the lens, cabinet, or mechanical parts may damage.
LFor details of the lens and installation, contact the sales dealer where you purchased
the projector.
The lenses listed below are designed for use with the LC-X7/X8/X800 and LC-W5 (when applicable).
AVAILABLE LENS
Part No. Code No. Type Zoom Focus Projector Model No.
LC-X7/X8/X800 LC-W5
AH-21012 LNS-W01Z Wide Fixed Lens Fixed Manual OK OK
AH-21202 LNS-W02Z Wide Zoom Lens Motor Driven Motor Driven OK OK
AH-32021 LNS-W03 On-Axis Wide Fixed Lens Fixed Manual OK OK
AH-32401 LNS-W04 Wide Zoom Lens Motor Driven Motor Driven OK OK
AH-32501 LNS-W05 Wide Zoom Lens Motor Driven Motor Driven N/A OK
AH-32601 LNS-W06 Wide Zoom Lens Motor Driven Motor Driven OK OK
AH-32701 LNS-W07 On-Axis Wide Fixed Lens Fixed Manual N/A OK
AH-21102 LNS-S02Z Standard Zoom Lens II Motor Driven Motor Driven OK OK
AH-22051 LNS-S03 Standard Zoom Lens III Motor Driven Motor Driven OK OK
AH-21022 LNS-M01Z Semi-Long Throw Zoom Lens Motor Driven Motor Driven OK OK
AH-21091 LNS-T02 Long Zoom Lens Motor Driven Motor Driven OK OK
AH-32581 LNS-T03 Ultra-Long Zoom Lens Manual Manual OK OK
DO NOT USE THE OPTIONAL LENS BELOW FOR LC-X7/X8/X800 AND LC-W5.
OTHERWISE DAMAGES MAY RESULT.
LENS PART NO. : AH-21031 (LNS-T01)
3 types of Light -Block Plates
2 types of Lens Attachments 3 types of Spacers
2 types of Safety Clamps
- 2 -
The installation procedure and needed parts for lens installation varies on Optional Lens. Check the Part No. of the
Optional Lens and be sure to install or replace the lens by following the procedure below.
3Turn the Lens Mount Cover counter-clockwise
and take it off by pulling forward. (See Fig. 3)
LENS REPLACEMENT AND INSTALLATION PROCEDURE
Fig. 3
Lens Mount Cover
A
Fig. 4
B
A
B
4Remove 2 Screws Aand loosen 2 Screws B.
Slide the Top Cover forward to take off. (See
Fig. 4)
Top Cover
Focus Lens Lock Screw
Locate the Motor on right side.
Lens Attachment
Part No. (610 275 6029)
Connector
Lens Motor Lead Fig. 2
Lens Attachment
Socket
Lens Attachment for each Lens.
1Remove the safety lens cap on the rear of
the lens (mounting side). Insert the Lens
Attachment and secure with the four (4) screws
(supplied). (See Fig. 1.)
Screw Driver
(supplied with the optional lens)
Lens Attachment
Type No. (PART No.)
Lens Part No.
Lens Attachment 01
AH-25841
(910 303 8743)
AH-21012, AH-21202,
AH-32021, AH-32401,
AH-32501, AH-32601,
AH-32701, AH-21091,
AH-32581, AH-21102,
AH-22051, AH-21022
Lens Attachment 02
AH-25871
(910 304 6229)
AH-21201, AH-21021,
AH-21041
Fig. 1
Connect the Lens Motor Lead to the socket on
the top right of the Lens Attachment. (Motor
Driven Lens only) (See Fig. 2)
2Turn off the projector, press the Main On/Off
Switch to Off and unplug the AC power cord
from the AC outlet.

-19-
Lens Mounting
- 3 -
5Remove the Cover Plate by lifting upwards.
(See Fig. 5)
Fig. 5
Cover Plate
6The LC-X7/LC-X8LC-W5 can use three (3)
different types of Light-Block Plates, use the
Light-Block Plate that corresponds to the
appropriate optional lens. (Refer to the list
below.)
NOTE:
LMake sure the shape of the Light-Block Plate(s) is
correct.
L
Make sure the mark (UP/DOWN and FRONT/BACK)
on Light-Block Plates are correct and set them
properly.
L
Use 2 Light-Block Plates for AH-32021.
Light-Block Plate for each Lens
Light-Block Plate
Type No. (PART No.)
Lens Part No.
Type FK2A
(610 337 0064)
AH-21102, AH-22051,
AH-32581, AH-21012,
AH-32401, AH-32501,
AH-32601
Type FK2B
(610 337 0224)
AH-21022, AH-21091,
AH-21202, AH-32701,
AH-32021
(610 335 4545) AH-32021
7Insert the lower Light-Block Plate. (See Fig. 6.)
Fig. 6
8Grasp (release lock) the Lens Lock Lever and
turn it fully upward. (See Fig. 7) Install the
Lens into the projector. Grasp the Lens Lock
Lever and turn the Lever fully downward until
lever is Locked (clicked position) properly. (See
Fig. 8) When installing the Motor Driven
Lens, be sure to mount Lens Motor on right
side. (See Fig. 1)
After installing the lens, make sure the Lens is
not loose and properly installed.
Fig. 7
Fig. 8
LENS LOCK RELEASE
LENS LOCK
Grasp (unlock)
Lens Lock Lever
and pull upward.
Grasp (unlock)
Lens Lock Lever
and fully pull
downward until it is
locked (clicked).
NOTE:
LThe Light-Block Plate FK2A and FK2B are separated
to the upper and lower plates.
Lower Plate
Upper Plate
DOWN
UP
- 4 -
Safety Clamp
Type No. (PART No.)
Lens Part No.
Type SC-A
(610 332 3759)
AH-21102, AH-22051,
AH-21022, AH-21091,
AH-32581, AH-21012,
AH-21202, AH-32021,
AH-32401, AH-32501,
AH-32601, AH-32701
Type SC-B
(610 322 3742)
AH-21201, AH-21021,
AH-21041
10 To ensure that the lens is securely fixed to
the projector when mounting, be sure to
attach the provided Safety Clamp. There
are two different types of Safety Clamps
depending on the lens of the projector.
Check the Part No. of the lens before
attaching the Safety Clamp and use a Safety
Clamp that matches to the lens.
1Remove the screw holding the lens. (See Fig.9-
1/10-1)
2Insert the removed screw to the Safety Clamp.
3Place the Safety Clamp in the location of the
removed screw. Make sure that the Safety
Clamp is mounted to hold the Lens Lock Lever
in the lock position. Check the placement of the
Safety Clamp. (See Fig. 9-2/10-2)
Safety Clamp
(SC-A)
Screw
Safety Clamp
(SC-A)
Lens Lock Lever
Lens Lock Lever
Safety Clamp
Safety Clamp
(SC-B)
Safety Clamp
(SC-B)
Lens Lock Lever
Lens Lock Lever
Safety Clamp
Screw
Safety Clamp
Attached Figure
Safety Clamp
Attached Figure
Fig. 9-1
Fig. 9-2
Fig. 10-1
Fig. 10-2
Set up the projector and project image on a
screen. Loosen the Focus Lens Lock Screw
and rotate the Projection Lens to obtain proper
focus. After adjusting focus, be sure to lock
the Projection Lens with the Focus Lens Lock
Screw securely. (See Fig. 1)
Adjust focus of the Projection Lens Part No.
AH-32021 and AH-32701 following the Focus
Adjustment on page 6.
9Adjust focus of the Projection Lens. (AH-21012,
AH-32021 and AH-32701 only.)

-20-
Lens Mounting
- 5 -
11 Install the Upper Light-Block Plate into
the guide of Lower Light-Block Plate.
(See Fig. 11)
Note:
LWhen installing the Upper Light-Block Plate, the
Lower Light-Block Plate should be lifted upward with
your hand.
L
Make sure the mark (UP/DOWN and FRONT/BACK)
on Light-Block Plate(s) is correct and set them
properly.
Fig. 12
When using No.AH-32021
- When installing No. AH-32021, use two (2) Light-
Block Plates. Make sure the figure is correct and put
in proper position. (See Fig.13)
7Before mounting the Light-Block Plate (No. 610
335 4545), turn the projector on and move the
projected image to the most upper left with
the lens shift function. Then turn the projector
off.
<Insert the Light-Block Plate (No. 610 335 4545)
in the direction shown in the figure to the right.
The Light-Block Plate should encircle the lens.
Rotate the Light Block Plate counter clockwise
until the convex side is in a downward position.
Upper PlateLower Plate
Fig. 11
Fig. 13
NO. 610 335 4545
(On front of FK2B)
TYPE FK2B
Note: The side with "THIS SIDE BACK" must face backward.
Fig. 14
Fig. 15
12 Replace and fix the Top Cover with two (2)
Screws Aand 2 screws B. (See Fig. 14)
13 Fit the raised dot of the Lens Mount Cover
to the leftmost edge of the Label on the
projector, and then turn the Lens Mount Cover
clockwise and adjust the position of the raised
dot to the one of the projector. (See Fig. 15)
Note: If not mounted properly, the Lens Mount Cover
may fall, causing hazards or injury.
A
B
A
B
Top Cover
Label
Dot on the cabinet
Dot on the lens
mount cover
Lens Mount Cover
- 6 -
Some parts are not used for installation or replacement.
Keep these parts for later use.
Note: Figures in this manual may differ from the actual product.
Focus Lock Screw
Focus Lock Ring
Lmark (yellow)
(AH-32021 only)
FOCUS ADJUSTMENT
Set up the projector and project image on the screen.
1. Loosen the Focus Lock Screw on the lens.
2. Rotate the lens to obtain proper focus on center
area of the screen.
When the distance between the screen and lens is 1
meter, set Lmark (yellow) of the lens on Focus Lock
Screw position. (This is only for No. AH-32021.)
3. Lock the Focus Lock Screw securely.
When proper focus is not observed at outer area of the
screen, proceed the following adjustments.
4. Loosen the Focus Lock Ring on the lens. (Turn the
Lock Ring counter-clockwise.)
5. Rotate the lens to obtain proper focus on outer area
of the screen.
6. Lock the Focus Lock Ring securely. (Turn the Lock
Ring clockwise.)
If proper focus is not observed over the entire screen,
repeat above adjustments 1~ 6.
FOCUS CORRECTION
14 Turn the projector on and operate Lens
shift, Zoom and Focus fully to check the
Light-Block Plates. If Light-Block Plate(s)
interferes with those operations, check the
Light-Block Plate(s) is set properly.
CAUTION : Do not operate the
projector with Light-Block Plate(s)
removed. Doing so may result in
malfunction of the projector.
No. AH-21012, AH-32021 and AH-32701
Adjust zoom first and then adjust focus.
No. AH-32581
Rotate this part of
the lens to obtain
proper zoom.
Rotate this part of
the lens to obtain
proper focus.
BE SURE TO CHECK FOR SAFETY
After installing or replacing the lens, be
sure to check the following for safety.
1. Check the lens is securely fixed
with the screws.
2. Check no wiring is damaged or
tangled on the gear of the lens
motor or the other mechanical
parts.
3. Check no part is missing, and
no mounting part is loose.
When the lens is attached to the projector and images
are being projected onto the screen, the peripheral
focus may be out of focus in some localized areas. If
this happens, insert the one, of three sizes of spacers,
in between the Lens Attachment and the lens to adjust
the focus.
Inserting the Spacer corrects the distance on the Lens
Adjustment and improves the diagonal focus.
The corrected distance is determined by the thickness
of the used spacers. As a guide, the distance is
adjusted by approximately 30 mm for each 0.1-mm
thickness of the spacers.
There are three types of spacers provided, and there
are four of each spacer type. Use these spacers to
correct the distance as required.
Spacer "1"
Color; Clear
Thickness; 0.1 mm
60-inch projection
Screen
A
B
C
D
B'
A'
D'
C'
Distance
Lens
Lens Attachment
Spacer "2"
Color; Black
Thickness; 0.2 mm
Spacer "3"
Color; Cream
Thickness; 0.3 mm
Correction distance
30 mm/for 60-inch
projection
Correction distance
60 mm/for 60-inch
projection
Correction distance
90 mm/for 60-inch
projection
Spacer
Other manuals for LC-X800
1
Table of contents
Other Eiki Projector manuals

Eiki
Eiki LC-X5 Setup guide

Eiki
Eiki LC-XIP2600 Parts list manual

Eiki
Eiki EK-610U User manual

Eiki
Eiki EK-120 Series User manual

Eiki
Eiki Powerhouse LC-SX1U Setup guide

Eiki
Eiki LC-WS250 User manual

Eiki
Eiki LC-SM3 User manual

Eiki
Eiki LC-UXT3 Setup guide

Eiki
Eiki LC-NB3E User manual

Eiki
Eiki 3875BA User manual

Eiki
Eiki LC-XGA970UE Setup guide

Eiki
Eiki EK-620U User manual

Eiki
Eiki EIP-XSP2500 User manual

Eiki
Eiki DLP Projector EIP-5000 User manual

Eiki
Eiki LC-360 Setup guide

Eiki
Eiki LC-XlU Setup guide

Eiki
Eiki LC-XB250 User manual

Eiki
Eiki LC-XBS500 User manual

Eiki
Eiki LC-XA20 User manual

Eiki
Eiki LC-X3/X3L Setup guide