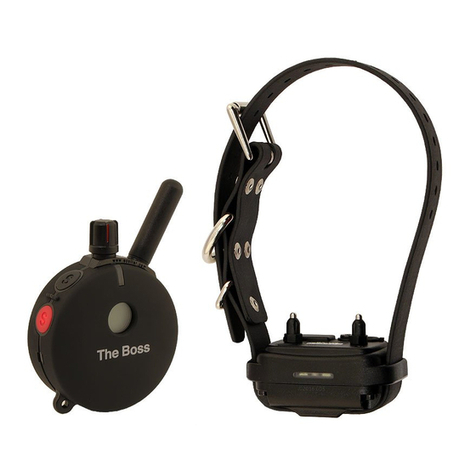
Einstein E-Collar ET-302TS User manual

Thank you for Supporting American Workers
ET-302TS
Owner's Manual

Welcome to the World of Einstein E-Collar™
Thank you for purchasing the Einstein Remote Education Collar from
E-Collar Technologies, Inc. We have made every attempt to provide you
with the most technologically advanced product using the most stringent
quality and manufacturing standards.
We are confident you will be pleased with the results you will attain with
the ET-302TS Two Dog Remote. Please remember you will get better
results with the use of lower stimulation combined with consistent training
techniques. The use of high levels of stimulation should only be used as a
last resort and in life-threatening situations.
Good luck with your training and please feel free to contact us should you
have any questions.
1-855-326-5527 or 1-855-ecollar
Remote Education Collar
ET-302TS Owner's Manual

Einstein Owner's Manual ET-302TS
•
•
•
•
•
•
•
•
02
CHARACTERISTICS
Range : Up to 800 yards
Momentary and Continuous Stimulation Supported
Tapping Sensation
Employs Quick Charge Li-Polymer Batteries
Convenient Intensity Dial for Quick Adjustment
Stimulation Levels Adjustable from 0 to 100
Collar Receiver Light for Night Tracking
Lock and Set Stimulation Feature

Einstein Owner's Manual ET-302TS
•
2 Collar Receivers
•
Lanyard
•
Test Light
•
Contact Point Tool
•
Contact Points 3/4"
•
Transmitter
•
Owner’s Manual
Battery Charger
•
CONTENTS
03
ET-302TS
Owner's Manual

TABLE OF CONTENTS
•
•
•
•
•
•
•
•
•
•
•
•
•
•
•
Safety and General Information
Getting Started
Charging the Batteries
Turning Your E-Collar On/Off
The LCD Display Features
Button Functions
Changing the Intensity Level of Stimulation
Lock/Unlock the Stimulation Intensity Level
Indicator Light
Lost Transmitter Mode
Testing Your Einstein
Replacing the Contact Points
Correctly Fitting the Collar
Warranty
Memo
05
06
08
10
11
12
15
18
19
20
21
22
23
24
25
04
Einstein Owner's Manual ET-302TS

SAFETY AND GENERAL INFORMATION
•
•
•
•
The Einstein Education Collar complies with all National and
International Standards and Guidelines for human exposure to
radio frequency electromagnetic energy.
Nearly all electronic devices are susceptible to
electromagnetic interference (EMI) if inadequately shielded or
designed without precautions to EMI.
Einstein E-Collar transmitters manufactured by E-Collar
Technologies, Inc. comply with Article 15 of the FCC rules and
operate under Part 95 of FCC regulations.
IMPORTANT NOTICE
1.
2.
To avoid Electromagnetic Interference and/or compatibility
conflicts, please turn off your transmitter and collar receiver in
any facility where posted notices instruct you to do so. Never use
your equipment in close proximity of a Hospital or Health Care
Facility or enter the facility without turning off both units.
An FCC license is not needed to operate Einstein E-Collar
transmitters. However, any change or modification made to the
transmitter, including the supplied antenna, without the expressed
written approval of E-Collar Technologies, Inc. could void your
authority to operate.
05
Einstein Owner's Manual ET-302TS

TRANSMITTER PARTS
06
Einstein Owner's Manual ET-302TS
Antenna
Stimulation Level Dial
/ Set and Lock Knob
Stimulation Button (1D)
Stimulation Button (2D)
Indicator Light
(LED Window)
LCD Display
Mode Button
On/Off Magnetic Dot
Light and On/Off Button
Battery Charging Receptacle
and Rubber Cover
Momentary / Continuous Button

COLLAR RECEIVER PARTS
Battery Charging
Receptacle and
Rubber Cover
Collar Strap
5/8" Contact Points
Indicator and Tracking Lights
(LED Window)
On/Off Magnetic Dot
THIS D-CLIP IS
NOT TO BE USED
AS A TIE OUT
07
Einstein Owner's Manual ET-302TS
Momentary / Continuous Button

CHARGING THE BATTERIES
Indicator Light will blink “Green” under normal operation. It will
flicker “Red” when stimulation is applied and will blink “Red” when
recharging is required. We recommend you fully charge your e-collar
every six months when not in use to maintain battery life.
Transmitter Battery Charging
Receptacle and Rubber Cover
Collar Receiver Battery Charging
Receptacle and Rubber Cover
Battery Charger and Splitter Cable
Splitter Cable
120 Volt Charger
Wall Outlet
Charging Cable
08
Einstein Owner's Manual ET-302TS

CHARGING THE BATTERIES
09
Einstein Owner's Manual ET-302TS
The indicator light will turn solid red during charge cycle and
turn green if it is fully charged.
•

TURNING YOUR E-COLLAR ON/OFF
•
To turn the Collar Receiver On or Off :
Position the color dot on the Transmitter close to the color dot
on the Collar Receiver. Push the tapping sensation button to
assure the unit is on and properly functioning.
TRANSMITTER ON/OFF BUTTON
COLLAR RECEIVER ON/OFF MAGNETIC SWITCH
•
To turn the Transmitter On or Off :
Press the “L” light button for more than 2 seconds.
If “L” light button is pressed less than 0.5 seconds, it will turn
On/Off Tracking lights of Collar Receiver.
10
Einstein Owner's Manual ET-302TS

THE LCD DISPLAY FEATURES
In 1D mode, the1D icon will blink indicating the stimulation is ready to
be changed. If the 1D icon is solid, it has been locked into a specific
stimulation level as displayed on the LCD. Release the stimulation lock by
clicking down on the rotary dial until the 1D icon begins to blink; now you
can change the stimulation to a new level. The new selected level can be
locked by clicking down on the rotary dial until the 1D icon stops blinking.
In 1D mode, the 2D icon will not be displayed.
In 2D mode, the 2D icon will blink when the stimulation is ready to
be changed.If the 2D icon is solid, it has been locked into a specific
stimulation level as displayed on the LCD. Release the stimulation lock by
clicking down on the rotary dial until the 2D icon begins to blink; now you
can change the stimulation to a new level. The new selected level can be
locked by clicking down on the rotary dial until the 2D icon stops blinking.
In 2D mode, the 1D icon will not be displayed.
Displays the Stimulation Level : “0”means no stimulation
and “HI” means the highest level(100
)
Press down on the Stimulation Level Knob or press any button to wake up
the LCD display. Please note that if the collar receiver is on, pressing the
stimulation buttons and/or the mode button will trigger the collar receiver.
In Tapping Sensation mode, the LCD displays "T" as shown in
the right picture and you cannot change the stimulation level.
•
Indicates current stimulation type is momentary or
continuous stimulation. "M" and "C" icons will be toggled
when Momentary/Continuous Button is pressed.
11
Einstein Owner's Manual ET-302TS
•
•

BUTTON FUNCTIONS
TRANSMITTER
The ET-302TS transmitter is equipped with five control buttons,
LCD display, and an adjustable dial. For long range use hold the
transmitter up like the Statue of Liberty and never allow the antenna to
touch anything as it will decrease the range. Power lines and foliage
will also reduce the range.
12
Einstein Owner's Manual ET-302TS
Stimulation Button (1D)
Stimulation Button (2D)
Mode Button Light and On/Off Button
Momentary / Continuous Button

Mode Button “M”
- Mode Button allows the user to change modes, cycling between 1D Mode
to
Tapping Sensation Mode
,
Tapping Sensation Mode
to 2D Mode, 2D Mode to
Tapping Sensation Mode
, and
Tapping Sensation mode
to 1D Mode as shown
in the diagram.
- In 1D Mode, you can change the intensity level of 1D by rotating the
dial and locking it. (See “LOCK/UNLOCK THE STIMULATION INTENSITY
LEVEL” for details) The intensity level of 2D will be same as that of 1D
unless it is locked.
- In Tapping Sensation Mode, you can send only a tapping sensation to
each collar receiver. We purposely made it easy to switch back and forth
from tapping sensation to stimulation with one button control.
- In 2D Mode, you can change the intensity level of 2D by rotating the dial
and locking it. The intensity level of 1D will be same as that of 2D unless it
is locked.
Stimulation Button (1D)
- In 1D Mode, you can jump to 2D Mode by pressing 2D Stimulation Button
and vice versa.
- In 1D/2D Mode, Sends momentary or continuous stimulation to the Dog 1
collar receiver based on the state of Momentary/Continuous Button.
- In Tapping Sensation Mode, Sends a tapping sensation to the Dog 1 collar
receiver.
- If the current mode is 2D Mode, the mode will be changed to 1D Mode by
pressing 1D Stimulation Button.
1 Dog Mode2Dog ModeTapping Sensation Mode Tapping Sensation Mode
BUTTON FUNCTIONS
13
Einstein Owner's Manual ET-302TS

Stimulation Button (2D)
- In 1D/2D Mode, Sends momentary and continuous stimulation to the Dog 2
collar receiver based on the state of Momentary/Continuous Button.
- In Tapping Sensation Mode, Sends a tapping sensation to the Dog 2 collar
receiver.
- If the current mode is 1D Mode, the mode will be changed to 2D Mode by
pressing 2D Stimulation Button.
Light Button “L”
- When pressed less than 0.5 seconds, it will turn On or Off the high
intensity night tracking light.
- When pressed for more than 2 seconds, it will turn On or Off the
transmitter.
Momentary/Continuous Button
- M/C Button on the backside of the transmitter allows the user to
switch between Momentary Stimulation and Continuous Stimulation.
- If Continuous Stimulation is selected, pressing stimulation buttons (1D or
2D) will send stimulation to the collar receiver for the duration of the button
being pressed. After 10 seconds the Over-Stimulation feature will stop the
stimulation until the button is released and pressed again.
* In 1D Mode, it will turn ON/OFF Dog 1 collar receiver light.
* In 2D Mode, it will turn ON/OFF Dog 2 collar receiver light.
* In Tapping Sensation Mode, Light ON/OFF Function is disabled.
* 1st pressing will make the collar receiver light flashing.
* 2nd pressing will make the collar receiver light turned on solid.
* 3rd pressing will make the collar receiver light turned off.
* When the button is pressed, “L” will be displayed.
BUTTON FUNCTIONS
14
Einstein Owner's Manual ET-302TS

CHANGING THE INTENSITY LEVEL
OF STIMULATION
Rotating clockwise increases
the stimulation level and
conversely, rotating counter-
clockwise lowers the
stimulation level.
It is highly recommended that the user practices changing levels
and modes before putting the collar receiver on the dog.
Setting the correct stimulation level for your dog is very important.
To set your “conditioning” stimulation level, put the collar receiver
(see page 23 for proper fitting technique) on your dog. Let him/
her get used to the collar receiver for a couple of hours. While
watching your dog, turn the level to “0” and press the stimulation
button (1D/2D).
Slowly turn the stimulation up at a rate of approximately 2-3
levels per second. When your dog first perceives the stimulation,
usually between 15 and 40, release the button. This is your
“conditioning” stimulation level. You may need to add a few
levels later as your dog becomes more conditioned to the
stimulation. The “conditioning” stimulation is used when the
trainer wants to use the stimulation in continuous mode.
15
Einstein Owner's Manual ET-302TS

CHANGING THE INTENSITY
LEVEL OF STIMULATION
For example, if you want your dog to come to you and heel, you
can hold the button down until your dog comes and heels or if
jumping is an issue, you can hold the button down anytime their
front paws are off the ground. Your dog will learn that he/she
controls the stimulation.
Setting the “Corrective” stimulation level is a little more difficult
due to the wide differences in temperaments and stimulation
tolerance among the many breeds of dogs. On average, it is
normally 20 to 40 levels higher than the “Conditioning” level.
This higher level will only be used in “Momentary” mode as not to
over-stimulate your dog.
This mode is used for stopping unwanted behaviors such
as chewing, digging, street-running, excessive barking, and
aggressiveness, etc. It is important to apply the “Momentary”
stimulus at the exact time of the unwanted behavior. Additional
pulses may be used to reinforce the command if compliance is
not immediate. A treat is recommended after compliance. If a
treat is not available, verbal positive reinforcement is acceptable.
16
Einstein Owner's Manual ET-302TS
CHANGING THE INTENSITY LEVEL
OF STIMULATION
IMPORTANT TRAINING TIP
E-Collars should be used to reinforce commands your dog already
knows. It is not a replacement for basic leash obedience training, but
a tool to allow you to better communicate to your dog.
For best results, use the least amount of stimulation required to
get compliance from your dog. A calm and consistent approach to
training will always produce better long term results. It is highly
recommended that aggressive dogs be taken to a professional trainer
for evaluation before e-collar use.
There are many different e-collar training techniques
recommended by a variety of professional trainers. We beleive
you, the owner of the dog, can best determine the most
successful technique for your dog. YouTube has many videos
demonstrating these varying techniques by simply searching
“e-collar training” or “remote dog training techniques”.
Good Luck with your training!
17
Einstein Owner's Manual ET-302TS

LOCK/UNLOCK THE
STIMULATION INTENSITY LEVEL
How to Lock/Unlock the Stimulation Level
This feature is useful when controlling two dogs simultaneously and you
want to have different stimulation levels for each dog.
In 1D Mode, you can see the 1D icon is blinking on the LCD display. Set the
desired stimulation level and then push down on the top of the stimulation
dial until you see “1D” icon stop flashing.
If the stimulation level doesn’t change when you rotate the stimulation knob,
you have successfully locked the stimulation level of Dog 1.
Change the mode to 2D Mode by pressing the Mode Button twice and
repeat the previous step. The “2D” icon light on the bottom portion of the
LCD display will stop flashing. when you have successfully locked the
stimulation level of Dog 2.
To unlock the stimulation level simply press the stimulation knob again and it
will unlock the stimulation level of the dog selected by the mode button.
18
Einstein Owner's Manual ET-302TS

INDICATOR LIGHT
TRANSMITTER INDICATOR LIGHT
Battery Charge level is signified by the flashing light going from
“green” (ready for use) to “amber” (need to charge soon) and then
to “red” (charge immediately). When any of the function buttons are
pressed the indicator light will turn “red” to signify activation.
•
COLLAR RECEIVER
INDICATOR
LIGHT
Battery Charge level is signified by the flashing light going from
“green” (ready for use) to “amber” (need to charge soon) and then
to “red” (charge immediately). When any of the function buttons of
the transmitter are pressed, the indicator light on the collar receiver
will flicker “red” indicating a control signal has been successfully
received.
•
19
Einstein Owner's Manual ET-302TS
Table of contents
Other Einstein Pet Care Product manuals
Popular Pet Care Product manuals by other brands

Pet Fit Designs
Pet Fit Designs Triple One Standard User manual & assembly instructions

Havahart
Havahart 5140G operating instructions

AGPtek
AGPtek Ownpets M81N DC32 Series quick start guide

Petsafe
Petsafe HIG11-13658 operating guide

Cardinal Gates
Cardinal Gates WI-30 Assembly instructions

Pettec
Pettec Antibark Spray Trainer Advance operating manual