6.Measurment Operation
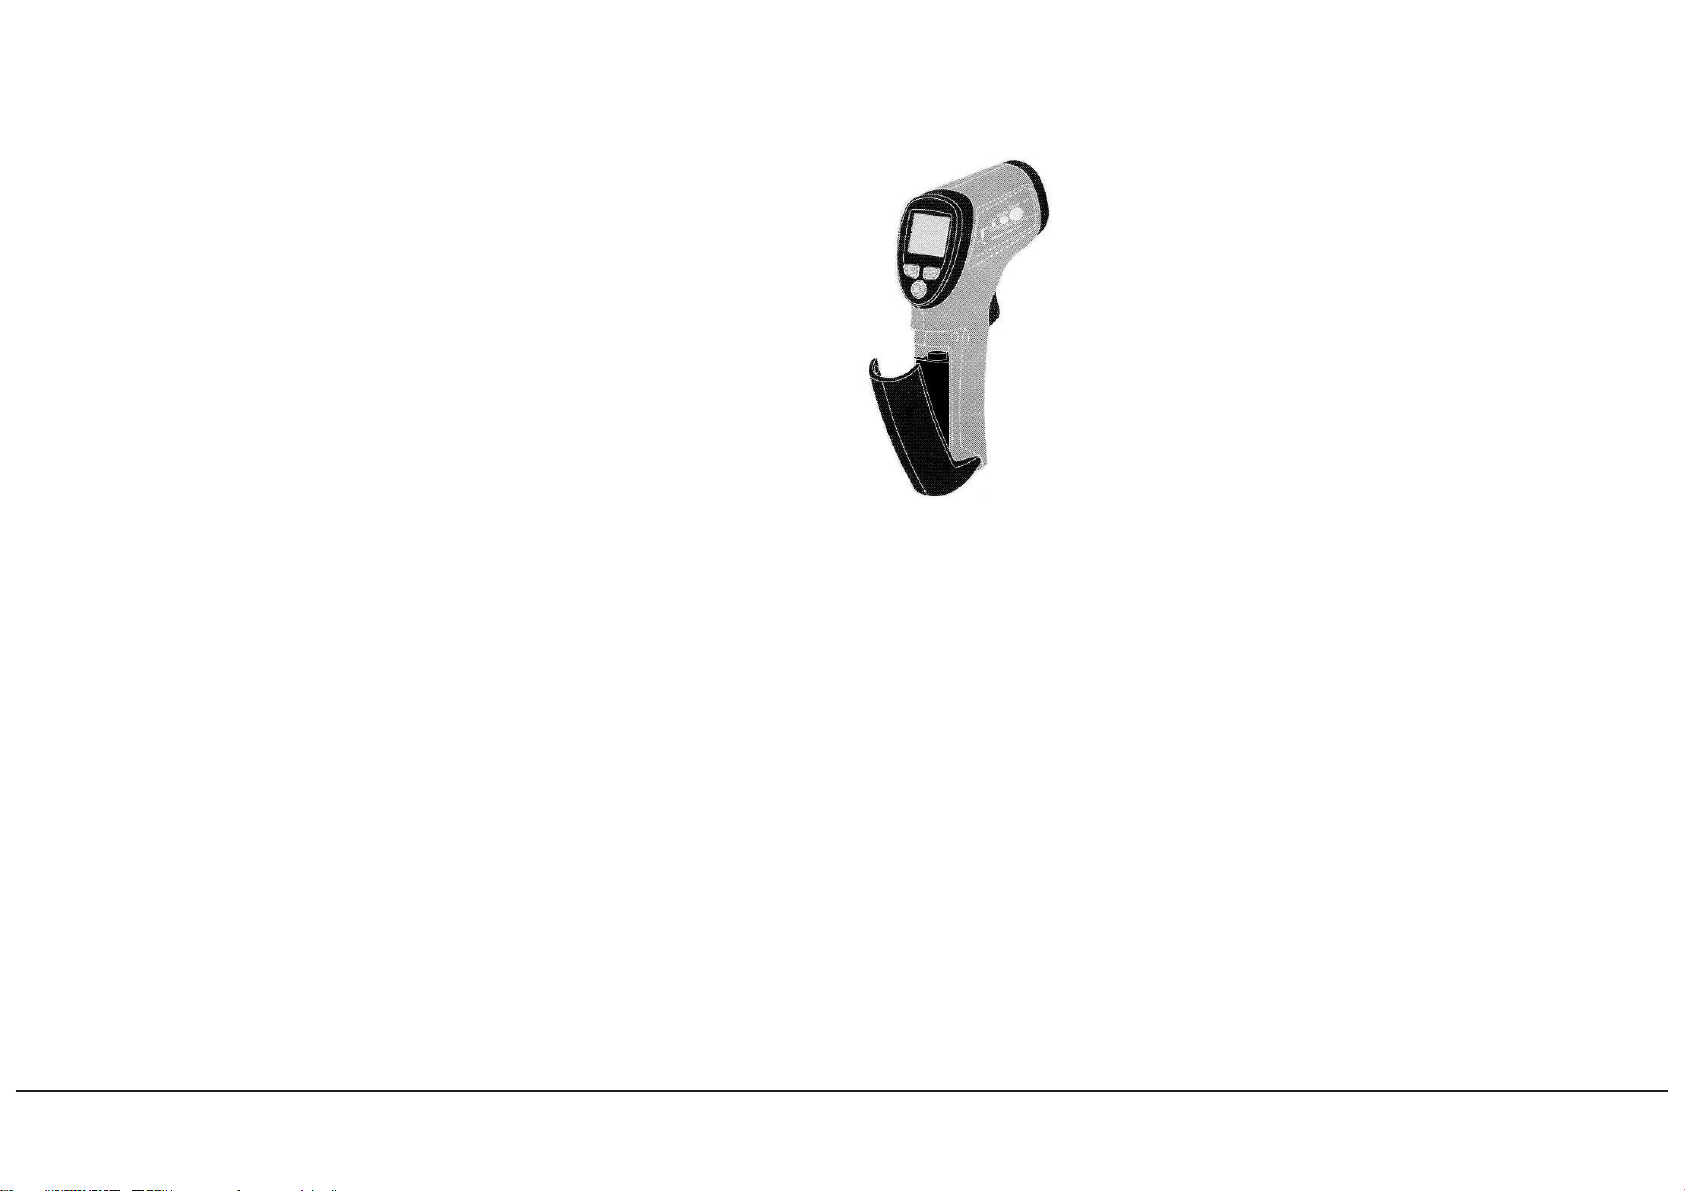
6-1 .Hold the meter by its Handle Grip and point it toward the surface
to be measured.
6-2.PuII and hold the Trigger to turn the meter on and begin testing.
The display will light if the battery is good. Replace the battery if the
display does not light.
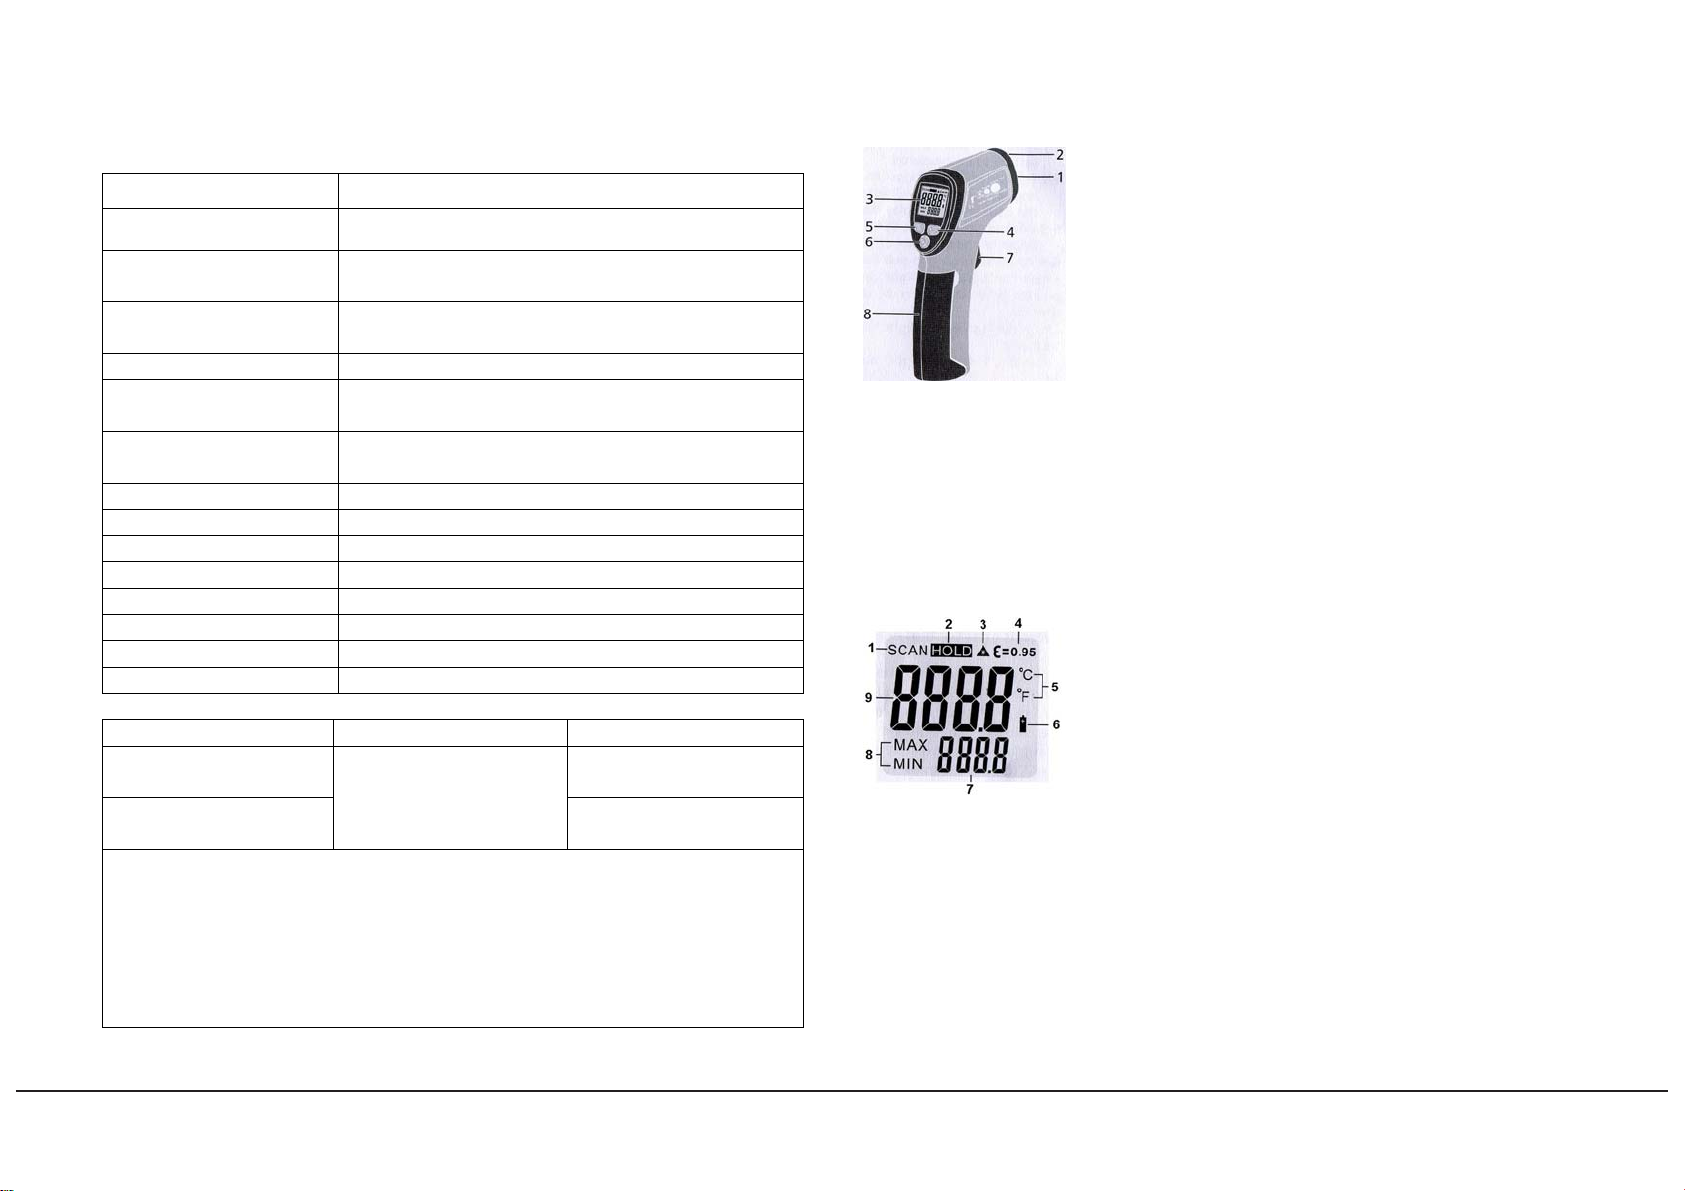
6-3.While measuring, the SCAN display icon will appear in the upper
left hand corner of the LCD.
6-4.While continuing to pull the Trigger:
• Push the "Laser/ Backlight" button once to turn on the laser pointer
When the laser is on, the laser icon "" will appear on the LCD.
Push the "Laser/ Backlight" button two times to turn on the backlight.
Push the "Laser/ Backlight" button three times to turn the laser off.
Push the "Laser/ Backlight" button four times to turn both the laser
and backlight off.
• Select the temperature units (°C or °F) using the "°C/ °F" buttons.
•Select the Max/Min mode using the "Max/Min" buttons.
6-5.Release the Trigger and the HOLD display icon will appear on the
LCD indicating that the reading is being held.
6-6.The meter will automatically power off on approximately 8
seconds after the trigger is released.
Note: Measurement Considerations.
Holding the meter by its handle, point the IR Sensor toward the object
whose temperature is to be measured. The meter automatically
compensates for temperature deviations from ambient temperature.
Keep in mind that it will take up to 30 minutes to adjust to wide
ambient temperatures are to be measured followed by high
temperature measurements, some time (several minutes) is required
after the low (and before the high) temperature measurements are
made. This is a result of the cooling process which must take place
for the IR sensor.
7.Battery Replacement
7-1 .As battery power is not sufficient, LCD will display " "
replacement with one new battery type 9V is required.
7-2 Open battery cover, then take out the battery from instrument and
replace with a new 9-Volt battery and place the battery cover back.
8. Notes
8-1 How it Works Infrared thermometers measure the surface
temperature of an object. The unit's optics sense emitted, reflected,
and transmitted energy, which is collected and focused onto a
detector. The unit's electronics translate the information into a
temperature reading which is display on the unit. In units with a laser,
the laser is used for aiming purposes only.
8-2.Field of View Make sure that the target is larger than the unit's
spot size. The smaller the target, the closer you should be to it. When
accuracy is critical, make sure the target is at least twice as large as
the spot size.
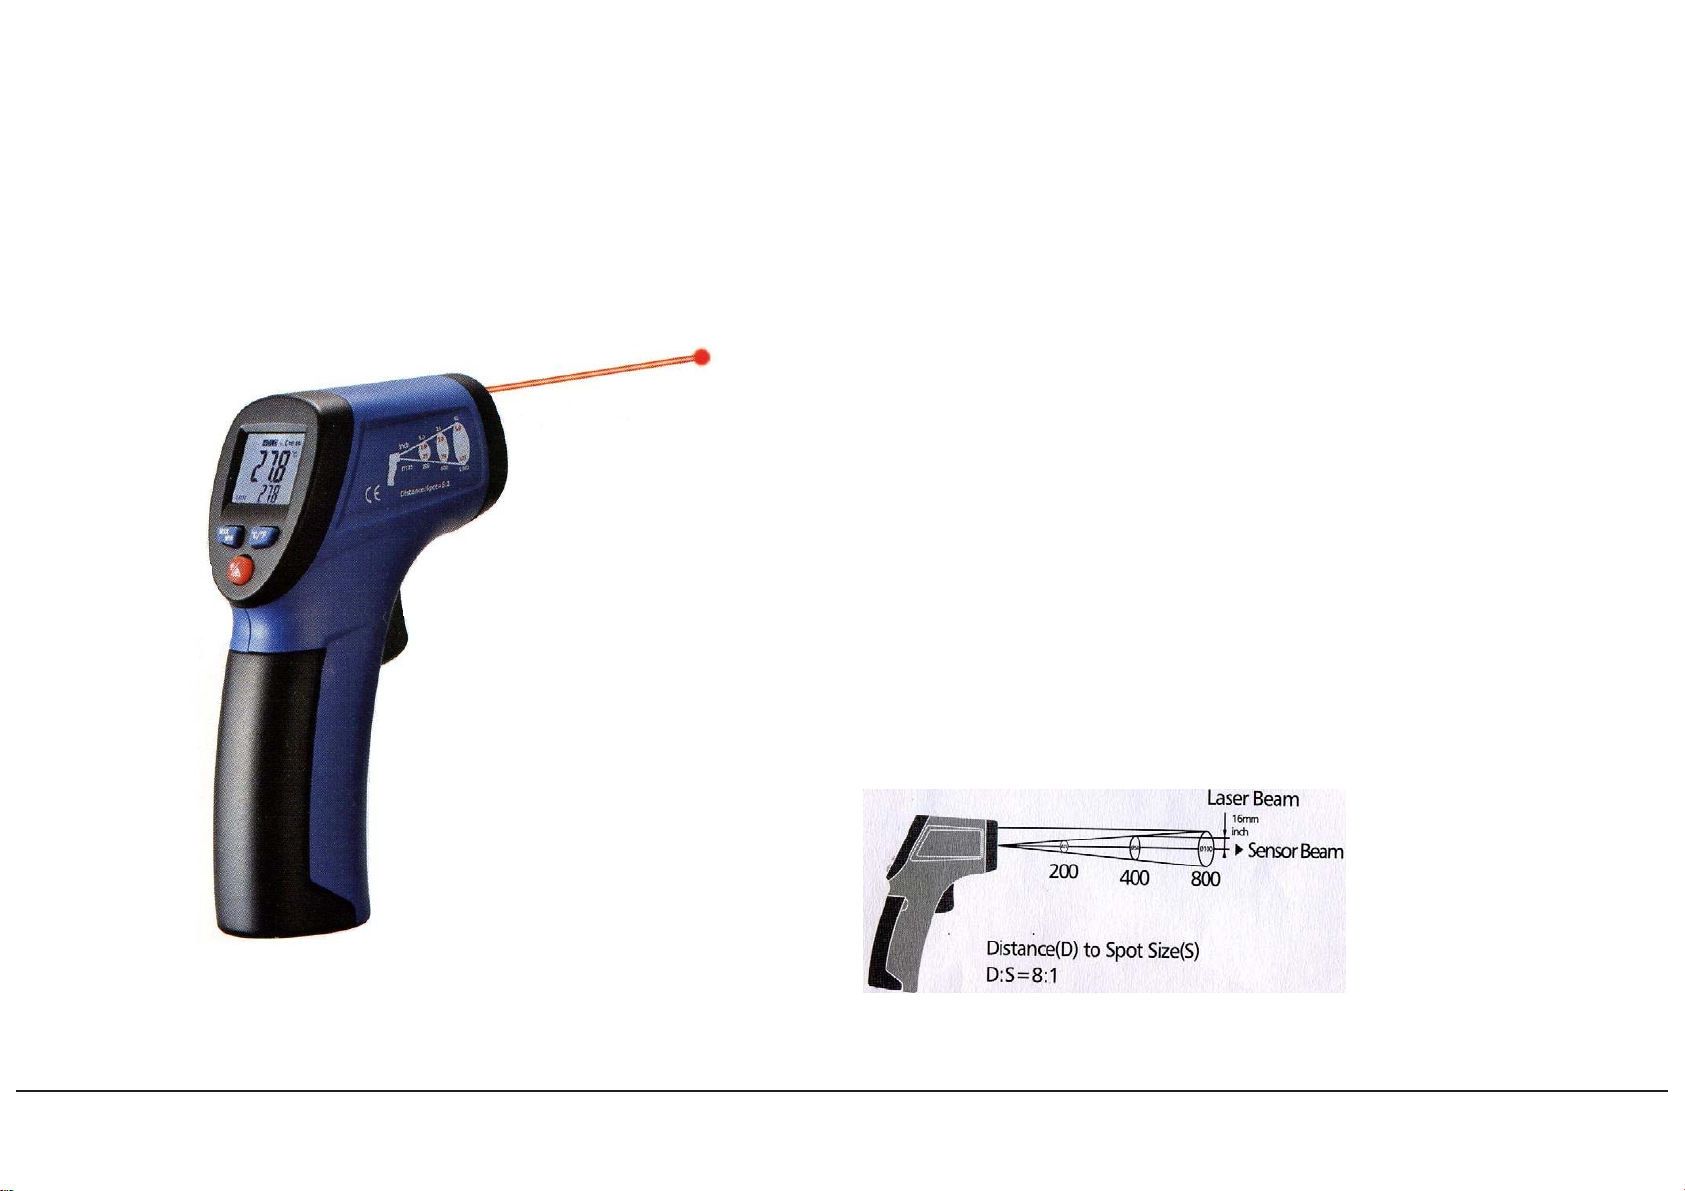
8-3.Distance & Spot Size As the distance (D) from the object
increases, the spot size (5) of the area measured by the unit
becomes larger.
8-4.Locating a hot Spot To find a hot spot aim the thermometer
outside the area of interest, then scan across with an up and down
motion until you locate hot spot.
8-5.Reminders
• Not recommended for use in measuring shiny or polished metal
surfaces (stainless steel, aluminum, etc.).
•The unit cannot measure through transparent surfaces such as
glass. It will measure the surface temperature of the glass instead.
• Steam, dust, smoke, etc., can prevent accurate measurement by
obstructing the unit's optics.
ELCART DISTRIBUTION SPA via Michelangelo Buonarroti, 46 - 20093 Cologno Monzese (Milano) ITALY
T
el.
++39(0)2/25.1
1.73.10
Fax
++39(0)2/25.1
1.76.10
sito
internet:
www
.elcart.com
e-mail:
[email protected]La divulgazione dei dati contenuti in questa scheda è da ritenersi un servizio puramente informativo e non costituisce alcun vincolo da parte della Elcart in merito a prestazioni ed utilizzo del prodotto.