ElectroFlip iSee User manual
This document is a property of ElectroFlip LLC (www.ElectroFlip.com).
No unauthorized reproduction is allowed.
1
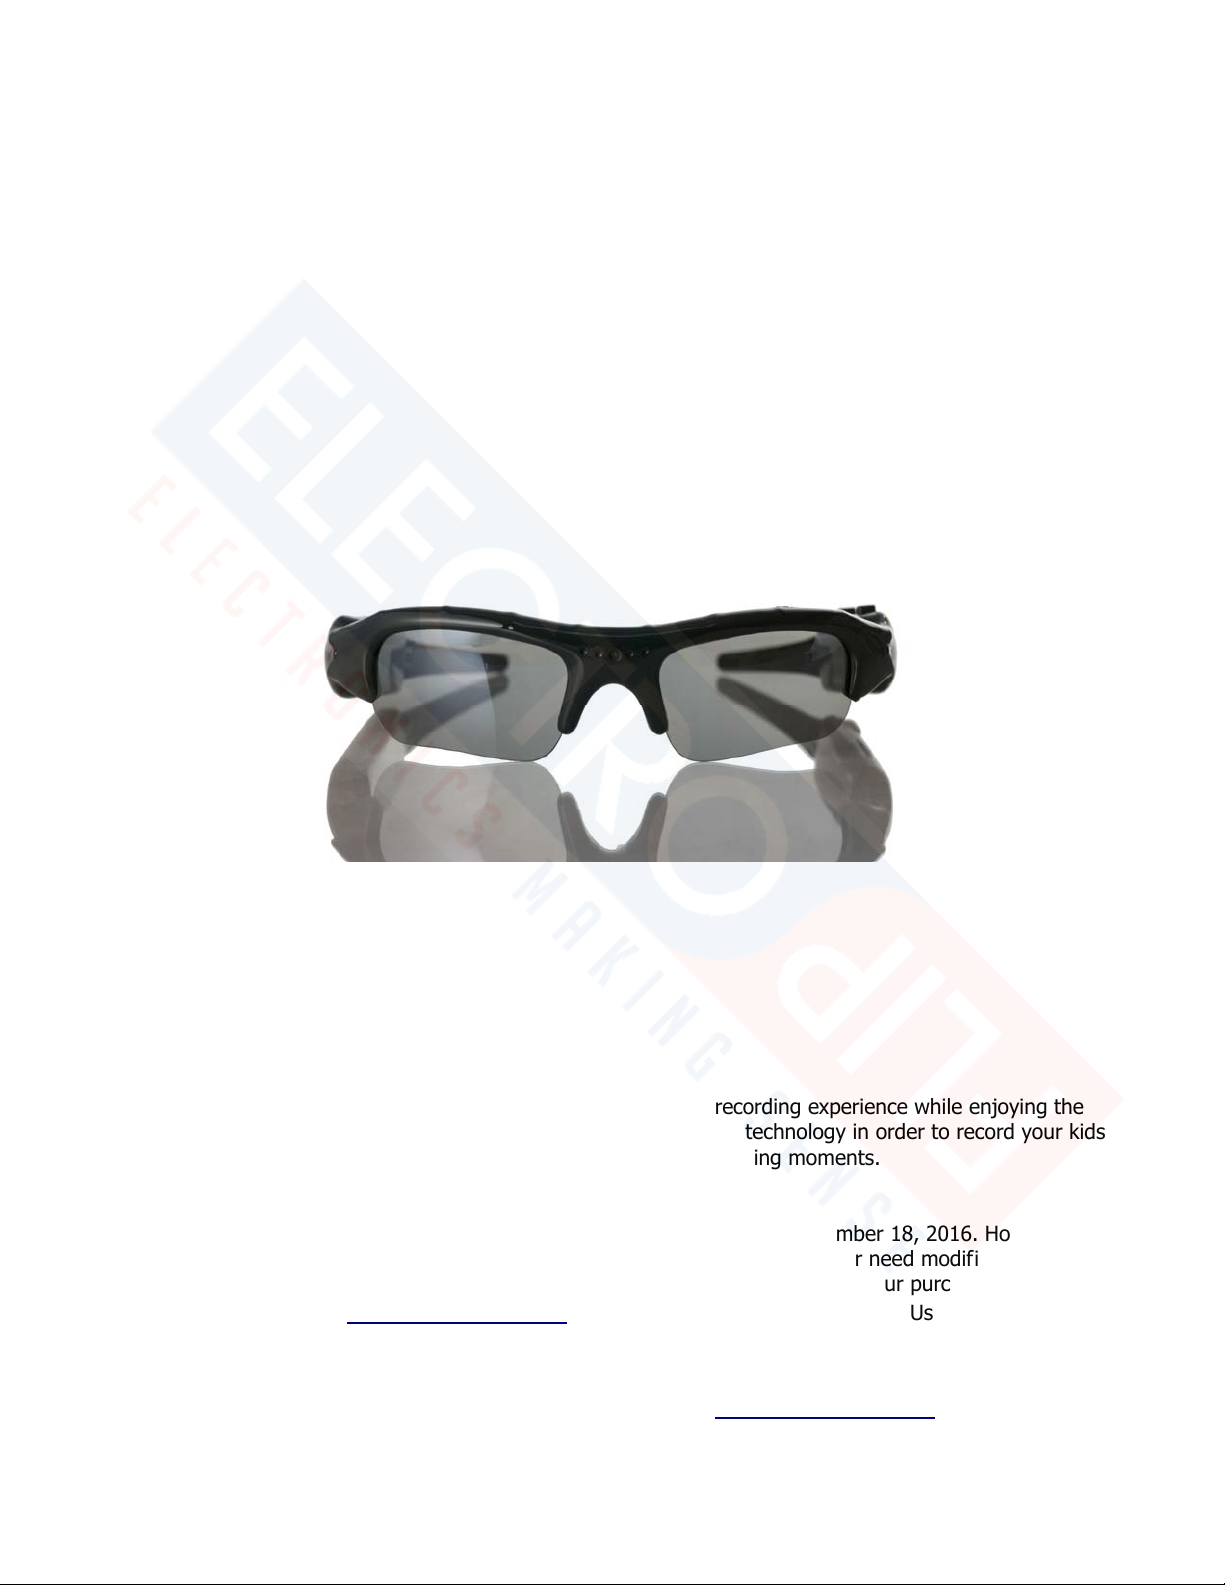
iSee
Video Camera Sport Glasses
USER GUIDE
The iSee device has features designed to enhance your video recording experience while enjoying the
activities you have. You can now take advantage of this great, new technology in order to record your kids
unforgettable games hands-free or your fishing moments.
All information and instructions included in this manual are current as of November 18, 2016. However, due
to the fluid nature of advancing technology, some characteristics may change or need modifications in the
future. Should you encounter any problems or have any further questions about your purchase, please visit
our website www.ElectroFlip.com and contact us through our Contact Us page.

This document is a property of ElectroFlip LLC (www.ElectroFlip.com).
No unauthorized reproduction is allowed.
2
Table of Contents
SAFETY PRECAUTION ................................................................................................................... 3
PRODUCT INFORMATION ............................................................................................................. 3
Hardware Parts ................................................................................................................................ 3
GETTING STARTED ....................................................................................................................... 4
Charging the Battery ........................................................................................................................ 4
Inserting a Memory Card .................................................................................................................. 4
Turning On the Device ...................................................................................................................... 4
Turning Off the Device ...................................................................................................................... 4
Recording a Video ............................................................................................................................ 5
To Stop A Recording ......................................................................................................................... 5
Video Playback ................................................................................................................................. 5
Time and Date Watermark ................................................................................................................ 6
Storage ........................................................................................................................................... 8
TROUBLESHOOTING ..................................................................................................................... 9
This document is a property of ElectroFlip LLC (www.ElectroFlip.com).
No unauthorized reproduction is allowed.
3
SAFETY PRECAUTION
Do not charge the batteries for more than 24 hours. Charging the batteries for more than 24 hours
could damage the lithium-polymer batteries.
Only use the USB charging cable that came with the device to avoid damaging the batteries and/or
the device.
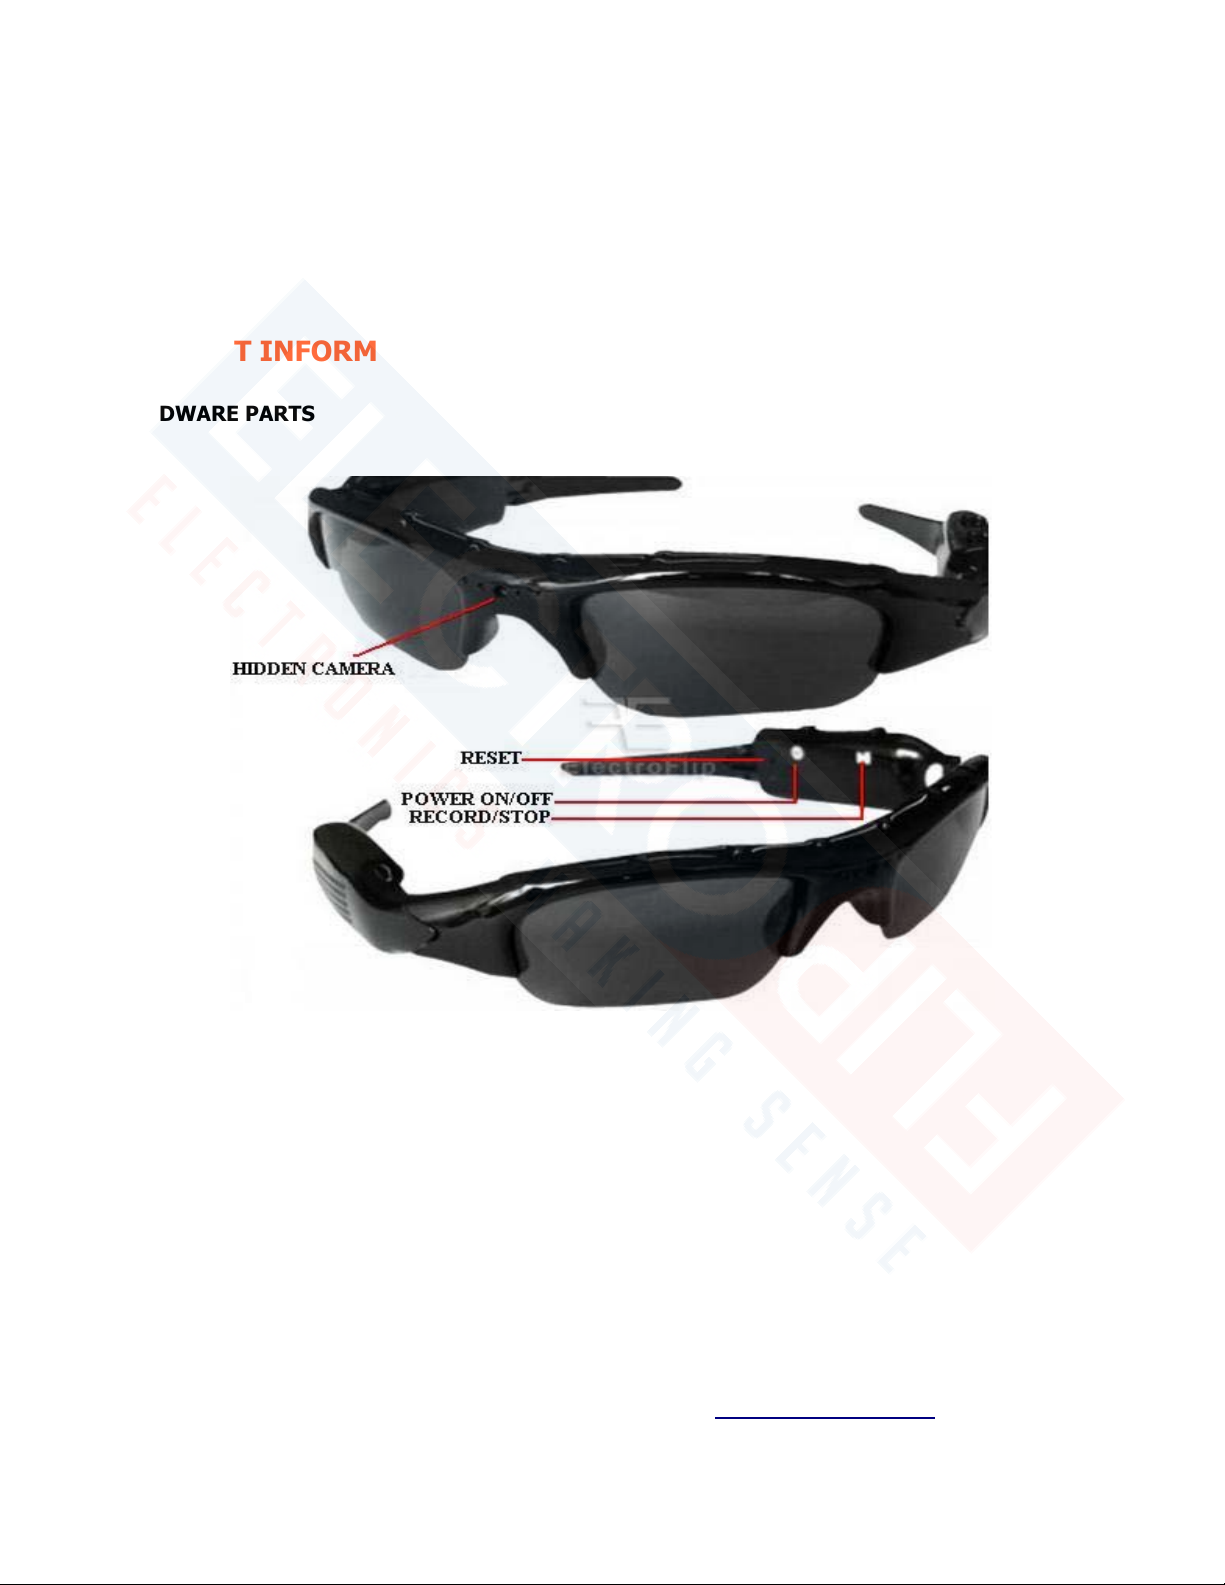
PRODUCT INFORMATION
HARDWARE PARTS
This document is a property of ElectroFlip LLC (www.ElectroFlip.com).
No unauthorized reproduction is allowed.
4
GETTING STARTED
CHARGING THE BATTERY
The batteries of this device can be charged by plugging the USB cable into a computer. The device would
require 3 – 4 hours of charging (full charge). For the initial charge or the first 3 uses of the device, make
sure to charge the batteries for at least 8 hours but not more than 24 hours. When charging the batteries,
a red LED light will light up and remain lit even when fully charged.
NOTE: It is suggested to charge the batteries before use if the device has not been used in a while. Please
also note batteries will charge faster when the device is powered down.
INSERTING A MEMORY CARD
The device is equipped with a MicroSD/MicroSDHC card slot for expanded memory. Please follow the steps
below on how to insert a memory card to the device.
1. Format the memory card before inserting it to the device.
2. Locate the memory card slot on the device.
3. It's a spring-loaded slot which requires the memory card to be pushed down until it locks into
place. Do not exert too much force when you push down the memory card.
4. To remove the memory card, gently push down the memory card to (click noise) unlock it.
TURNING ON THE DEVICE
1. Press and hold the On/Off power button for 3 seconds the Red LED illuminates (device is powered
up).
2. Wait another 5 seconds for complete bootup and you are now in standby mode.

This document is a property of ElectroFlip LLC (www.ElectroFlip.com).
No unauthorized reproduction is allowed.
5
TURNING OFF THE DEVICE
1. Press and hold the On/Off power button for 3 seconds to turn the device Off.
NOTE: The device will automatically turn off if you do not use it for more than 20 seconds.
RECORDING A VIDEO
To start recording a video, follow the steps below:
1. Turn On the device wait for full boot up, then press simply the same “On/Off” Power button again
for just 1 second to start recording.
2. The red LED light will begin blinking while in recording. The lights can be seen in your peripheral
vision while wearing the glasses. So you’ll know when recording.
IMPORTANT NOTE (bonus features): To take a simple photo, just press the “Camera Icon” button
once, you’ll notice the LED turns blue, now its in photo mode, take a photo with the power button. The
mode after photo is Audio recording only, this LED is yellow.
TO STOP A RECORDING
1. Press once the “On/Off” power button.
2. Once you stop recording the device will automatically save the file to the memory card. Please give
the device a couple seconds to save the file before trying to record again or powering off.
3. Once the blinking red LED light stops that would mean that the device is back in standby mode and
is ready to record another video or be powered off.
NOTE: The device will automatically power off if you do not use it for more than 15 seconds or if a
memory card is Not installed or Not compatible.

This document is a property of ElectroFlip LLC (www.ElectroFlip.com).
No unauthorized reproduction is allowed.
6
VIDEO PLAYBACK
You can download and view videos through your computer in two ways with the days – USB Connection
and through the Memory Card.
Device Connected via USB
1. Turn on the device.
2. Connect the device to the USB port of your computer using the USB cable that came with
the package. The device will be recognized as an external storage device of the computer
which will be labeled either D:, E: or F: under My Computer.
3. Open the storage drive pertaining to your device then drag the video clips and drop them
to your desktop (or whichever location you prefer to save the files). You can also do copy
and paste.
4. Once you have drag and drop (or copy and paste) the video files, you may play them using
QuickTime, RealPlayer or any video player that supports the video format of the device
(AVI).
5. After you are finished uploading the files, make sure that you use the hardware removal
tool located on the browsers tool bar. Failure to do so can corrupt or damage the devices
data storage.
This document is a property of ElectroFlip LLC (www.ElectroFlip.com).
No unauthorized reproduction is allowed.
7
Using the Memory Card
1. Insert the memory card of your iSee to a card reader then connect the card reader to your
computer.
2. Open My Computer and locate the removable disk pertaining to your memory card. It
may be labeled as D:, E:, or F:.
3. Open the removable disk drive and drag and drop the video clips from the memory card to
your desktop (or whichever location you prefer to save the files). You can also do copy and
paste.
4. Play the video files using QuickTime, RealPlayer or any video player that supports the video
format of the device. It is recommended to playback video files directly from the hard drive
of your computer to ensure a smooth playback.
5. After you are finished uploading the files, make sure that you use the hardware removal
tool located on the browsers tool bar. Failure to do so can corrupt or damage the devices
data storage.
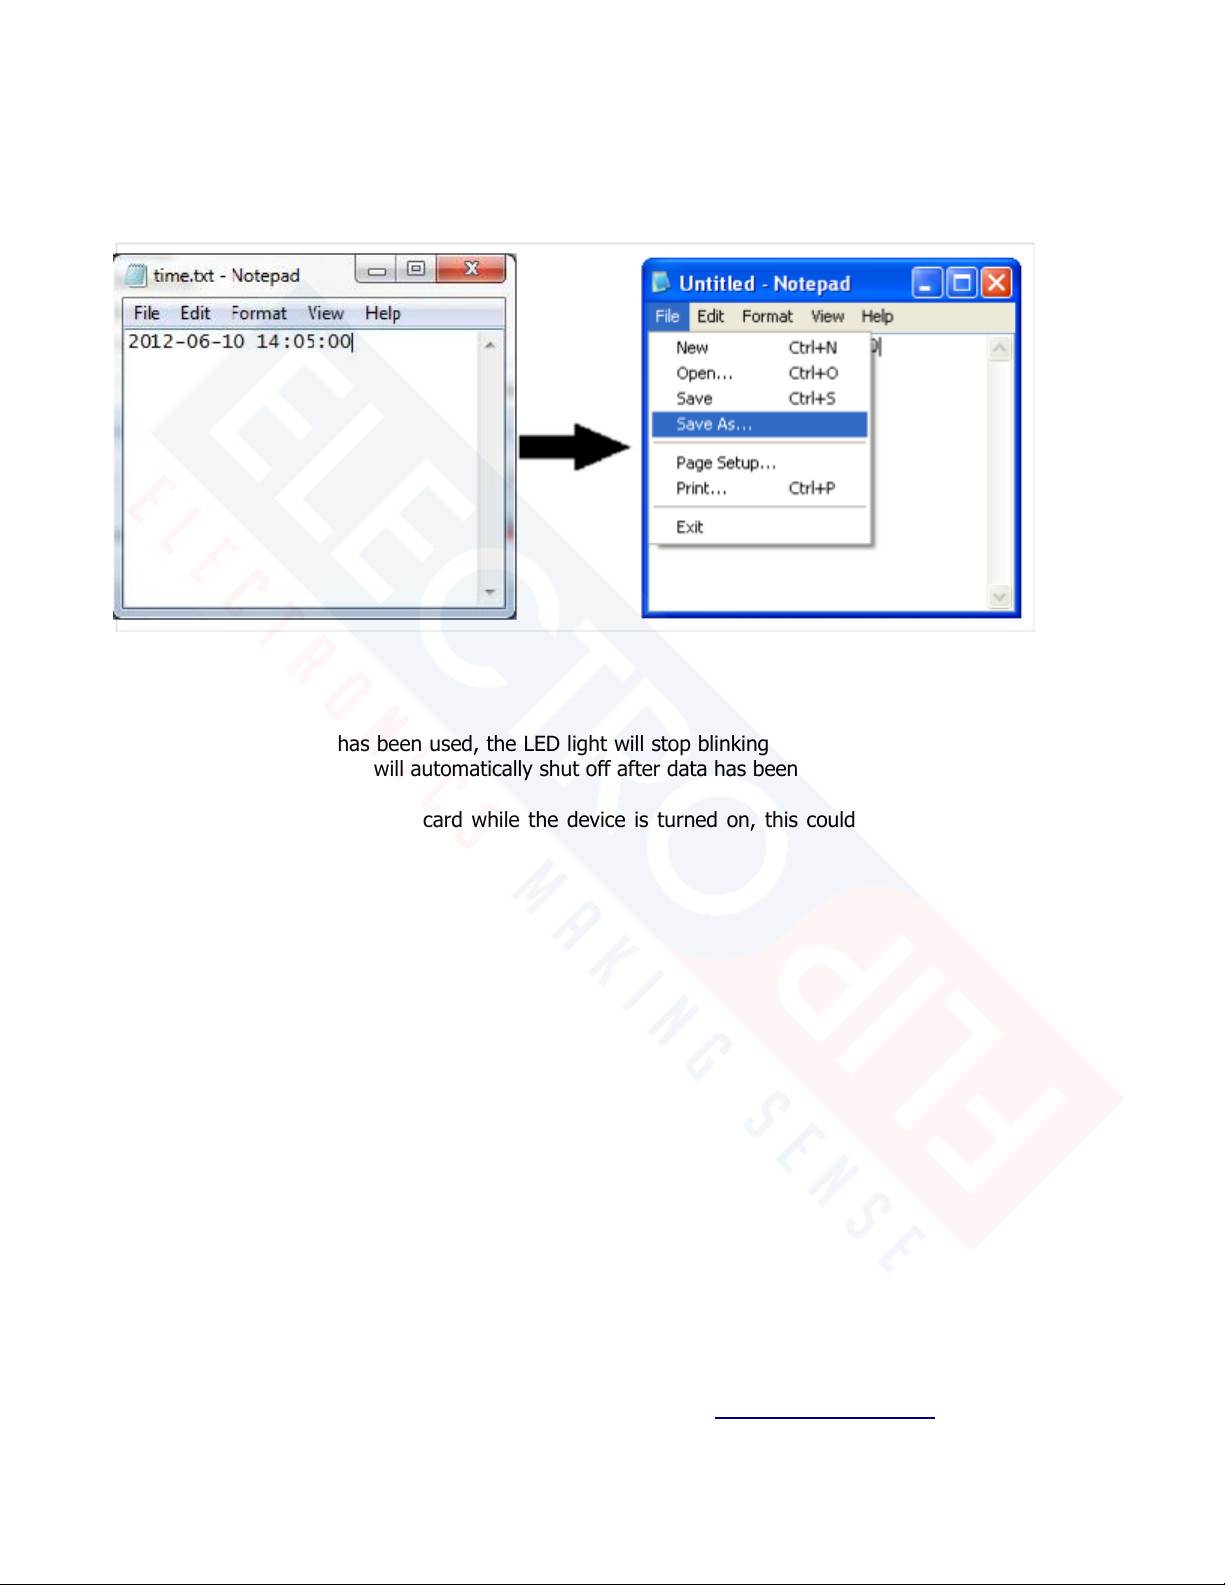
TIME AND DATE WATERMARK
1. After your first recording the camera unit will have created a time.txt in the root of your memory
card. This file will have the follow formatted date/time:
2014-12-25 15:11:22
YYYY-MM-DD HH:MM:SS (Note: Time is in military format)
2. Adjust the date and time accordingly. Then, save the as the same name file name “time.txt” in
the same folder location you found it on your memory card.
3. Follow the video or photo procedures above to take a video or photo all videos and photos going
forward will have the updated time and date watermarked on them.
4. Keep in mind, two very important points. To retain the Date/Time each time you check the video or
photo footage you will need to DELETE the newly created time.txt file (this file has the old default time)
to avoid overwriting the internally saved Date/Time file of your camera device.
Please see screen shots on the next page.
This document is a property of ElectroFlip LLC (www.ElectroFlip.com).
No unauthorized reproduction is allowed.
8
Screenshot Examples:
Below are the screenshots on how to save the time stamp file to the main directory or root
directory of your memory card. Please review the screen shots to be familiar with the process.
STORAGE
When all storage space has been used, the LED light will stop blinking and the device will automatically go
into data saving mode then will automatically shut off after data has been saved.
NOTE: Do not remove MicroSD card while the device is turned on, this could lead to data corruption or
loss of video footage.

This document is a property of ElectroFlip LLC (www.ElectroFlip.com).
No unauthorized reproduction is allowed.
9
TROUBLESHOOTING
Below are possible issues that you may encounter when using the device. If the issue you are having is not
on the list you may visit our FAQ section (http://help.electroflip.com/index.php) or you can contact us
through our website, www.ElectroFlip.com, and go to our Contact Us page. You may also give us a call
at our Customer Support number 1-877-686-7495.
SYMPTOM POSSIBLE REASON SOLUTION
Fails to Start Dead battery Recharge battery
Device jam Reset then start again
Auto Shut-off Dead battery Recharge battery
No Memory Inserted Insert a MicroSD card
Memory Card Not Compatible Use a Class 2 or 4 MicroSD Card
Data Not Saving Memory is full Delete unwanted files
Battery power shortage Recharge
All information and instructions included in this manual are current as of November 18, 2016. However, due
to the fluid nature of advancing technology, some characteristics may change or need modifications in the
future. Should you encounter any problems or have any further questions about your purchase, please visit
our website www.ElectroFlip.com and contact us through our Contact Us page.
Other manuals for iSee
1
Table of contents
Other ElectroFlip 3D Glasses manuals


