manuals.online logo
Brands
  1. Home
  2. •
  3. Brands
  4. •
  5. Electrolux
  6. •
  7. Kettle
  8. •
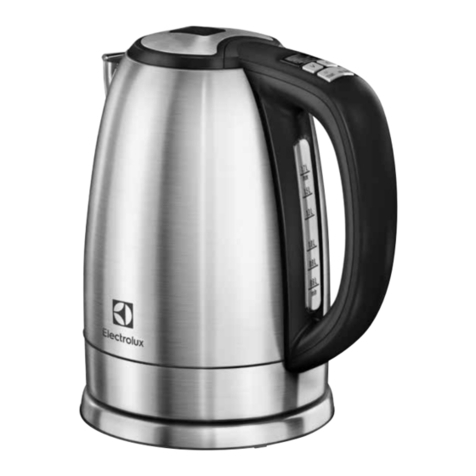
  9. Electrolux EEWA51 AR Series User manual

Electrolux EEWA51 AR Series User manual

EN INSTRUCTION BOOK
FR MODE D’EMPLOI
RU ИНСТРУКЦИЯ
TR EL KITABI
DE ANLEITUNG
ERGOSENSE
EEWA51xx/52xxAR
ELU IFU EEWA51xx_52xx.indd 1ELU IFU EEWA51xx_52xx.indd 1 20.05.14 11:3320.05.14 11:33
Questo manuale d’istruzione è fornito da trovaprezzi.it. Scopri tutte le offerte per Electrolux EEWA5200
o cerca il tuo prodotto tra le migliori offerte di Bollitori
CONTENTS
ENGLISH...................................................... 3
FRANÇAIS................................................... 3
.................................................... 3
TΫRKÇE........................................................ 3
DEUTSCH..................................................11
11.........................................................
11.........................................................
WE’RE THINKING OF YOU
CUSTOMER CARE AND SERVICE
Thank you for purchasing an Electrolux appliance. You’ve chosen a product that brings with it
decades of professional experience and innovation. Ingenious and stylish, it has been designed with
you in mind. So whenever you use it, you can be safe in the knowledge that you’ll get great results
every time.
Welcome to Electrolux.
Get usage advice, brochures, trouble shooter, service information:
www.electrolux.com
Register your product for better service:
www.electrolux.com/productregistration
Buy Accessories and Consumables for your appliance:
www.electrolux.com/shop
When contacting Service, ensure that you have the following data available.
The information can be found on the rating plate. Model, PNC, Serial Number.
Warning / Caution-Safety information
General information and tips
Enviromental information
Visit our website to:
Subject to change without notice.
ELU IFU EEWA51xx_52xx.indd 2ELU IFU EEWA51xx_52xx.indd 2 20.05.14 11:3320.05.14 11:33
EN
FR
RU
TR
DE
3
B
A
EC
F
I
G
D
H
EN FR RU TR
J
1L Model
A. Jug
B. Removable mesh lter
C. Spout
D. Lid
E. Opening lid button
F. Handle
G. Water level indicator
H. ON/OFF switch with
indicator light
I. Separate base and mains
cable
J. Temperature selector*
*EEWA 5120
Components
A. Bouilloire
B. Filtre anti-calcaire
amovible
C. Bec verseur
D. Couvercle
E. Bouton d'ouverture du
couvercle
F. Poignée
G. Indicateur de niveau d'eau
H. Interrupteur marche/
arrêt avec indicateur de
fonctionnement
I. Socle séparé et cordon
d'alimentation
J. Sélecteur de température*
*EEWA 5120
Composants
A. Kasa
B. Çıkartılabilir ağ ltre
C. İbik
D. Kapak
E. Kapak açma düğmesi
F. Sap
G. Su seviyesi göstergesi
H. AÇMA/KAPATMA düğmesi
ve gösterge ışığı
I. Ayrı altlık ve elektrik
kablosu
J. Değişken sıcaklık ayar
düğmesi
*EEWA 5120
Bileşenler
A. 
B.  

C. 
D. 
E.  

F. 
G.   
H.  /
  
I.   
 
J. 
*
*EEWA 5120

ELU IFU EEWA51xx_52xx.indd 3ELU IFU EEWA51xx_52xx.indd 3 20.05.14 11:3320.05.14 11:33
www.electrolux.com4
EN
R
FR
T
Safety advice / Consignes de sécurité
Read the following instruction
carefully before using the appliance for
the rst time.
• This appliance is not intended for use
by persons (including children) with
reduced physical, sensory or mental
capabilities, or lack of experience
and knowledge, unless they have
been given supervision or instruction
concerning use of the appliance by a
person responsible for their safety.
• Children should be supervised to
ensure that they do not play with the
appliance.
• The appliance may only be connected
to a power supply whose voltage
and frequency comply with the
specications on the rating plate!
• Never use or pick up the appliance if
– the supply cord is damaged,
– the housing is damaged.”
• The appliance must only be
connected to an earthed socket. If
necessary an extension cable suitable
for 10 A can be used.
• If the appliance or the supply cord
is damaged, it must be replaced by
the manufacturer, its service agent or
similarly qualied person, in order to
avoid hazard.
• Always place the appliance on a at,
level surface.
• The appliance must be switched o
and the mains plug withdrawn before
cleaning and maintenance.
• The appliance and accessories
become hot during operation. Use
only designated handles and knobs.
Allow to cool down before cleaning or
storage.
• The mains cable must not come into
contact with any hot parts of the
appliance.
• Do not immerse the appliance in
water or any other liquid.
‘ Attention: If the kettle is overlled
there is a risk that the boiling water
may spray out, which could scald or
burn! Therefore never ll the kettle
above the maximum marking.
• Never operate appliance with open
lid.
• Do not use or place the appliance on
a hot surface or near source of heat.
• Only use the kettle for heating water!
• The kettle can only be used with the
stand provided.
• Appliance is for indoor use only.
• This appliance is intended for
domestic use only. The manufacturer
cannot accept any liability for possible
damage caused by improper or
incorrect use.
Les instructions suivantes doivent être
lues attentivement avant d'utiliser la
machine pour la première fois.
• Cet appareil n'est pas destiné à
être utilisé par des personnes (y
compris des enfants) dont les
capacités physiques, sensorielles ou
mentales sont diminuées, ou qui ne
disposent pas des connaissances
ou de l'expérience nécessaires, à
moins qu'elles n'aient été formées
ou encadrées pour l'utilisation
de cet appareil par une personne
responsable de leur sécurité.
• Les enfants doivent être surveillés an
qu'ils ne puissent pas jouer avec cet
appareil.
• L'appareil doit être branché sur un
réseau électrique correspondant
à la tension et à la fréquence
d'alimentation indiquées sur la plaque
signalétique.
• Ne jamais utiliser ou mettre en
marche l'appareil si – le cordon
d'alimentation est endommagé; – le
corps de l'appareil est endommagé.
• L'appareil doit être branché à une
prise électrique reliée à la terre. Une
rallonge électrique adaptée à une
intensité de 10A peut être utilisée si
nécessaire.
• Si l'appareil ou le cordon
d'alimentation est endommagé, il
doit être remplacé par le fabricant,
l'un de ses réparateurs ou toute autre
personne dûment qualiée an
d'éviter tout danger.
• L'appareil doit toujours être placé
sur une surface de travail plane et
horizontale.
• L’appareil doit être éteint et
débranché du réseau électrique
après chaque utilisation et avant tout
nettoyage ou entretien.
• L'appareil et ses accessoires
deviennent chauds en cours de
fonctionnement. Utiliser les poignées
et les boutons prévus à cet eet
uniquement. Laisser l'appareil
refroidir avant de le nettoyer ou de le
ranger.
• Le cordon d'alimentation ne doit
pas entrer en contact avec les pièces
chaudes de l'appareil.
• Ne pas plonger l'appareil dans l'eau
ou tout autre liquide.
‘ Attention: si la bouilloire est trop
remplie, de l'eau bouillante peut être
projetée et entraîner des brûlures!
Par conséquent, ne jamais remplir
la bouilloire au-dessus du repère
maximum.
• Ne jamais faire fonctionner la
bouilloire couvercle ouvert.
• Ne pas utiliser ou poser l'appareil sur
une surface brûlante ou à proximité
d'une source de chaleur.
• La bouilloire doit uniquement servir à
faire chauer de l'eau!
• Seul le socle fourni doit être utilisé
avec la bouilloire.
• Cet appareil est réservé à une
utilisation à l'intérieur uniquement.
• Cet appareil est destiné à un usage
domestique uniquement. Le fabricant
décline toute responsabilité en cas de
dommages résultant d'une utilisation
incorrecte ou inadaptée de l'appareil.
ELU IFU EEWA51xx_52xx.indd 4ELU IFU EEWA51xx_52xx.indd 4 20.05.14 11:3320.05.14 11:33
EN
FR
RU
TR
DE
5
RU
TR
  / Emnyet tavsyes
Cihazı ilk kez kullanmadan önce
aşağıdaki talimatı dikkatle okuyun.
• Güvenlik açısından kendilerinden
sorumlu bir kişi tarafından cihazın
kullanımıyla ilgili olarak gereken
eğitim verilmeden veya kontrol/
gözetim altında tutulmadan, çocuklar
da dahil olmak üzere ziksel, duyusal
veya zihinsel yeterlilikleri sınırlı olan
ya da deneyimi ve bilgisi olmayan
kişilerin bu cihazı kullanması uygun
değildir.
• Çocukların, gerekli uyarılar yapılarak
cihazla kesinlikle oynamaması
sağlanmalıdır.
• Cihaz yalnızca, voltaj ve frekansı anma
değerleri plakasındaki özelliklere uyan
bir güç kaynağına bağlanmalıdır.
• Ürünle birlikte gelen kablo veya
gövde zarar görmüşse cihazı kesinlikle
kullanmayın veya tutmayın.
• Cihaz yalnızca topraklı bir prize
bağlanmalıdır. Gerekirse, 10 A
için uygun bir uzatma kablosu
kullanılabilir.
• Ürün veya ürünle birlikte gelen kablo
hasar görürse, bir tehlike olasılığını
ortadan kaldırmak amacıyla söz
konusu kablo; üretici, servis temsilcisi
veya benzer niteliklere sahip bir kişi
tarafından değiştirilmelidir.
• Cihazı daima düz bir yüzey üzerine
yerleştirin.
• Temizlik ve bakım öncesinde cihaz
kapatılmalı ve şi prizden çekilmelidir.
• Cihaz ve aksesuarları çalışırken
ısınır. Yalnızca ilgili kol ve düğmeleri
kullanın. Temizleme veya saklama
öncesinde soğumasını bekleyin.
• Elektrik kablosu cihazın sıcak
parçalarıyla temas etmemelidir.
• Cihazı suya veya herhangi bir sıvıya
daldırmayın!
‘ Dikkat: Isıtıcı aşırı doldurulursa,
kaynayan su dışarı taşabilir ve
haşlanma veya yanmaya neden
olabilir! Bu yüzden cihazı asla
maksimum işaretinin üzerinde su ile
doldurmayın.
• Cihazı kapağı açıkken kesinlikle
çalıştırmayın.
• Cihazı sıcak bir yüzey üzerinde
veya bir ısı kaynağının yakınında
kullanmayın veya bu tür yerlere
koymayın.
• Su ısıtıcıyı yalnızca su ısıtmak için
kullanın!
• Su ısıtıcı yalnızca standla birlikte
kullanılabilir.
• Cihaz kapalı alanlarda kullanıma
yöneliktir.
• Bu cihaz, yalnızca ev kullanımı
amacıyla tasarlanmıştır. Üretici, uygun
olmayan veya hatalı kullanımdan
kaynaklanan hasarlar açısından
herhangi bir sorumluluk kabul etmez.
  
  
 .
•   
  ,
   
  
  
    ,
   .
•     
.
•    
    
 , 
  !
•    
   
.*
•   
  .
  
   10
.
•   
  
   
 , 
   
 .
•   
  
.
•     
 
   
.
•     
 .
    
 .   
   .
•     
  .
•     
  .
‘ :  
  
  ! 
   
.
•    
 .
•     
   
   .
•    
 !
•    
   .
•   
   .
•   
   
 . 
   
   
.
ELU IFU EEWA51xx_52xx.indd 5ELU IFU EEWA51xx_52xx.indd 5 20.05.14 11:3320.05.14 11:33
www.electrolux.com6
EN
FR
RU
TR
Getting started / Première utilisation
   / Başlarken
2. Place the base unit on a rm and at
surface. Plug the mains plug into a
wall socket. Excess cord can be wound
into the bottom of base unit.
1. Before rst use, rinse the inside and
wipe the outside of the kettle with a
damp cloth.
3. Press the button to open the lid,
pour water into the kettle. It is also
possible to ll the kettle through the
spout, without opening the lid. Make
sure water level is visible in the water
level indicator, but not exceeding the
Max. mark.
2. Placez le socle sur une surface plane
solide. Branchez l'appareil à une prise
secteur murale. L’excédent de cordon
d’alimentation peut être rangé sous
la base d’alimentation de la bouilloire
grâce à l’enrouleur de cordon.
1. Avant la première utilisation,
rincez l’intérieur de la bouilloire et
essuyez l’extérieur à l’aide d’un chion
humide.
3. Pour ouvrir le couvercle, appuyez sur
le bouton, puis versez de l'eau dans
la bouilloire. Vous pouvez également
remplir la bouilloire directement par
son large bec verseur. Assurez-vous que
l'indicateur de niveau d'eau soit visible,
an de ne pas dépasser le repère Max.
2. Altlığı düz ve sağlam br zemn
üzerne yerleştrn. Güç kablosu fşn
prze takın. Kablonun fazla kısmı,
tabanın altında bulunan bölüme
sarılablr.
1. İlk kez kulanmadan önce su ısıtıcının
ç yüzeyn yıkayın ve dış yüzeylern
neml br bezle sln.
3. Düğmeye basarak kapağı açın,
tanka su doldurun. Su ısıtıcıyı
kapağını açmadan, ağız kısmından
da doldurmak mümkündür. Su
sevyesnn, Max. şaretn geçmeyecek
şeklde su sevye göstergesnde
görülebldğnden emn olun.
2.    
 . 
  .  
    .
1.   
   
   
 .
3.   
     .
     
 ,   .
,   
     
  .
ELU IFU EEWA51xx_52xx.indd 6ELU IFU EEWA51xx_52xx.indd 6 20.05.14 11:3320.05.14 11:33
EN
FR
RU
TR
DE
7
5. Temperature setting*. Depending
on what drink you wish to prepare
(green tea/instant coee or black tea),
you can select between hot or boiling
water by turning the knob to the
respective symbol.
*EEWA 5120
6. The automatic switch o function.
When the water has boiled or the
kettle is moved from the base, it will
switch o automatically. If you wish to
stop the heating process before the
water is boiling, simply lift up the ON/
OFF switch to the OFF position.
4. Close the lid and make sure it snaps
in correctly. Otherwise the auto
switch o function will not work
reliably. Place the kettle onto the
base. Press down the ON/OFF switch;
the indicator light will illuminate and
the kettle will start to heat up.
5. Réglage de la température*. En
fonction de la boisson que vous
souhaitez préparer (thé vert/café
soluble ou thé noir), vous pouvez
sélectionner soit de l’eau chaude soit
de l’eau bouillante en tournant le
curseur sur le symbole correspondant.
*EEWA 5120
6. Fonction d'arrêt automatique. Une
fois l'eau bouillie, ou la bouilloire
retirée de son socle, cette dernière
s'arrête automatiquement. Si vous
souhaitez arrêter la bouilloire avant
ébullition, il vous sut de mettre
l'interrupteur sur la position arrêt.
4. Fermez le couvercle et assurez-
vousqu'il soit fermé correctement.
Si le couvercle est mal enclenché,
l'arrêt automatique ne fonctionnera
pas correctement. Placez la
bouilloire sur son socle. Appuyez sur
l'interrupteur marche/arrêt; le voyant
s'allume et la bouilloire commence à
chauer.
5. Sıcaklık ayarı*. Hazırlamak istediğiniz
içeceğe (yeşil çay/neskafe ya da siyah
çay) göre, düğmeyi ilgili sembole
getirerek sıcak ya da kaynar su
arasında seçim yapabilirsiniz.
*EEWA 5120
6. Otomatk kapanma fonksyonu.
Su kaynadığında veya ısıtıcı altlık
üzernden alındığında, chaz otomatk
olarak kapanır. Isıtma şlemn su
kaynamadan önce sonlandırmak
stersenz, sadece AÇMA/KAPATMA
düğmesn, yukarı kaldırarak KAPATMA
konumuna getrn.
4. Kapağı kapatın ve doğru şeklde
oturduğundan emn olun. Aks
takdrde otomatk kapanma
fonksyonu güvenlr şeklde
çalışmayacaktır. Su ısıtıcıyı altlık
üzerne yerleştrn. AÇMA/KAPATMA
düğmesne basın; gösterge ışığı yanar
ve ısıtıcı suyu ısıtmaya başlar.
5.  *. 
  
 ( , 
,  )  
   ,
    
 .
*EEWA 5120
5.  . 
    
  
.  
   , 
 /  
 .
4.   ,
   .
   
 
. 
  . 
 / ,
 ,  
 .
ELU IFU EEWA51xx_52xx.indd 7ELU IFU EEWA51xx_52xx.indd 7 20.05.14 11:3320.05.14 11:33
www.electrolux.com8
EN
FR
RU
TR
E
F
R
T
Cleaning / Nettoyage
1. Before cleaning, always unplug the
appliance. Never rinse or immerse
the kettle or base unit in water. Just
wipe with a damp cloth, using no
abrasive detergents. Occasionally
rinse out the kettle with clean water.
3. Decalcifying is recommended
regularly, depending on water
hardness. Fill the kettle with
water and decalcier according to
decalcier product instructions.
Do not boil the solution as it may
foam over. Afterwards, rinse kettle
thorougly with fresh water.
2. To clean the mesh lter, grab the
strainer insert and lift out.
Cleaning the heating plate –
supercial spots of rust may appear
on the base unit. Remove with a
stainless steel cleaning agent.
1. Avant toute opération de
nettoyage, débranchez toujours
l'appareil. Ne rincez ni n'immergez
jamais la bouilloire ou son socle dans
l'eau. Essuyez-les simplement à l'aide
d'un chion humide, sans utiliser
de produit nettoyant caustique ou
abrasif. De temps à autre, rincez
l'intérieur de la bouilloire à l'eau claire.
3. Il est recommandé de procéder à
un détartrage régulier en fonction
de la dureté de l'eau. Remplissez la
bouilloire d'eau et de détartrant en
respectant les consignes d'utilisation
du produit détartrant. Ne laissez pas
bouillir la solution, car la mousse
formée pourrait déborder. Puis,
rincez soigneusement l'intérieur de la
bouilloire à l'eau claire.
2. Pour nettoyer le ltre, retirez-le en le
tirant vers le haut.
Nettoyage de la plaque chauante:
de la rouille supercielle peut se
former sur la plaque chauante.
Éliminez-la à l'aide d'un nettoyant
pour acier inoxydable.
1. Temizlemeden önce daima cihazın
şini prizden çekin. Su ısıtıcı veya
altlığı kesinlik su içinde yıkamayın
veya suya daldırmayın. Aşındırıcı
deterjanlar kullanmaksızın sadece
nemli bir bezle silin. Isıtıcıyı ara sıra
temiz suyla durulayın.
3. Kireç çözme işleminin suyun
sertliğine bağlı olarak düzenli bir
şekilde yapılması önerilir. Kireç
çözücü ürünün talimatlarına uygun
şekilde su ısıtıcıyı su ve kireç çözücü
ile doldurun. Suyu kaynatmayın,
köpürüp taşabilir. Ardından, su
ısıtıcıyı taze su ile iyice yıkayın.
2. Ağ fltrey temzlemek çn,, süzgeç
takacağını tutun ve kaldırarak dışarı
çıkartın. Rezstansın temzlenmes
– rezstansın yüzeynde pas lekeler
görüleblr. Paslanmaz çelk temzleme
maddes le bunları çıkarın.
Temzleme
1.   
   .
    
 .   
   .
  
  .
3.  
 , 
  
.   
  
.   
-  .
  
  .
2.    
 .  
:  
  
  .
    
 .
 /
ELU IFU EEWA51xx_52xx.indd 8ELU IFU EEWA51xx_52xx.indd 8 20.05.14 11:3320.05.14 11:33
EN
FR
RU
TR
DE
9
EN
FR
RU
TR
Troubleshooting / Gestion des pannes
Problem Possible cause Solution
The appliance switches o before boiling. Too much lime scale at the heating element of
the kettle.
Run the decalcifying procedure.
The appliance does not switch o. Close lid until it locks.
Insert the mesh lter correcttly.
The appliance cannot be switched on. After operating with little or no water, the
appliance has not cooled down suently.
Allow to cool a short time and try again.
Problème Cause possible Solution
L'appareil s'arrête avant ébullition. Trop de calcaire entartre la plaque chauante. Exécutez la procédure de détartrage.
L'appareil ne s'arrête pas. Fermez le couvercle de façon à l'enclencher
correctement.
Insérez le ltre anti-calcaire correctement.
Impossible de faire fonctionner l'appareil. Après une utilisation avec peu ou pas d'eau,
l'appareil n'est pas susamment refroidi.
Laissez-le refroidir un moment, puis réessayez.
Sorun Olası neden Çözüm`
Cihaz kaynama gerçekleşmeden önce
kapanıyor.
Su ısıtıcının rezistansında çok fazla kireç
birikintisi vardır.
Kireç çözme işlemini gerçekleştirin.
Cihaz kapanmıyor. Kapağı yerine oturtarak kapatın.
Filtreyi doğru şekilde takın.
Cihaz çalıştırılamıyor. Cihaz çok az su ile veya susuz olarak
çalıştırıldıktan sonra yeterince soğumamıştır.
Bir süre soğumasını bekleyin ve tekrar
deneyin.
Sorun gderme
   
   .     
 .
  .
  .    .
   .
  .    
      
.
     .
  /
ELU IFU EEWA51xx_52xx.indd 9ELU IFU EEWA51xx_52xx.indd 9 20.05.14 11:3320.05.14 11:33
www.electrolux.com10
EN
FR
RU
TR
Disposal
Packaging materials
The packaging materials are environ-
mentally friendly and can be recycled.
The plastic components are identied by
markings, e.g. >PE<, >PS<, etc.
Please dispose the packaging materials
in the appropriate container at the
community waste disposal facilities.
Old appliance
The symbol on the product or on
its packaging indicates that this product
may not be treated as household waste.
Instead it shall be handed over to the
applicable collection point for the
recycling of electrical and electronic
equipment. By ensuring this product
is disposed of correctly, you will help
prevent potential negative consequences
for the environment and human health,
which could otherwise be caused by
inappropriate waste handling of this
product. For more detailed information
about recycling of this product, please
contact your local city oce, your
household waste disposal service or the
shop where you purchased the product.
Disposal /
Mise au rebut
Matériaux d'emballage
Les matériaux d'emballage sont sans
danger pour l'environnement et
recyclables. Les éléments en plastique
sont identiés par des marquages comme
>PE<, >PS<, etc.
Veuillez jeter les emballages dans les
conteneurs appropriés de votre centre
local de traitement des déchets.
Appareils usagés
Le symbole sur le produit ou sur
son emballage indique qu'il ne doit pas
être jeté avec les ordures ménagères.
Il doit de préférence être coné à un
centre de recyclage adapté au traitement
des équipements électriques et
électroniques. En vous assurant que ce
produit est recyclé correctement, vous
contribuerez à éviter les conséquences
néfastes pour l'environnement et la
santé que pourrait avoir une mauvaise
gestion de ce produit en n de vie. Pour
plus d'informations sur le recyclage de
ce produit, contactez votre centre local,
votre service de traitement des ordures
ménagères, ou le magasin qui vous a
vendu ce produit.
Mise au rebut
Elden çıkarma
Ambalaj malzemeler
Ambalaj malzemes çevre dostudur ve
ger dönüştürüleblr. Plastk bleşenler
üzerlerndek şaretler le tanınır; ör. >PE<,
>PS< vb.
Lütfen ambalaj malzemesn, sze en yakın
çöp atık tesslerne uygun br taşıyıcı
çnde atın.
Eskyen chazlar
Üründe ya da ambalajında bulunan
smges, bu ürünün evsel atık olarak
değerlendrlemeyeceğn belrtr. Aksne,
chazın elektrkl ve elektronk aygıtların
ger dönüştürülmes çn uygun br top-
lama noktasına götürülmes gerektğn
fade eder. Bu ürünün düzgün bçmde
atılmasını sağlayarak, ürünün uygun atık
yöntemler dışında değerlendrldğnde
ortaya çıkablecek çevre ve nsan sağlığı
açısından olası olumsuz sonuçların ön-
lenmesne katkıda bulunmuş olursunuz.
Bu ürünün ger dönüşümü le lgl olarak
daha ayrıntılı blg ednmek çn lütfen
yerel yönetm brmlerne, evsel atık/çöp
toplama hzmet yetkllerne ya da ürünü
satın aldığınız yere başvurun.
Elden çıkarma

 
  
   .
  -
  ,  >PE<,
>PS<  ..
  
    
  .
 
     -
 ,    -
   . 
     
   
   
.  
   -
  
  
    
.   
    -
    -
,  ,   -
  ,   ,
    .
 /
ELU IFU EEWA51xx_52xx.indd 10ELU IFU EEWA51xx_52xx.indd 10 20.05.14 11:3320.05.14 11:33
11
EN
FR
RU
TR
DE
B
A
EC
F
I
G
D
H
J
1L Model
DE
A. Gehäuse
B. Herausnehmbarer
Kalklter
C. Ausgusstülle
D. Abdeckung
E. Taste zum Önen der
Abdeckung
F. Gri
G. Wasserstandanzeige
H. EIN/AUS-Schalter mit
Leuchtanzeige
I. Separate Basis und
Netzkabel
J. Temperaturwähler*
*EEWA 5120
Teile
ELU IFU EEWA51xx_52xx.indd 11ELU IFU EEWA51xx_52xx.indd 11 20.05.14 11:3320.05.14 11:33
www.electrolux.com12
DE Lesen Sie sich die folgenden
Anweisungen sorgfältig durch,
bevor Sie das Gerät zum ersten Mal
verwenden.
• Personen (einschließlich Kindern)
mit eingeschränkten körperlichen,
sensorischen oder geistigen
Fähigkeiten oder mit fehlender
Erfahrung und Kenntnissen dürfen
dieses Gerät nur unter Aufsicht oder
nach Anleitung durch eine für ihre
Sicherheit verantwortliche Person
benutzen.
• Kinder müssen beaufsichtigt werden,
um zu gewährleisten, dass diese mit
dem Gerät nicht spielen.
• Das Gerät darf nur an eine
Stromversorgung angeschlossen
werden, deren Spannung und
Frequenz mit den Angaben auf dem
Typenschild übereinstimmt!
• Das Gerät niemals verwenden, wenn–
das Netzkabel oder– das Gehäuse
beschädigt ist.
• Das Gerät darf nur mit einer
geerdeten Steckdose verbunden
werden. Falls notwendig kann
ein Verlängerungskabel für 10 A
verwendet werden.
• Wenn das Gerät oder das Netzkabel
beschädigt ist, muss es zur
Vermeidung von Gefahren vom
Hersteller, vom Kundendienst oder
von einer entsprechend qualizierten
Person ausgetauscht werden.
• Das Gerät immer auf eine ebene
Fläche stellen.
• Das Gerät muss vor der Reinigung
und Wartung ausgeschaltet und vom
Stromnetz getrennt werden.
• Während des Betriebs können sich
Gerät und Zubehör erhitzen. Nur
ausgewiesene Grie und Knöpfe
verwenden. Das Gerät abkühlen
lassen, bevor es gereinigt oder
aufbewahrt wird.
• Das Netzkabel darf mit den heißen
Teilen des Geräts nicht in Kontakt
kommen.
• Das Gerät nicht in Wasser oder andere
Flüssigkeiten eintauchen.
‘ Achtung: Wird zuviel Wasser in den
Wasserkocher gefüllt, kann das
kochende Wasser herausspritzen
und es drohen Verbrühungen oder
Verbrennungen! Den Kocher daher
nie über die oberste Markierung
hinaus befüllen.
• Das Gerät nie ohne Abdeckung
betreiben.
• Das Gerät nicht auf einer heißen
Fläche oder in der Nähe einer
Wärmequelle abstellen oder
verwenden.
• Den Wasserkocher nur zum Erhitzen
von Wasser verwenden!
• Der Wasserkocher darf nur mit der
mitgelieferten Basis verwendet
werden.
• Das Gerät darf nicht im Freien
verwendet werden.
• Dieses Gerät ist nur für den Einsatz
im Haushalt geeignet. Der Hersteller
übernimmt keine Haftung für durch
unsachgemäßen Einsatz verursachte
mögliche Schäden.
Sicherheitshinweise /
ELU IFU EEWA51xx_52xx.indd 12ELU IFU EEWA51xx_52xx.indd 12 20.05.14 11:3320.05.14 11:33
13
EN
FR
RU
TR
DE
ELU IFU EEWA51xx_52xx.indd 13ELU IFU EEWA51xx_52xx.indd 13 20.05.14 11:3320.05.14 11:33
www.electrolux.com14
DE
Erste Schritte /
.1 .2 .3
2. Die Basis auf eine stabile ebene
Fläche stellen. Den Netzstecker in eine
Steckdose stecken. Nicht benötigtes
Kabel kann an der Unterseite der Basis
aufgewickelt werden.
1. Vor der ersten Inbetriebnahme des
Wasserkochers sollten Sie ihn innen
ausspülen und außen mit einem
feuchten Tuch abwischen.
3. Die Taste zum Önen der
Abdeckung drücken, Wasser in den
Kocher füllen. Die Wasserbefüllung
ist auch direkt über die Ausgusstülle
möglich, so muss der Deckel nicht
geönet werden. Der Wasserstand soll
an der Wasserstandanzeige sichtbar
sein, die oberste Markierung jedoch
nicht übersteigen.
ELU IFU EEWA51xx_52xx.indd 14ELU IFU EEWA51xx_52xx.indd 14 20.05.14 11:3320.05.14 11:33
15
EN
FR
RU
TR
DE
.5
EEWA 5120*
A 5120*EEW
.6.4 .5
5. Temperaturstufen*. Je nachdem
welches Getränk Sie zubereiten
möchten (grünen Tee/Instantkaee
oder schwarzen Tee) durch Drehen
des Knopfes auf das entsprechende
Symbol können Sie heißes oder
kochendes Wasser auswählen.
*EEWA 5120
6. Die automatische Abschaltung.
Wenn das Wasser gekocht hat
oder der Wasserkocher von der
Basis genommen wird, schaltet
er sich automatisch aus. Soll die
Wassererhitzung vor dem Siedepunkt
abgebrochen werden, einfach den
EIN/AUS-Schalter in die Position AUS
anheben.
4. Die Abdeckung schließen und
sicherstellen, dass sie einrastet.
Andernfalls funktioniert die
automatische Abschaltung nicht
zuverlässig. Den Wasserkocher
auf die Basis setzen. Den EIN/AUS-
Schalter herunterdrücken; die Anzeige
leuchtet auf und der Wasserkocher
beginnt mit dem Erhitzen.
ELU IFU EEWA51xx_52xx.indd 15ELU IFU EEWA51xx_52xx.indd 15 20.05.14 11:3320.05.14 11:33
www.electrolux.com16
DE 1. Vor der Reinigung immer den
Netzstecker des Geräts ziehen.
Den Wasserkocher oder die Basis nie
abspülen oder in Wasser eintauchen.
Nur mit einem feuchten Tuch ohne
scheuernde Reinigungsmittel
abwischen. Den Wasserkocher
gelegentlich mit sauberem Wasser
ausspülen.
3. Je nach Wasserhärte sollte das Gerät
regelmäßig entkalkt werden. Den
Wasserkocher der Produktanleitung
entsprechend mit Wasser und
Entkalker füllen. Die Lösung nicht
kochen lassen, da sie überschäumen
könnte. Danach den Wasserkocher
gründlich mit frischem Wasser
ausspülen.
2. Zum Reinigen des Kalklters den
Siebeinsatz nach oben herausziehen.
Reinigen der Heizplatte – Auf der
Heizplatte können sich oberächliche
Rostecken bilden. Mit einem
Edelstahlputzmittel entfernen.
.1 .2 .3
Reinigung und Pflege /
ELU IFU EEWA51xx_52xx.indd 16ELU IFU EEWA51xx_52xx.indd 16 20.05.14 11:3320.05.14 11:33
17
EN
FR
RU
TR
DE
DE
Fehlersuche /
Problem Mögliche Ursache Lösung
Das Gerät schaltet sich aus, bevor das Wasser
kocht.
Das Heizelement des Wasserkochers ist zu stark
verkalkt.
Den Entkalkungsvorgang durchführen.
Das Gerät schaltet sich nicht aus. Abdeckung einrasten lassen.
Kalklter richtig einsetzen.
Das Gerät kann nicht eingeschaltet werden. Nach dem Betrieb mit wenig oder ohne Wasser
hat sich das Gerät nicht genügend abgekühlt.
Kurz abkühlen lassen und erneut versuchen.
ELU IFU EEWA51xx_52xx.indd 17ELU IFU EEWA51xx_52xx.indd 17 20.05.14 11:3320.05.14 11:33
www.electrolux.com18
DE
Entsorgung /
Entsorgung
Verpackungsmaterialien
Die Verpackungsmaterialien sind umwelt-
freundlich und wiederverwertbar. Die
Kunststoteile tragen Kennzeichnungen,
z.B. >PE<, >PS< usw.
Bitte entsorgen Sie die Verpackungsma-
terialien in einem geeigneten Container
eines Wertstohofes.
Altgerät
Das Symbol an Produkt oder Verpa-
ckung weist darauf hin, dass das Produkt
nicht mit dem normalen Hausmüll ent-
sorgt werden darf. Es muss stattdessen
bei der entsprechenden Sammelstelle
für Recycling von Elektro- und Elektro-
nikschrott abgegeben werden. Durch
die ordnungsgemäße Entsorgung des
Produkts können negative Folgen für Um-
welt und Gesundheit vermieden werden.
Detaillierte Informationen zum Recyceln
des Produkts bieten die Gemeinde, die
Müllentsorgung oder der Händler, bei
dem das Produkt gekauft wurde.
ELU IFU EEWA51xx_52xx.indd 18ELU IFU EEWA51xx_52xx.indd 18 20.05.14 11:3320.05.14 11:33
19
EN
FR
RU
TR
DE
ELU IFU EEWA51xx_52xx.indd 19ELU IFU EEWA51xx_52xx.indd 19 20.05.14 11:3320.05.14 11:33
www.electrolux.com/shop
Electrolux Appliances AB
St. Göransgatan 143
S-105 45 Stockholm
Sweden
Share more of our thinking at www.electrolux.com
Printed on recycled paper
3482E EEWA51xx/52xxAR02010514
ELU IFU EEWA51xx_52xx.indd 20ELU IFU EEWA51xx_52xx.indd 20 20.05.14 11:3320.05.14 11:33

This manual suits for next models

2

Other Electrolux Kettle manuals

Electrolux EEK7700S User manual

Electrolux

Electrolux EEK7700S User manual

Electrolux E4K1-4ST User manual

Electrolux

Electrolux E4K1-4ST User manual

Electrolux EEWA7300 User manual

Electrolux

Electrolux EEWA7300 User manual

Electrolux EEK3505 User manual

Electrolux

Electrolux EEK3505 User manual

Electrolux EWA 1800 User manual

Electrolux

Electrolux EWA 1800 User manual

Electrolux ULTRASPEED EEWA7500 User manual

Electrolux

Electrolux ULTRASPEED EEWA7500 User manual

Electrolux EasyBreakfast EEWA1 Series User manual

Electrolux

Electrolux EasyBreakfast EEWA1 Series User manual

Electrolux EEWA7800AR User manual

Electrolux

Electrolux EEWA7800AR User manual

Electrolux EEWA 5110 User manual

Electrolux

Electrolux EEWA 5110 User manual

Electrolux EEWA31 Series User manual

Electrolux

Electrolux EEWA31 Series User manual

Electrolux EEW A 70 0 0 User manual

Electrolux

Electrolux EEW A 70 0 0 User manual

Electrolux E7GK1-71BP User manual

Electrolux

Electrolux E7GK1-71BP User manual

Electrolux Create 4 User manual

Electrolux

Electrolux Create 4 User manual

Electrolux SWK 10 Series User manual

Electrolux

Electrolux SWK 10 Series User manual

Electrolux EEK5200 User manual

Electrolux

Electrolux EEK5200 User manual

Electrolux EASYSENSE EEWA32XX User manual

Electrolux

Electrolux EASYSENSE EEWA32XX User manual

Electrolux EEWA5310 User manual

Electrolux

Electrolux EEWA5310 User manual

Electrolux Create 3 E3K1-3ST User manual
Electrolux

Electrolux Create 3 E3K1-3ST User manual

Electrolux EASYSENSE EEWA32 Series User manual

Electrolux

Electrolux EASYSENSE EEWA32 Series User manual

Electrolux 582589 User manual

Electrolux

Electrolux 582589 User manual

Electrolux EEK1505S User manual

Electrolux

Electrolux EEK1505S User manual

Electrolux E7K1-6BP User manual

Electrolux

Electrolux E7K1-6BP User manual

Electrolux EEWA7800 User manual

Electrolux

Electrolux EEWA7800 User manual

Electrolux SWK 10 series User manual

Electrolux

Electrolux SWK 10 series User manual

Popular Kettle manuals by other brands

AENO EK7S user manual

AENO

AENO EK7S user manual

Bosch TWK 720 Series user manual

Bosch

Bosch TWK 720 Series user manual

Morphy Richards 43541 instructions

Morphy Richards

Morphy Richards 43541 instructions

Quest Engineering 1143B instruction manual

Quest Engineering

Quest Engineering 1143B instruction manual

iGenix 2200W Instructions for use

iGenix

iGenix 2200W Instructions for use

Kenwood JKP210 series instructions

Kenwood

Kenwood JKP210 series instructions

Daewoo SDA2452 user manual

Daewoo

Daewoo SDA2452 user manual

Team Kalorik TKG JK 1029 N manual

Team Kalorik

Team Kalorik TKG JK 1029 N manual

Russell Hobbs 19251-56 instructions

Russell Hobbs

Russell Hobbs 19251-56 instructions

Philips essence HD4659 manual

Philips

Philips essence HD4659 manual

Crown DC-6 Installation & operation manual

Crown

Crown DC-6 Installation & operation manual

UFESA HA7616 instruction manual

UFESA

UFESA HA7616 instruction manual

CONSTRUCTA CCK0272W user manual

CONSTRUCTA

CONSTRUCTA CCK0272W user manual

Saturn ST-EK0004 manual

Saturn

Saturn ST-EK0004 manual

Coline HB-3198-UK manual

Coline

Coline HB-3198-UK manual

Berlinger Haus BH-9016 operating instructions

Berlinger Haus

Berlinger Haus BH-9016 operating instructions

KitchenAid 5KEK1522 owner's manual

KitchenAid

KitchenAid 5KEK1522 owner's manual

LENTZ 74123 instruction manual

LENTZ

LENTZ 74123 instruction manual

manuals.online logo
manuals.online logoBrands
  • About & Mission
  • Contact us
  • Privacy Policy
  • Terms and Conditions

Copyright 2025 Manuals.Online. All Rights Reserved.