1716
3.USING ESPRESSO EQUIPMENT
Shut down
procedures
At the end of the day,
shut down the machine
as follows:
1. Remove handles from machine.
Fill two clean stainless steel milk
jugs with cold water and sub-
merge steam wands into water.
Open both steam taps for a few
seconds to flush steam wands.
At this stage, leave wands sub-
merged in water so they can soak
to allow easy removal of milk
deposits.
2. Clean group heads with group
head brush by vigorously moving
brush around group seal area.
Press K button for a second or so
to flush each group head.
5. Repeat back flushing four times.
After the fourth time, wait 3–4
seconds for pressure to be
released before removing handle.
Otherwise you could be scalded
or burnt, and the group seal
could drop out of the group head,
requiring repairs to be made by
the service agent.
8.
6. Back flush remaining group heads
as described in steps 4 and 5
above. Then rinse each group
head by running hot water
through the head (K button) for 10
seconds or so.
9. Gather all utensils and handles.
Remove filters from handles and
wash everything in a sink using a
plastic scourer and washing up
detergent. Rinse everything and
store on espresso machine.
7. Release steam for a few seconds
through steam wands, which are
still submerged in water. Remove
wands from jugs and wipe wands
with a clean damp cloth.
3. Fit a blind filter to any handle,
making sure blind filter is properly
inserted.
4. Firmly place handle fitted with
blind filter to any group head.
Press the K button (or delivery
button/lever on semi-auto
machine) for six seconds. This
back flushes the group head. Note
that on an auto machine the green
light over the K button will
flash after six or so seconds to
indicate restricted flow. This is
normal. It is essential to watch
the machine during this opera-
tion, as considerable pressure
is built up.
Under side of group head.
Clean seal area with brush.
Blind filter. Used when back flushing group
head and handle.
seal area shower head
Remove drip tray. Hold a cloth
under the drip tray outlet and
carry tray to rinsing area. Rinse in
soapy water (careful of sharp
edges), rinse totally, shake off
excess water, wipe bottom of tray
with a cloth and replace
immediately in position.
Never leave the tray off the
machine, as the ele tric wiring is
exposed, creating a danger to
those working the machine.
As well, damage can be done to
the machine if water reaches the
wiring.
3.USING ESPRESSO EQUIPMENT
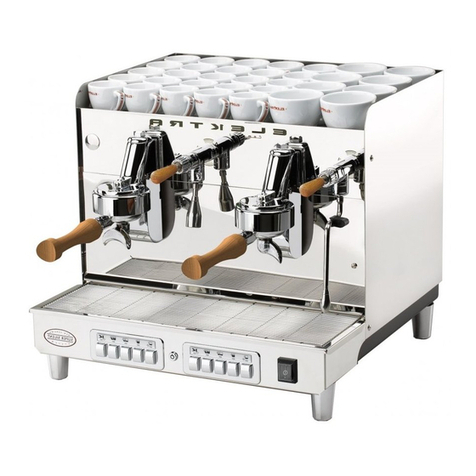
Normally you would leave the
espresso machine on overnight.
On the Elektra Barlume, this is
switch setting 2. On other
machines, this is typically the ON
position (switch position 1).
Leaving the machine on
overnight means you can be ready
to serve coffee in a few minutes,
compared to waiting half an hour
with a cold start. The normal
opening procedure is:
Priming group heads and handles
filled with ground coffee
Normal opening
procedure
1. Press each continuous delivery
button (the button). You will
eventually hear a soft steaming
sound build up in both group
heads. Once the steaming sound
has stopped, switch off both
groups. At this stage, don’t fit the
handles.
2. Insert the steam wands into milk
jugs and turn on the steam for a
second or so then turn it off. This
should remove all condensation
in the wands.
3. Press the single filter basket into
the single handle and the double
filter basket into the double handle.
4. Load both handles with coffee and
place handles into group heads.
Prime the group head assemblies
by switching on both groups and
letting coffee run into the drip tray
for about 15 seconds. Leave han-
dles filled with coffee grounds in
group heads.
6. Empty used coffee from both han-
dles and press K buttons for
both groups for a second or so to
flush out oils from the
showerheads. Then place the
handles back on the group heads.
5. Grind fresh coffee in all dosing
grinders.
Remove condensation from steam wand
by inserting wand into a milk jug
and briefly releasing steam
Flushing shower in group head to remove oils
condensation
drained from
steam wand
