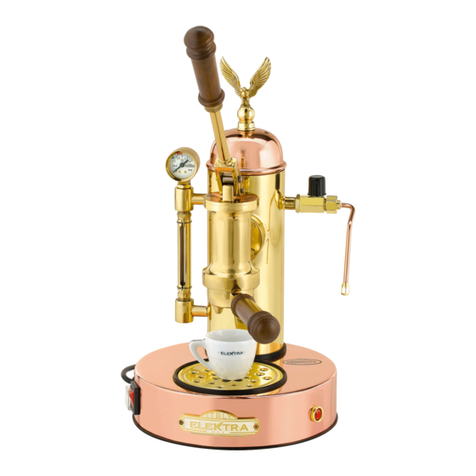
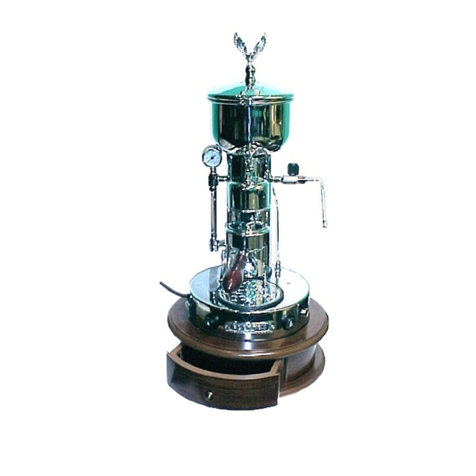
ELEKTRA NIVOLA User manual

ELEKTRA SRL
VIA A. VOLTA,18 - 31030 DOSSON DI CASIER (TREVISO) ITALY
TEL. (+39) 0422 490405 R.A. - FAX (+39) 0422 490620
A.D.: Holbein & Partners - COD. 03718035 - Edition: June 2009
Macchine da caffè e macinadosatori da casa
IMANUALE DELL’UTENTE
GB USER MANUAL
DANWENDERHANDBUCH
FMANUEL DE L’USAGER
EMANUAL DEL USUARIO
ITALIAN ESPRESSO COFFEE MACHINES
I
Household coffee machines and grinders
GB
Kaffeemaschinen und Dosiermühlen für Haushalt
D
Machines à café et moulins-doseurs domestiques
F
Máquinas de café y molinillos para el hogar
E
I MANUALE DELL’UTENTE GB USER MANUAL DANWENDERHANDBUCH
FMANUEL DE L’USAGER EMANUAL DEL USUARIO

3
ITALIAN ESPRESSO COFFEE MACHINES

I
14
DESCRIZIONE DELL’APPARECCHIATURAC
NIVOLA (N)
19 18 17 16
7
14
4
2
1
11
13
8
9
5
6
10
12
3

I
16
MICROCASA A LEVA (L)
19 18 17 16
1
2
14
15
10
12
13
9
5
7
3
8
6

I
18
MICROCASA SEMIAUTOMATICA (S)
19 18 17 16
1
9
10
12
2
14
15
8
7
5
13
4
3
6

I
20
MINIVERTICALE (V)
19
18
17
16
10
12
14
1
4
2
7
8
6
13
9
5
11
3

I
22
MACINADOSATORE (M)
19
8
2
3
4
5
7
6
1
9
10

gb
43
gb

gb
44
CONTENTS
NIVOLA (N)
MICROCASA PISTON & LEVER (L)
MICROCASA SEMIAUTOMATIC (S)
MINIVERTICALE (V)
COFFEE GRINDER (M)
1
2
3
4
5
1
2
3
4
5
6
7
1
2
3
A INTRODUCTION
CDESCRIPTION OF THE APPLIANCE
B GENERAL RECOMMENDATIONS AND SAFETY REGULATIONS
D UNPACKING
STARTING UP THE NEW MACHINE FOR THE FIRST TIME
SETTING THE TIME (N)
ADJUSTING THE GRINDING (M)
ADJUSTING THE DOSE OF GROUND COFFEE (M)
WATER SUPPLY (N)
WATER SUPPLY (L)
WATER SUPPLY (S-V)
FIRST START UP (N)
FIRST START UP (L)
FIRST START UP (S)
FIRST START UP (V)
E
50
50
51
51
52
54
54
54
55
56
56
56
57
57
57
47
50
48
53
54
SWITCHING ON (N)
SWITCHING ON (L-S-V)
MAKING COFFEE WITH GROUND (N-L-S-V)
MAKING COFFEE WITH PODS (N-S-V)
COFFEE DISPENSING (N)
COFFEE DISPENSING (L)
COFFEE DISPENSING (S-V)
MAKING CAPPUCCINO (N)
MAKING CAPPUCCINO, MILK AND OTHER HOT DRINKS (L-S)
MAKING CAPPUCCINO, MILK AND OTHER HOT DRINKS (V)
WARMING THE CUPS (N-V)
COFFEE GRINDING (M)
USE
G
1
2
3
4
5
6
7
8
9
10
11
12
58
58
58
58
59
59
59
59
60
61
61
62
62
ADJUSTMENTS
F57

gb
45
CLEANING THE FILTERS AND FILTERHOLDERS (N-L-S-V)
CLEANING THE DRIP TRAY (N-L-S-V)
CLEANING THE WATER TANK (N)
CLEANING THE CAPPUCCINO FOAMER (N)
CLEANING THE STEAM WAND (L-S-V)
CLEANING THE BODY (N-L-S-V-M)
MAINTENANCE AND CLEANING (M)
MAINTENANCE AND CLEANING
H
1
2
3
4
5
6
7
63
63
63
63
64
64
64
64
I DATA MANAGEMENT
TIME DISPLAY (N)
BOILER PRESSURE DISPLAY (L-S)
1
2
65
65
65
EUROPEAN APPROVALS (N-L-S-V-M)
AMERICAN APPROVALS (N-L-S-V)
AUSTRALIAN APPROVALS (N)
SOUTH KOREAN APPROVALS (N)
1
2
3
4
J TROUBLESHOOTING 66
K DISPOSAL OF THE APPLIANCE 68
M TEST 156
L APPROVALS 69
N GUARANTEE 157
THE MACHINE DOES NOT HEAT UP (N)
THE MACHINE DOES NOT HEAT UP (L-S)
THE MACHINE DOES NOT HEAT UP (V)
CLOCK NOT WORKING (N)
INCREASED GRINDING TIME AND NOISE (M)
1
2
3
4
5
66
66
67
67
67
69
69
69
69

gb
46

gb
47
This manual applies to the entire range of home coffee machines and grinders manufactured
by ELEKTRA.
Each topic has been specifically treated in a separate paragraph for each model belonging
to the range, indicating the title of the paragraph itself and the models to which it refers,
using the letters shown below:
- N = NIVOLA model items W / W-R
- L = MICROCASA A LEVA model items S1 / S1C / S1CO
- S = MICROCASA SEMIAUTOMATICA model items SX / SXC
- V = MINIVERTICALE model items A1 / A1C
- M = COFFEE GRINDER model items MS / MSC
INTRODUCTIONA

gb
48
GENERAL RECOMMENDATIONS AND
SAFETY REGULATIONS
B
This booklet is an essential and integral part of the product and must be given to the user.
It contains basic safety instructions that must be carefully followed for the installation,
operation and maintenance of the appliance.
Save this booklet for any future reference.
After having unpacked the appliance, make sure it is intact.
If in doubt, do not use the appliance and contact a qualified techician.
The packing elements (plastic bags, polystyrene foam, nails, etc.) should not be left within
reach of children since they are potential sources of danger.
Before connecting the appliance, check that the mains electricity supply corresponds to the
data given on the rating plate.
The rating plate is located under the base of the machine.
The appliance should be installed by a qualified technician according to the manufacturer’s
instructions and in compliance with current safety regulations.
Incorrect installation could cause injury to persons or animals and damage to property, for
which the manufacturer cannot be held liable.
This appliance is only electrically safe when it has been connected to an efficient
grounding system in compliance with current safety regulations.
Make sure that this fundamental safety requirement has been observed and if in doubt
request a thorough check of the system by a qualified electrician.
The manufacturer cannot be held liable for any damage that may be caused by failure to
ground the appliance.
Check that the current carrying capacity of the system is adequate for the maximum rated
output of the appliance (as indicated on the rating plate).
If in doubt, contact a qualified technician.
Such technician should also make sure that the section of the cables is adequate for the
power absorbed by the appliance.
Do not use adapters, multiple current taps or extension cables.
If it is absolutely necessary, only use plugs, simple or multiple adapters and extensions that
comply with current safety regulations. Make sure, however, that the limit of current carrying
capacity does not exceed that indicated on the simple adapter and extensions or the maxi-
mum power value indicated on the multiple adapter.
This appliance must only be used for the purpose for which it was designed.
Any other use is to be considered as unsuitable and therefore dangerous.
The manufacturer cannot be held liable for any damage or injury caused by improper, wrong
or unreasonable use.
1
2
3
4

gb
49
When using electrical appliances, basic safety precautions should always be followed:
- Do not dip the appliance in water to clean it;
- Do not touch the appliance when hands or feet are wet or damp;
- Do not operate the appliance barefoot;
- Do not use extension cables in bathrooms or shower-rooms;
- Do not tug the power supply cable to disconnect the appliance from the mains supply;
- Do not expose the appliance to the elements (rain, sun, etc.), unless expressly allowed;
- Do not allow children or incompetent persons to use the appliance.
Disconnect the appliance from the mains electricity supply before carrying out any mainte-
nance, by pulling out the plug or by switching off at the mains switch.
To clean the appliance, strictly follow the instructions in this booklet.
In the event of failure or malfunctioning of the appliance, switch it off and under no circum-
stances try to repair it yourself. Always request service by a qualified technician.
Any repair, electrical or mechanical adjustment must only be carried out at the factory or
by an authorized service center using only original spare parts. Failure to comply with these
instructions could jeopardize the safety of the appliance.
The appliance should be connected to the electricity supply through a multipolar linked
switch having a contact separation of at least 3 mm in all poles, in compliance with current
safety regulations.
Unwind the whole power supply cable to prevent dangerous overheating.
Do not obstruct the intake and outlet grilles. In particular do not cover the upper cup tray
with a cloth or such like.
The supply cable of this appliance must not be replaced by the user. Should the cable be
damaged, switch off the appliance and contact solely a qualified electrician for replacement.
Should the machine no longer be used, it must be made inoperative by cutting the supply
cable after having disconnected it from the electrical power supply.
Moreover, make sure that all those parts which could be possible sources of danger are
made harmless.
ATTENTION CALIFORNIA RESIDENTS
Proposition 65 WARNING
Consuming beverages that have been prepared in this espresso machine will expose you
to lead, a chemical known to the State of California to cause birth defects and other
reproductive harm.
5
6
7
8
9
10
11
12

gb
50
DESCRIPTION OF THE APPLIANCEC
NIVOLA (N)
Main switch
Power light
Water level warning light
Stand-by light
Water tank extraction screw
Cup-warming grille
Cup-warmer cover
Water tank
Coffee/stop/cappuccino selection knob
Filter-holder
Cappuccino foamer
Cup-rest grille
Drip tray
Clock glass
ACCESSORIES:
1-cup filter
2-cup filter
Doser spoon
Coffee press
Instructions manual with guarantee card
“Home Division Collection” brochure
1
2
3
4
5
6
7
8
9
10
11
12
13
14
16
17
18
19
MICROCASA PISTON & LEVER (L)
1
2
3
5
6
7
8
9
10
12
13
14
15
Main switch
Boiler
Heating warning light
Knob of steam wand
Steam wand
Boiler cover
Boiler pressure safety valve
Coffee dispensing lever
Filter-holder
Cup-rest grille
Drip tray
Boiler water level indicator
Boiler pressure gauge
16
17
18
19
ACCESSORIES:
1-cup filter
2-cup filter
Doser spoon
Coffee press
Instructions manual with guarantee card.
“Home Division Collection” brochure
DIMENSIONS:
Weight: Kg 10
Boiler capacity: Lt 1,8
Height: cm 45
Base diameter: cm 26
(See picture on page 14)
(See picture on page 16)
DIMENSIONS:
Weight: Kg 9
Tank capacity: Lt 1,5
Height: cm 37,5
Width: cm 30
Depth: cm 35

gb
51
MICROCASA SEMIAUTOMATIC (S)
Main switch
Boiler
Heating warning light
Coffee dispensing button
Knob of steam wand
Steam wand
Water tank cover
Water tank
Boiler water supply button
Filter-holder
Cup-rest grille
Drip tray
Boiler water level indicator
Boiler pressure gauge
ACCESSORIES:
1-cup filter
2-cup filter
Doser spoon
Coffee press
Instructions manual with guarantee card.
“Home Division Collection” brochure
1
2
3
4
5
6
7
8
9
10
12
13
14
15
16
17
18
19
MINIVERTICALE (V)
1
2
3
4
5
6
7
8
9
10
11
12
13
14
Main switch
Power light
Heating warning light
Coffee dispensing button
Knob of steam wand
Steam wand
Water tank cover
Water tank
Cup-warming compartment
Filter-holder
Steam button
Cup-rest grille
Drip tray
Black wooden base
16
17
18
19
ACCESSORIES:
1-cup filter
2-cup filter
Doser spoon
Coffee press
Instructions manual with guarantee card.
“Home Division Collection” brochure
DIMENSIONS:
Weight: Kg 13
Tank liters: Lt 2
Height: cm 69
Base diameter: cm 26
(See picture on page 18)
(See picture on page 20)
DIMENSIONS:
Weight: Kg 12
Tank capacity: Lt 2
Boiler capacity: Lt 2
Height: cm 58
Base diameter: cm 26

gb
52
COFFEE GRINDER (M)
Main switch
Beans hopper cover
Beans hopper assembly
Grinding adjustment ring
Adjustment ring locking pin
Ground-coffee hopper cover
Dose adjustment pin
Ground-coffee hopper
Leva dosatore
Dose lever
ACCESSORIES:
Coffee press
Instructions manual with guarantee card.
“Home Division Collection” brochure
DIMENSIONS:
Weight: Kg 8
Height: cm 38
Depth: cm 26
Base diameter: cm 18
1
2
3
4
5
6
7
8
9
10
19
(See picture on page 22)

gb
53
Packaging is carried out with the aim of protecting the machine from damage during
transportation. The packaging materials used are recyclable.
They are therefore chosen according to environmental protection criteria and ease of
disposal, the latter process being geared at further integration in productive cycle materials.
Thanks to this mechanism, not only is the volume of waste reduced but a more rational use
of non renewable resources is also ensured.
1) Open the top of the box and remove the machine, carefully taking out the accessories
and the present manual contained inside it and keeping these items close at hand for
the later phases of use of the appliance.
2) Remove the nylon bag covering the upper part of the machine and put it in a safe
place out of the reach of children.
3) Grasp the base of the machine from inside the box and remove it by lifting it upwards.
4) Remove any other packaging and protection materials attached to the machine.
5) Hand the packaging materials over to an authorized company for disposal
and recycling.
6) Store the packaging box in a safe place.
7) In the case of removal or service, the machine or the grinder should be moved only in its
original packaging box in order to avoid any damage during transport.
DO NOT CONNECT THE ELECTRIC POWER PLUG OF THE MACHINE BEFORE HAVING READ
THE INSTRUCTIONS CONTAINED IN CHAPTER “E STARTING UP THE NEW MACHINE FOR THE
FIRST TIME”.
UNPACKINGD

gb
54
STARTING UP THE NEW MACHINE
FOR THE FIRST TIME
E
1
2
3
WATER SUPPLY (N)
1) Lift up the cup-warming tray 6.
2) Pour the water into the tank 8 with a jug, to a maximum level of 4 or 5 centimetres
below the upper rim, in order to prevent overflowing.
- Water shortage in tank 8 is signalled by an intermittent buzzer and by the flashing
of warning light 3.
- While there is no water in the machine, all functions are automatically interrupted
for safety reasons (e.g. coffee brewing stops).
- Once it has been filled up with water, the machine automatically starts working
again (e.g. coffee brewing starts again).
WATER SUPPLY (L)
1) Fill 3/4 of the boiler 2 with cold, drinkable water, lifting the cover 7 and loosening
the safety valve 8.
Before filling the tank again:
- Turn the machine off by putting the main switch into the “OFF” position,
- Turn the knob 5 of the steam wand 6 and wait for all the steam to go out and for
the pressure gauge 15 pointer to be on zero.
WATER SUPPLY (S-V)
1) Fill the tank 8 with cold, drinkable water, lifting the cover 7.

gb
55
4 FIRST START UP (N)
The following instructions must always be carried out for any new machine or after any long
periods of non-use of machine; failure to carry out the instructions shall render the product
guarantee null and void.
1) Make sure that the button 1 is on the OFF position.
2) Supply the machine with water as indicated in chapter 1.
3) Put the cappuccino foamer 11 in a jug with water, until the two lateral steam outlet
holes are covered. The latter operation is necessary to avoid splashing during
the following automatic cycle carried out by the machine.
4) Select the cappuccino function 20 with knob 9.
5) Connect the electric power plug of the machine.
6) Turn on the machine by pressing the main switch 1 into the ON position.
The machine will emit a 5-second audible sound and will then carry out a 24-second
automatic starting-up cycle with the stand-by light 4 coming on.
This cycle has the purpose of filling the hydraulic circuit with water, as it is emptied after
factory testing to prevent damage during machine storage and transport.
7) Wait for the start-up cycle to end, which is signalled by the stand-by light 4 going off.
8) Stop the cappuccino function 20 bringing knob 9 on the STOP position 21:
at this point the machine is operative and ready for use.
CAPPUCCINO FUNCTION 20 STOP FUNCTION 21 COFFEE FUNCTION 22
FUNCTION KNOB 9
This manual suits for next models
4
Table of contents
Other ELEKTRA Coffee Maker manuals

ELEKTRA
ELEKTRA Espresso Equipment Troubleshooting guide
ELEKTRA
ELEKTRA Micro Casa Semiautomatica Installation guide

ELEKTRA
ELEKTRA SPF User manual

ELEKTRA
ELEKTRA Micro Casa a Leva S1 Installation guide

ELEKTRA
ELEKTRA ITALIAN ESPRESSO COFFEE MACHINES User manual

ELEKTRA
ELEKTRA INDIE User manual

ELEKTRA
ELEKTRA INDIE User manual

ELEKTRA
ELEKTRA Crema Caffe User manual
ELEKTRA
ELEKTRA S1CB Chrome Installation guide
ELEKTRA
ELEKTRA KUP User manual